
Think internal linking is just for tech-savvy experts? Think again! Internal links play a crucial role in enhancing your website’s structure and user experience. If you’re a newcomer to WordPress, you might feel daunted by the task of adding internal links to your site.
But fear not! In this post, Discover how linking your content improves navigation, keeps users engaged, and helps search engines understand your website. Get ready to watch your website’s traffic and ranking soar!
By the end of this tutorial, you’ll have the knowledge and confidence to connect different parts of your content seamlessly. So, let’s dive right in and discover the secrets of mastering internal links in WordPress!
What are Internal Links in WordPress?
In WordPress, internal links refer to hyperlinks that connect one post/page on your website to another post/page within the same website. These links are used to establish a connection and navigation flow between different sections or related content within your site.
Internal linking serves several purposes:
- It helps search engines understand the structure and hierarchy of your website, allowing them to index and rank your content more effectively.
- Internal links facilitate user navigation, making it easier for visitors to explore related topics or find additional information on your site.
- Internal linking can improve the overall user experience by providing context and guiding readers to relevant resources or previous articles.
By strategically incorporating internal links throughout your WordPress site, you can enhance both SEO and user engagement, improving visibility, increasing traffic, and ensuring longer visitor retention.
Adding Internal Links in WordPress Manually
To add internal links in WordPress manually,
Step #1: Highlight the Text Portion
First, open the existing post/page or create a new one where you want to add internal links. Now highlight the text in which you want to add an internal link.

Step #2: Add Link
Then click on the ‘Link’ icon from the toolbar. Alternatively, you can press ‘ctrl + k’ or ‘Command + k’ to add internal links. Now a box will appear where you will be able to place your internal link.
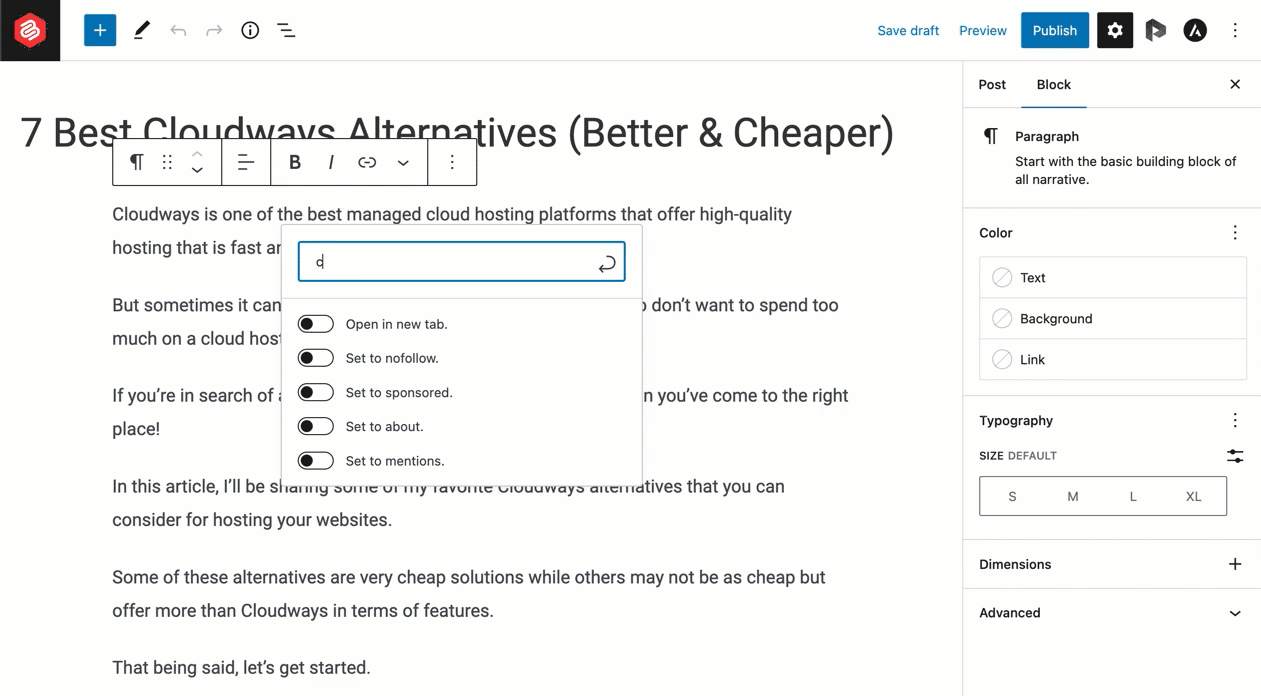
In the box, you can place any internal link directly or search for the page/post of your website. Click on your desired post/page, and the link will automatically be placed.
If you want, you can make the link open in a new tab by toggling on the ‘Open in new tab’ option.
Adding Internal Links in WordPress Automatically
Manual internal linking works when you have a fewer number of posts. But when you have hundreds of posts, you need to go with the automatic approach.
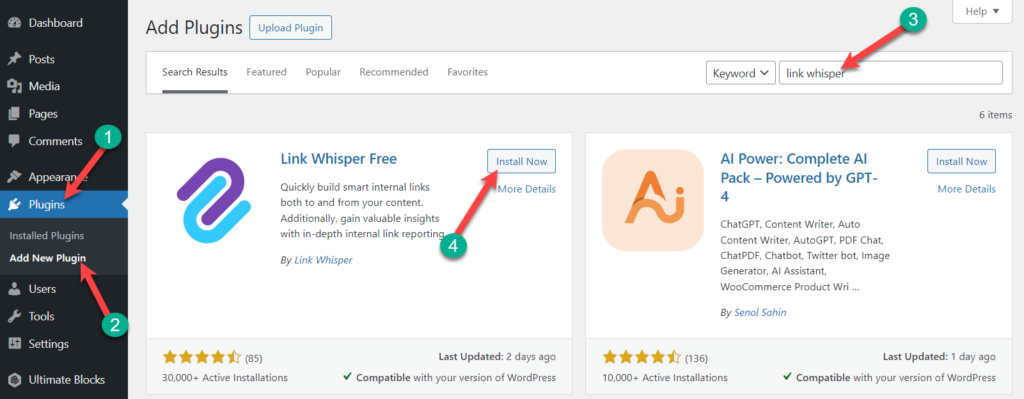
There are a handful number of WordPress internal linking plugins that lets you add internal links automatically. We use and recommend Link Whisper. It makes automatic interlinking extremely easy. It has both free and pro versions.
Let’s get started with the free version.
Step #1: Install Link Whisper
First, go to your WordPress Dashboard and navigate to Plugins > Add New. Then search for ‘Link Whisper’ and install & activate the plugin.
Step #2: Choose Suitable Link
Now go to the post/page where you want to add internal links. Then scroll to the bottom, and you’ll find all the suggested links there.
Step #3: Add a Link
Then if a link seems suitable, click on the ‘Copy Link’ and scroll to the text and then add the link there.
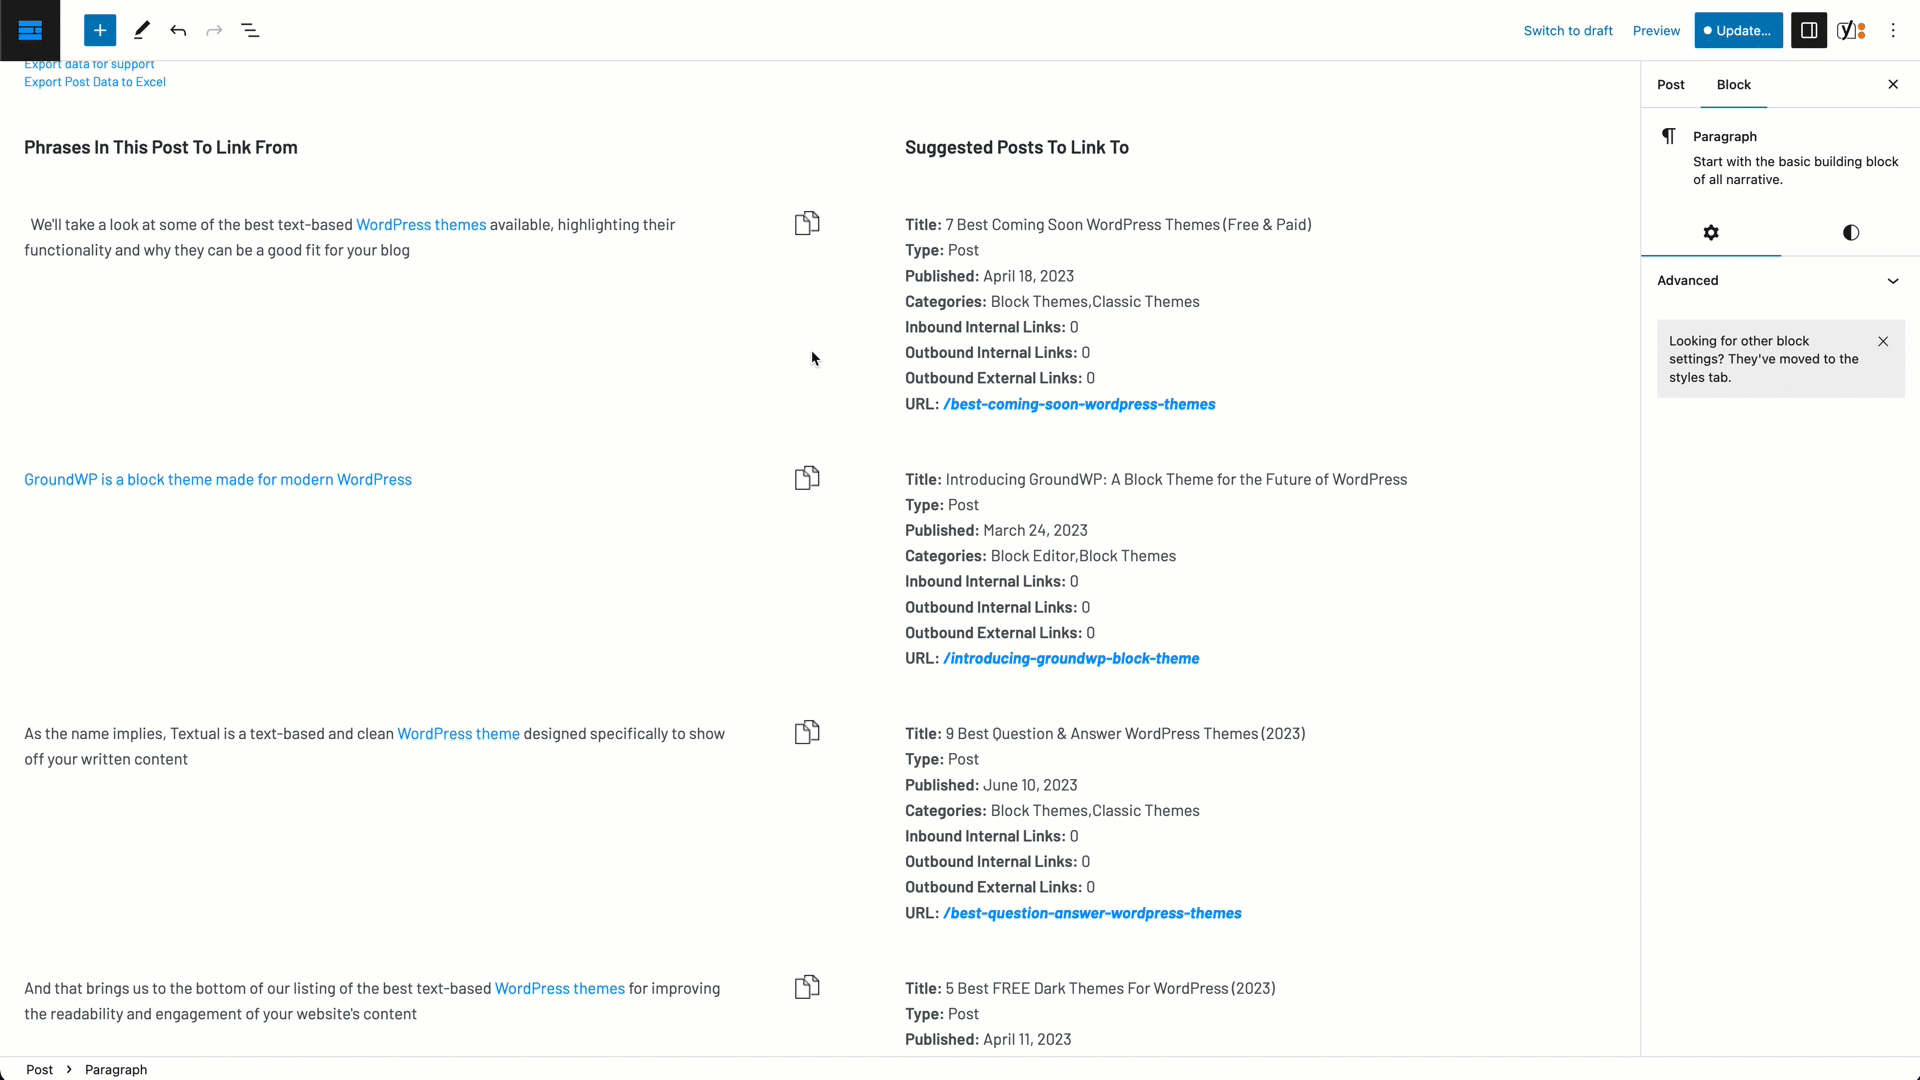
You can do the same for other suggested links.
You can check the internal links report by navigating to WordPress Dashboard > Link Whisper > Report. Then click on the ‘Run Link Scan’ button.
Conclusion
So this is how you can add internal links to your WordPress posts and pages.
If you’ve found the post useful, please consider sharing the post on Facebook, Twitter, or LinkedIn.
Disclosure: This post contains affiliate links. That means if you make a purchase using any of these links, we will earn a commission without any extra cost to you. Thanks for your support.
Leave a Reply