
Are you thinking to export WordPress site to a different hosting or just create a clone website of yours? Exporting a website is very much easier and you don’t even need to invest money to export a WordPress site.
There are a lot of tools available in the WordPress plugins directory. Besides, you can also directly export your website with the help of the WordPress export tool.
In this post, I will show you the whole process step by step. Afterward, you will be able to export a WordPress site all by yourself.
Let’s start then.
Exporting Website Using Built-in Export Tool of WordPress
By default, WordPress comes with a built-in tool to export a WordPress site.
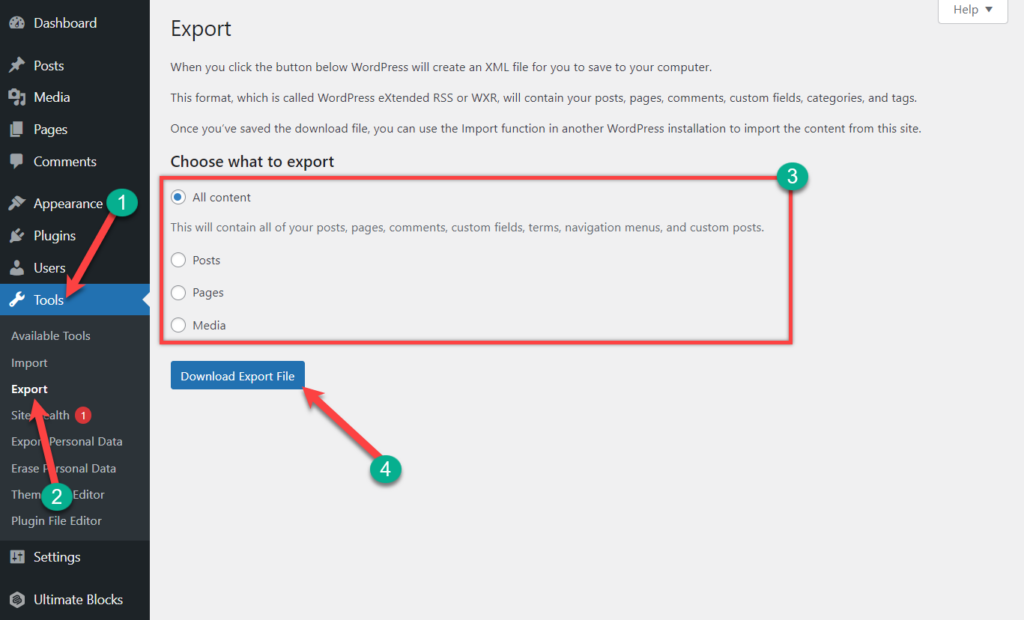
You can export single items like posts, pages, media or you can export all of the content at once. My suggestion is to select the ‘All Content’ option. This will allow you to export all your pages, posts, comments, custom fields, tags, categories, navigation menus, and custom posts.
But you have to remember that this method will only export your database options for you, it will not include any of your theme or plugin files.
Step 1: Download Export File
To use this tool first navigate to Tools -> Export from your admin dashboard.
Now go ahead and click on the ‘Download Export File’ option. It will not have any effect on your website except creating a copy of your website.
Now, a .xml file will be downloaded to your computer.
Step 2: Import .XML file
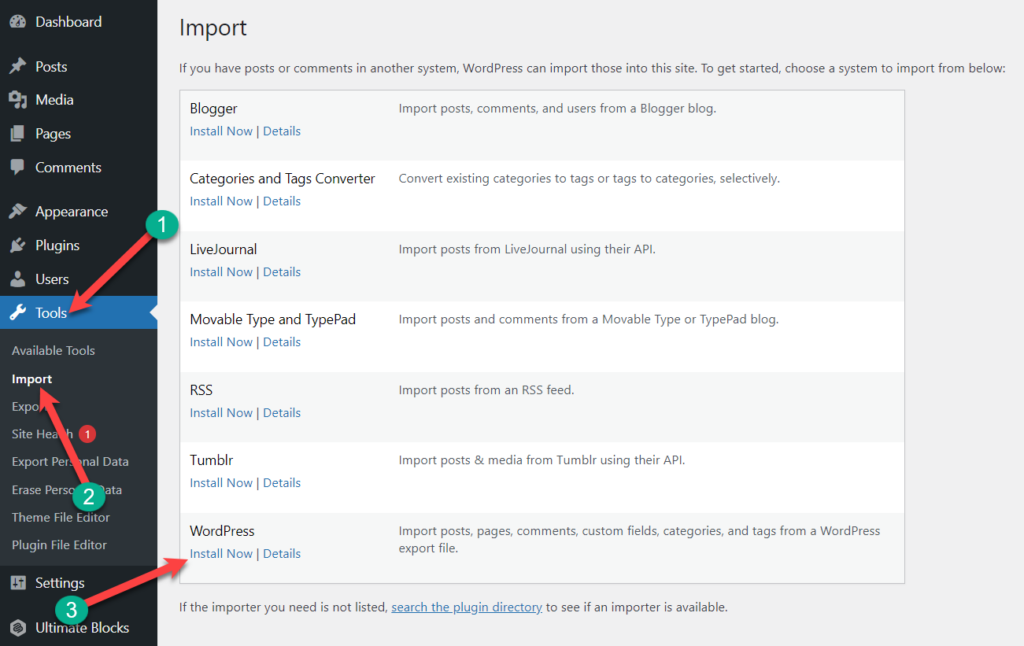
To import it on your website navigate to Tools -> Import. But before you do it you need to have or install WordPress importer. From Tools, install importer.
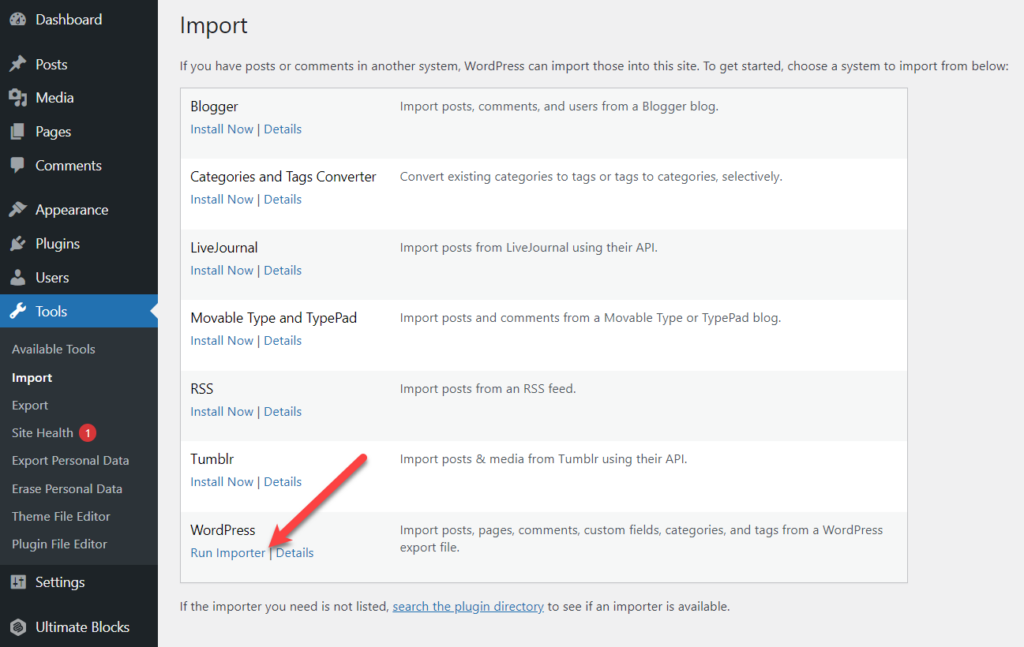
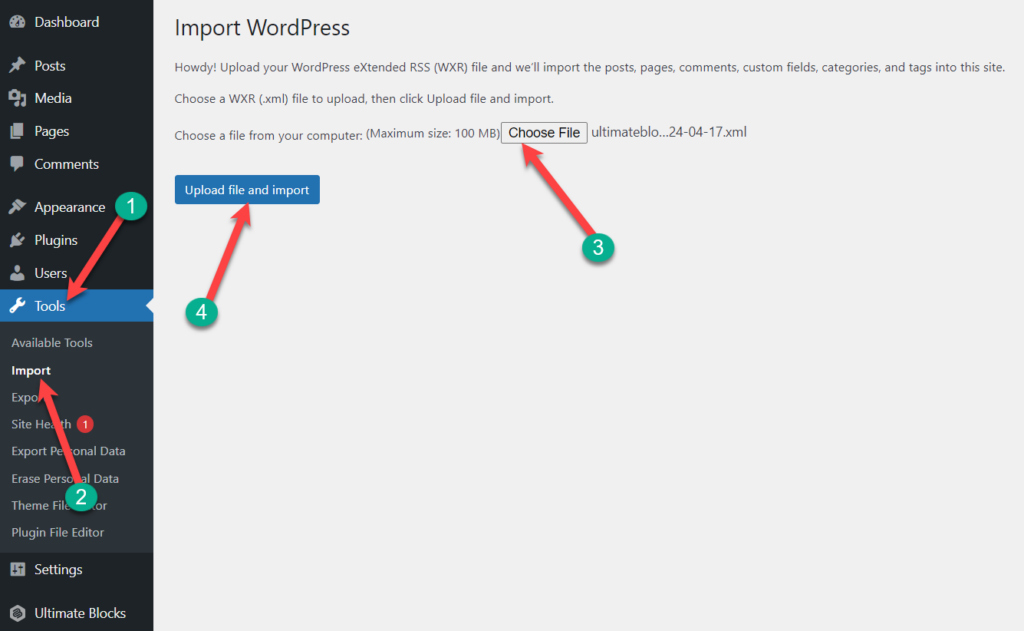
Then click on the ‘Run Importer’ and select the XML file that you created earlier. Hit the ‘Upload and import’ button.
As long as the original website is online, WordPress will be able to import your media files such as images, and blog posts.
This may seem a tiresome process to you, but due to this reason, different companies have been using WordPress site migration tools.
Exporting a WordPress Site Using a Plugin
There are a lot of plugins available in the WordPress directory. Among all of these plugins, UpdraftPlus is considered as the best to export and import your WordPress websites.
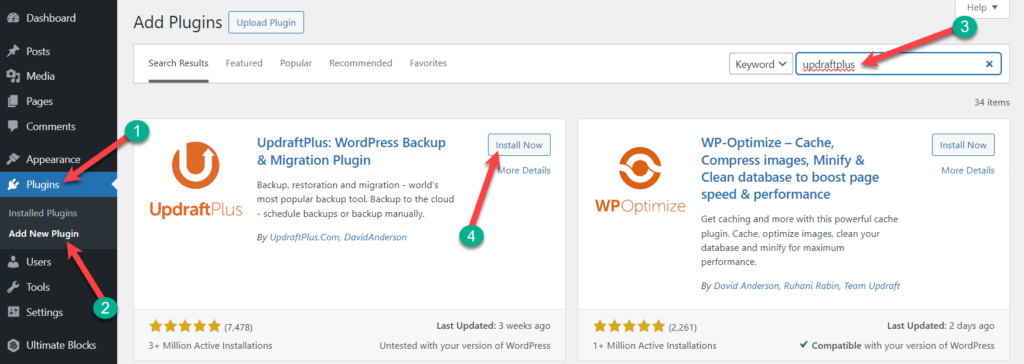
Step 1: Install the UpdraftPlus Plugin
To export your website using this plugin at first install and activate UpdraftPlus.
Step 2: Take a Backup
After activating the plugin, navigate to Settings -> UpdraftPlus Backups page from your dashboard.

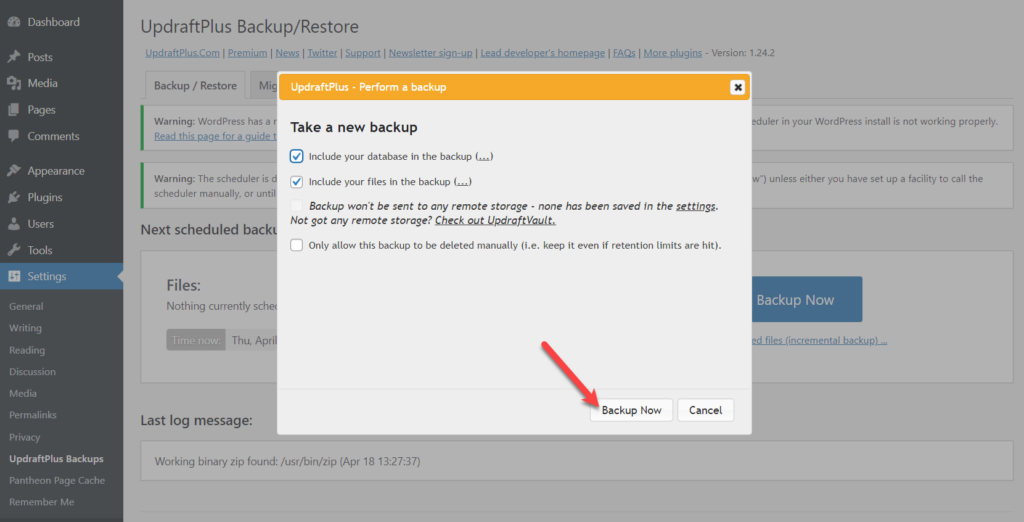
Now click the ‘Backup Now’ button.
A pop-up message will appear with several options. You can leave the options as it is and click the Backup Now button.
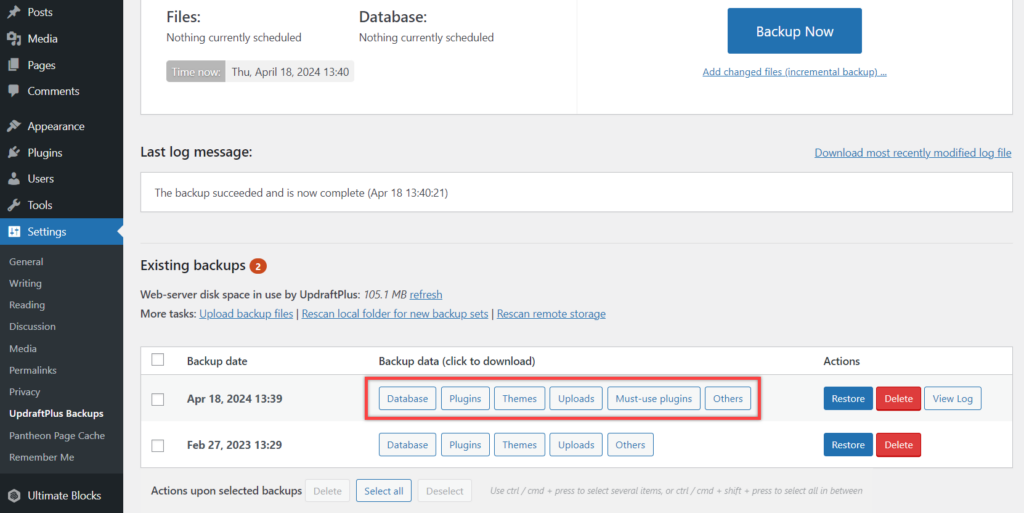
Step 3: Download the Backup File
Once the backup is complete you can download files on your computer by clicking individual buttons.
Step 4: Restore Backup
After that, you can restore this backup easily. If you like to restore this backup on any other website, then navigate to that website and make sure you have installed Updraftplus.
Then all you have to do is navigate to Settings -> UpdraftPlus Backups and then click on ‘Backup / Restore‘ tab.
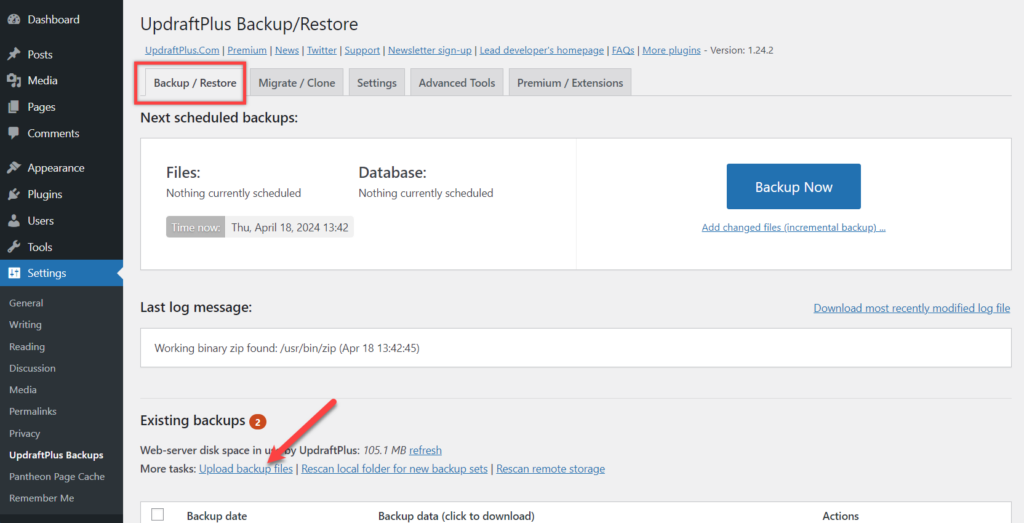
Click on the ‘Upload backup files’ then drag and drop the downloaded backup files. As you upload the file you will find it on the Backup data.
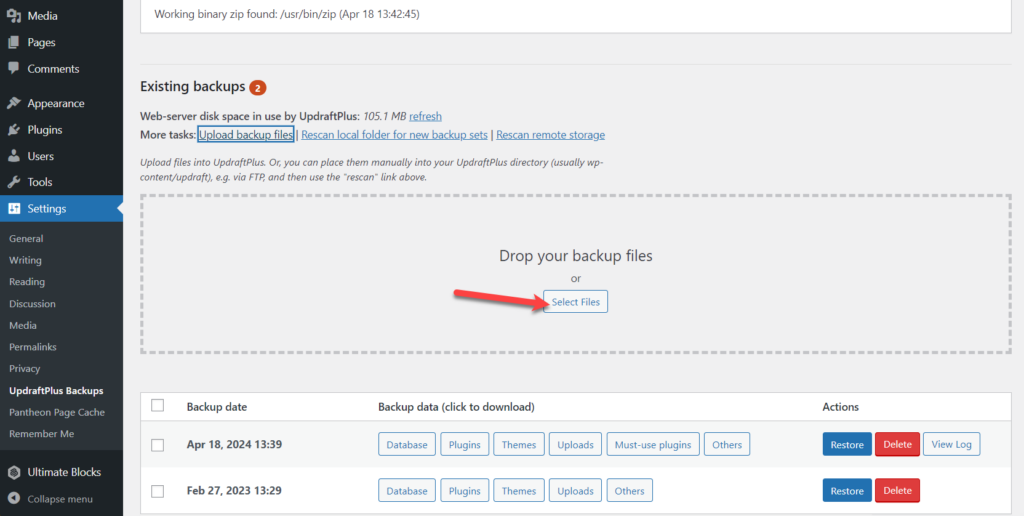
Now, just click on the restore button of all files, and your website will be entirely exported to this new website.
Final Words
It’s totally up to you how you want to export WordPress site to new host. If you choose plugins, then it is better to use the premium version as the premium version helps you complete the task easily, and you also get direct support. If you want to go free, I am here. Ask me anything related WordPress export, I will be happy to help you.
Leave a Reply