WordPress is the most popular CMS. It powers more than 40% sites on the web.
If you’ve installed WordPress on your web host, you have done a great job. But installing WordPress is just starting, you need to do few more things after installing WordPress.
In this post, I will be sharing a list of things to do after installing WordPress. You can consider it as a checklist.
If you’ve just installed WordPress but don’t know what do next, this checklist is for you. Every time I start a new WordPress blog, I follow this checklist.
- 1. Active the Akismet Plugin
- 2. Delete the Sample Contents
- 3. Set Title, Tagline and Timezone
- 4. Choose WWW or Non-WWW
- 5. Change Your Default Theme
- 6. Add Site Icon & Logo
- 7. Install Essential Plugins
- 8. Update Your User Profile
- 9. Connect Your Site With Google Analytics & Search Console
- 10. Add New Categories
- 11. Create Essential Pages
Let’s dive into the details.
1. Active the Akismet Plugin
If you are new to WordPress, you may not be aware of comment & trackback spams. These things are really annoying.
But the good news is, WordPress has a pre-installed plugin called Akismet that helps you to get rid of these spams.
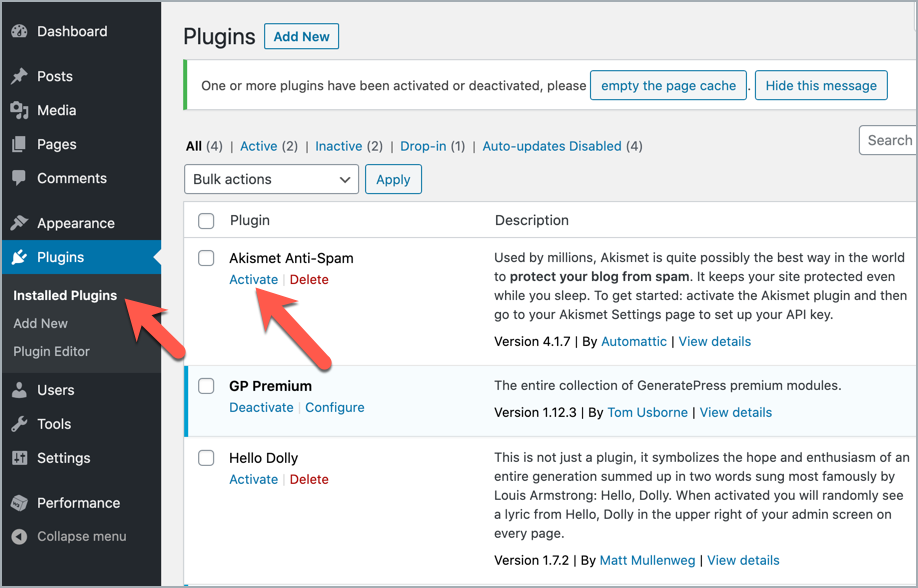
All you have to do is activate the plugin and enter the API key. Now go to your WordPress Dashboard > Plugins > Installed Plugins and activate Akismet plugin.
To active your Akismet account, you need to use an API key.
2. Delete the Sample Contents
By default, WordPress creates some sample contents to help you to understand different things. You should delete them right away before start building your site.
Here are 4 types of contents that need to remove.
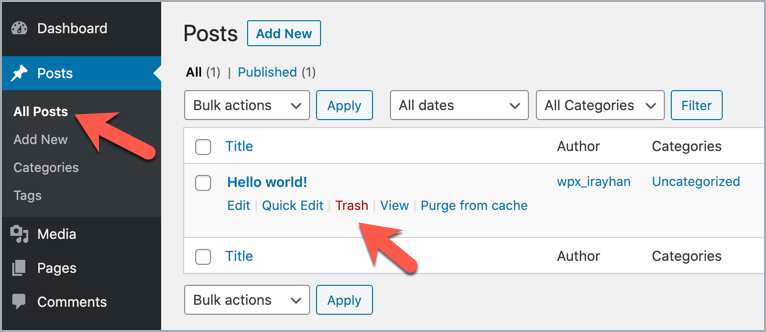
1. “Hello world” Post: To remove this sample post, go to WordPress Dashboard > Posts > All Posts and click on “Trash” under Hello world post.
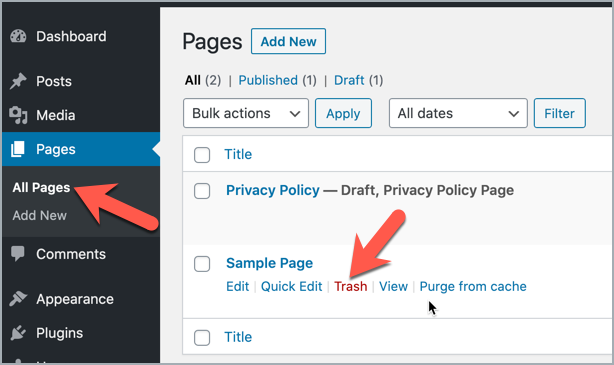
2. “Sample Page” Page To remove the sample page, go to Pages > All Pages and click on “Trash”. And it will be deleted.
3. “Mr. WordPress” Comment: This comment will be deleted automatically once you delete the “Hello world” post.
4. “Hello Dolly” Plugin WordPress also comes with default plugin named “Hello Dolly”. This plugin is not necessary.
To delete the plugin, go to Plugins > Installed Plugins and click on “Delete”.
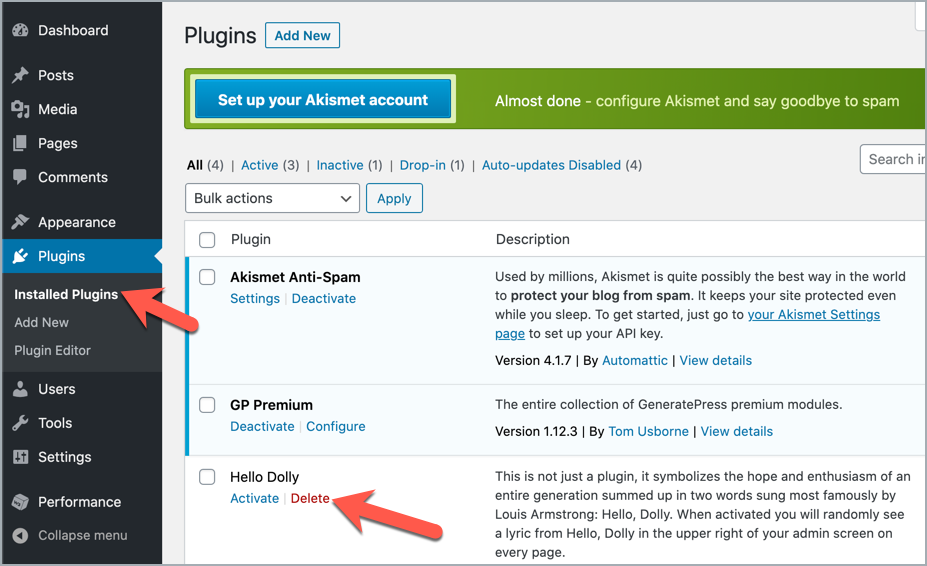
This will delete the plugin.
3. Set Title, Tagline and Timezone
Setting Title, Tagline and Timezone is extremely easy. But most of the newbies neglect these things.
Title and Tagline make it easier to understand what’s your site about. Proper timezone is essential for scheduling your posts.
You can set all of these from the same page. Just go to Setting > General and enter your Site Title and Tagline. If you are not sure what to write on Tagline, do it later. Then scroll down and choose a city in the same timezone as you.
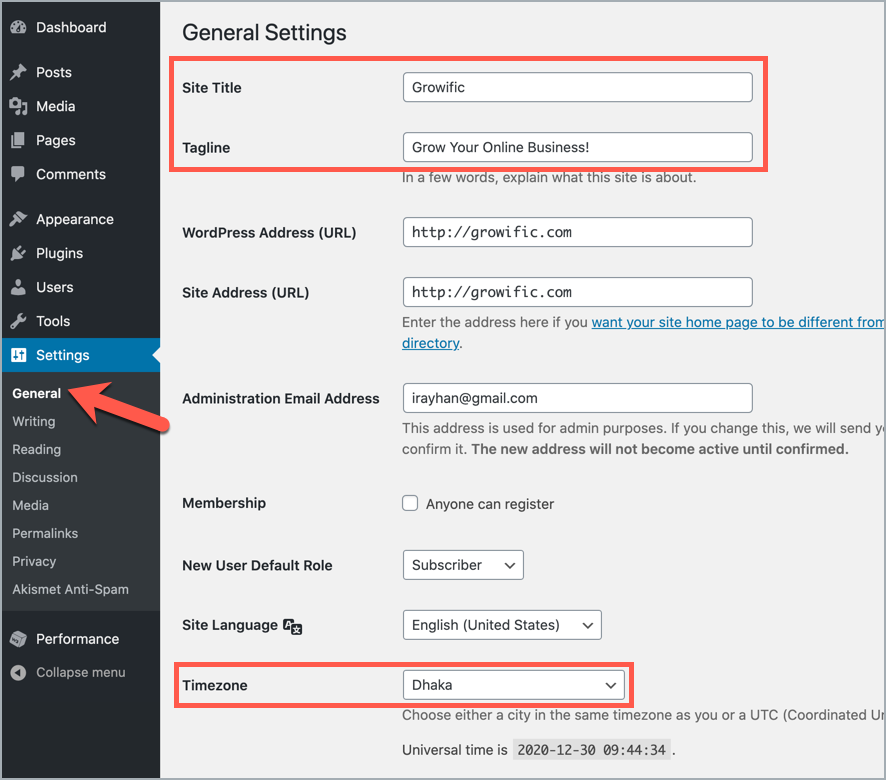
And click on “Save Changes”.
4. Choose WWW or Non-WWW
WordPress lets you choose WWW or non-WWW version of your site. You have to choose one for your site. There is no much difference between the version. But the problem will be raised if you change it later.
If you choose the non-WWW version, then your blog URL will be http://yourdomain.com, and if you choose WWW, it will be http://www.yourdomain.com.
Search Engine will consider both as two distinct addresses. So if you change it frequently, a lot of duplicate pages will be created in Google Index. It is very harmful for SEO.
Here at RoadToBlogging, I am using the non-WWW version. By default, WordPress keeps it as non-WWW. If you want to add WWW in your WordPress blog, go to Setting > General and add WWW to WordPress Address and Site Address.
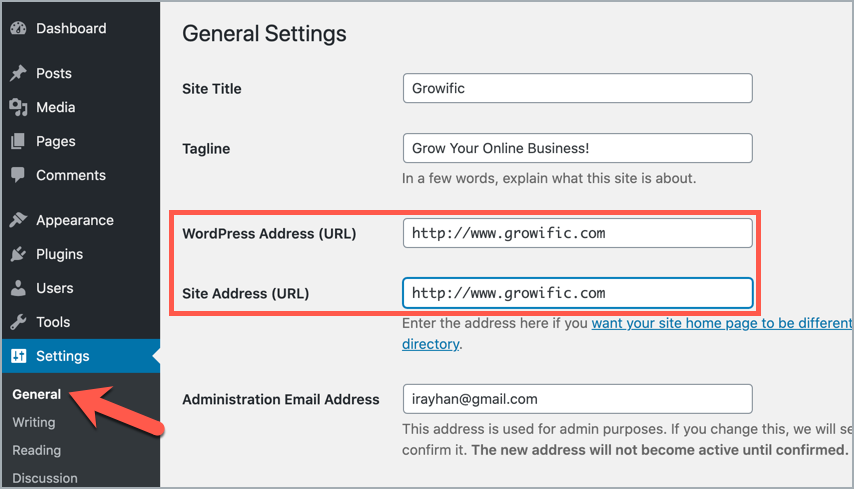
And click on “Save Changes”.
5. Change Your Default Theme
WordPress Installation comes up with some default WordPress themes. Those are good for personal blogs.
But if you’re going to create a professional blog/site, you should consider using a better theme.
WordPress has a huge collection of free and premium themes. You can get started with a free theme when you are just started. But if you want to invest some money, then go with a premium theme.
Here are some popular WordPress themes –
- Astra
- GeneratePress
- Divi
- Thrive Themes
- Kadence
Once you’ve found the right theme for your WordPress site, check – How to Install a WordPress Theme.
6. Add Site Icon & Logo
A site icon is a small icon that shows on the browser tabs and bookmarks mostly. And a logo is the small design that represents your site around the web. It’s crucial to have unique favicon and logo to increase your brand awareness.
You can create a site icon by using Photoshop or other tools. If you don’t have designing skills, you can use online tools like Favicon.cc or X-Icon Editor.
When it comes to designing a logo, you can do it yourself by using Photoshop or online logo maker tools. Otherwise, you need to hire someone to create a logo for you.
Once you’ve prepared the favicon and logo, go to WordPress Dashboard > Appearance > Customize.
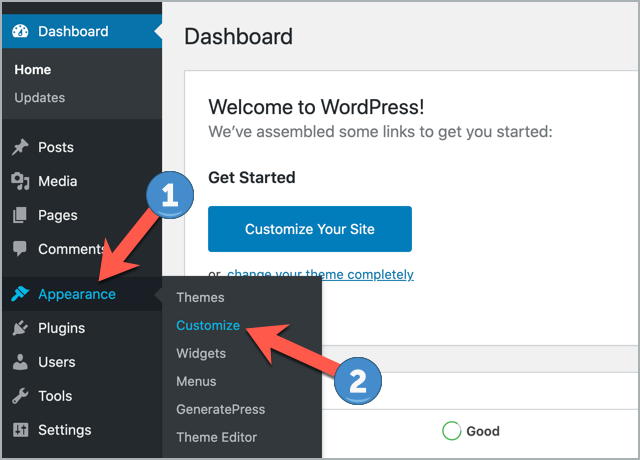
Then click on ‘Site Identity’.
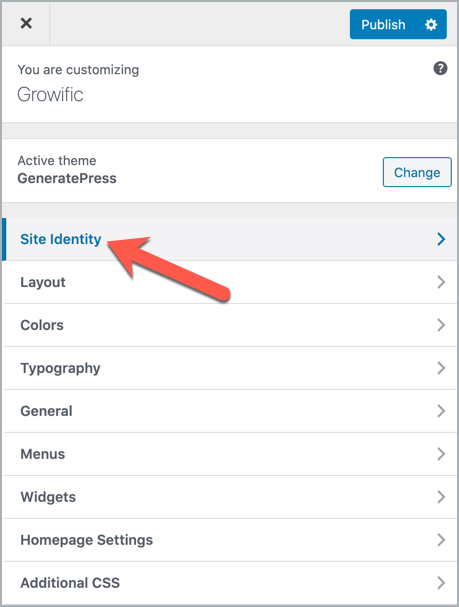
Then upload logo and site icon.
Just click on ‘Publish’ and you are done.
7. Install Essential Plugins
The best thing about the WordPress is, you can do almost everything in WordPress by using a plugin.
That means you don’t need to have any coding skills to add functionality in WordPress. And there is a plugin for anything you want to accomplish.
However, there are some common WordPress plugins which are essential for almost every kind of WordPress site. Here are some essential plugins –
- Rank Math (All-in-one SEO plugin)
- Ultimate Blocks (Extends the functionality of the WordPress editor)
- Elementor (Best WordPress Page Builder)
- Social Snap (Best social sharing plugin)
- Thrive Leads (List building plugin)
- Fluent Forms (Contact form plugin)
- WP Table Builder (Table builder plugin)
- W3 Total Cache (WordPress cache plugin)
- VaultPress (Backup service)
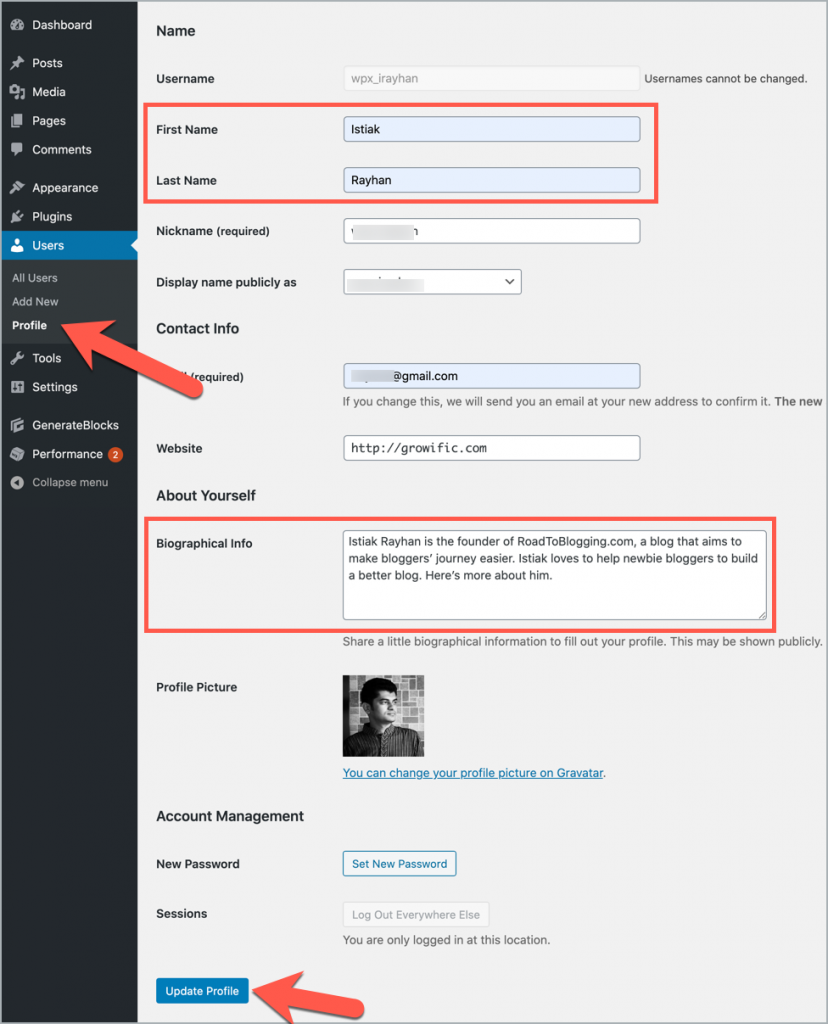
8. Update Your User Profile
Having biographical info and profile picture helps your readers to know more about you and to connect with you.
To update your user profile, go to WordPress Dashboard > Users > Profile. Then enter your name, contact info, biographical info, etc. You need to create Gravatar account to show your profile picture.
Your biographical info and profile picture will be displayed under every blog post like this –
You can also use an author box plugin like Fancier Author Box or Fanciest Author Box to make your profile more attractive.
9. Connect Your Site With Google Analytics & Search Console
Google Analytics and Search Console are the must have tools for site owners. Google Analytics tracks your visitors and Search Console helps you to monitor your site performance in Google Search. Both are free.
You need to connect your site with Google Analytics and Search Console to track your site performance.
10. Add New Categories
While you can add a new category when writing a post, it’s recommended to add all categories before publishing posts. It will help you to plan your posts properly.
To add categories, go to WordPress Dashboard > Posts > Categories. Then enter your category name, slug (URL) and description. And click on “Add New Category”.
11. Create Essential Pages
Like every website, WordPress sites need some essential pages. You should build these pages before publishing posts. These pages vary from niche to niche.
Here are three important pages that you should build immediately.
- About
- Contact
- Privacy Policy
Over to You
So these are the things that you should do after installing WordPress.
If you’ve faced any issues regarding these things, let us know via comment.
However, if you found this post useful, help me by sharing this post on Facebook, Twitter, or LinkedIn.
Leave a Reply