A WordPress post template is the backbone for all your articles and blog posts on your website. It defines the layout and design of your posts. Every WordPress theme comes with a blog post template that is applied across all posts.
But what if you want to create your own custom post template?
In this article, I’ll teach you how to create a custom single post template in WordPress using the blog editor.
With this method, you can create a custom post template without having to write any code or hiring a developer. You can do it all by yourself using the block editor with just a few simple steps.
That being said, let’s get started.
How to Create a Custom Single Post Template in WordPress
Using the block editor (Gutenberg) is a very convenient way to create custom post templates. The user-friendly interface of the editor makes it simple and fast.
Do note that you’ll need to have a block-based WordPress theme activated on your website to follow the steps given below. You can install block-based themes like Twenty-Twenty-Four or any other theme.
Here are the step-by-step instructions on how to create a single post template in WordPress:
Step 1. Go To Single Post Template Editor
In your WordPress dashboard, go to Appearance > Editor to open the template editor page.
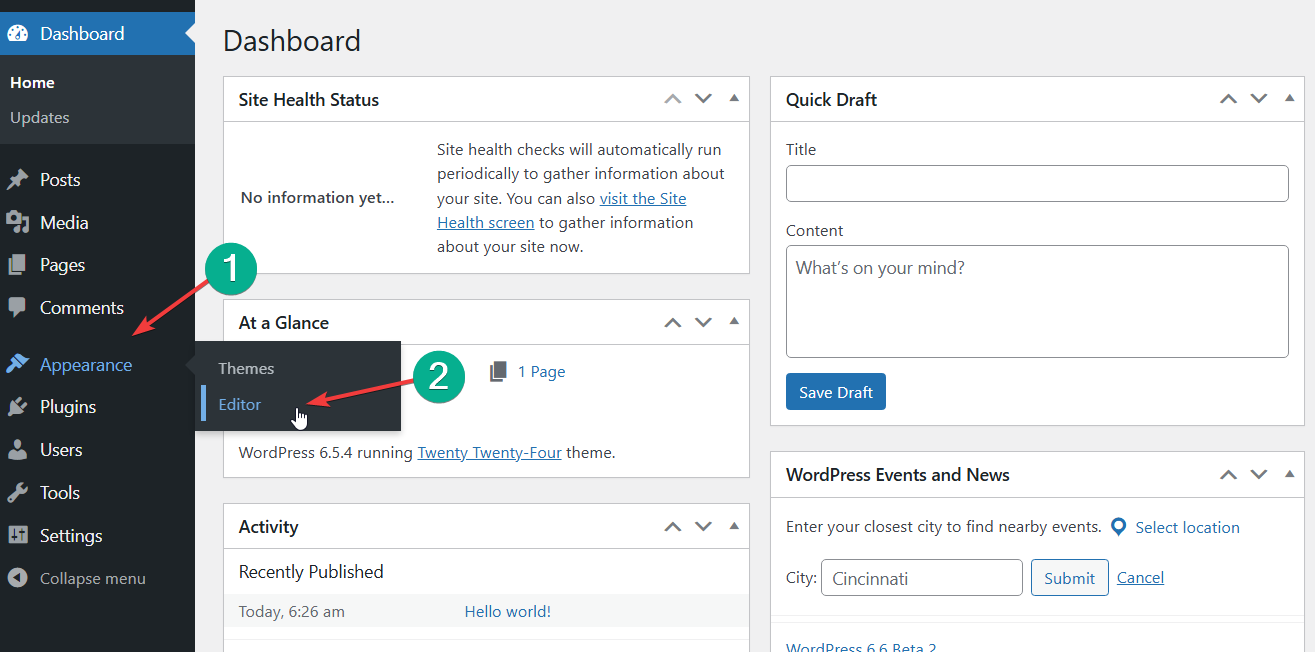
From here, click on Templates > Single Posts which will display all the single post templates created on your website.

Click on the Edit icon to begin customizing the single post template of your theme. You’ll now be redirected to the block editor.

Step 2. Create A Single Post Template In Block Editor
From the block editor, you can now create a custom single post template. Here’s how you can do it.
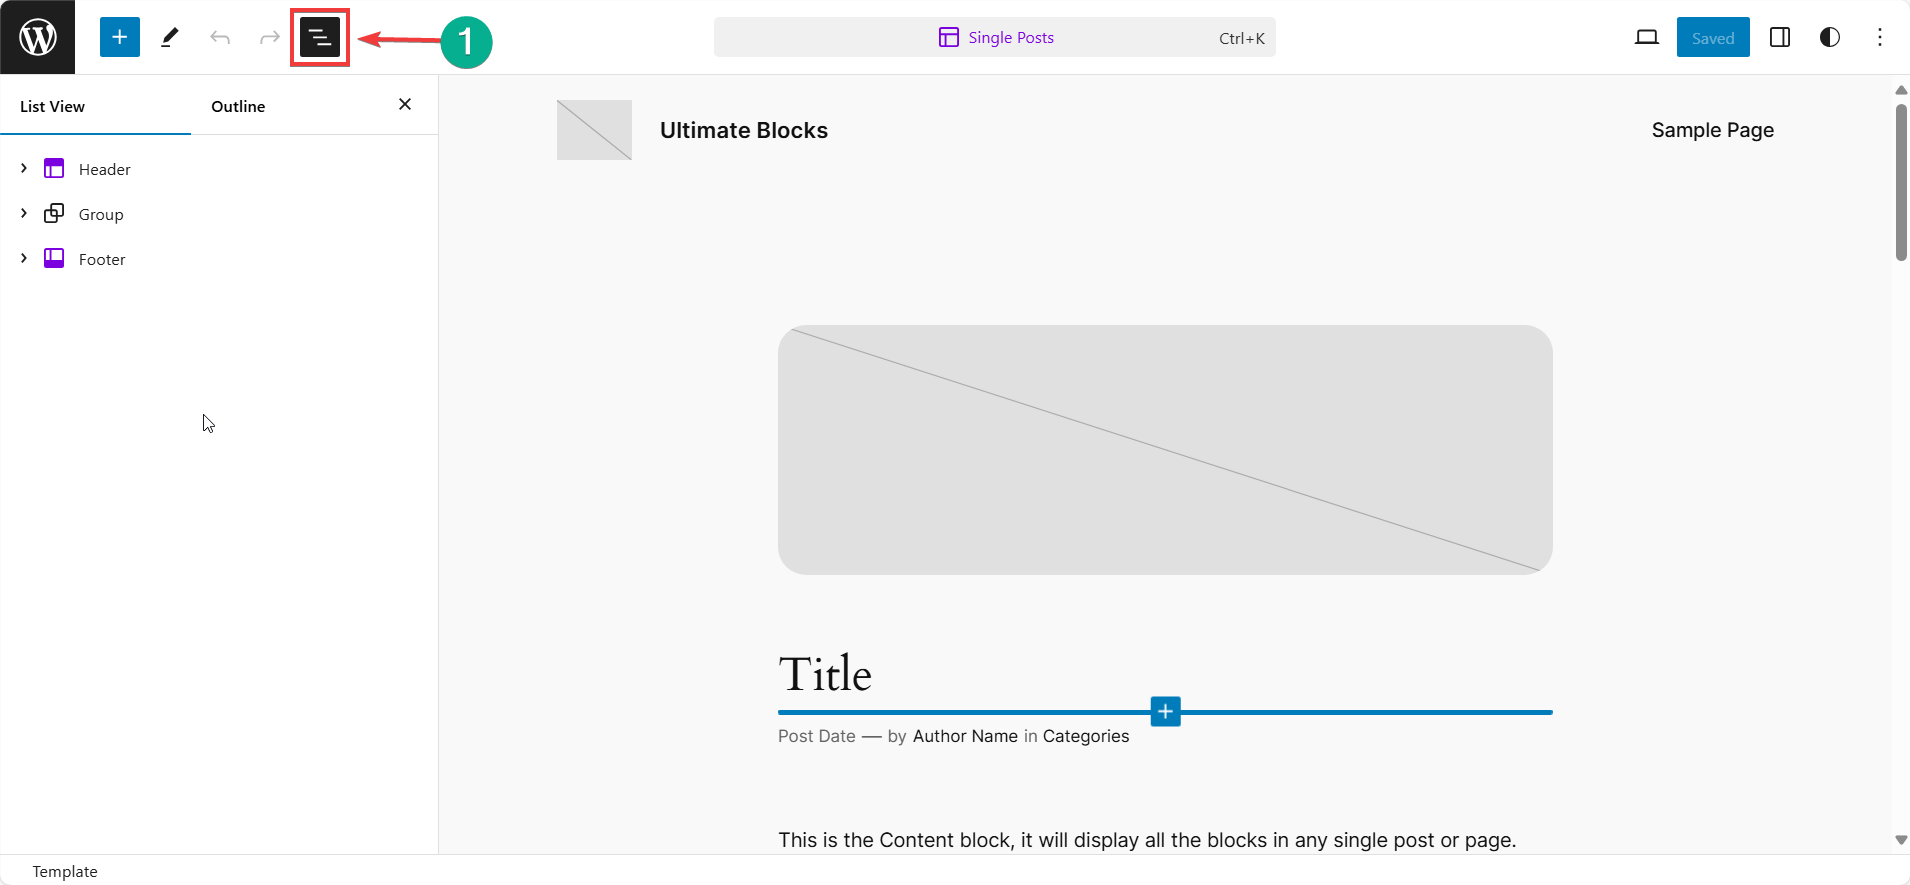
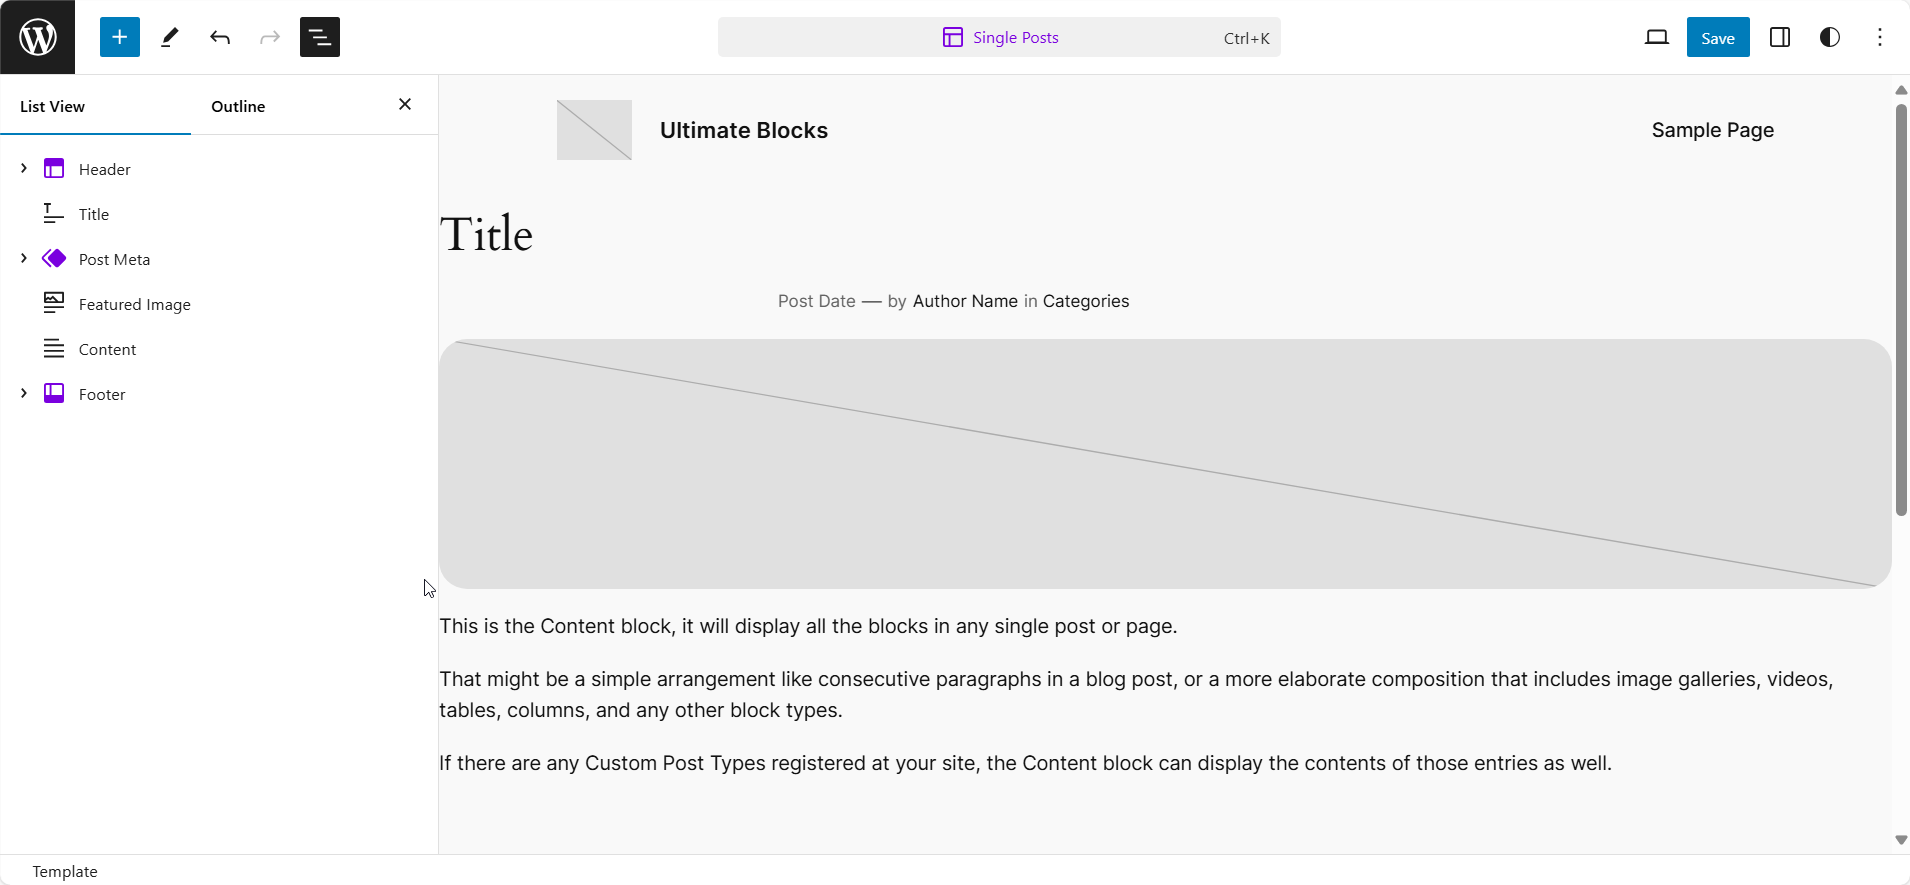
First, click on the List View icon at the top left screen. This will display all the elements in a list which makes it easy to navigate through the template.
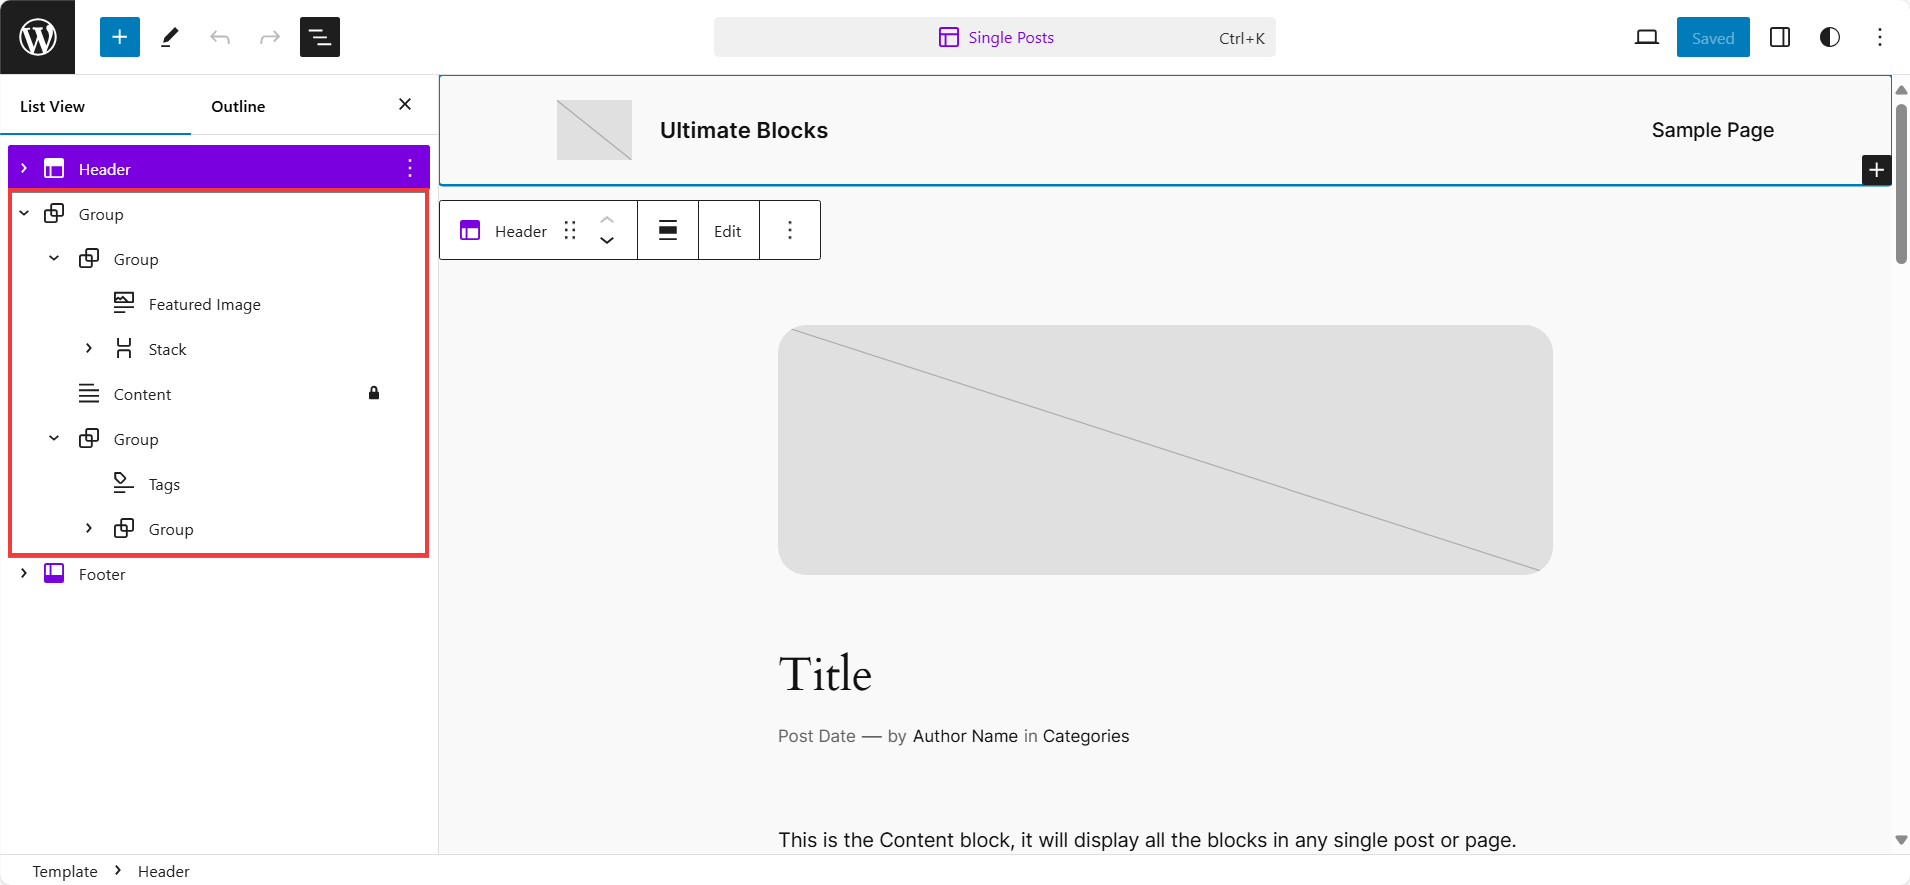
Expand the Group block from the List in the sidebar and you’ll find blocks used for the single post template. You can either delete all the blocks and start from scratch or keep the ones you want to use.
Now, you can start inserting blocks into your custom template. Here are some commonly used blocks on a single post template:
- Header – Displays your website’s logo, menu, buttons, and more.
- Post Title – Displays the title of your post. The block is automatically updated to the actual live title of the post.
- Featured Image – Displays the featured image you set for your blog posts.
- Content – The main body of your post. This is the content that you write in your blog posts.
- Post Meta – Displays additional information about the post such as author name, publish date, categories, tags, and so on. It’s also updated live depending on the post.
- Comments – Displays the comments section of the post with the ability for readers to leave their own comments as well.
- Footer – Displays the footer which includes the website’s logo, navigation links, site credits, and more.
You will have to insert all these blocks into your single post template. You can also insert additional blocks that you may feel need to be displayed on all your posts.
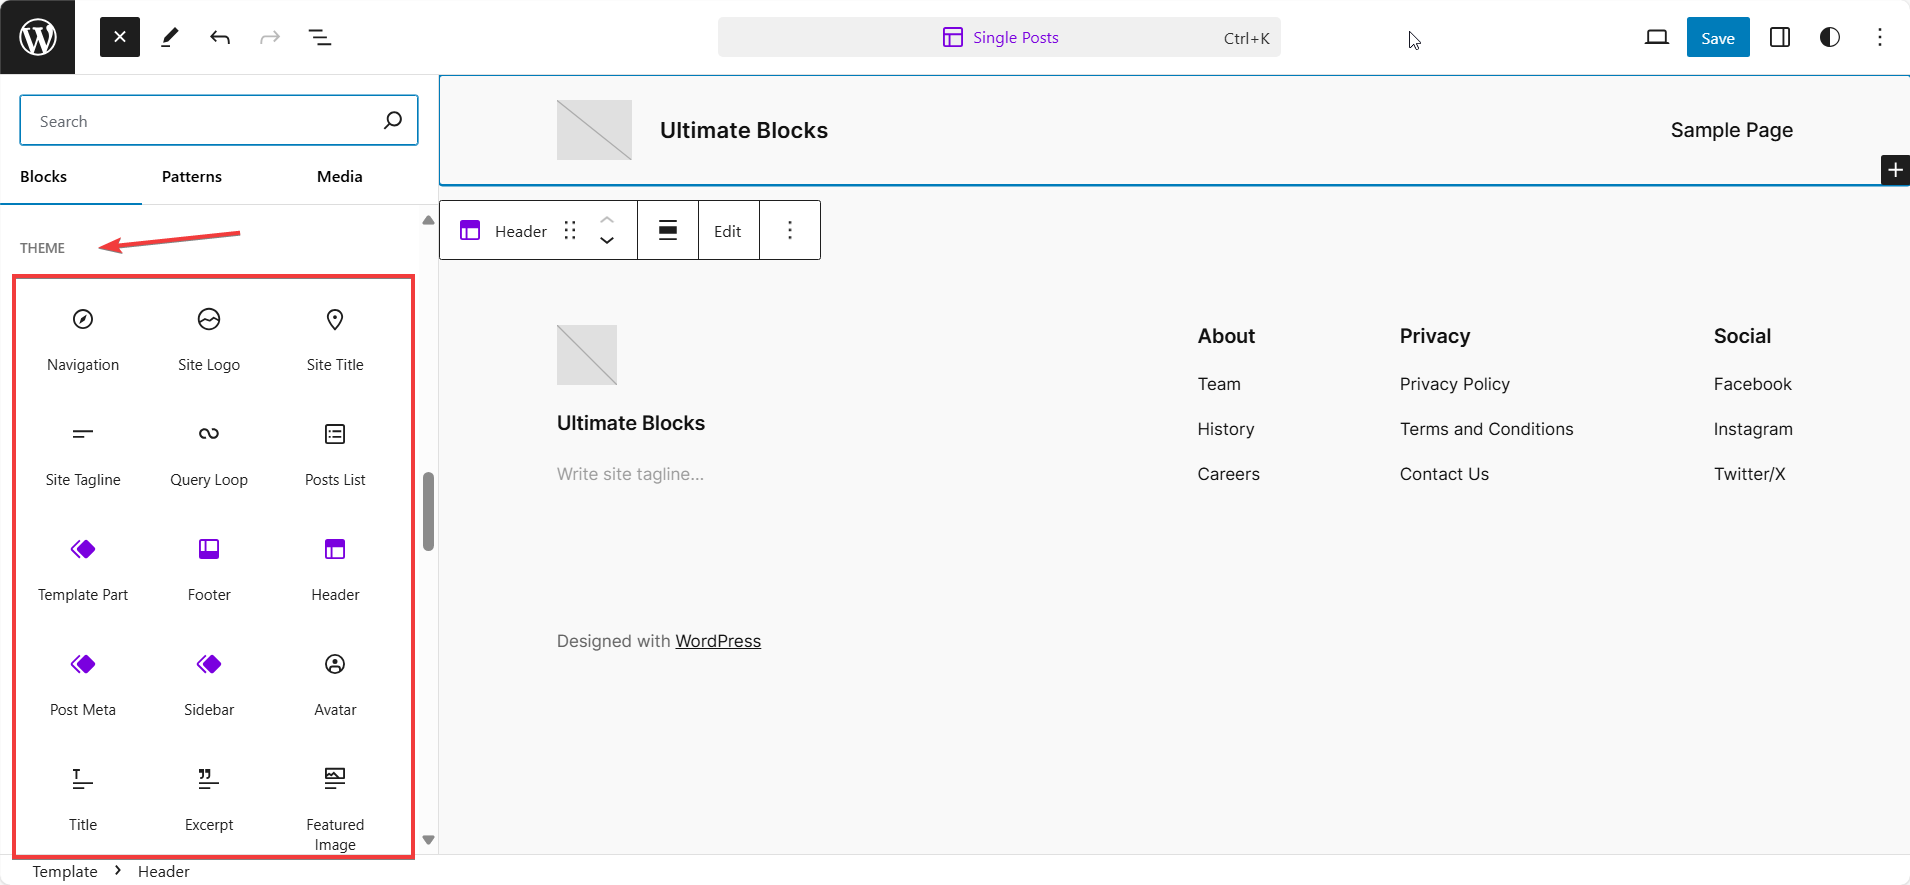
To insert blocks, simply click on the Plus icon and search for the blocks you want to insert. You’ll find all the above blocks under the Theme category in the Blocks list.
Here’s what my post template looks like after inserting the blocks mentioned above:
Now, we can go ahead and customize our single post template.
Step 3. Customize Your Single Post Template
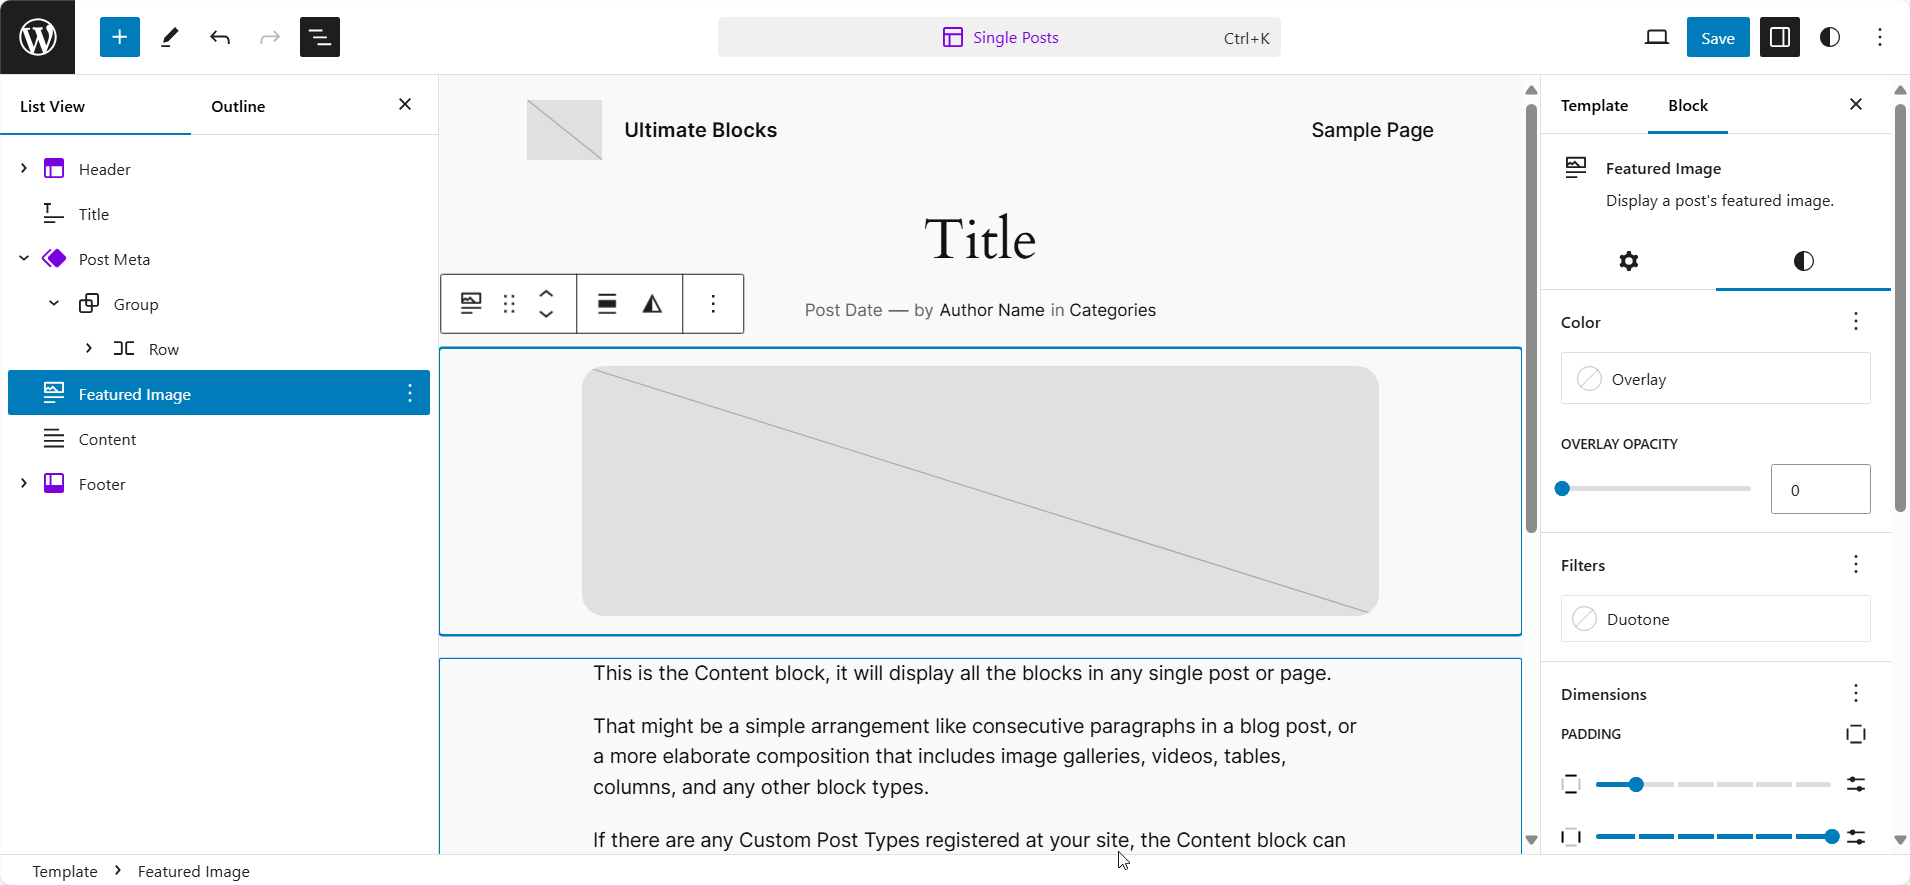
You can improve your custom single post template and make it even better by customizing its design and style. While this step is optional, doing this can help you match your post template to your website’s branding and aesthetics.
Open the right sidebar and you’ll be able to customize the styles of individual blocks. Here’s how the post template looks now after styling it a bit. You can customize the spacing, colors, fonts, and other styles.
You can also switch to the Tablet and Mobile modes and make sure the template you’re creating is responsive across all screen sizes.
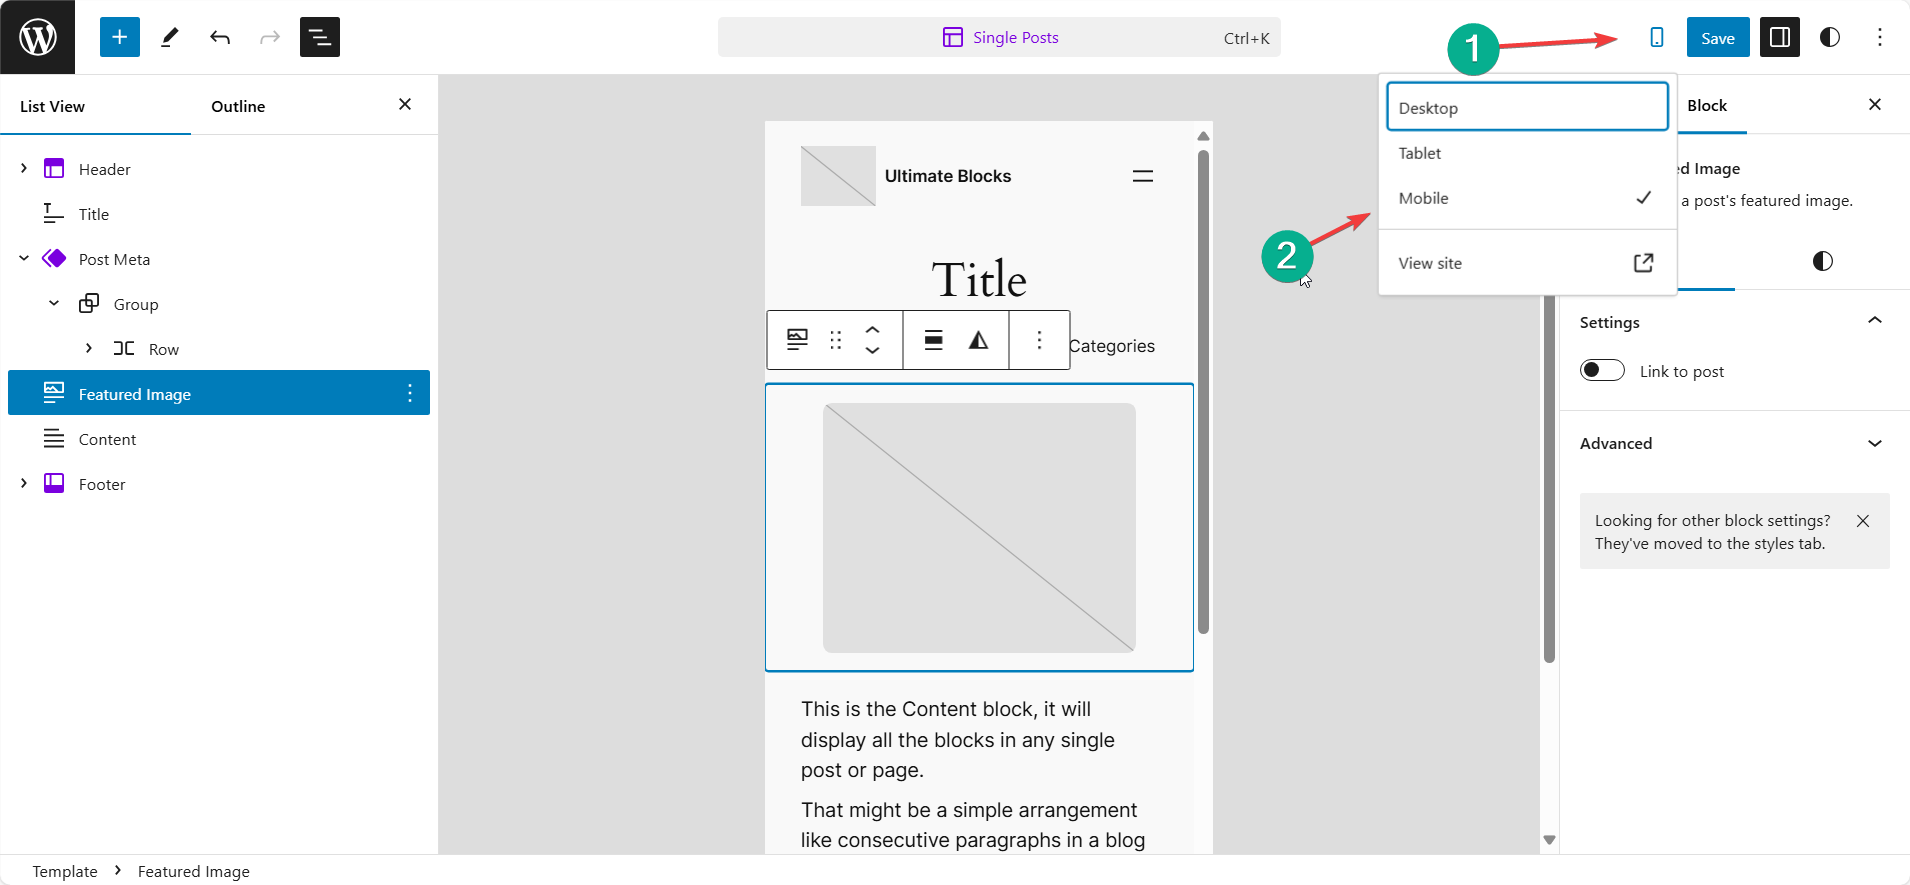
To do this, click on the Laptop icon and change it to the Tablet or Mobile to switch the view.
Step 4. Save Your Template
Once you’re done creating your single post template, it’s time to save it. To save the template, click on the Save button and you’ll be prompted with a confirmation message telling you where the changes will be applied.
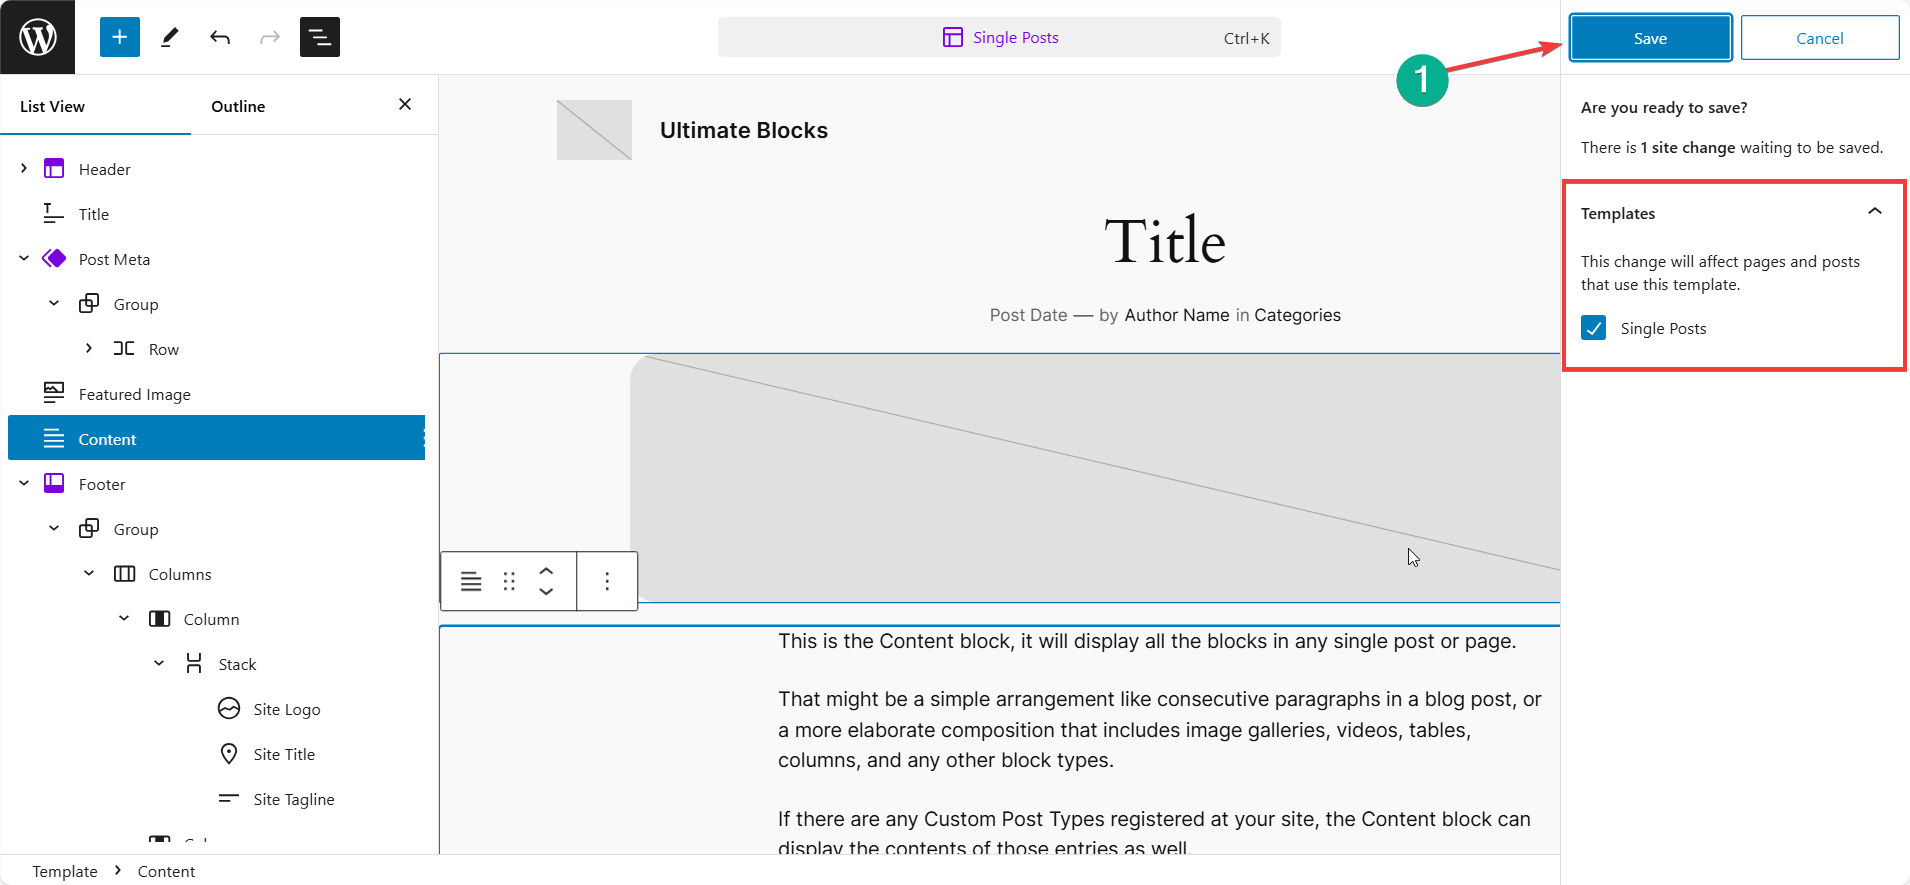
After saving the template, the changes will be applied to the single post template. Now, all your posts will have your created template for single posts.
Conclusion
So, that’s how you can create a custom single post template in WordPress using the block editor. This method is very easy and simple to create custom post templates.
You no longer have to write custom code or edit your theme files to modify your post templates. It can be done easily by just editing the template in Gutenberg.
However, it’s important to note that this only works on block-based themes. If your theme isn’t block-based, you won’t be able to customize the single post template this way.
If you have any questions about this guide, feel free to drop them in the comments section below. Also, feel free to browse more WordPress Gutenberg tutorials on our blog.


Leave a Reply