
Website navigation should be intuitive, not a puzzle. Complex navigation structures can leave visitors frustrated and disengaged. One essential aspect of crafting an organized and user-friendly site is creating submenus to enhance navigation and provide a seamless browsing experience for your visitors.
If you don’t know how to create a submenu in WordPress, then this post is for you. After reading this post, you will be able to create a submenu on your own.
Let’s begin.
Creating a Submenu in WordPress
I will show the whole process in two easy steps. Make sure you go through the whole post.
Step 1: Open Header
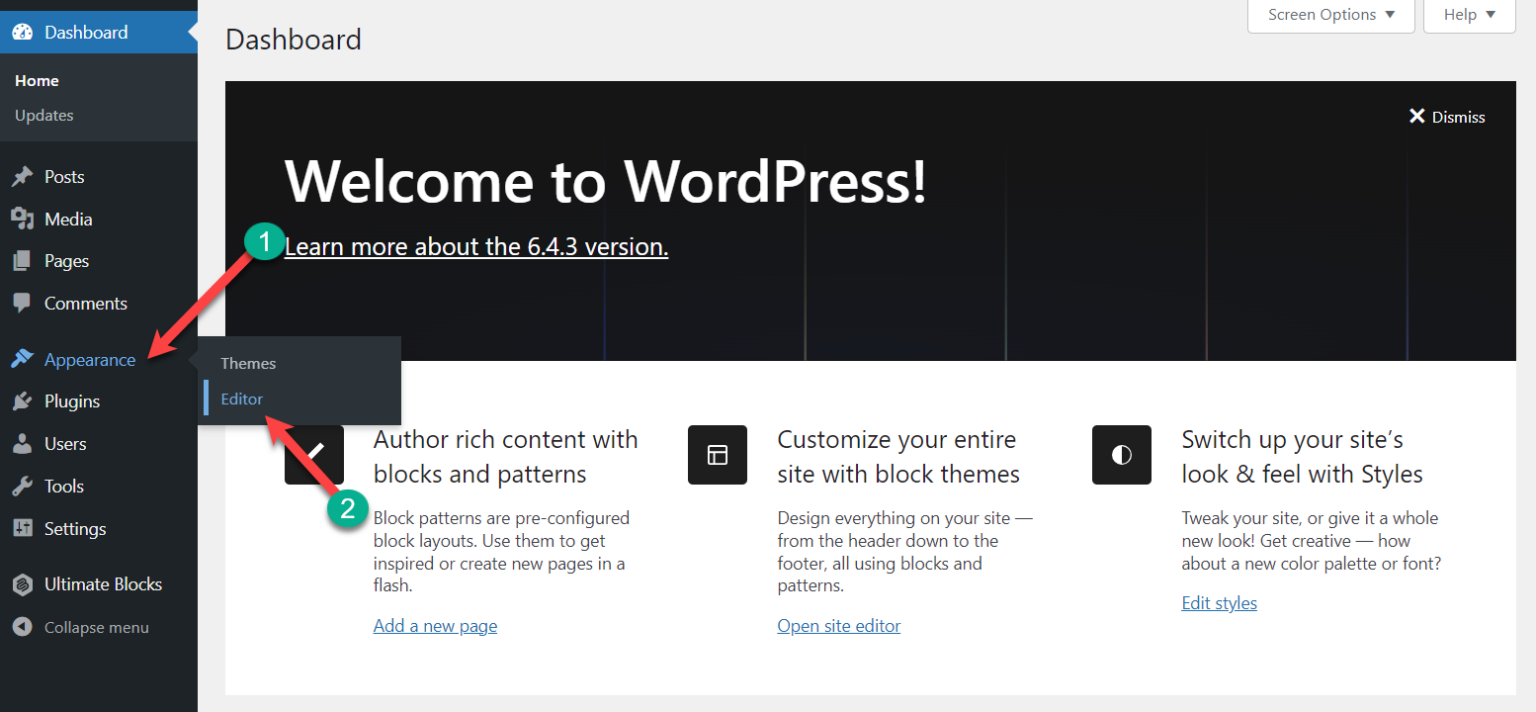
First, navigate to Appearance -> Editor.
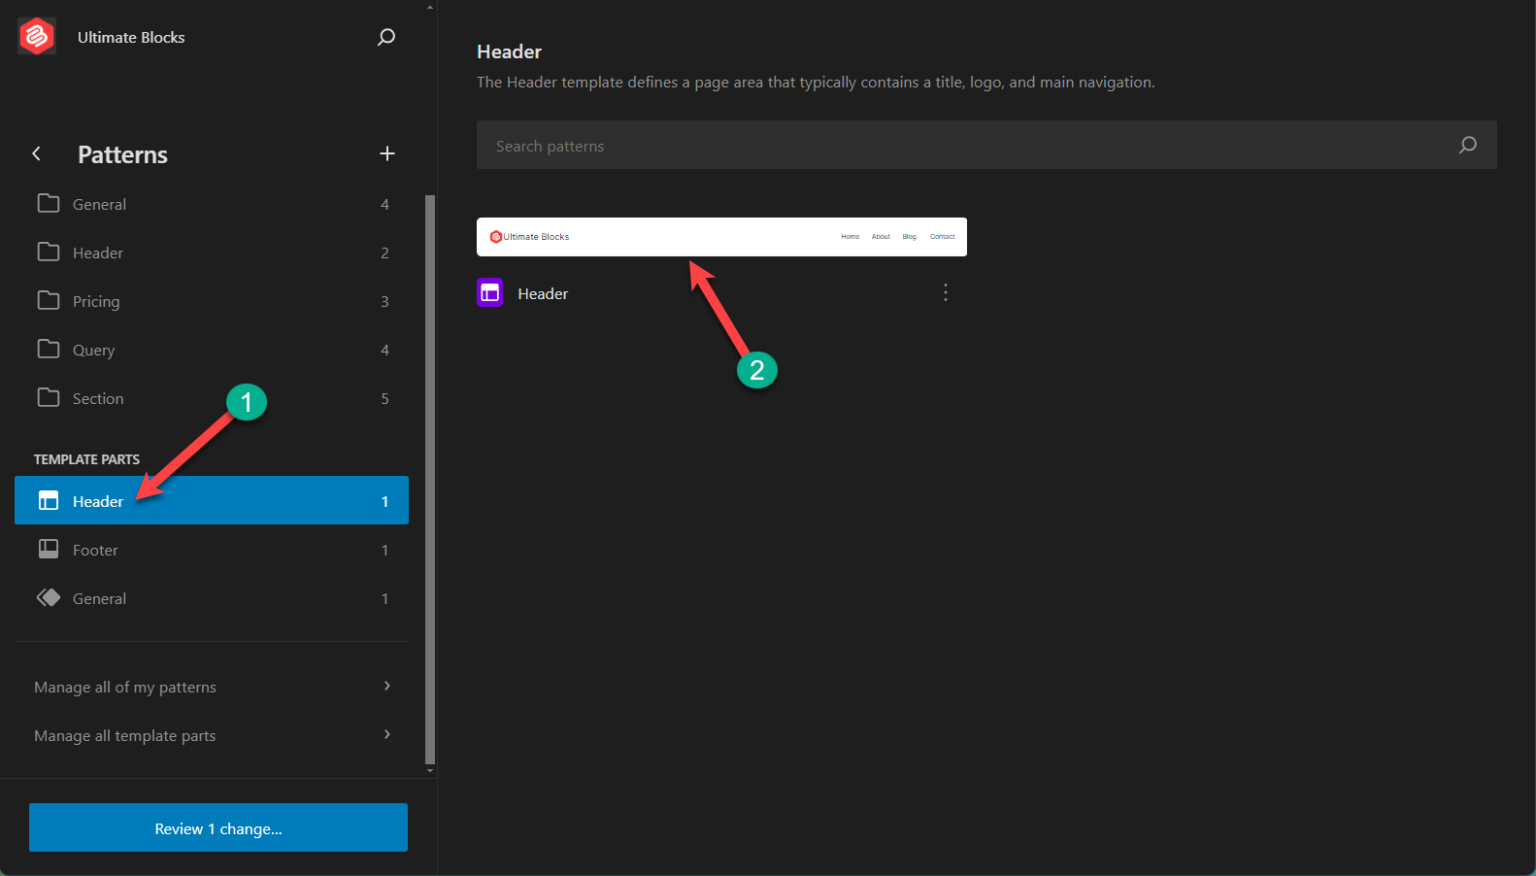
Click on Patterns.

Scroll below, from the TEMPLATE PARTS, click on ‘Header’. This will bring the header layout.
Then click on the header part.
Step 2: Create a Submenu
Click on the Navigation menu and open the settings panel.
You will see your menu items as a list on the right side. Hover the cursor on the menu item on which you want to add a sub-menu.
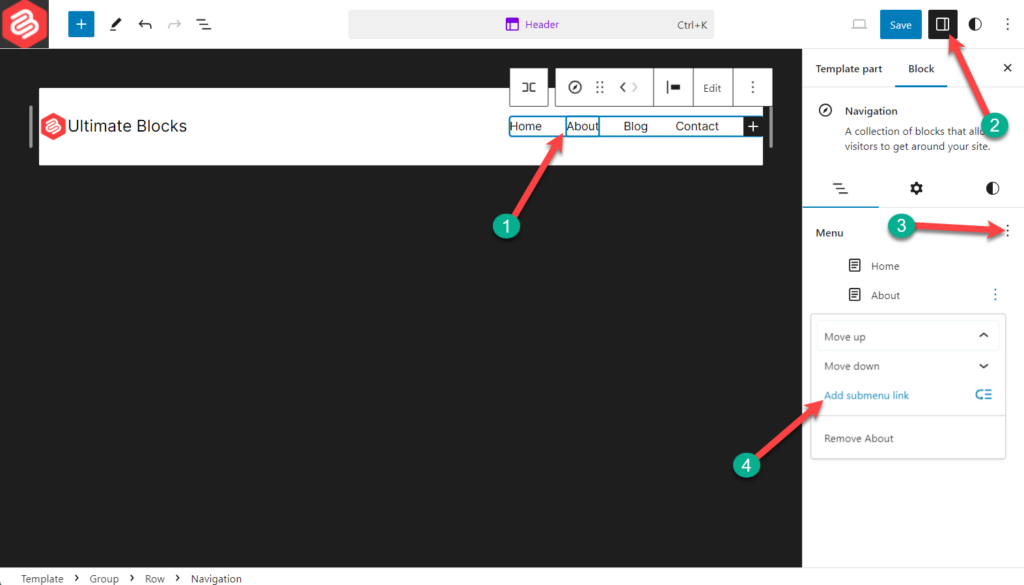
Click on the three-dot button and hit ‘Add submenu link’. Here add your page or post name, and it will appear in the list.
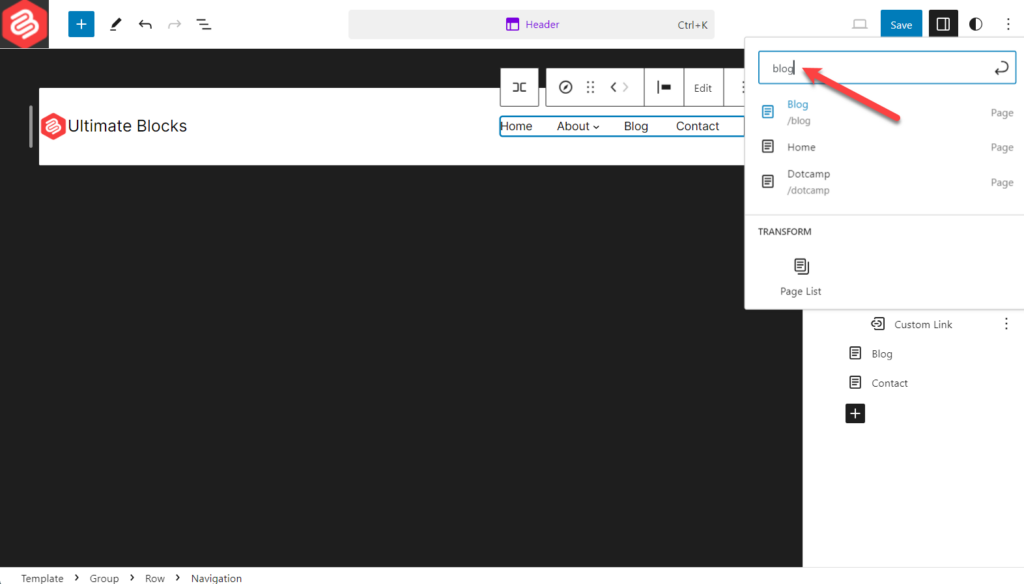
Select the item then you want as a sub-menu and hit the ‘Enter’ button.
In this way, you can add multiple sub-menu under any menu item.

After you create a submenu, you can customize its color, typography, etc.
Last Words
I hope now you know how to create a Submenu or drop-down menu in WordPress. If you have any complexity understanding the process, tell me in the comment box below. I will be happy to solve your complexity. If you liked the post, then share it with your friends.


Leave a Reply