
Adding Google Tag Manager to WordPress websites can provide you with a range of benefits. You can effectively manage various tracking codes like Facebook Pixel, Google Analytics, and AdWords from a centralized location.
It simplifies the process of adding and updating tags on your website without having to edit codes manually. This article will guide you on how to add Google Tag Manager to WordPress. Before that, let’s know about what the Google Tag Manager is.
What is Google Tag Manager?
Google Tag Manager is a tag management solution that allows you to deploy marketing and analytical tags on your website without touching the website’s code. With this system, you can create tags, triggers, and variables for your websites.
A tag is a simple code snippet that sends information to tools like AdWords and Google Analytics. Triggers define the time and action when the tag should be fired. For example, a trigger can be set to fire a tag when someone visits your website. Variables contain dynamic values for the tags and triggers.
How to Add Google Tag Manager to WordPress: Step-by-Step Guide
There are several steps involved in the process of adding Google Tag Manager to WordPress. Explore the steps below.
Step 01: Create a Google Tag Manager Account
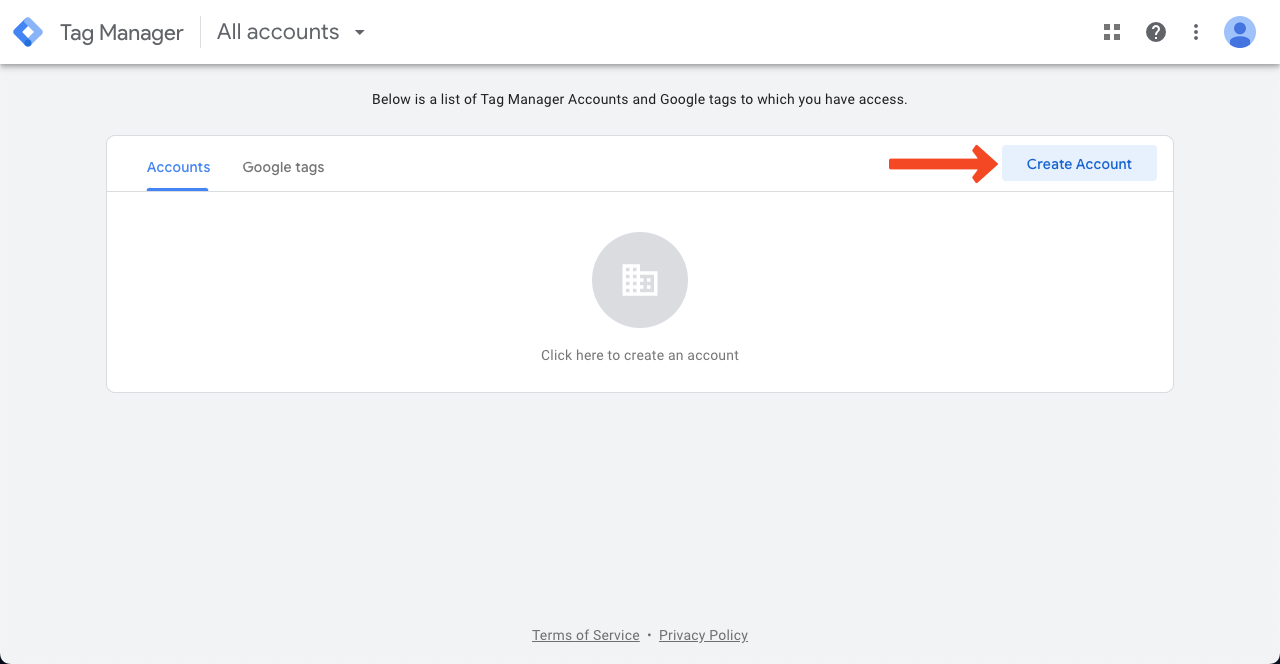
We hope you already have an account in Google Tag Manager. If not, no worries! Go to this link and hit the button Create Account.
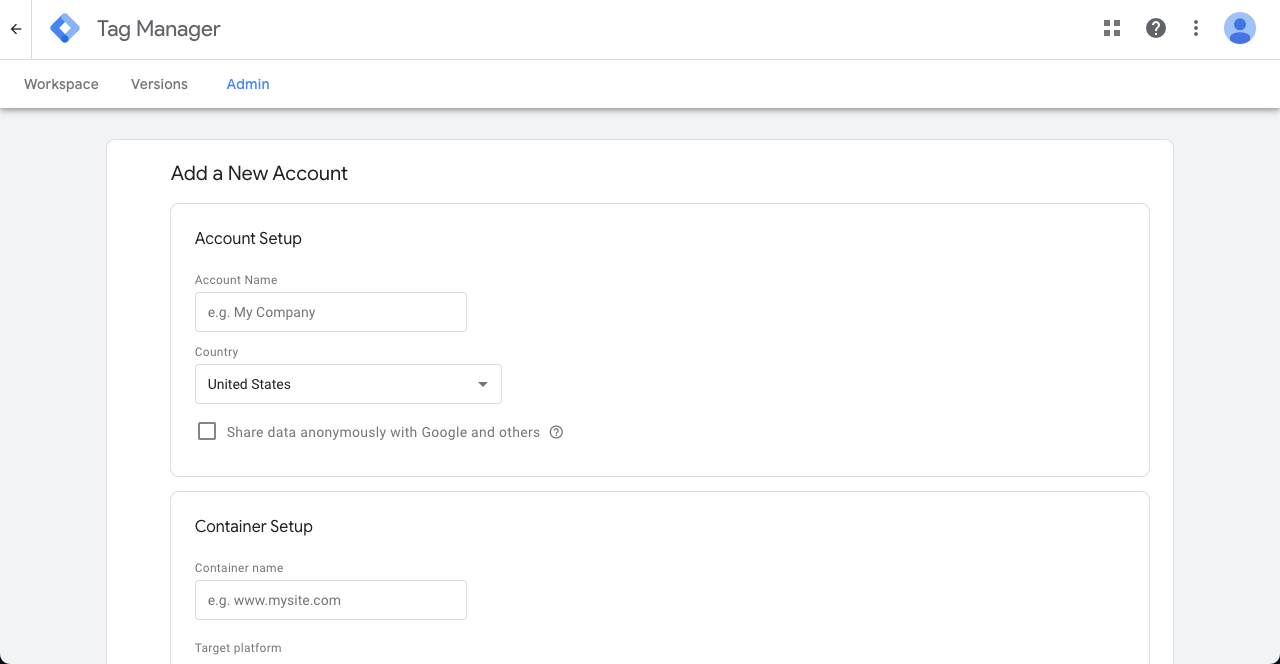
Fill up the necessary information on respected fields. Once you are done with the information, scroll down the page. You’ll get the Create button. Click it and do the rest tasks.
Step 02: Get the Google Tag Manager Code
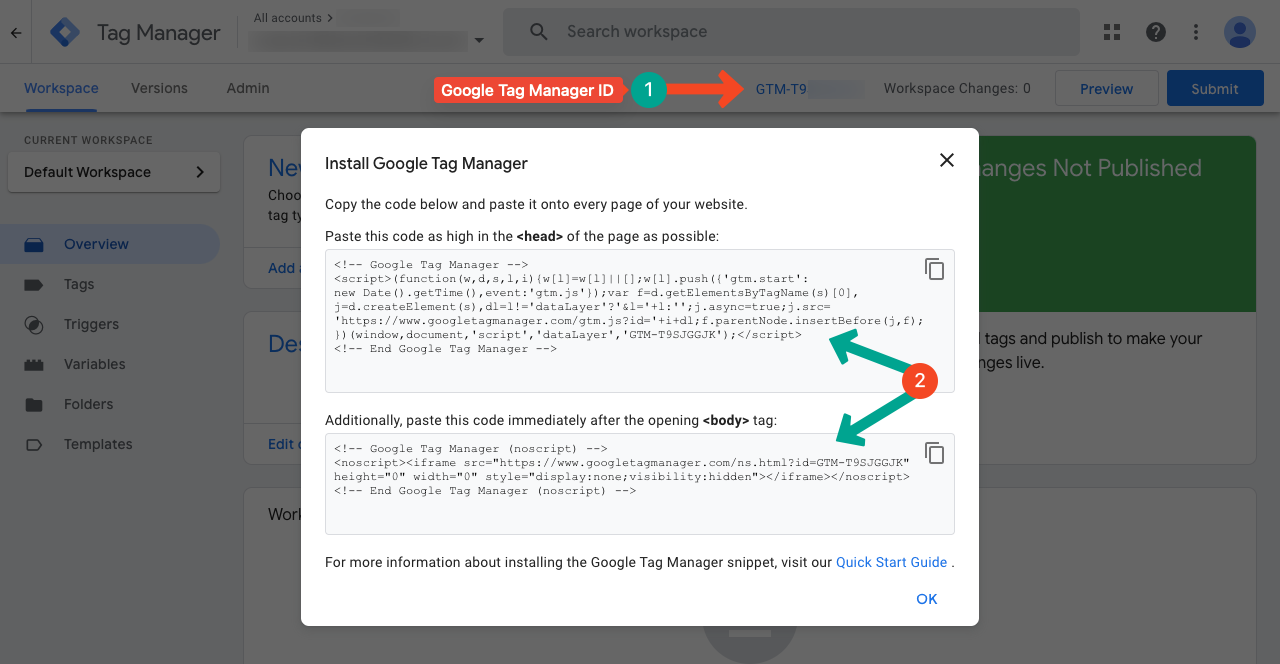
You’ll get the Google Tag Manager ID and code at the end of the account creation process. Now, you can configure this account with your website in two ways.
First, install the GTM4WP plugin and copy-paste the Tag Manager ID on the respective field. Second, copy-paste the <head> and <body> codes to the respective theme files section.
We’ll show you the methods in the following steps.
Method One: Install and Activate the GTM4WP Plugin
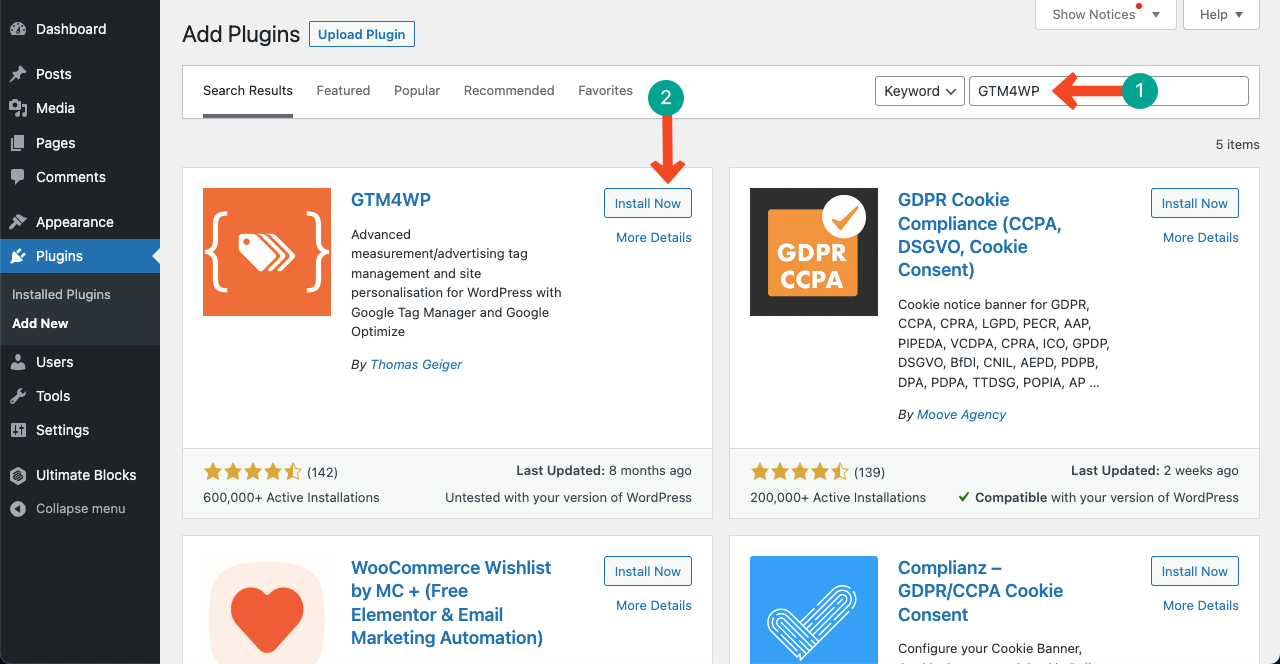
The GTM4WP plugin is developed by Thomas Geiger. Navigate to WordPress Dashboard > Plugins > Add New. Type the name GTM4WP in the search box. Install and Activate the plugin once it appears below.
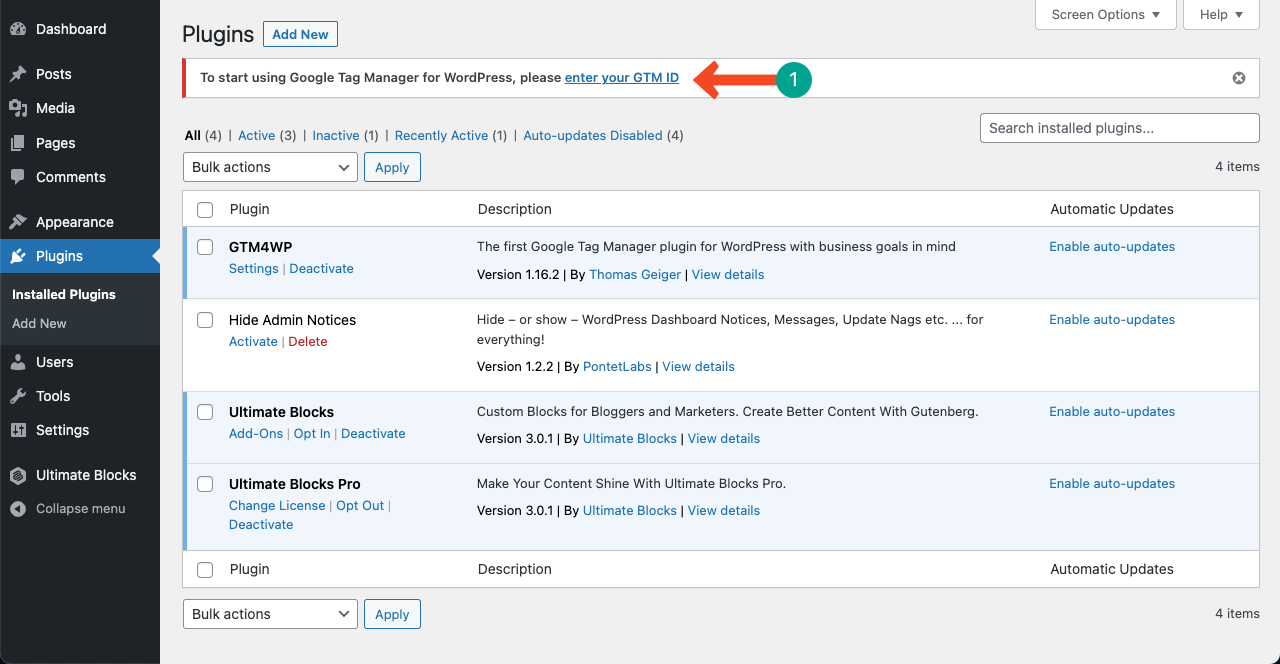
After installing the plugin, you’ll get a notification ‘enter your GTM ID’ on the top. Click on it.
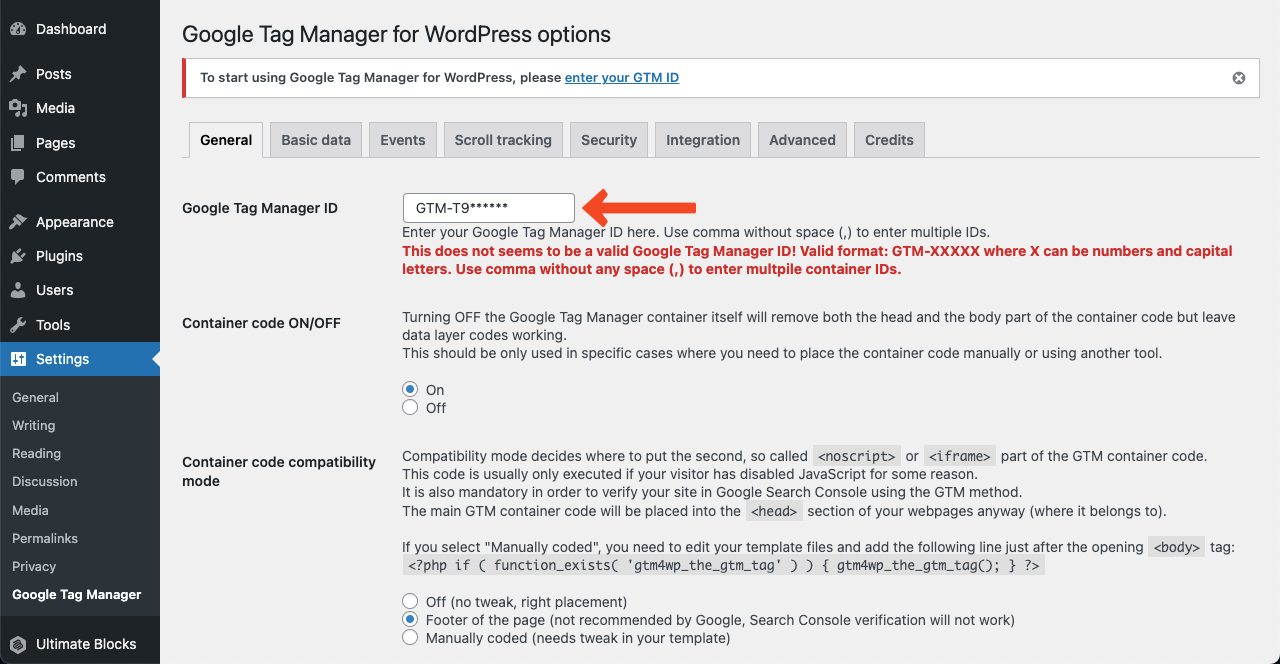
Copy-paste the Google Tag Manager ID to the box next to Google Tag Manager ID. We have pointed to the section in the image below.
Method Two: Copy-Paste the Google Tag Manager Code
We recommend activating a child theme before implementing this second method so the parent theme never gets disturbed. Plus, if you don’t love the second method after implementing it, you can override it just by switching to the parent theme.
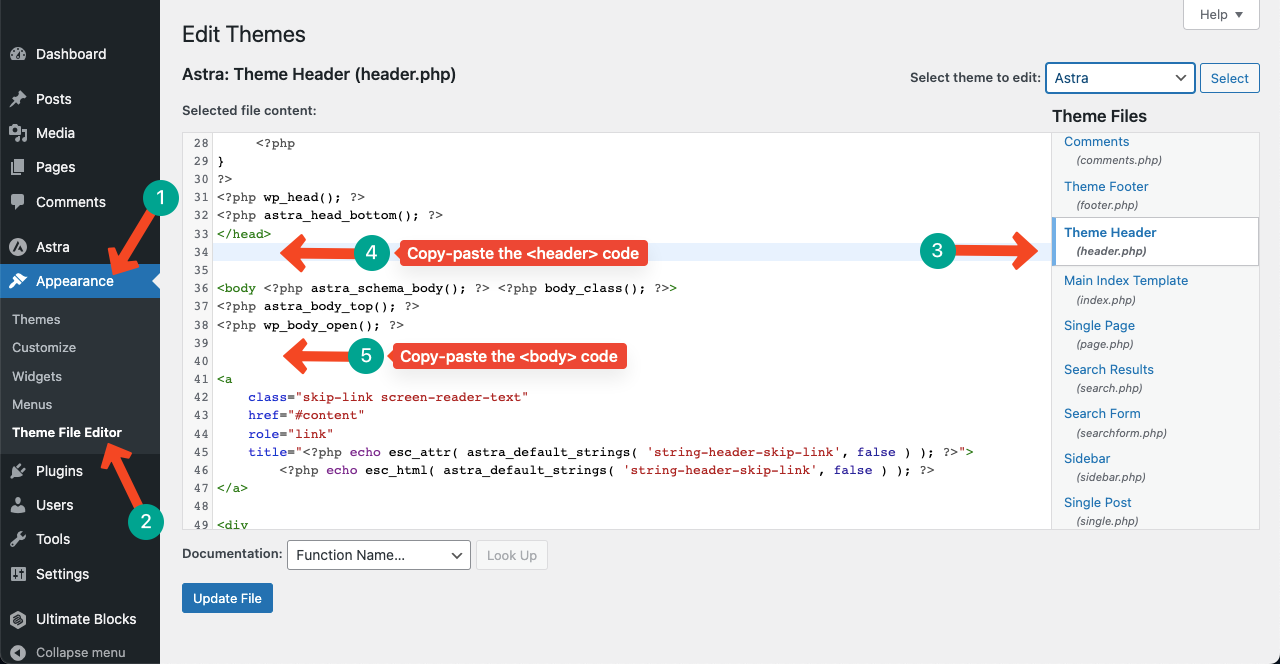
Hope you have the child theme activated. Now, go to Appearance > Theme File Editor. Open the Theme Header by clicking the header.php file under the Theme Files section.
Copy-paste the <head> code below the </head> section. Similarly, copy-paste the <body> code below the <body> section.
Press the Update File button at the end.
Thus, you can add Google Tag Manager to your website.
Conclusion
Google Tag Manager is a comprehensive part of any digital marketing today. If you want to grow your website and reap commercial benefits, you must become a pro in Google Tag Management.
If you have a live site, open an account in Tag Manager, configure it with your website, and start exploring it right from today. Hopefully, in three to four months, you will become confident in managing the system.

Leave a Reply