
Fonts are more than just text. They are an important element of your website’s design and user experience. They convey your brand’s personality and ensure readability. Whether you’re a professional web developer or a beginner, managing fonts effectively can transform your website’s aesthetics. If you don’t know how to do it, then this post is for you.
Here, I am sharing all the details for managing fonts. After reading the post, you will be able to install, delete, change font globally, and change the font for a specific portion.
Let’s begin.
Managing Fonts in WordPress
The new version of WordPress allows you to easily manage your fonts. From now on, you will be able to install or delete fonts very easily. First, let’s see how to install a font.
Installing a New Font in WordPress
To install a font, you have to open the editor and then the typography. Here, I am showing the process step by step.
Step 1: Open Editor
From your WordPress dashboard, navigate to Appearance -> Editor.
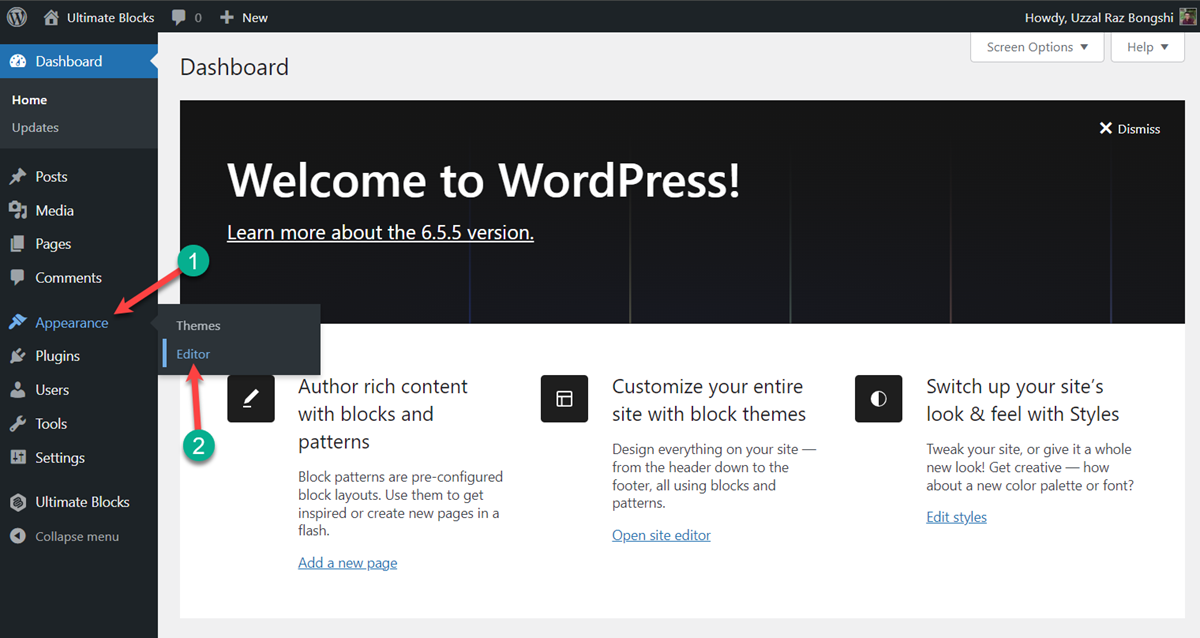
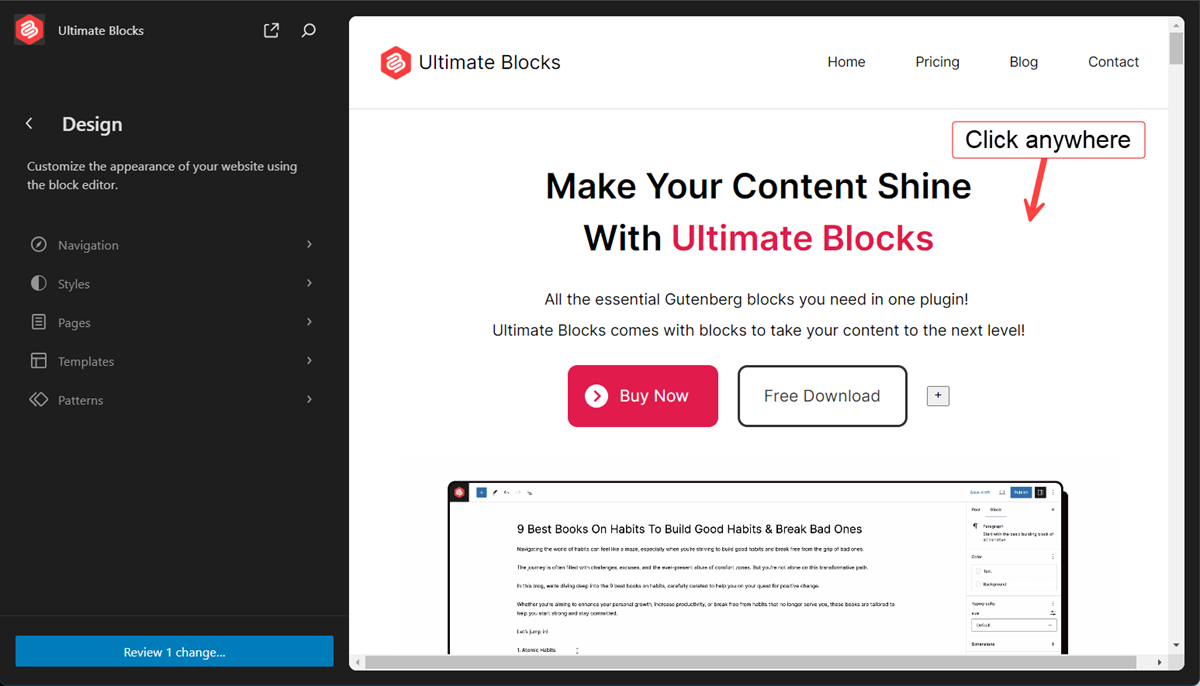
Click anywhere in the editor.
Step 2: Edit Typography
Click on the Style and then hit the ‘Typography’ option.
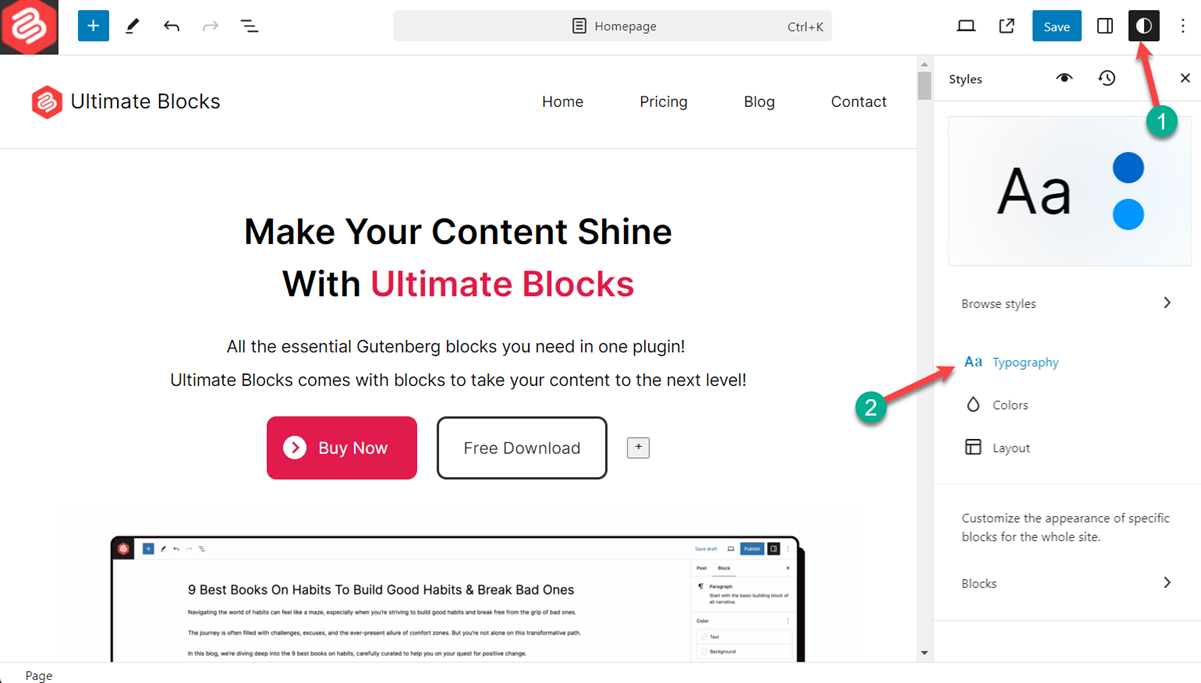
Click on the typography settings.
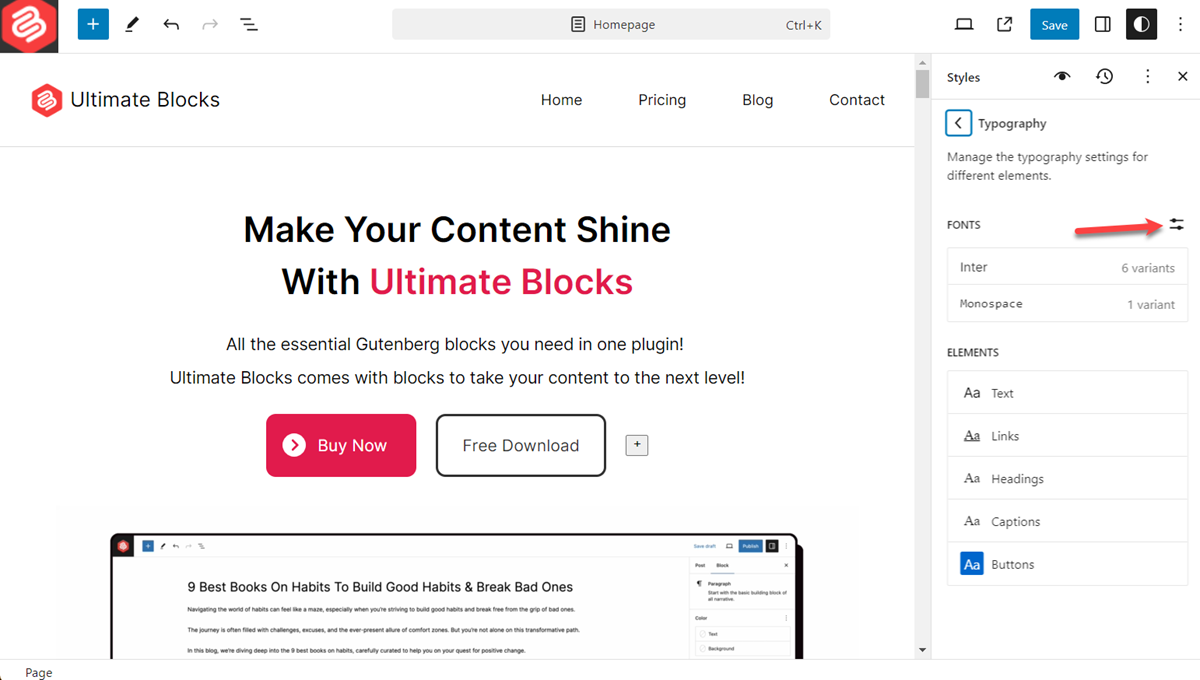
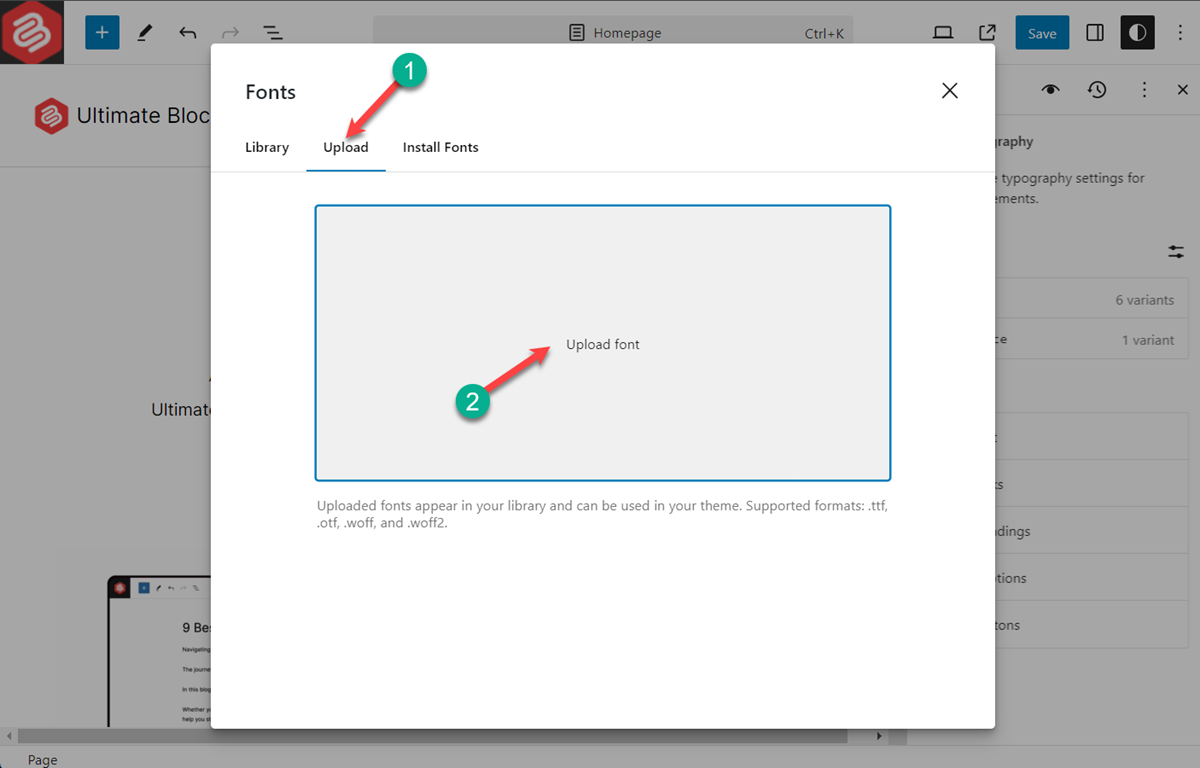
Step 3: Install Fonts
If you have downloaded any fonts, you can install them by uploading. Just click on the ‘Upload’ tab and then on the ‘Upload font’.
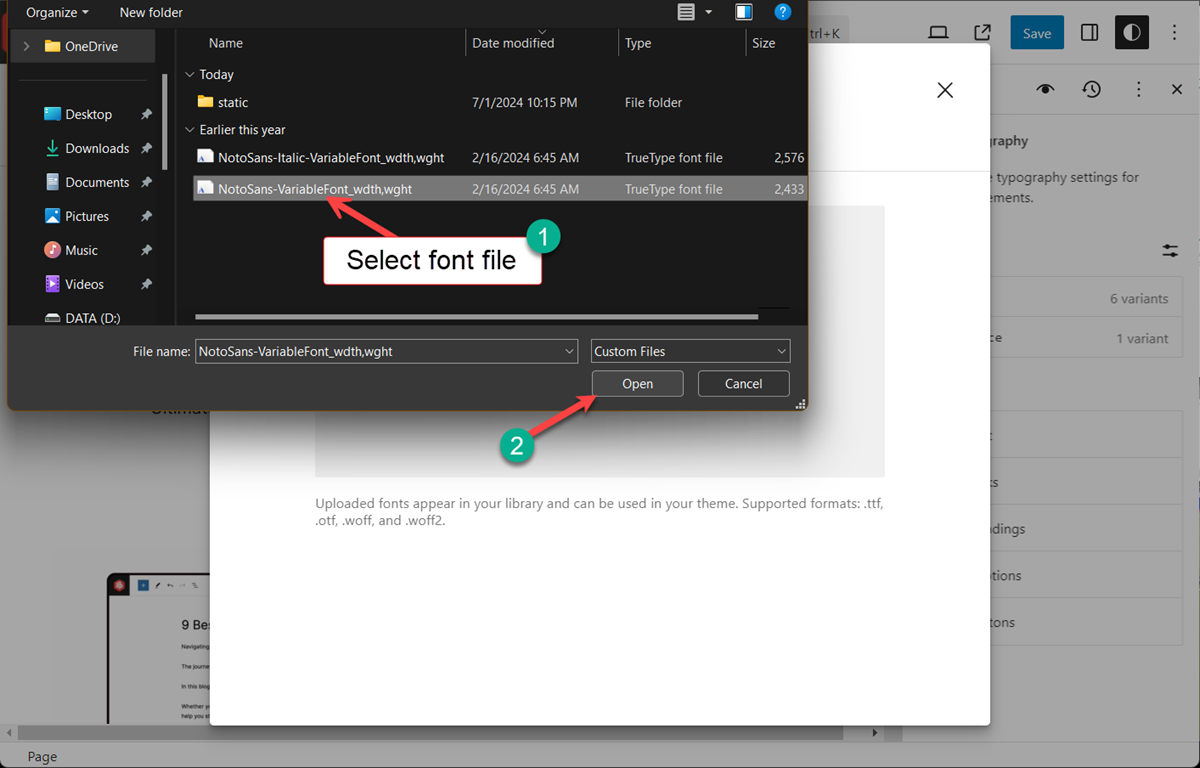
Choose your font file and hit the ‘open’ button.
Upon successful installation, you will be given a successful message.

Installing Fonts from Google Fonts: If you like, you can also install fonts from Google Fonts. To do it, you have to click on the ‘Install Fonts’ tab.
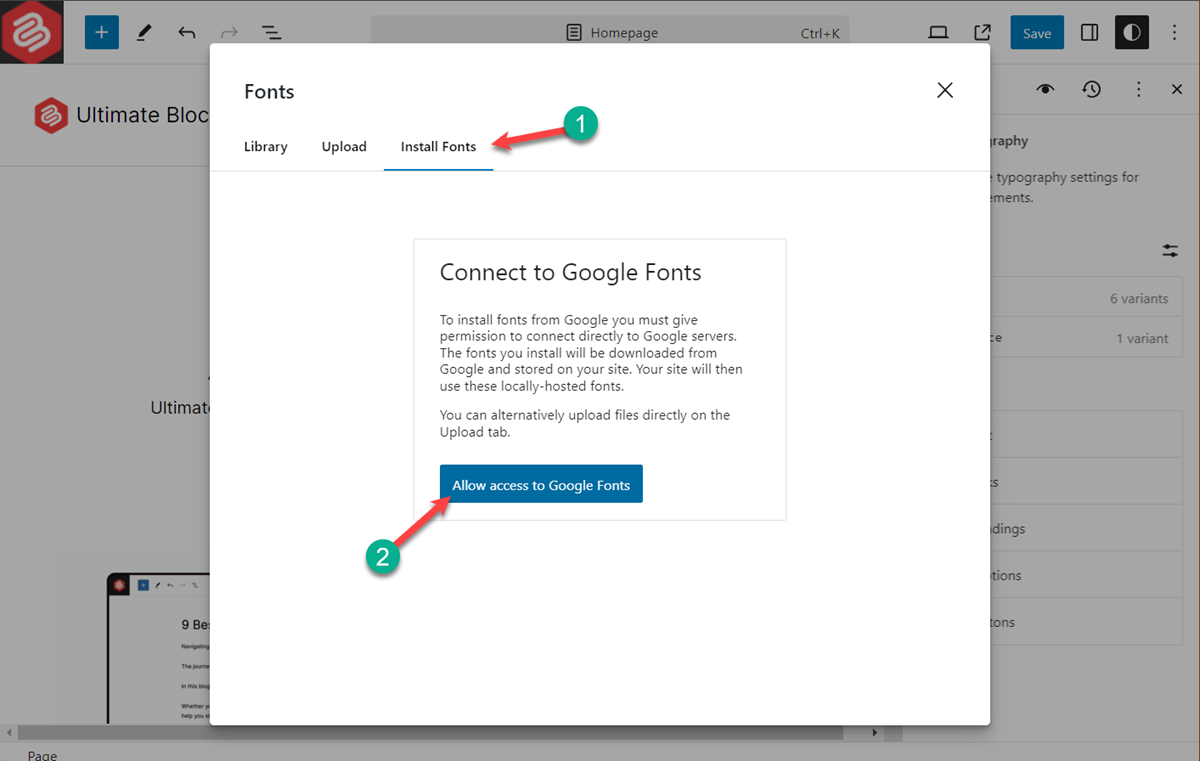
Then click on ‘Allow access to Google Fonts’. Now, all the Google fonts are in front of you.

Search for any fonts or hit the next page and choose your font.
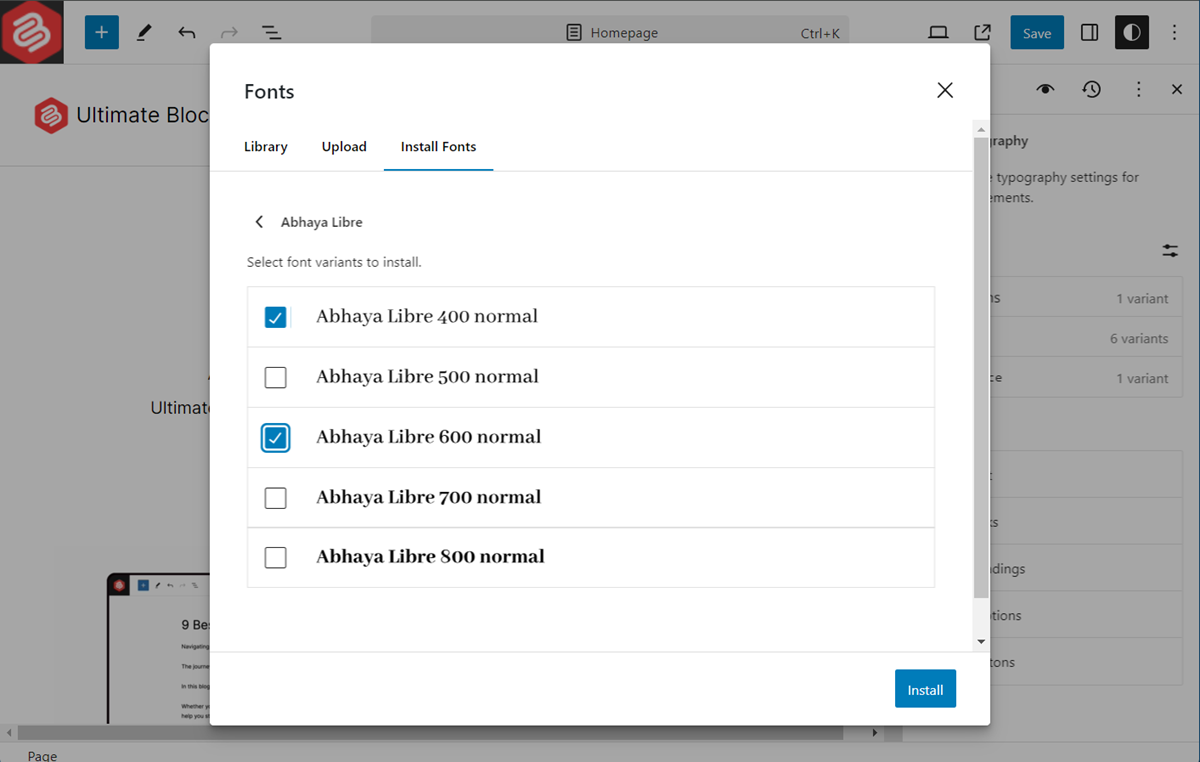
When you find it, choose the variant and click on the Install button.
After the installation is complete, the installed font will be available in your font library.
Deleting a Font in WordPress
To delete a font, follow Steps 1-2. Or you can navigate to Appearance -> Editor and then click on the style option.
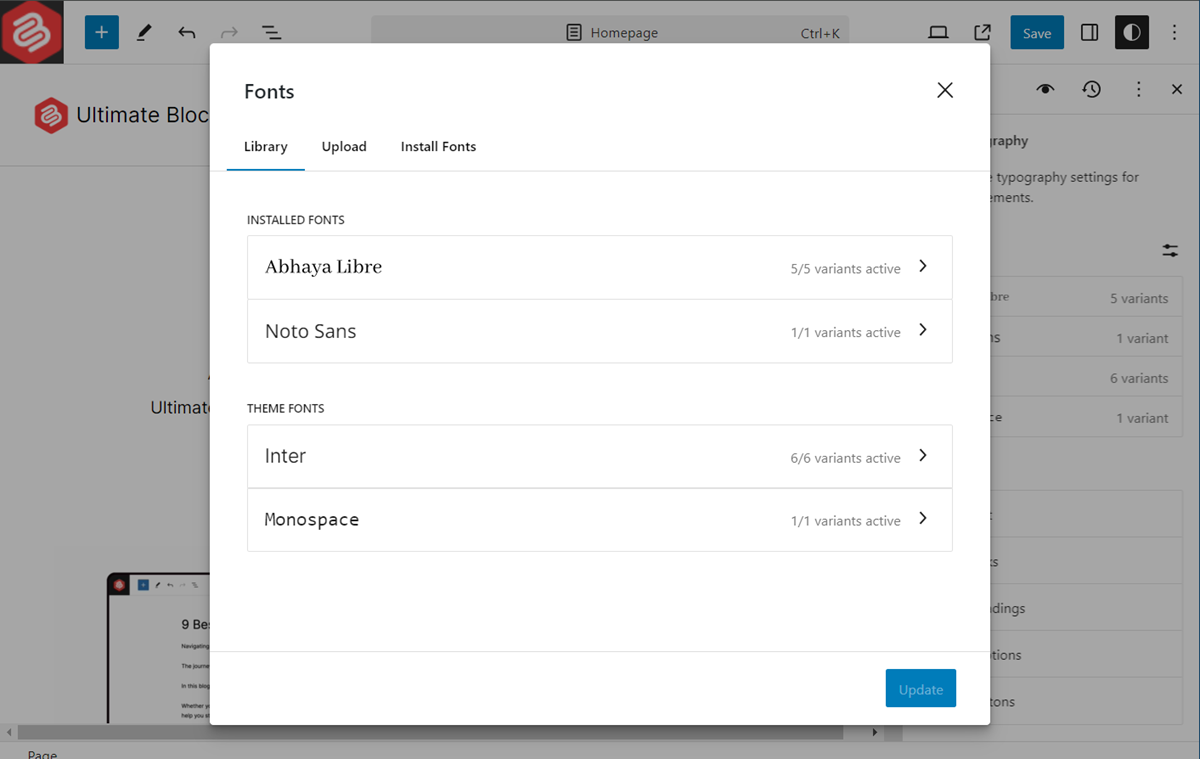
Afterward, hit Typography. Now click on the fonts settings.
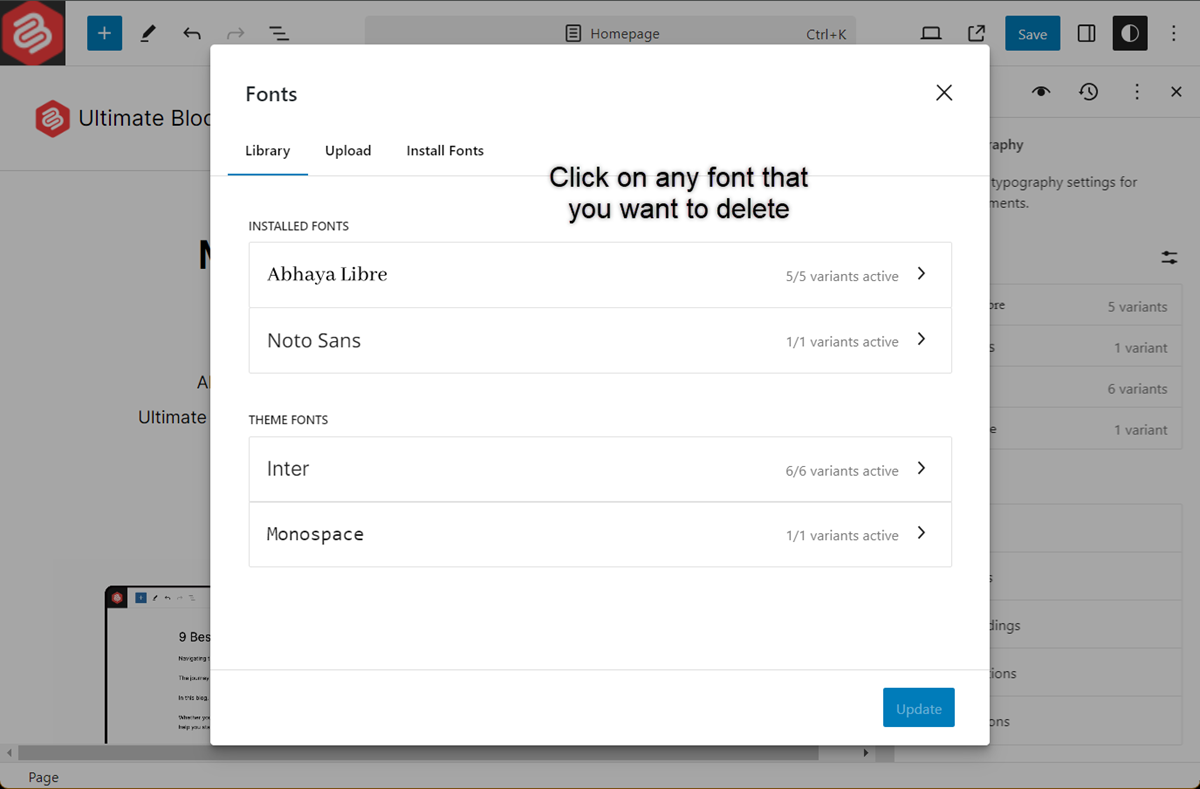
Here, you will see all the installed fonts. To delete one, click on it.
Select the variants and hit the delete button.
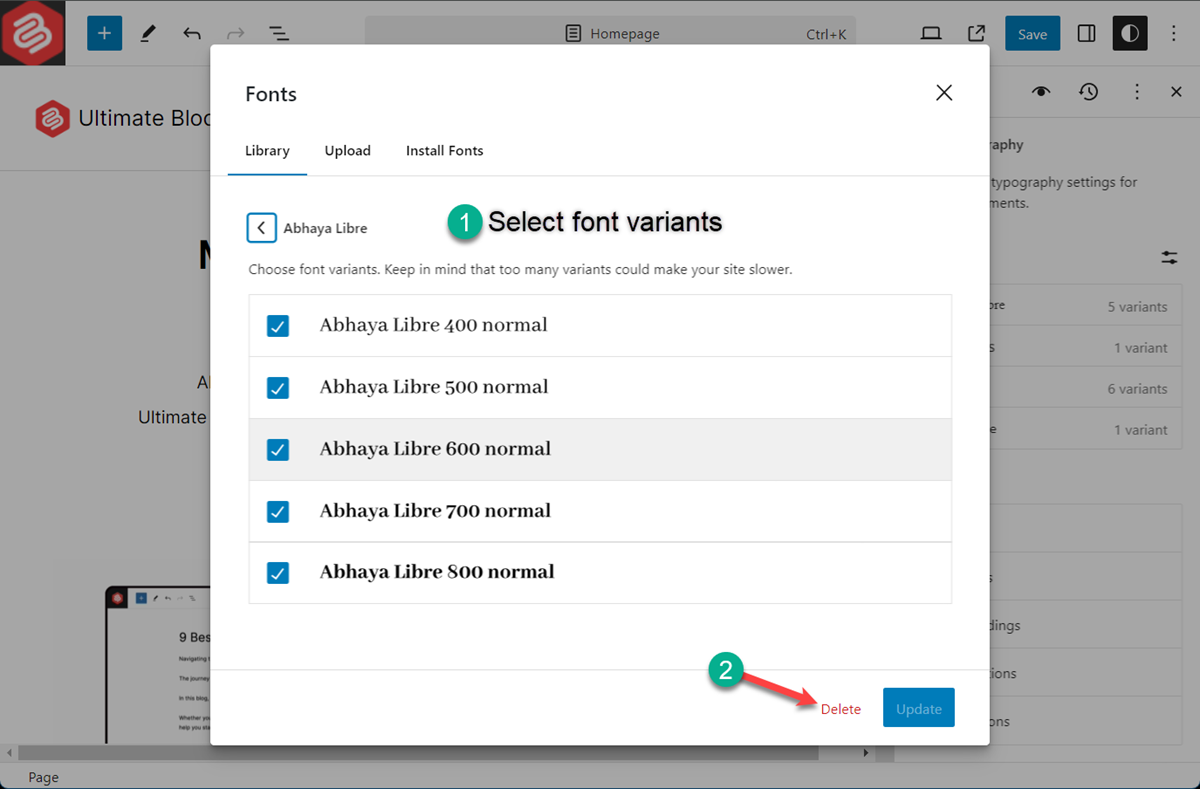
And your font will be deleted.
Changing Font Globally
If you ever wish to change font globally, like changing the font for all posts. Then you can do it very easily.
Step 1: Open the Editor
From your dashboard, navigate to Appearance -> Editor.
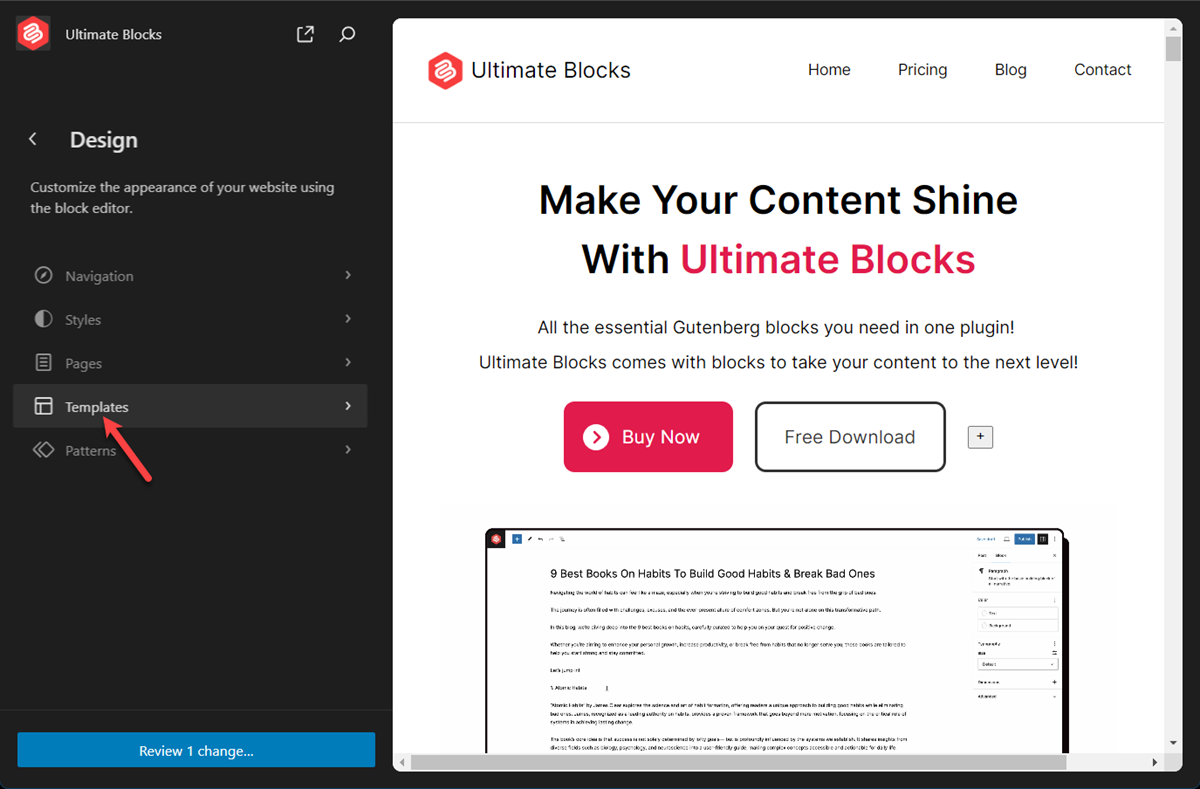
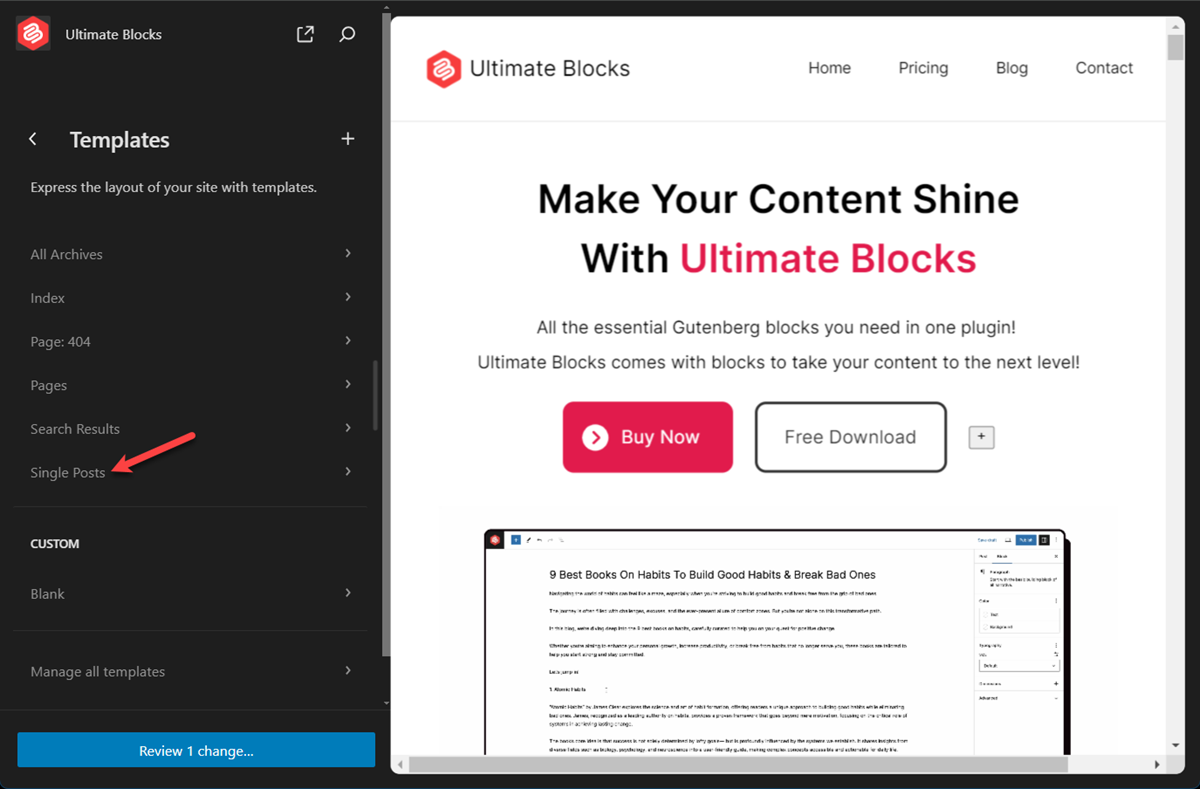
Click on Templates, and choose the one where you want to change font.
Step 2: Open Preferred Template
I am choosing ‘Single Posts’ as I want to update the font for all the posts.
Step 3: Change Font
Here, I would like to change the font of the paragraphs. Therefore, I am selecting the content group and clicking on the ‘Style’ tab.
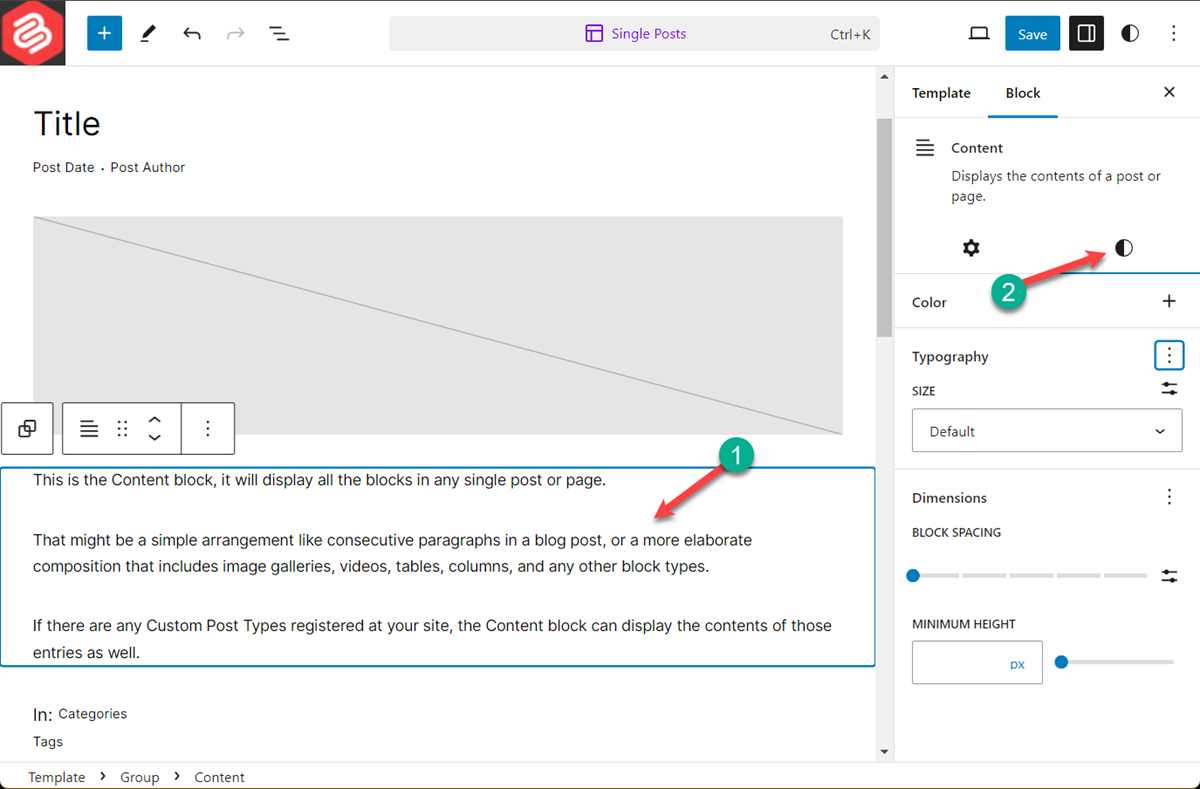
Now, click the three dots on the Typography option.
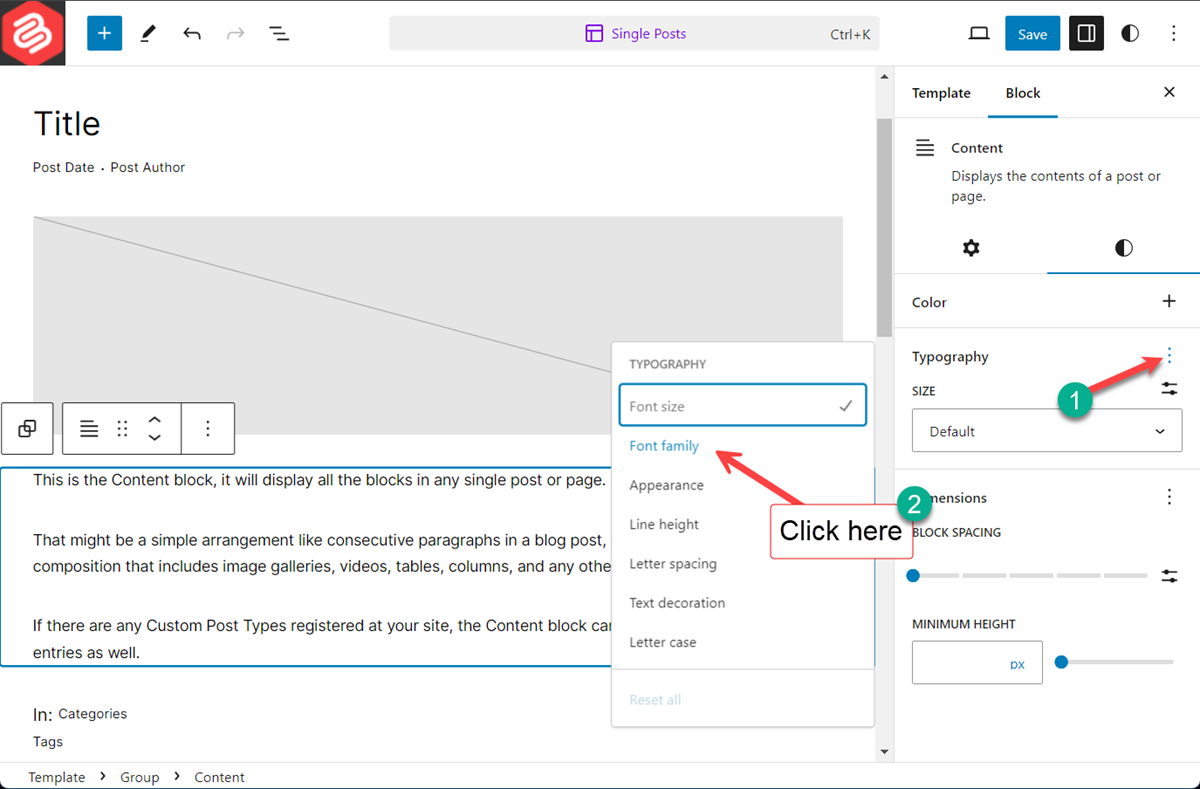
Then hit ‘Font Family’. This will bring the Font Family option to the screen.
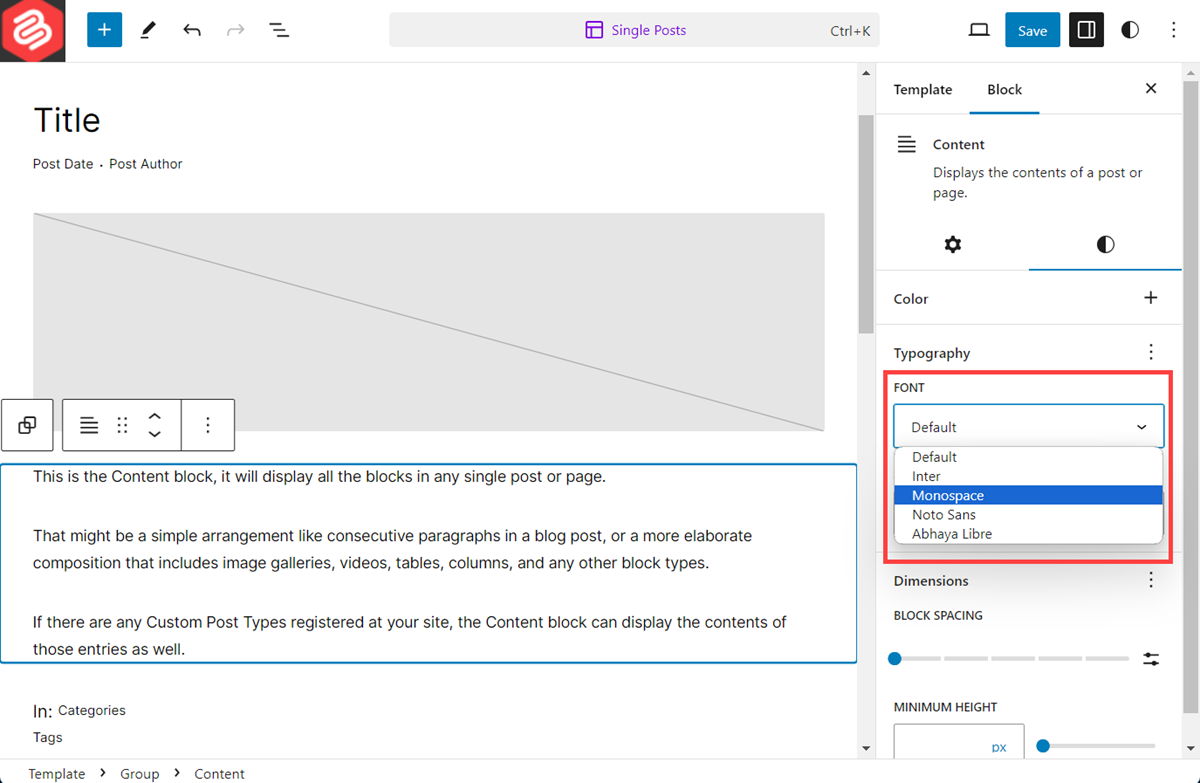
Now, choose your preferred font from the ‘Font’ option and hit the save button.
Changing the Font of a Specific Portion
If you would like to change the font of a specific portion, then first open that page/post. Click on the paragraph block in which you want to change font.
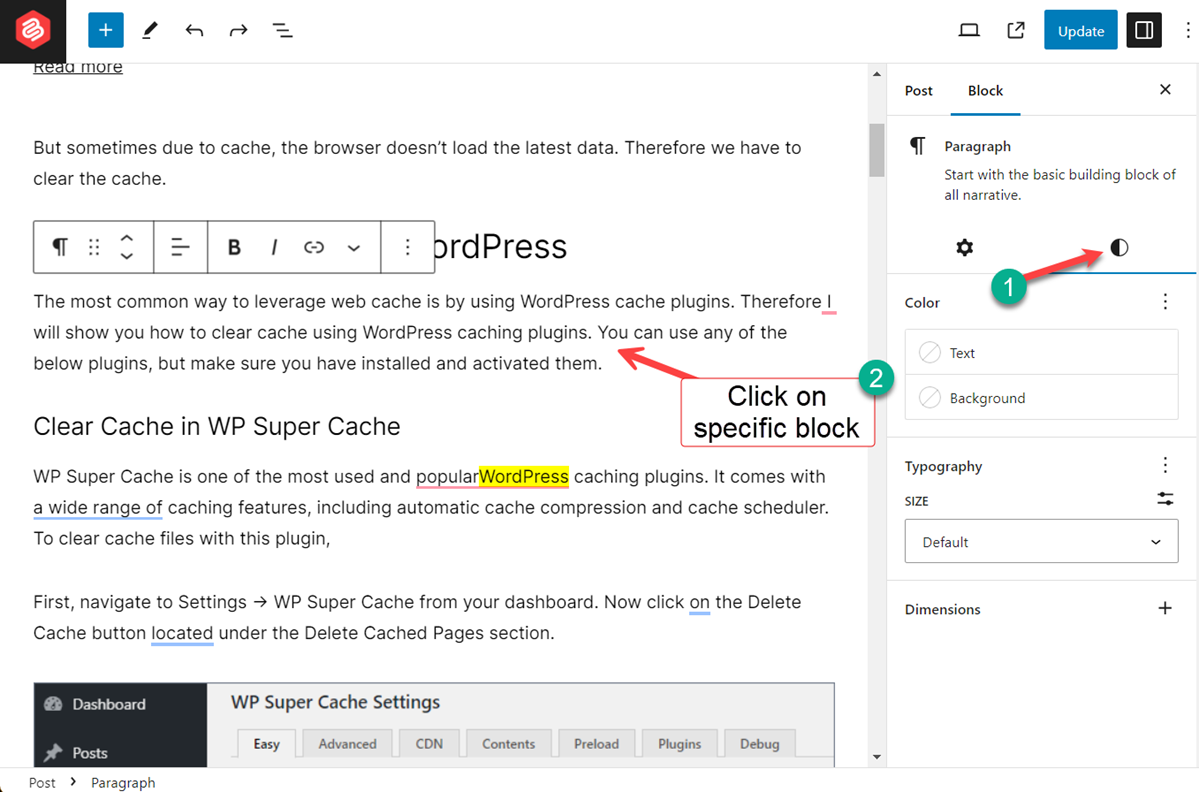
Hit the ‘Style’ settings.
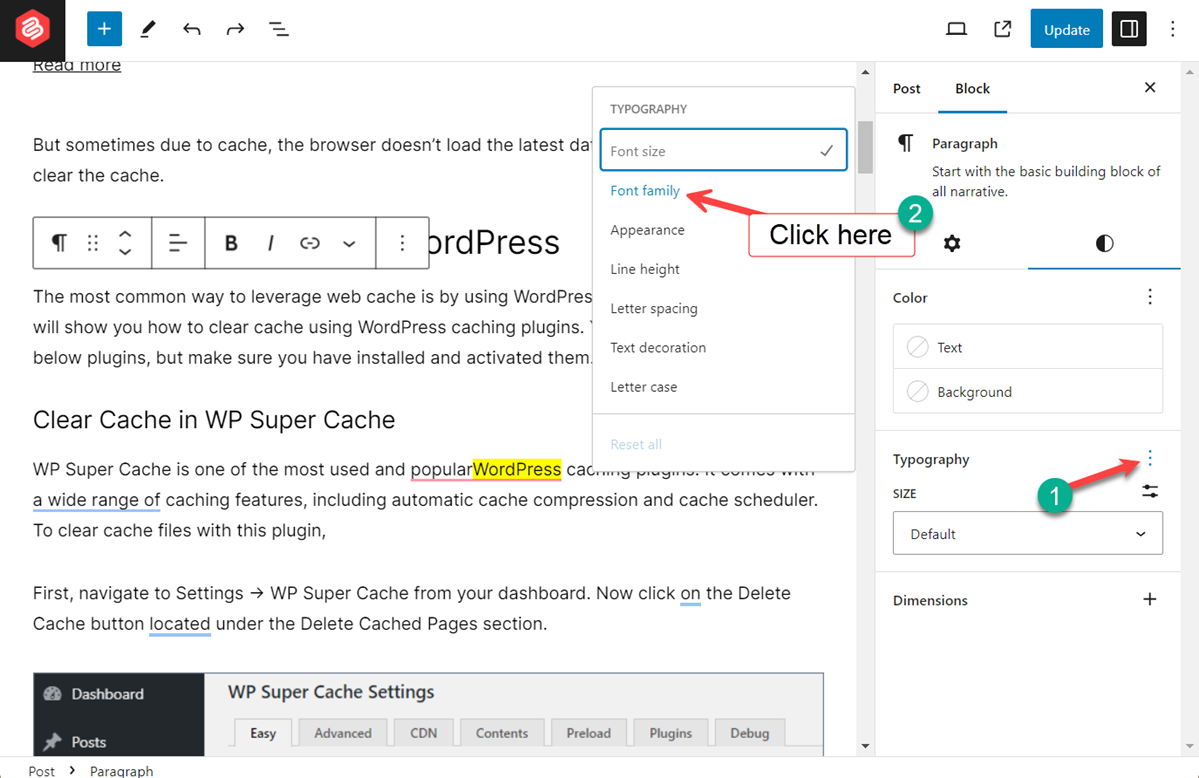
Click on the three dots on the typography option and hit ‘Font Family’.
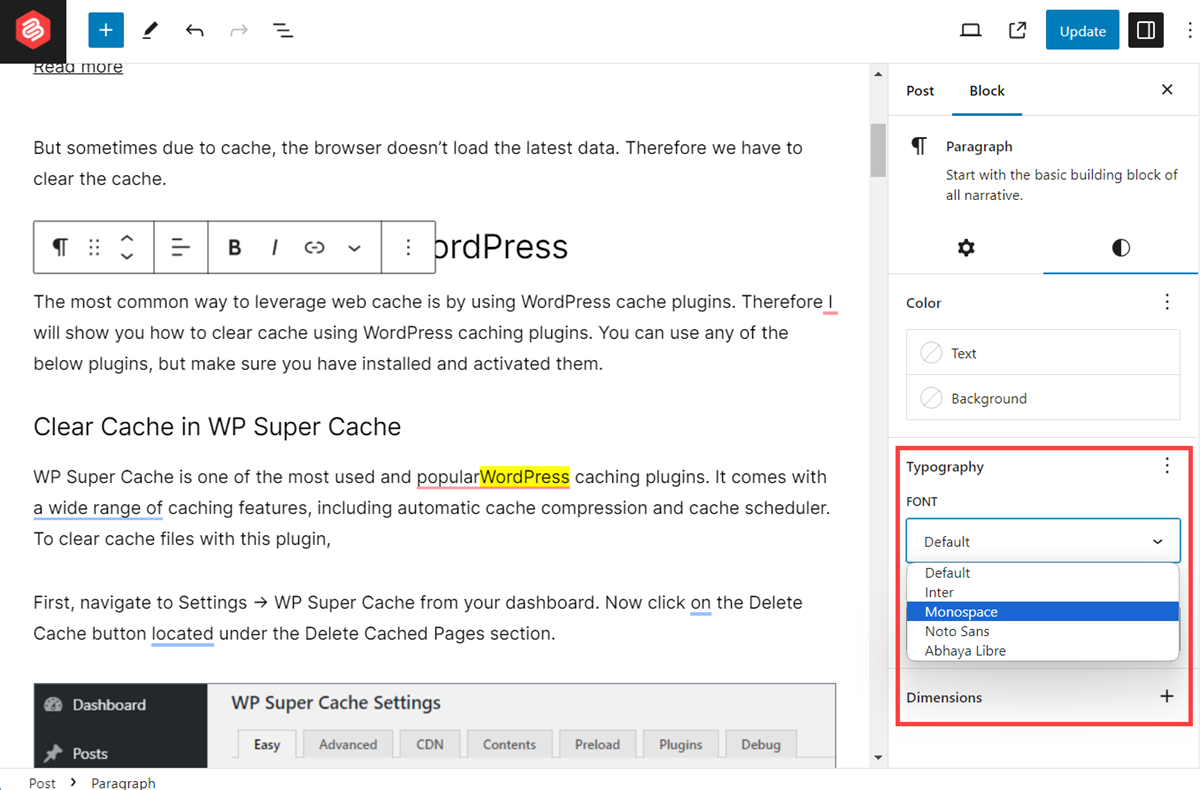
Now, choose your preferred font and hit the update button.
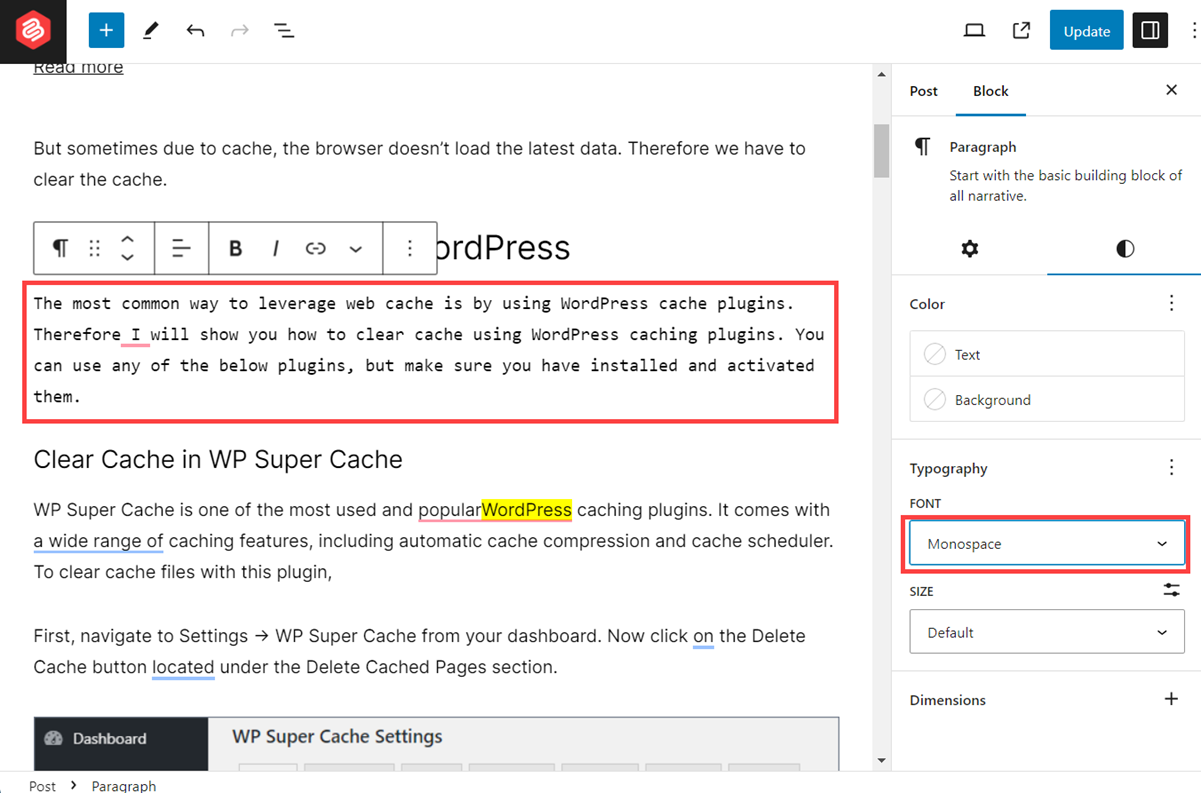
Now, you will see your font in action.
Best Practices for Font Management
- Make sure you don’t use a lot of different fonts on your website. Try to stick to two or three font families. If you use a lot of fonts, then it may look cluttered.
- Choose fonts that can be read easily, especially for the body text.
- Make sure your website is responsive and fonts look good on all devices.
- To reduce loading time, try to host fonts locally or use web-safe fonts.
Final Words
I hope now, you will be able to manage your website’s font very easily and enhance typography, making it more user friendly and visually appealing. Try different fonts and styles to find the perfect combination for your website.
If you like this post, then leave your thoughts in the comment box and don’t forget to share with your friends.


Leave a Reply