
A portfolio slider is a website feature that showcases a collection of images in a slideshow or carousel format. It allows you to display portfolios like design projects, services, products, artworks, and more.
It often includes arrow buttons so you can navigate between images or enable the autoplay option. If you want to create a portfolio slider in WordPress, you’re in the right place.
There are a handful number of portfolio plugins available in the WordPress arena. Here We’ll be using the Ultimate Blocks plugin to create an image portfolio slider and the Sliderberg plugin for creating an advanced portfolio slider.
Let’s dive into the discussion of how to create a portfolio slider in WordPress websites.
Method 1: Using the Ultimate Blocks Plugin (Image Slider)
If you want to display just images to your portfolio slider, then you can use the Ultimate Blocks plugin. It has an ‘Image Slider’ block that lets you add a portfolio image slider.
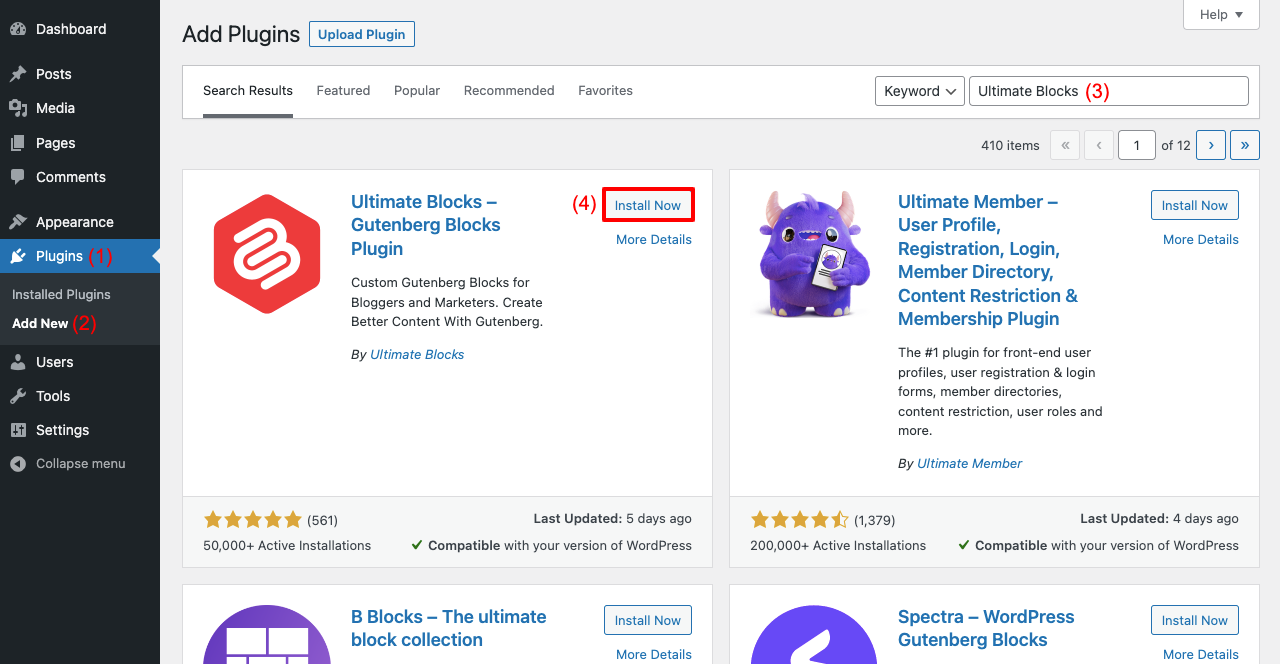
Step 01: Install and Activate the Ultimate Blocks Plugin
- Log into WordPress Dashboard.
- Jump into Plugins > Add New.
- Type Ultimate Blocks in the search box.
- Install and activate the plugin once it appears on the search result list.
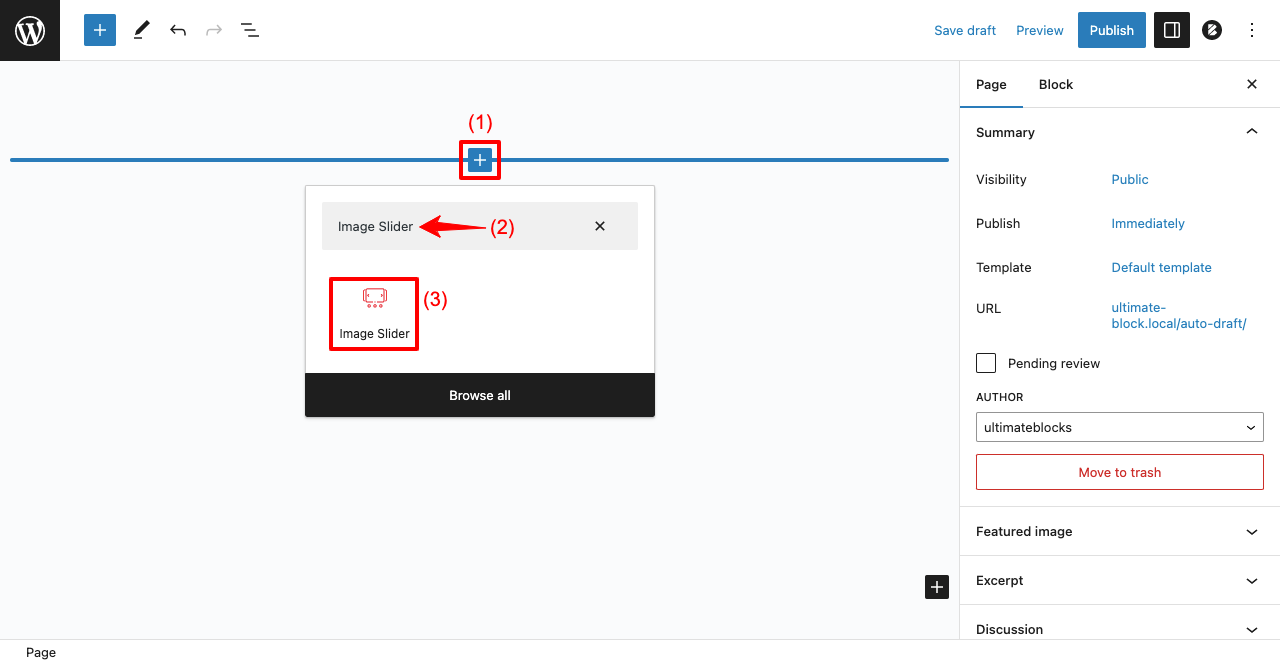
Step 02: Add the Image Slider Block to a Post or Page
- Open a post or page first where you want to add the image slider.
- Click the (+) icon.
- Type Image Slider in the search box.
- You’ll see the block below just in a few seconds.
- Click the Image Slider block.
Step 03: Add Images to the Image Slider Block
You may add any kind of image to the block and as many as you want. But for the tutorial, we’ll add food photography-related images.
- Click Upload or Media Library to add images from your desired sources.
- We have selected Media Library and planned to add four images.
- Select all the images and click Create a new gallery button.
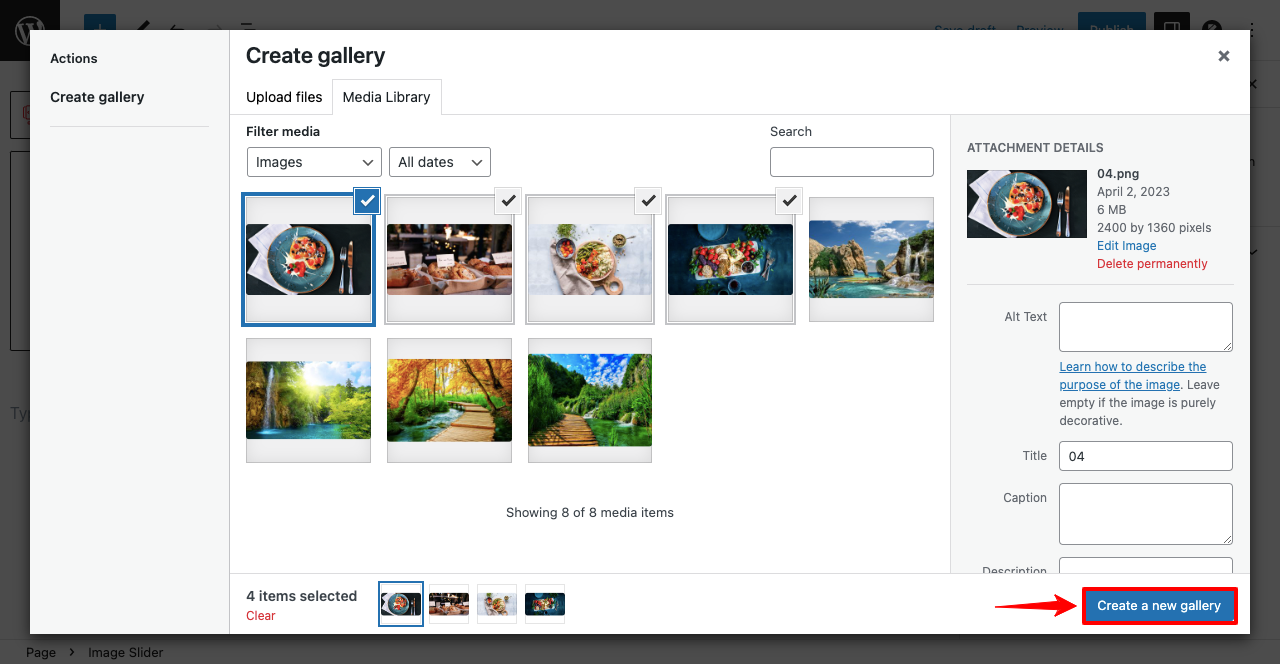
- You’ll be taken to a new page.
- Add a caption to each image below (optional).
- Click the button Insert gallery.
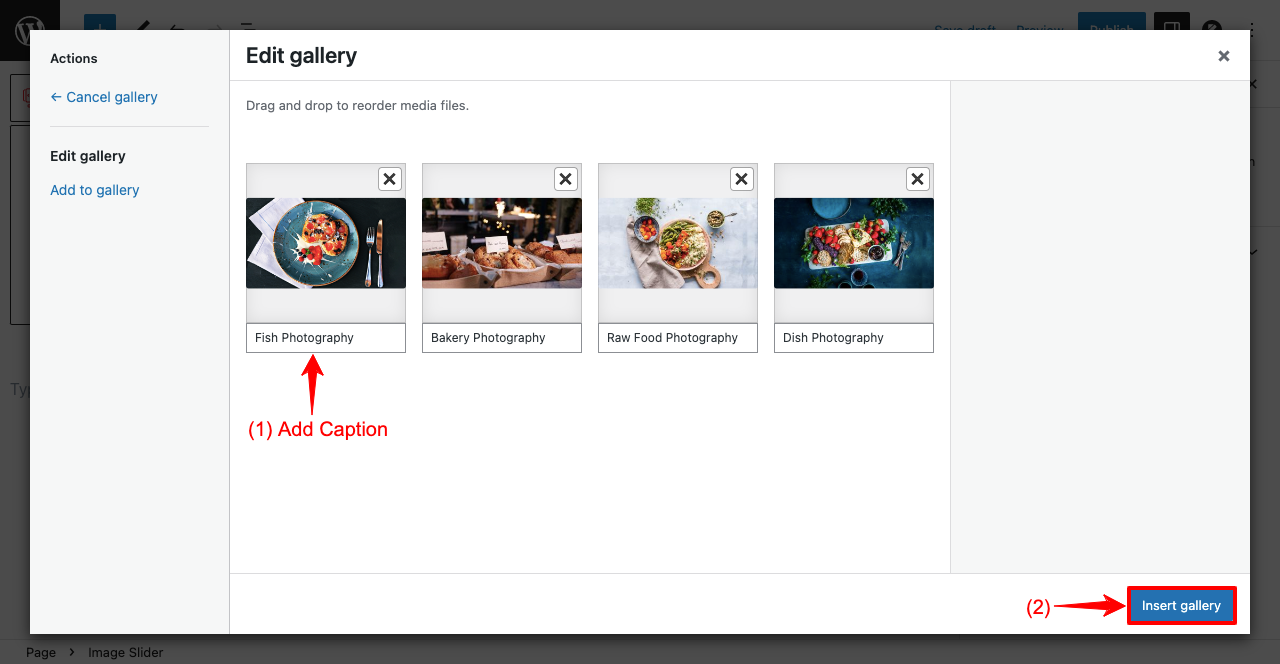
- You’ll see the image slider has appeared on your post or page.
- But you don’t like the appearance and want to customize it.
- Click the Slider Settings option from the right sidebar.

Step 04: Customize the Image Slider
- Clicking Slider Setting will open up some more customization options.
- It will take you only a few minutes to explore each of these options.
- Accordingly, you can customize the slider.
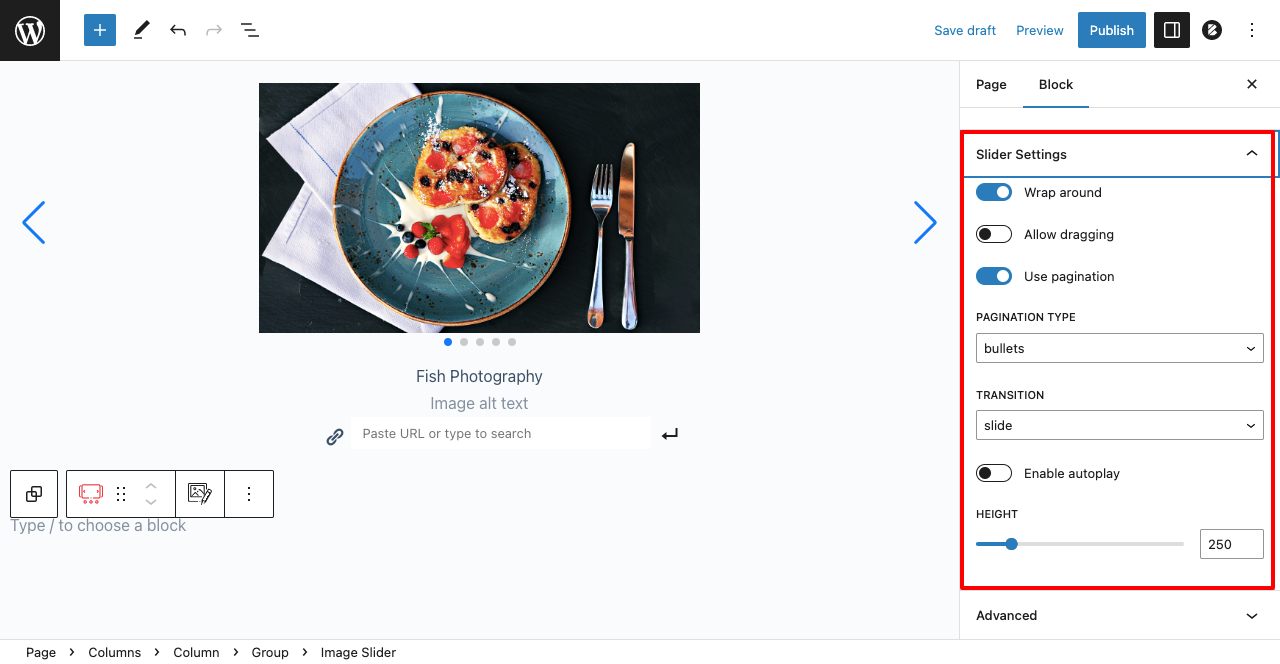
- We have Enabled Autoplay and set 3 Seconds duration.
- Set Height 500.

Step 06: Preview the Image Slider
- Save the image slider by clicking the Save draft, Update, or Publish button.
- Go to the preview mode of the page.
- You’ll see the slider is working well.
- If it doesn’t work, check the configuration from the backend again.
Thus, you can create an image slider in WordPress very easily. Visit this blog post to learn about some best free portfolio plugins for WordPress.
Method 2: Using the Sliderberg Plugin (Advanced Portfolio Slider)
Want to display your portfolio in a modern, interactive slider with images, headings, descriptions, and call-to-action buttons right on top of your project images? With Sliderberg, you can easily do that using the WordPress block editor.
Just follow these steps:
Step 1: Install the Sliderberg Plugin
Go to your WordPress dashboard and navigate to Plugins → Add Plugin.
Search for “Sliderberg,” then click Install Now and activate the plugin.

Step 2: Insert the Sliderberg Block
Open the page or post where you want to add your portfolio slider.
Click the + button, search for “Sliderberg,” and insert the Sliderberg block.

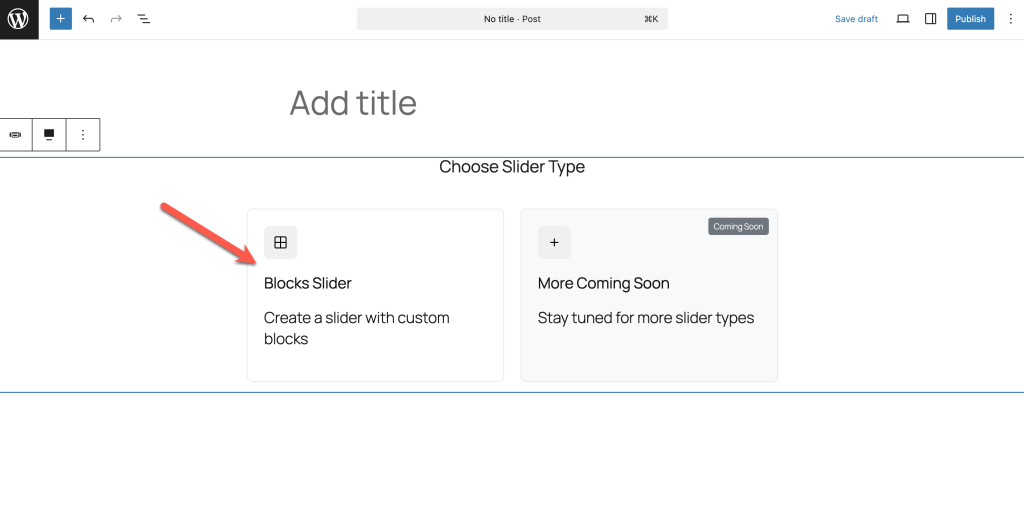
Step 3: Select the ‘Blocks Slider’ Type
Sliderberg supports several slider types. For advanced content, choose Blocks Slider so you can add images, headings, paragraphs, and buttons inside each slide.
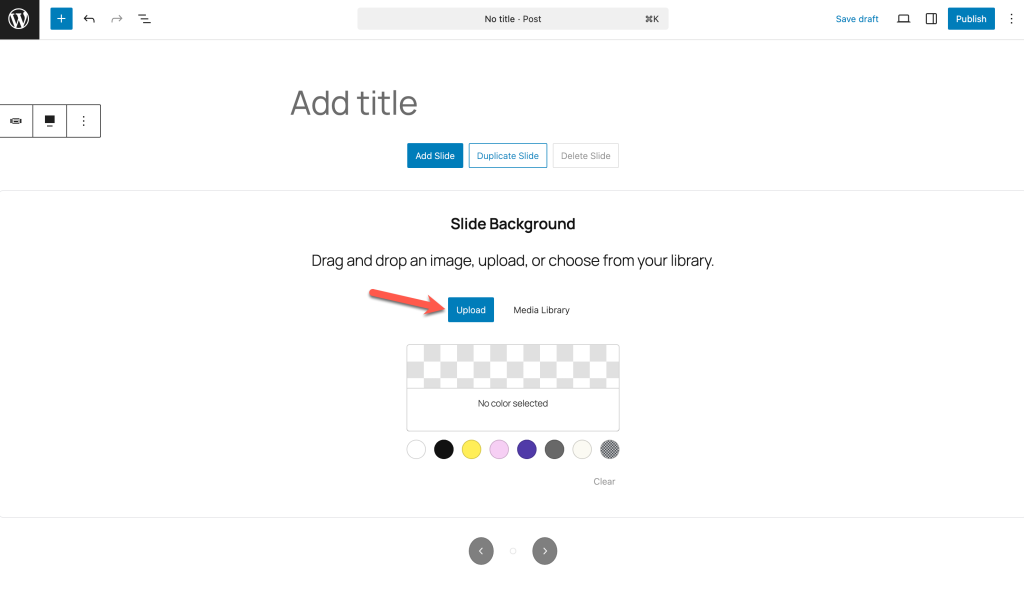
Step 4: Upload a Background Image
For each slide, click Upload to add your portfolio image as the slide’s background. You can use high-quality project screenshots or clean background images for best results.
Step 5: Add Content to the Slide
Add your project title (Heading block), a short description (Paragraph block), and a button (Button block) directly on top of the image. You can customize settings from the right-hand side options panel.
Step 6: Add or Duplicate Slides
Click Add Slide to create a new slide, or Duplicate Slide to copy your existing layout and swap out images/text for each portfolio item. I’d recommend you to duplicate the slide and replace content.
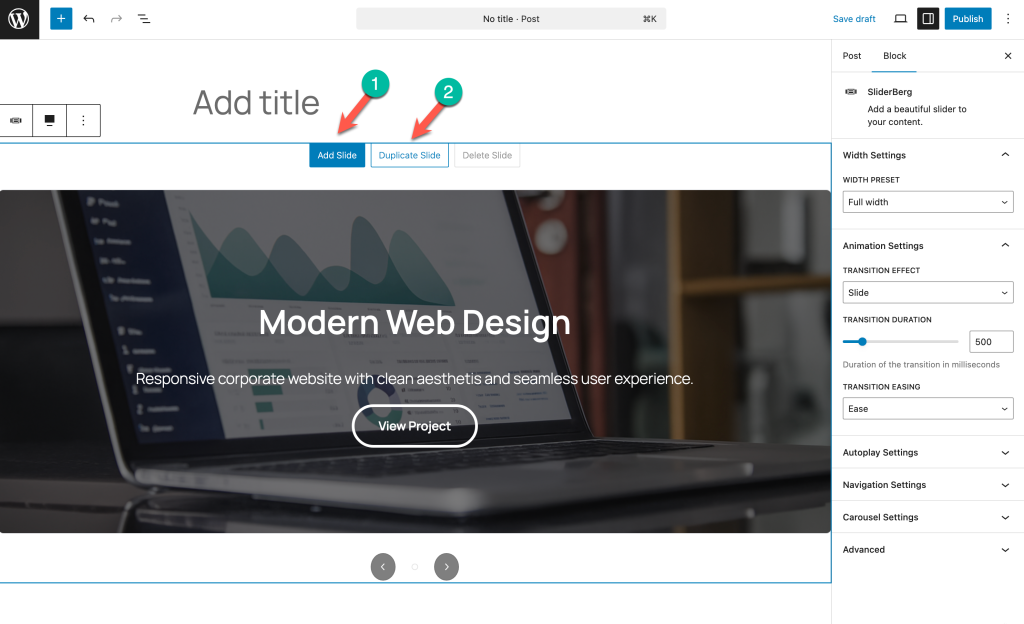
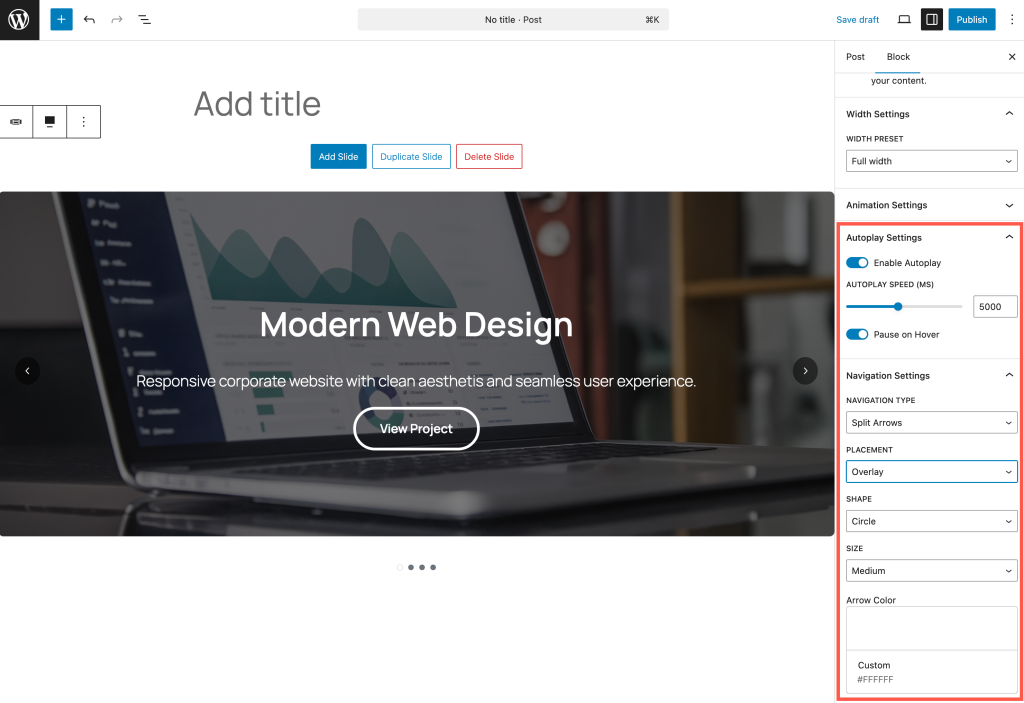
Step 7: Customize the Slider
On the right-hand sidebar, you can:
- Set width (full width looks great for portfolios)
- Adjust transition effect, speed, and easing
- Enable autoplay or set up manual navigation (arrows, dots, placement, colors)
- Enable carousel mode if you want to show multiple portfolio slides at once
Step 8: Publish and Preview
Once you’re happy with your slider, click Publish (or Update).
Visit your page to see your interactive, modern portfolio slider live!
Conclusion
Portfolio sliders are a great way by which you can display your projects, experiences, and services in visually appealing ways. It helps web owners create strong engagement with their audiences.
You can add this slider on any landing page, especially on home, product, and portfolio pages. But to make the most of this, make sure you are adding high-quality images of the same size to the slider.
This will create a perfect harmony between them. Hopefully, you can now create catchy image sliders for your website following this tutorial.


Leave a Reply