
The Paragraph block stands as the core foundation for textual content creation on WordPress posts and pages. This is the most used Gutenberg block in WordPress. Yet, it takes a good amount of time for new users to get all the functionalities of the block.
This is why we’ll explain to you how to use Paragraph blocks in WordPress, explaining its key features and functionalities. Let’s get started!
Supercharge Your WordPress Block Editor

How to Use Paragraph Block in WordPress
The Paragraph is one of the simplest and easiest blocks in the Gutenberg editor. Take a look at the steps explained below.
Step 01: Add the Paragraph Block in WordPress
The Paragraph block comes with the WordPress editor by default. You don’t need to find and add the block from the Gutenberg editor list. Just start writing what you want on the post and page editor.

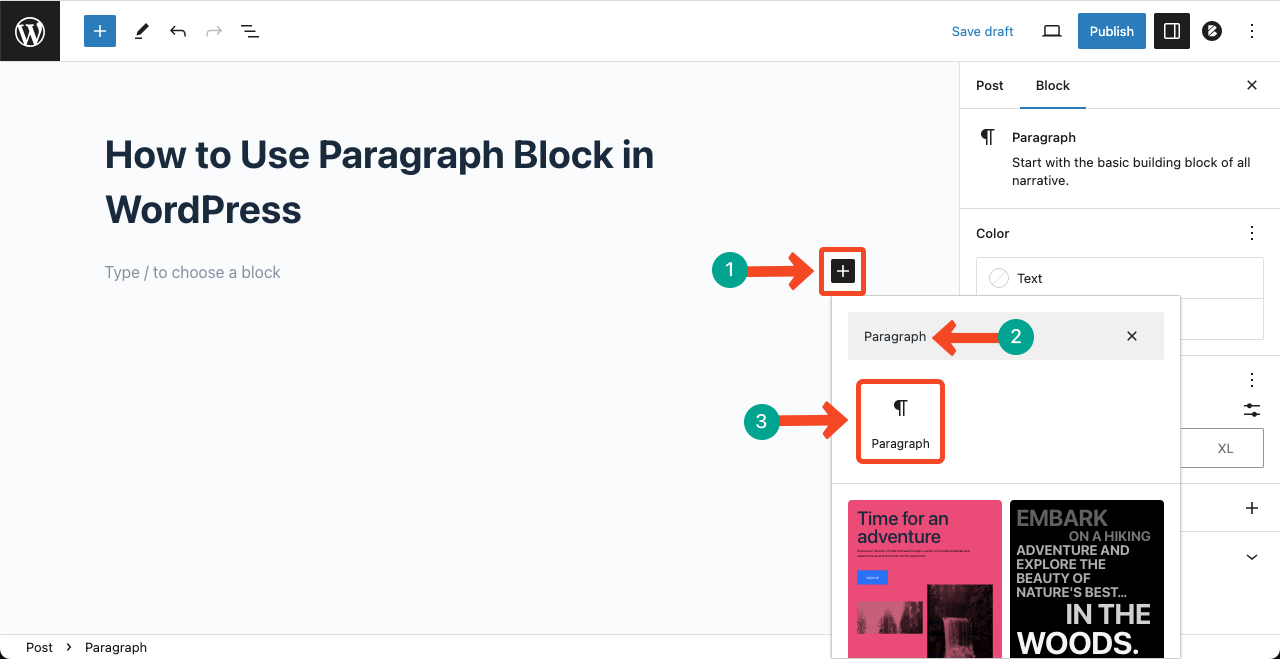
Yet, if you want to add the block from the Gutenberg list, you can do this. Press the Plus (+) icon on your post or page editor.
Type Paragraph in the search box. Click on the block once it appears below. The block will be added to the editor.
The more paragraphs you create, the more Paragraph blocks will be added to your editor. You can see it in the below image.

Step 02: Use Toolbar Options on the Paragraph Block
Whenever you select the paragraph block, you’ll see a toolbar appearing on top with several options. You can do the following things using options on the toolbar.
- Move up/down – Moves up or down the present block to another block.
- Align text – Align the text content to left, center, or right.
- Bold – Makes particular texts or the entire paragraph text bold.
- Italic – Allows making particular words or sentences italic-styled.
- Link – Add internal/external links to particular words/sentences.
- More – Include additional options like Footnote, Highlight, Inline code, Inline image, Language, and more.
- Options – Contain some more options like Copy, Duplicate, Add before, Add after, etc.

Step 03: Stylize the Paragraph Block
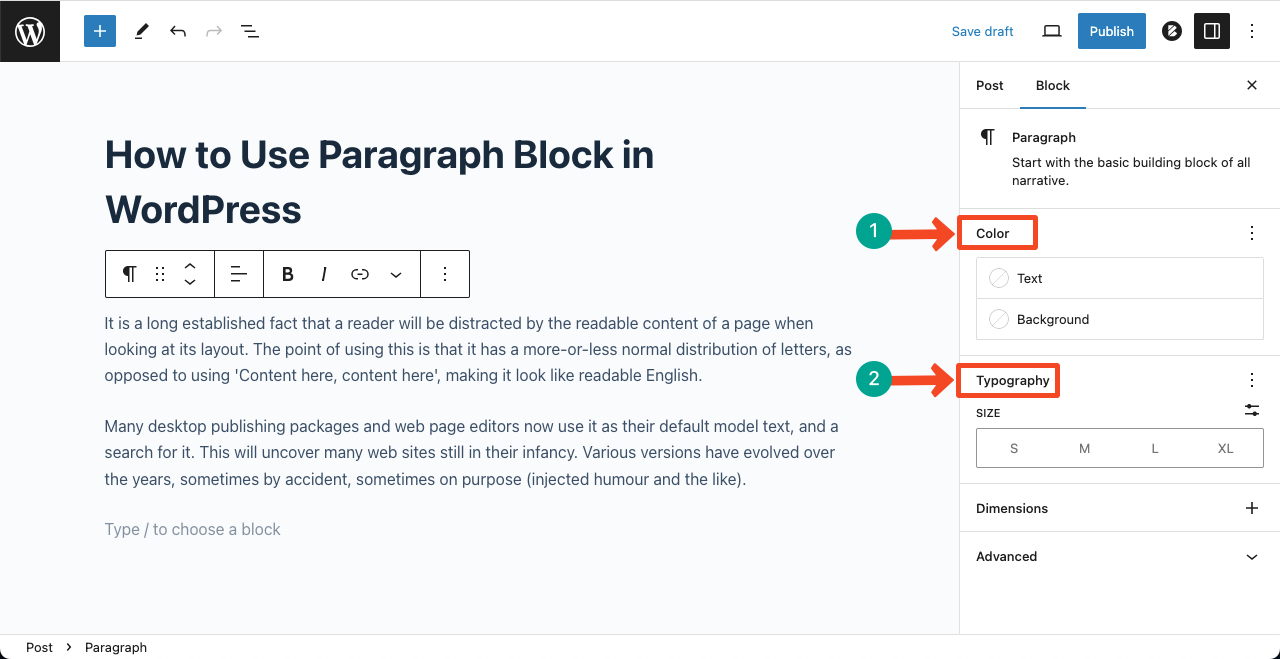
You’ll get stylization options on the right sidebar. The Color option will let you select and apply the Text and Background color of the paragraph block.
The Typography option will let you customize Line height, Letter spacing, Text decoration, Font size, and more.
Make the necessary changes as you need.
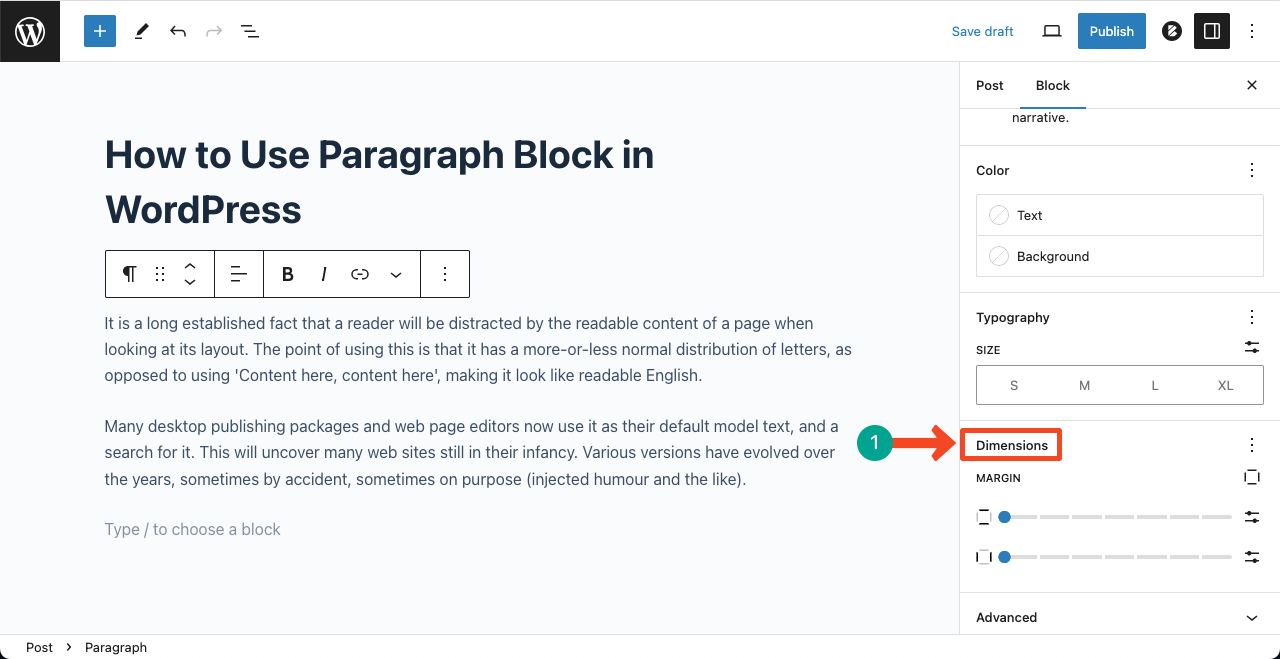
Step 04: Add Margin and Dimensions
Scrolling down a bit below, you will get Dimension. You can open the Padding and Margin options by clicking on it.
You can create suitable layouts for each paragraph block using them. But our recommendation is better if you leave them as they are.
Also Read:
- How to Justify Text in WordPress
- How to Align Text in WordPress
- How to Indent Paragraphs in WordPress
- How to Change Spacing Between Paragraphs
- How to Use the Verse Block in WordPress
Conclusion
Throughout this blog post, we have showcased various features and functionalities of the Paragraph block, explaining how to adjust font sizes and styles to incorporate new elements. Once you get used to them, it will be easy for you to exercise endless possibilities in content creation.


Leave a Reply