
The WordPress Video block allows you to embed and display videos on your posts and pages effortlessly. Whether you want to add a short tutorial clip, demo, or just your speech, the Video block is your go-to tool.
Plus, the block lets you configure lots of options like autoplay, playback control, adding a thumbnail, stylizations, and more. This article will cover a detailed guide on how to use the Video block in WordPress. Keep reading to the end.
Supercharge Your WordPress Block Editor!

How to Use the Video Block in WordPress
The Video is a simple default Gutenberg block on WordPress. It provides an intuitive way to embed videos to posts/pages and configure them according to your choices. Follow the steps explained below.
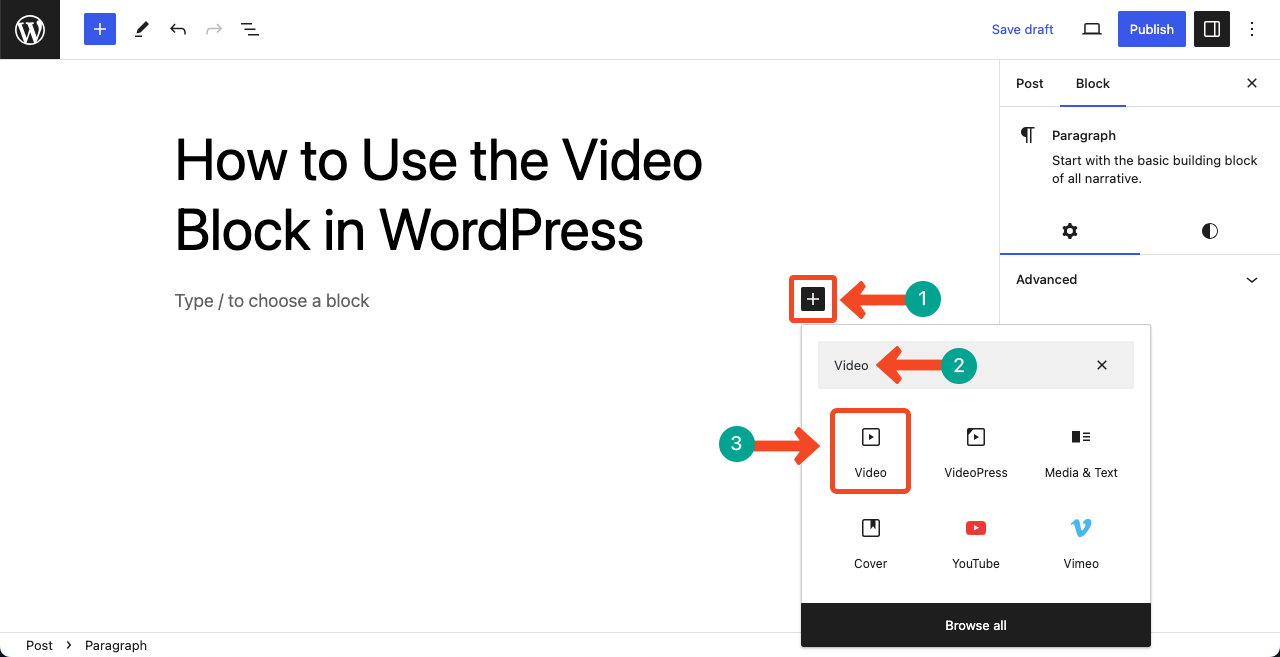
Step 01: Add the Video Block to Your Post/Page
Get into a post or page on WordPress. Press the Plus (+) icon on the post/page to open the Gutenberg editor. Type Video in the search box. The Video block will instantly appear below. Click on it.
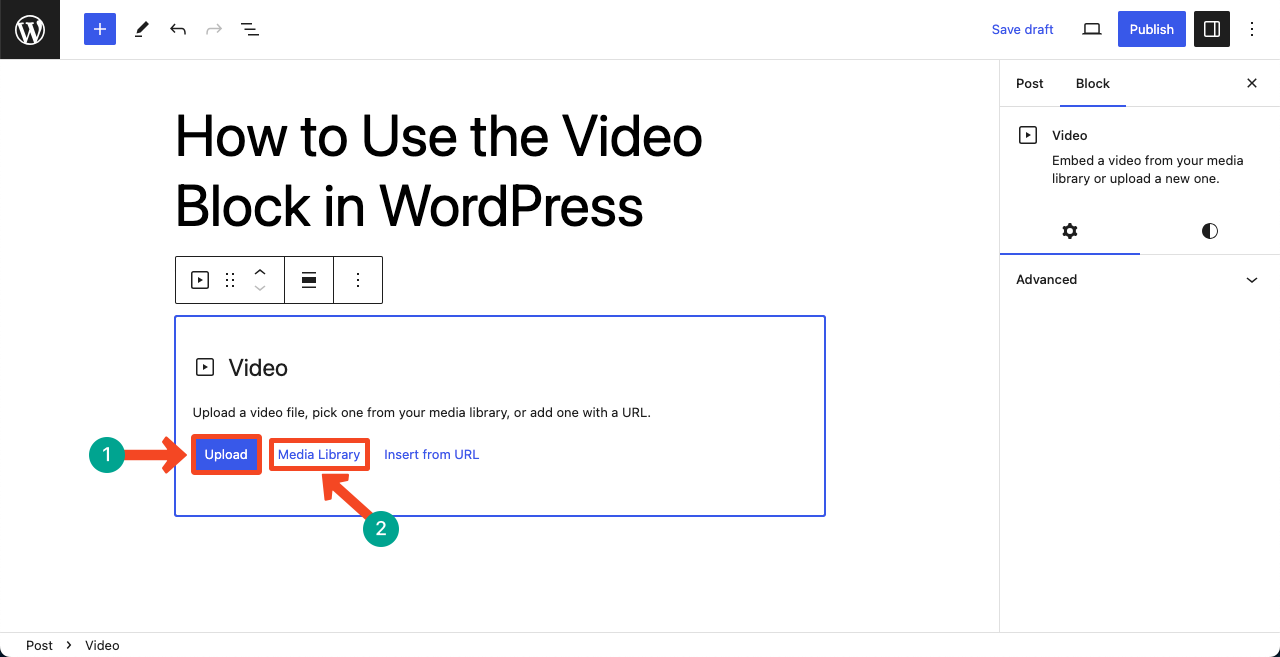
Add your desired video to the block, whether using the Upload or Media Library button.
Step 02: Select an Alignment and Write a Caption
You’ll find several useful options on the toolbar. The Align option pointed to the below image will let you centrally align the image on the post/page. The Caption will allow you to write a caption below the video.

Step 03: Configure the Settings
Come to the Settings tab on the right sidebar. You can configure the following things using the options available on it.
- Autoplay – Enabling it will automatically play your video whenever the video comes to the screen. This gives a GIF-like experience.
- Loop – Enabling Loop will keep restarting the video once it comes to an end.
- Muted – If you don’t want visitors to listen to the noises with the video, you can mute it using this option.
- Playback controls – Toggling on this option will allow web visitors to pause and start the video manually from any point.
- Preload – There are three settings in it. They are Auto, Metadata, and None. By selecting a suitable setting, you can define how much of the video file you want to be downloaded when loading the post/page.
- Poster Image – You can add an image to be used as a thumbnail for the video.

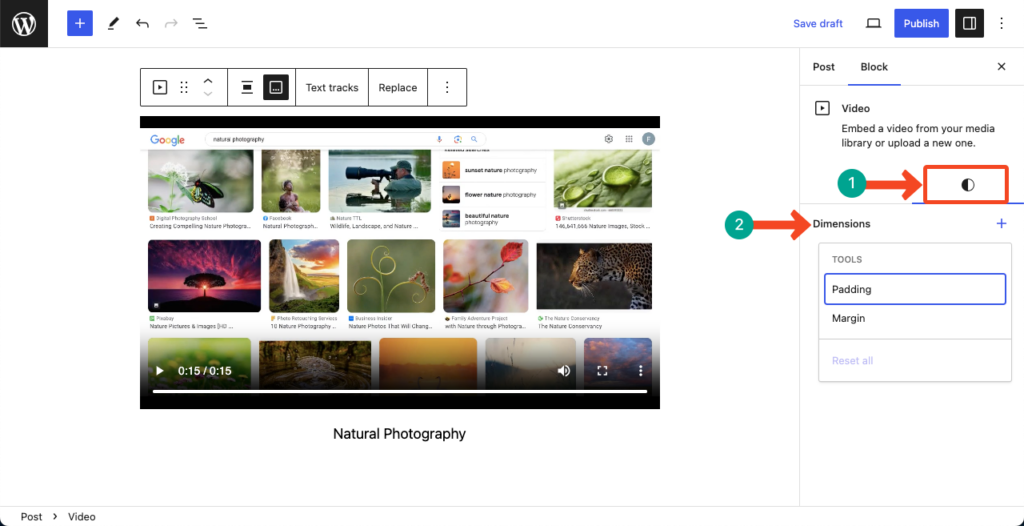
Step 04: Add Padding and Margin
Come to the Styles tab. Press the Plus (+) icon next to Dimensions. You’ll get the Padding and Margin options.
Using these options, you can add the desired amount of padding and margin for the video content within the block.
Also Read:
- How to Embed YouTube Video in WordPress
- How to Change YouTube Embed Size in WordPress
- How to Add a Video Background in WordPress
- How to Add a Cover Image/Video in WordPress
- How to Use the WordPress Cover Block
- How to Use the WordPress More Block
Conclusion
You’ll find today many Gutenberg block plugins online coming with the Advanced Video block. The Ultimate Blocks plugin is one of them. The Video block that the plugin has offers more options than the default one.
But the way to use and customize both blocks is almost the same. Hope you have found this article helpful enough. If the default block isn’t enough to meet your needs, you can try the Ultimate Blocks plugin.


Leave a Reply