Using the Image block is a powerful way to improve the visual appearance of a website and engage audiences. They help extend visitors’ sessions by removing monotony from their minds while reading lengthy content.
This is why the Image block has become a must-have element in all types of websites, whether blogging, portfolio, or eCommerce. No worries if you are new to WordPress and don’t know how to use the image block.
This article will show you a step-by-step guide on how to use the WordPress Image block.
How to Use the WordPress Image Block
The WordPress Image block is a default Gutenberg block. It allows you to insert and customize images with your content easily. Let’s see how to do it.
Step 01: How to Add Images to Post or Page Using the Image Block
Open your desired post/page where you want to add and use the WordPress image block. Hit the Plus (+) icon on the page. This will open up the Gutenberg editor. Type Image in its search box.
Once the image block appears below on the editor, click on it.
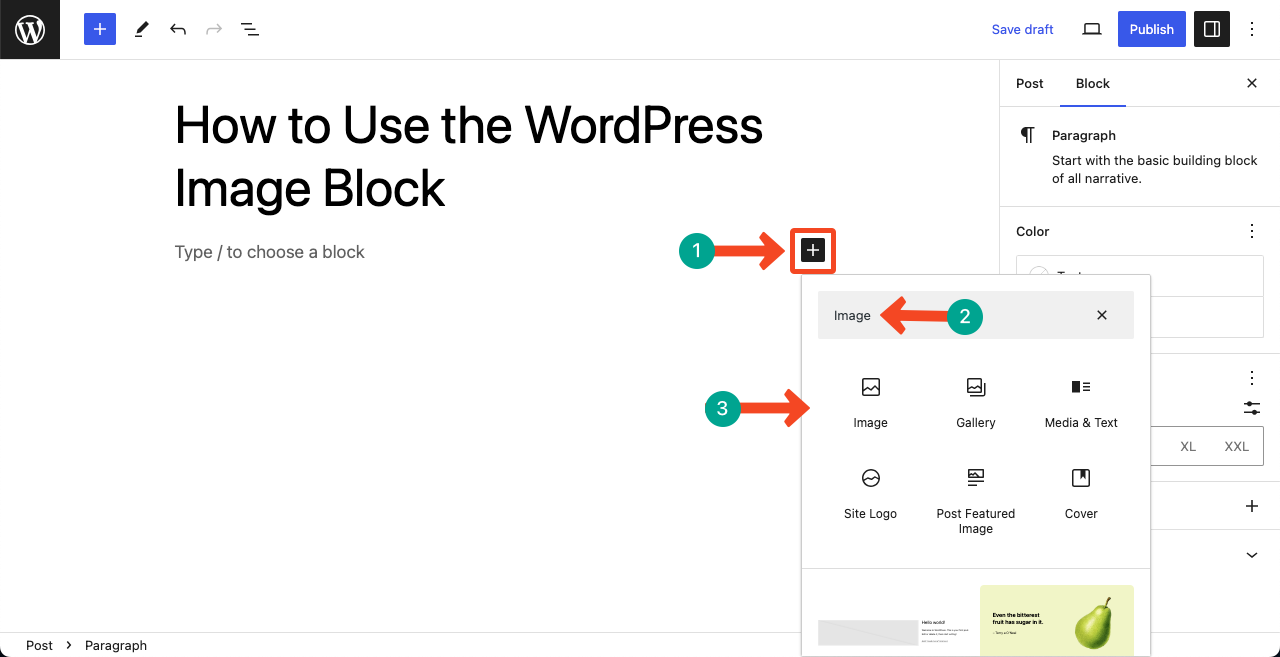
You’ll get the image uploading option. If you already have your desired image in the Media section on the website, choose the Media Library option.
But if the image is completely new, hit the Upload button. You’ll be allowed to add an image from your local drive.
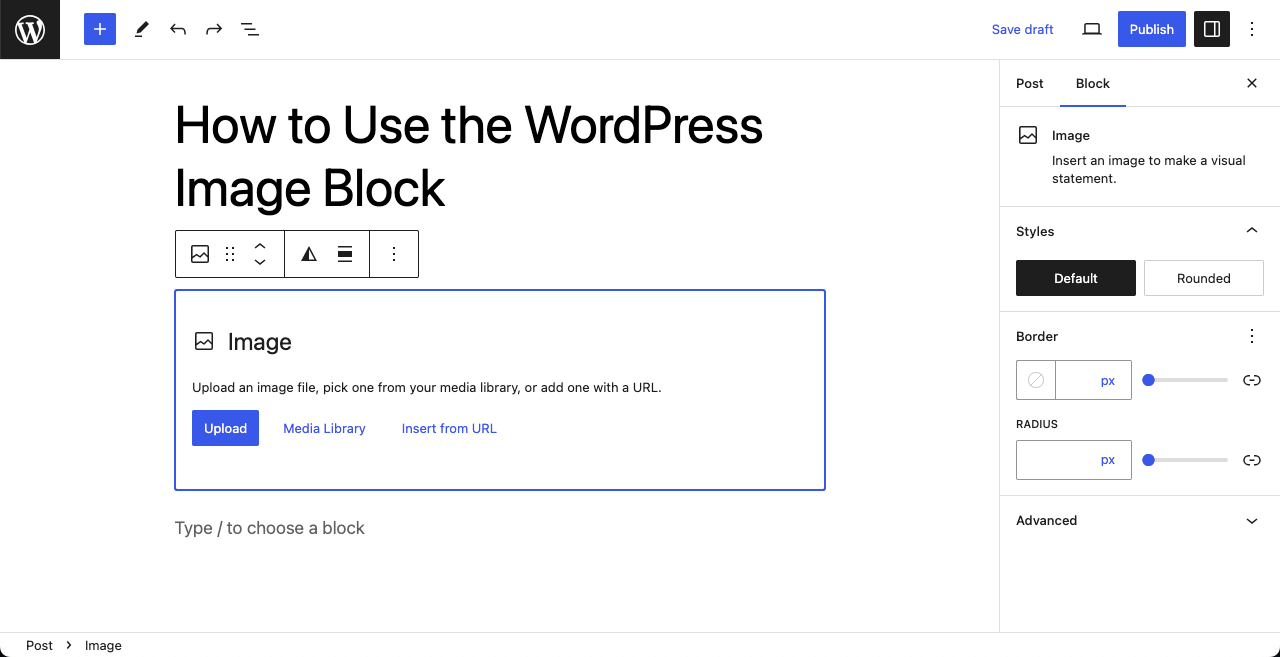
You can see in the image below that we have added an image to the editor using the WordPress image block.
Step 02: How to Use the Image Block Toolbar Settings
When you select the image or click on it, a toolbar appears on its top. You’ll get eleven different options on it. Hovering your cursor on the options will show up their names. Let’s briefly know about each of these options.
- Image – Selects the image you’ve added to the block.
- Drag – This six-dotted double-row icon lets you drag and drop the block to any other part of the post or page.
- Move – Allows you to move the block up or down.
- Duotone Filter – This triangular icon allows you to apply a two-color filter to your image.
- Alignment – This lets you align the image, whether left, right, or centrally.
- Add Caption – You can set a caption for the image.
- Insert Link – By inserting a link, you can redirect users to some other destination when they click this image.
- Crop – You can resize the image by cropping.
- Replace – This option lets you replace the image with another one from the media file.
- Three-dotted icon – It includes several additional options, like copy, duplicate, delete, and else.
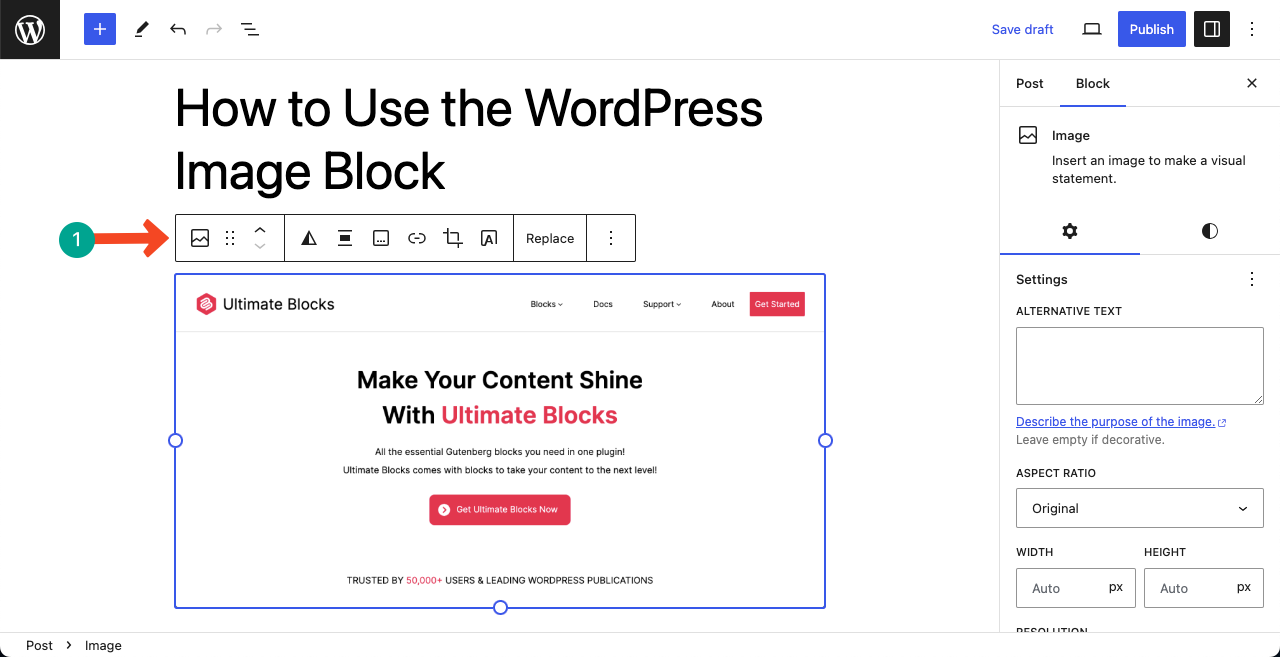
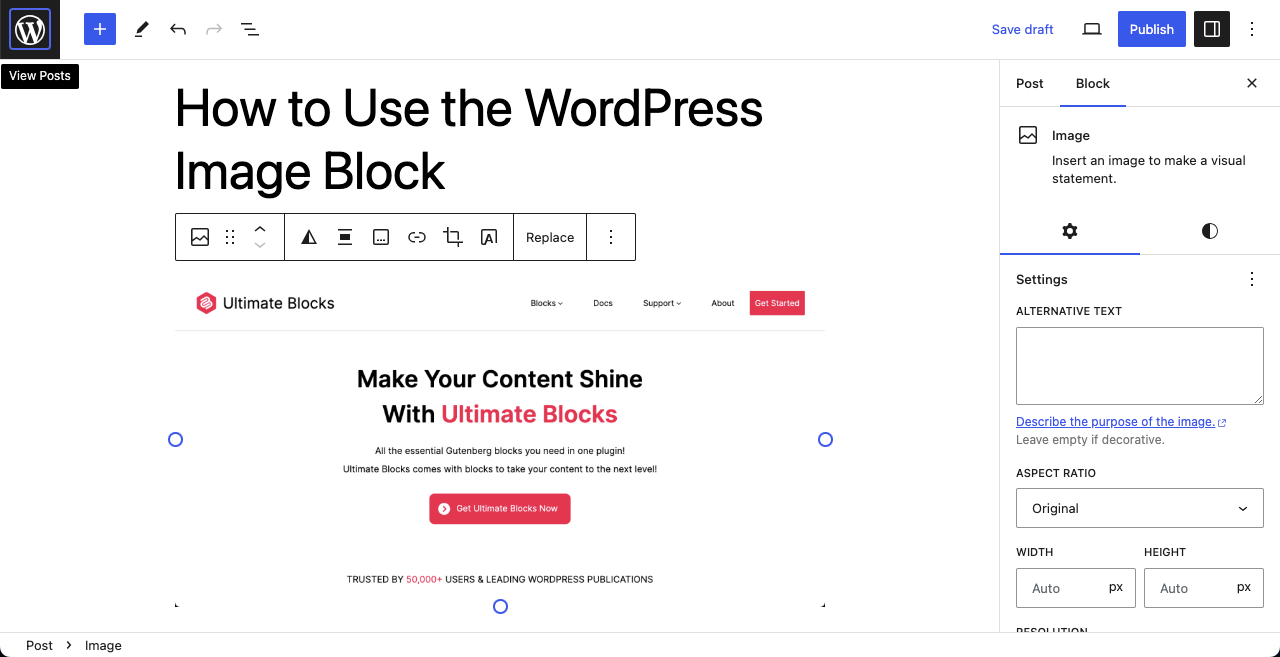
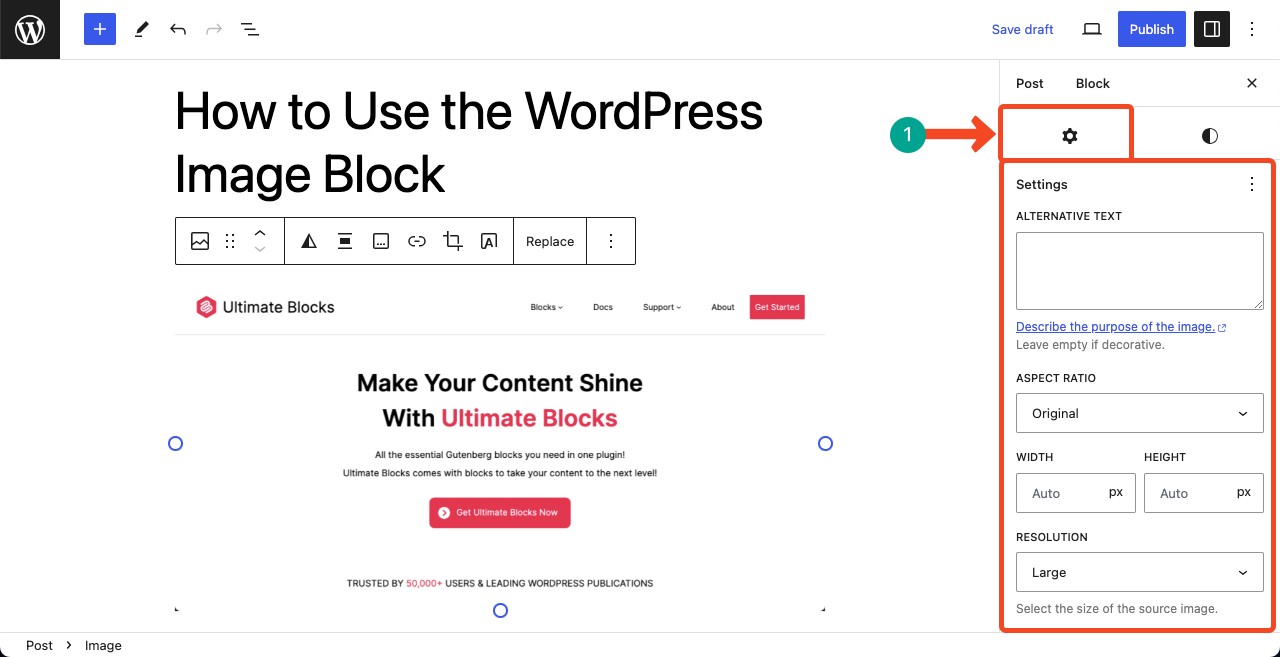
Step 03: How to Use Other Settings of the Image Block
You’ll get several other setting options on the right sidebar. From here, you can set the alt-tag and the size of the image.
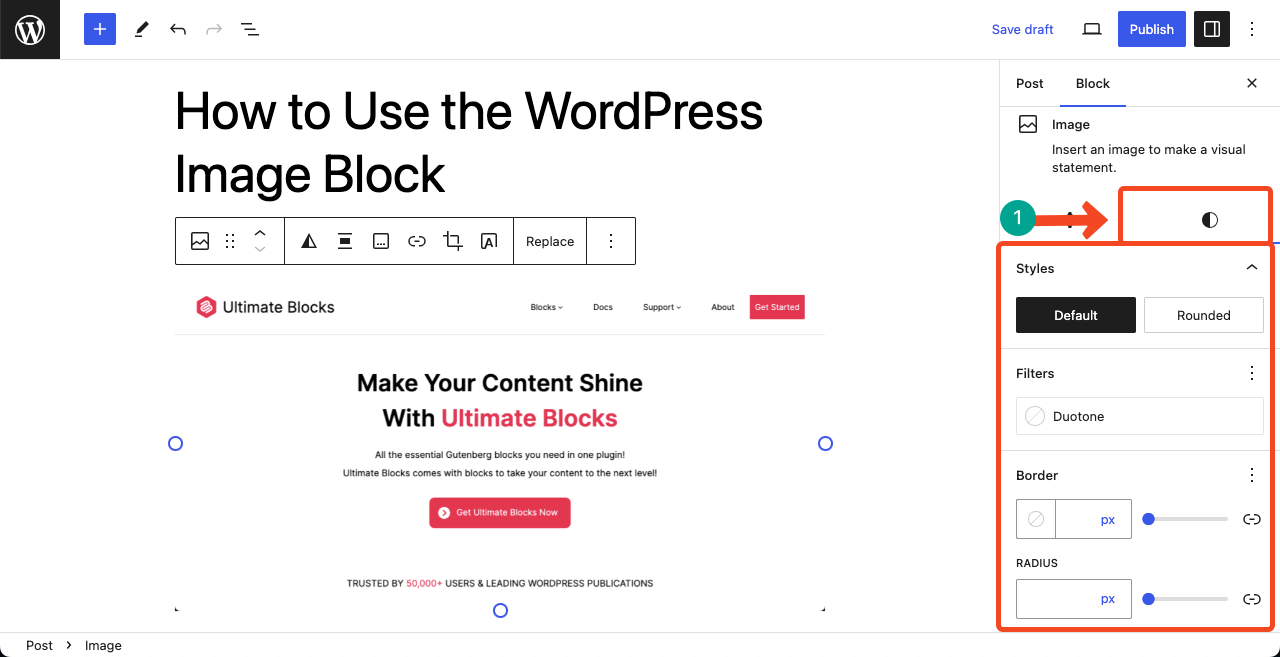
Step 04: How to Apply Stylization to the Image Block
Go to the Style tab on the right sidebar. From here, you can set the border and radius values. You can make the image Rounded and apply the Duotone filter.
Conclusion
From our experience, we have seen most people use the image block only to add images. They don’t know that they can do more customizations with the block. Hence, in this article, we have covered all these topics so people can make full use of this block from now on.
If you benefitted after reading this post, let us know your feedback through the comment section.


Leave a Reply