
Who doesn’t want to make his website faster? Well, image is a very big fact that helps you to load your website faster. The smaller your image size, the faster it loads on your website.
WebP is a modern image format that offers you a small size and helps your site to load faster. But there’s a problem you cannot convert images to WebP format directly, and therefore, you must use a plugin.
If you don’t know how to use WebP images in WordPress, then this post is just for you. After reading this post, you will be able to use WebP images in WordPress site of yours.
What is WebP?
WebP is an image file format that is developed by Google to optimize images better. WebP file format delivers you the same image file but with smaller sizes. Which allows your website to load faster.
According to the Google WebP compression study, WebP images are 25-34% smaller than a comparable JPEG image and 26% smaller than a comparable PNG image.
Which Browsers Support WebP?
All modern browsers, including Google Chrome, Mozilla Firefox, Microsoft Edge, Opera, and Safari, support WebP images. If you are still using Internet Explorer 11, then WebP is not for you.
Using WebP Images in WordPress
From WordPress 5.8 you will be able to use WebP images in the same way you use JPG or PNg formats. All you have to do is upload a WebP image in your media library, and the image will be accepted. For using WebP images, you won’t have to install any third-party plugins.
You can immediately use WebP on your website. However, 5% of people may not be able to see the content of your website by using an old version of the web browser.
Also, generating WebP images is not straightforward. There is no direct solution for automatic image conversion to WebP.
Below I will share with you a third-party solution that will allow you to convert your existing and all the new images to WebP format.
Step 1: Install WebP Express Plugin
First, download and install the WebP Express plugin from the WordPress plugins directory.

Step 2: Convert Images
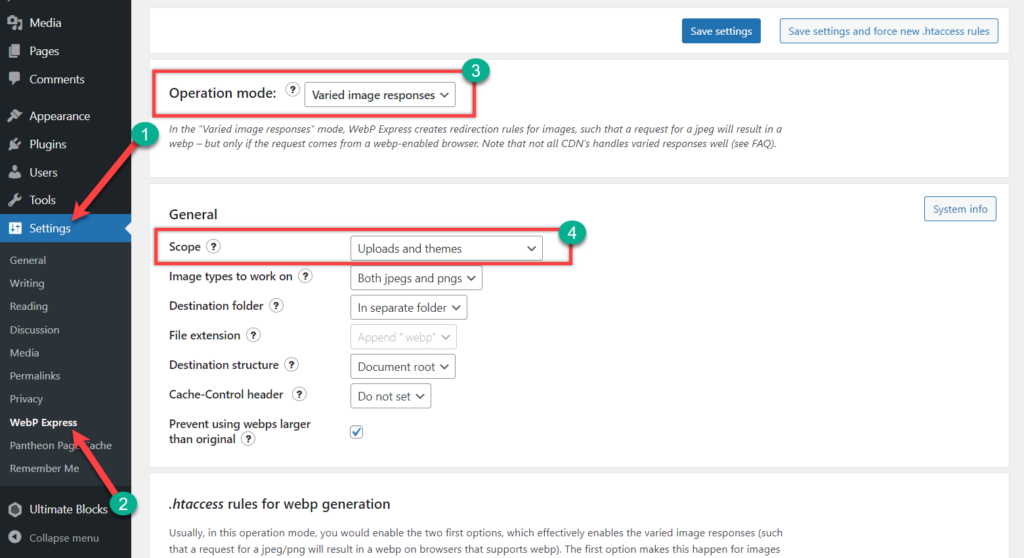
Next, navigate to Settings -> WebP Express. Now configure the plugin as you require. At first, choose the Operation mode as varied image response and scope as ‘Uploads and themes’.
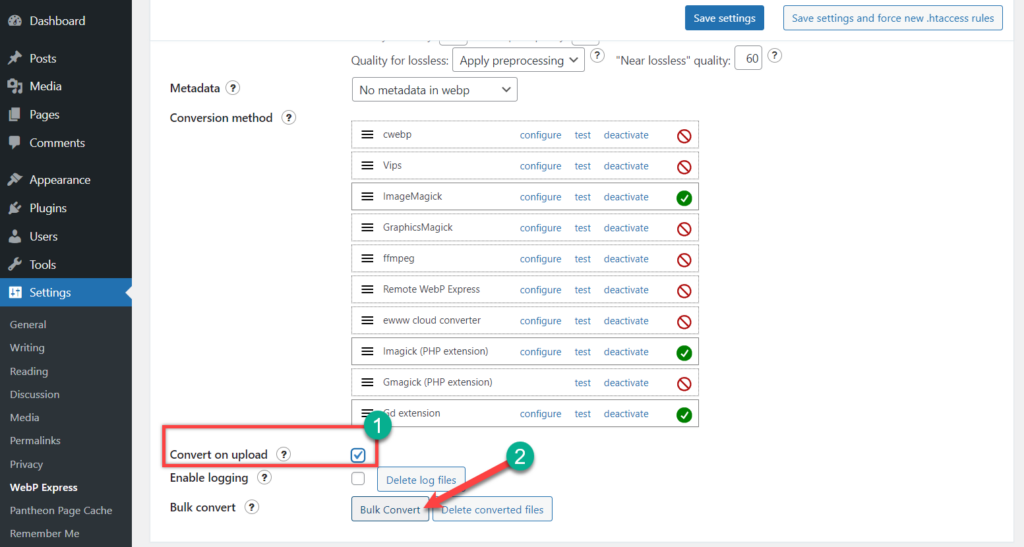
Now, scroll below. Place a tick mark on ‘Convert on upload’ and click on the Bulk convert button to convert existing images to Webp format.
Click on ‘Start conversion’.
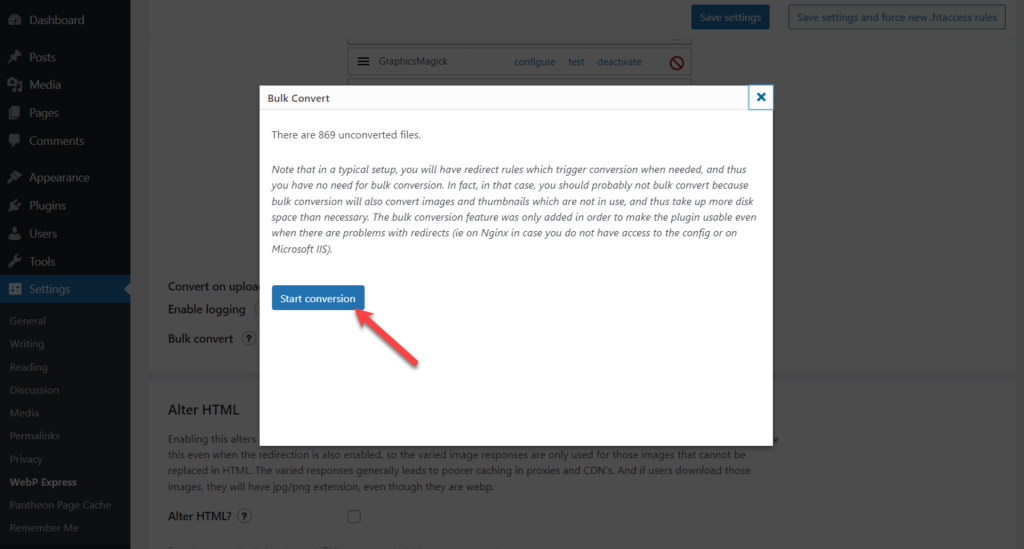
When you click the button, all of your existing images will be converted, and this process will take time.
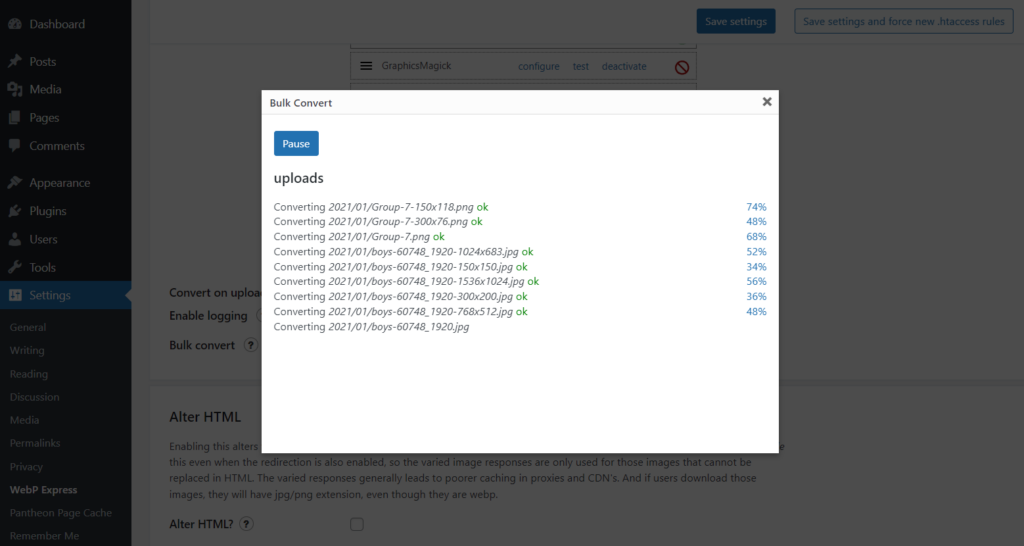
Once the process is finished, remember to click on the save changes button. Reboot your web hosting service so the changes can be applied.
Step 3: Test System
Later on, again navigate to Settings -> WebP Express and look for ‘.htaccess rules for WebP generation’. Here you will see buttons called ‘Live test’.

Click and check if you have successfully converted and enabled WebP image conversion for your system.
Using Alternative Plugin
There’s another plugin that can help you do it and use WebP images. Its name is Shortpixel.
Step 1: Install Shortpixel Pluign
To use this plugin, first install it from the WordPress plugins directory and then activate it.

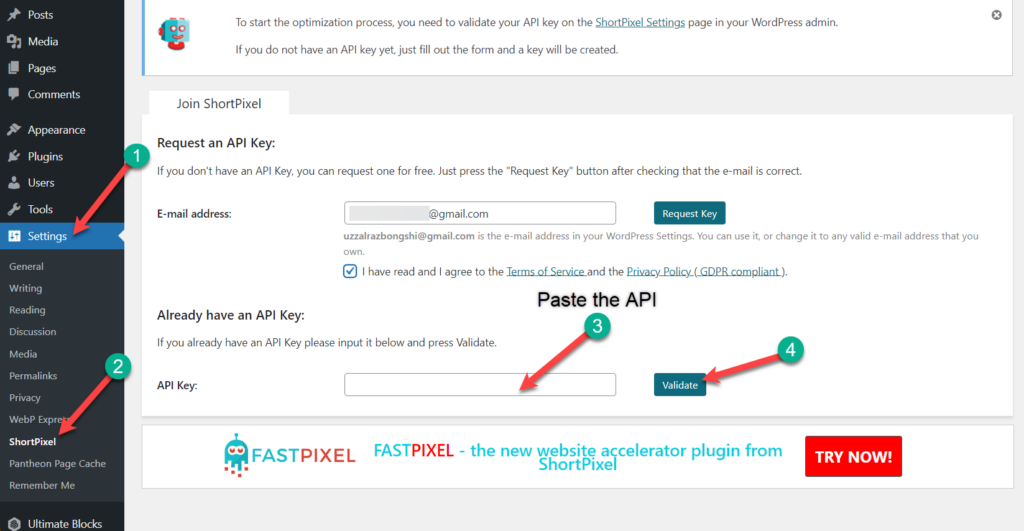
Step 2: Validate With API Key
Now navigate to Settings -> ShortPixel and click on the request for an API key.
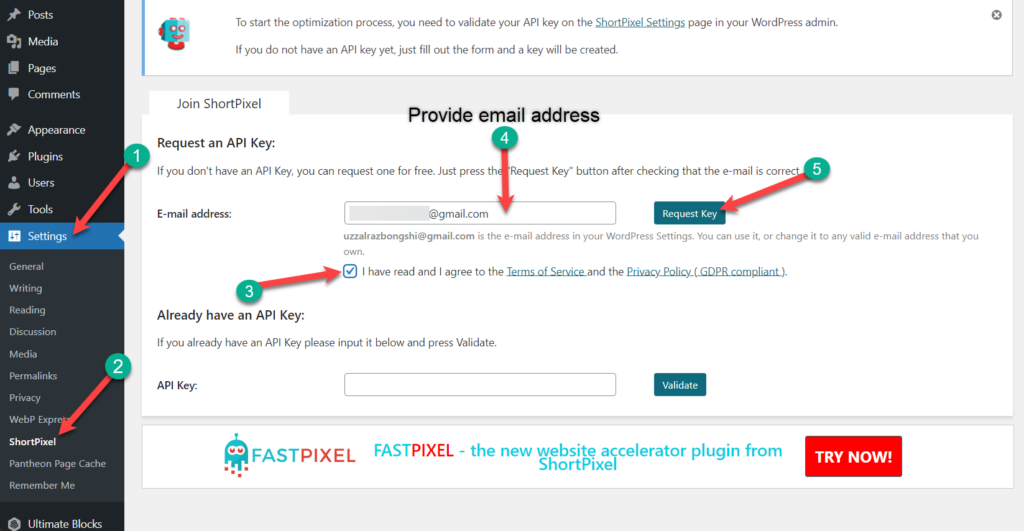
Visit your mail address and copy the API that was sent to you. Then paste it over that page.
Step 3: Create WebP Versions of Images
Then click on the Advanced tab and place a tick on ‘Also create WebP versions’ and ‘Deliver the next-generation versions of the image‘.
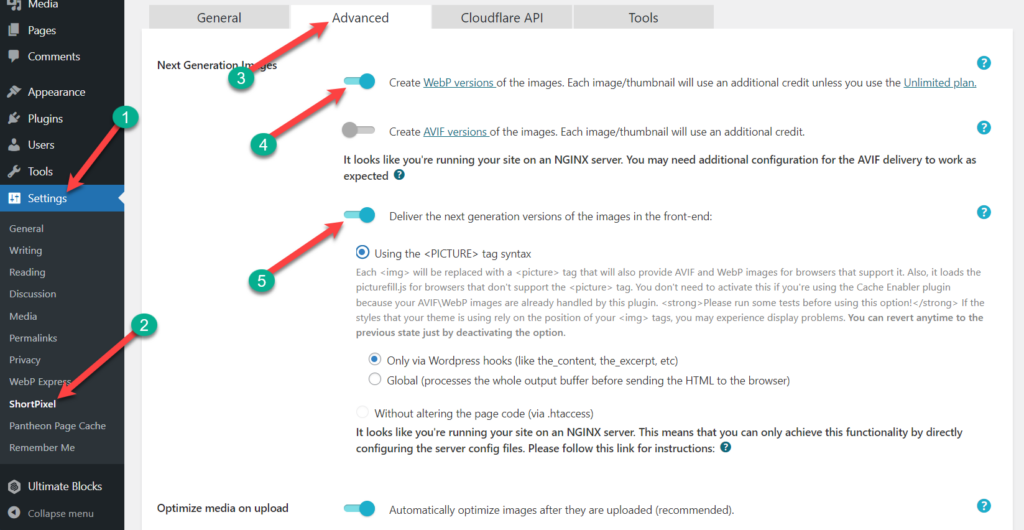
Select the radio button ‘using the <picture> tag syntax’ and leave the other section default. Don’t forget to save your changes. Then, you will be able to use WebP images.
Conclusion
From now on, you will be able to use WebP images in WordPress very easily. If you have any questions or have any further inquiries about using WebP images, feel free to ask. I will be happy to answer you. If you liked the post, then please share it with your friends, and don’t forget to leave your thoughts in the comment box below.


Leave a Reply