
Contact Forms are an everyday element that is needed in our website. We need forms to collect data from our visitors. If you don’t know how to create one then this post is for you. By default WordPress won’t provide you a contact form, you have to create it manually.
In this post, I will show you how to create a contact form in WordPress. After reading the post you will be able to create one by yourself.
Let’s begin.
What is a Contact Form?
A contact form is a simple yet essential feature on a website that allows visitors to communicate with you or an administrator directly. Generally, it includes fields for the visitor to fill out, such as their name, email address, subject, and message. Contact forms streamline communication by providing a structured way for users to send inquiries, feedback, or requests without needing to open their email client or navigate away from the site.
Adding a Contact Form in WordPress
There are a lot of plugins that allow you to create a contact form. Here, I am going to use Fluent Forms. This is a popular contact form plugin that allows you to create any type of form, and the best part is you don’t need to be a pro. You can create any forms by drag & drop. To add a contact form, follow below steps.
Step 1: Install a Contact Form Plugin (Fluent Forms)
At first, go to your WordPress Dashboard and click on ‘Add New’ from the ‘Plugins’ menu. Then, search for ‘Fluent Forms’ and install the plugin.
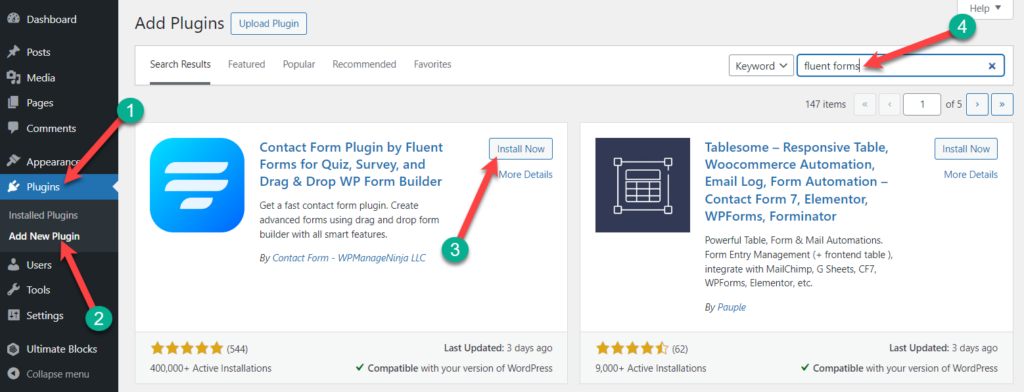
After the installation is complete, don’t forget to activate it.
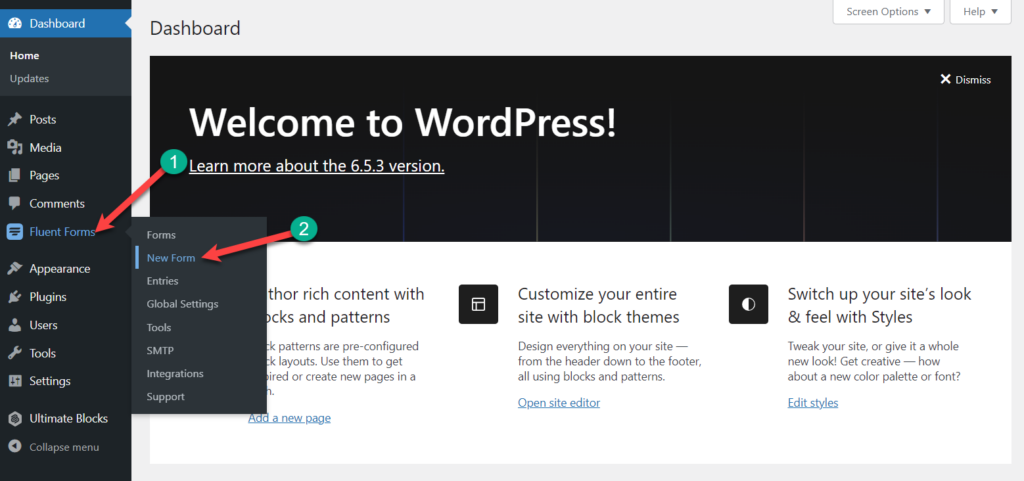
Step 2: Create Your Contact Form
It’s time to create your contact form, click on the ‘New Form’ from the ‘Fluent Forms’ Menu.
From here, you will be able to create a blank form from scratch. But here, we will create one using a template; therefore, click on the ‘Choose a Template’ option.

As we are going to create a contact form, we will choose the ‘Contact Form’ template.
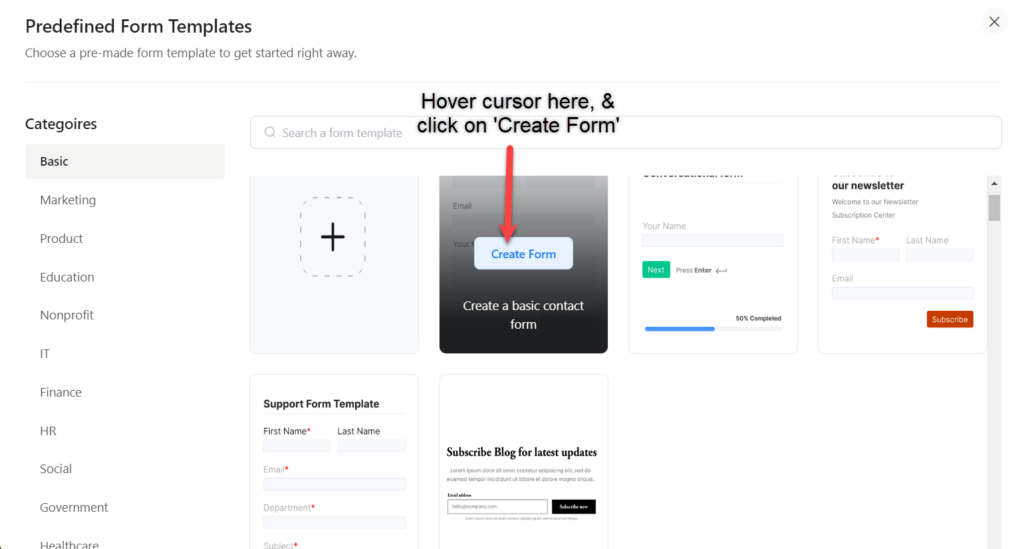
Just hover your cursor and click on the ‘Create Form’ button.
The default form comes with name, email, subject, and message fields. If you need more fields, just drag from the right-hand side and drop it in the form.
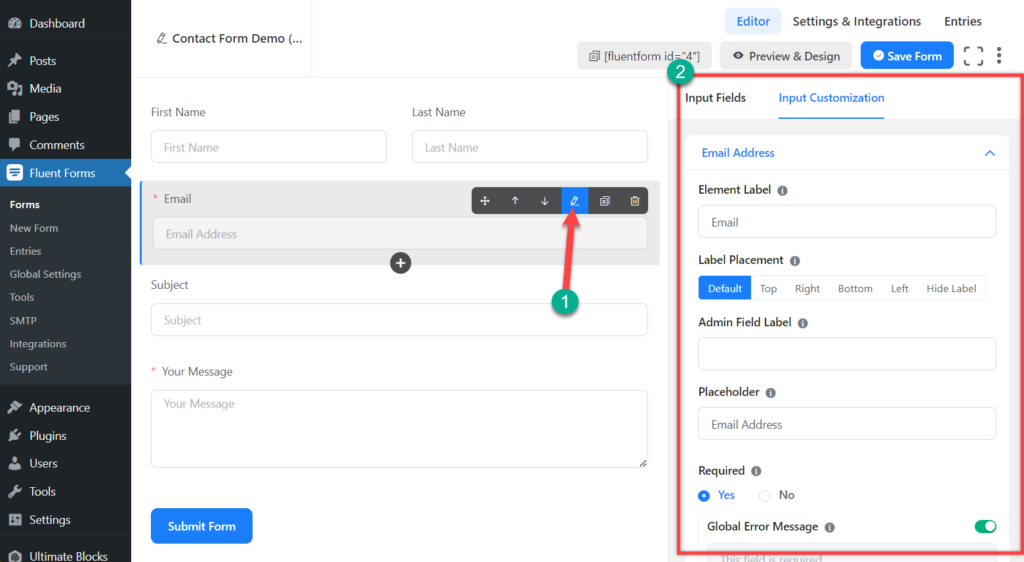
If you want, you can edit any field option by clicking the edit button. Then, configure it from the right side.
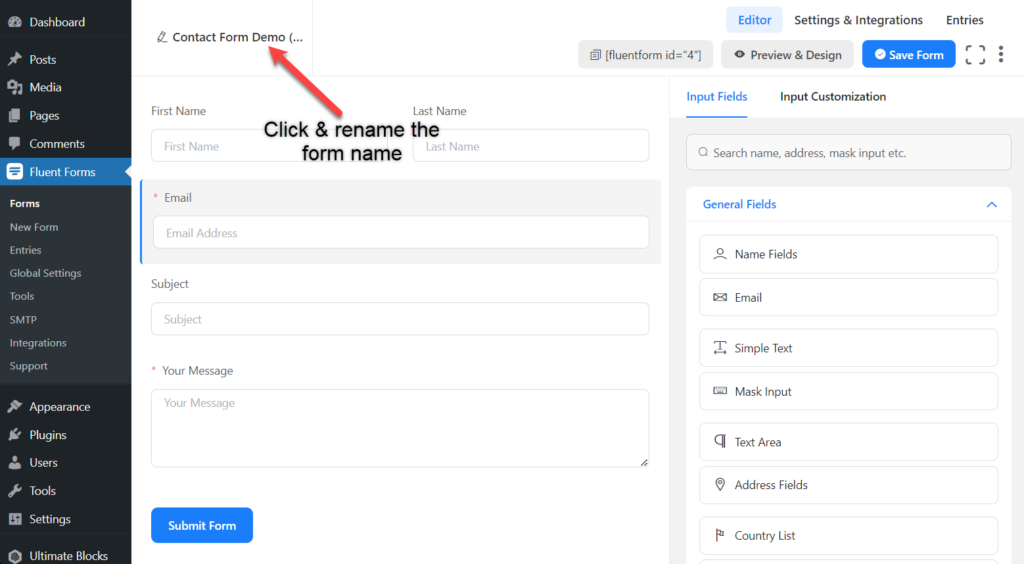
Now, write the name of your contact form from the top left.
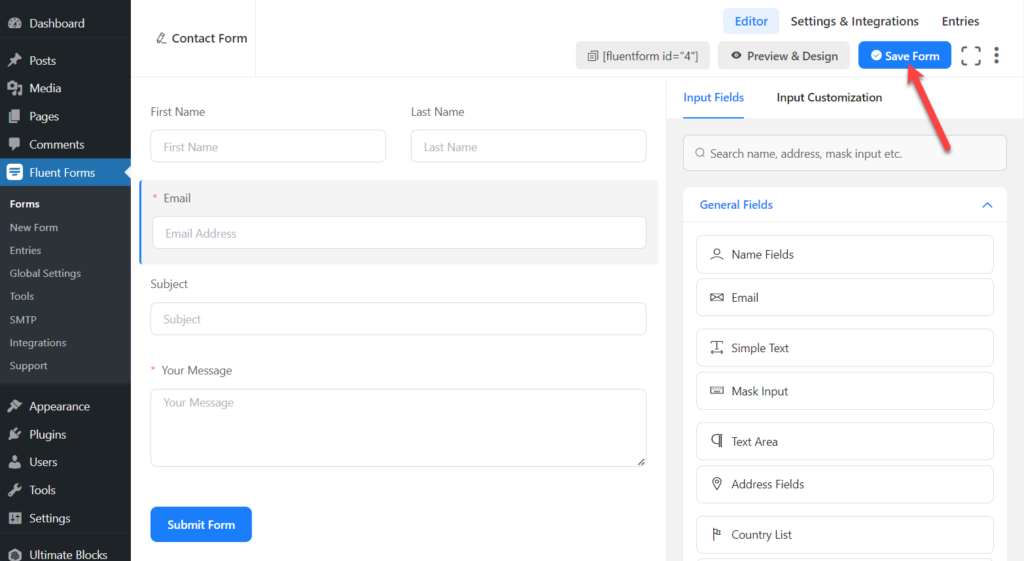
Click on the ‘Save Form’ button from the top right corner.
Step 3: Edit Settings & Integrations
Great, you have successfully created a contact form. Now, click on the Settings & Integrations tab above.
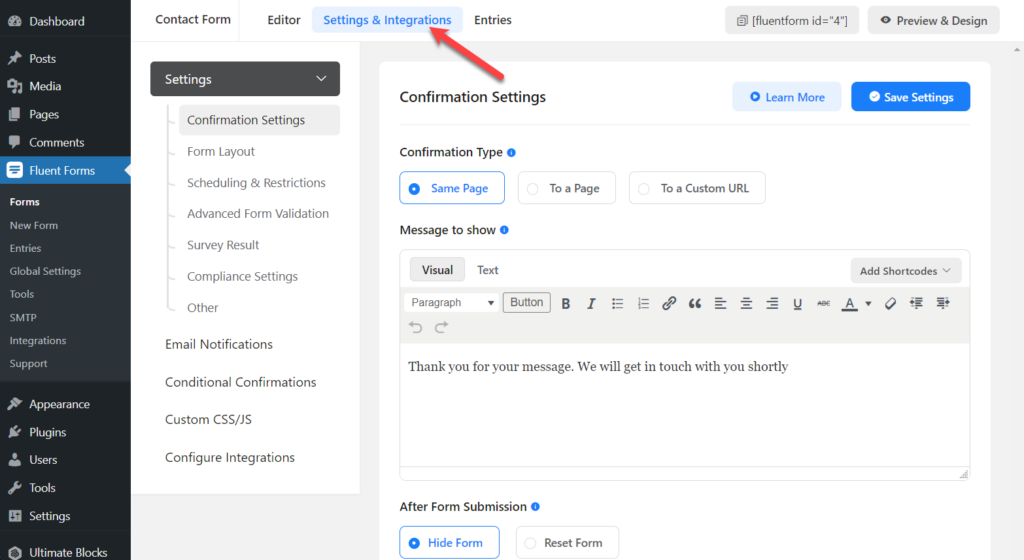
From here, you will be able to configure configuration message, form layout, scheduling, restrictions, result, compliance, notifications, CSS, Integrations, etc. Configure as you require.
If you like to configure global settings, then navigate to Fluent Forms -> Global Settings.
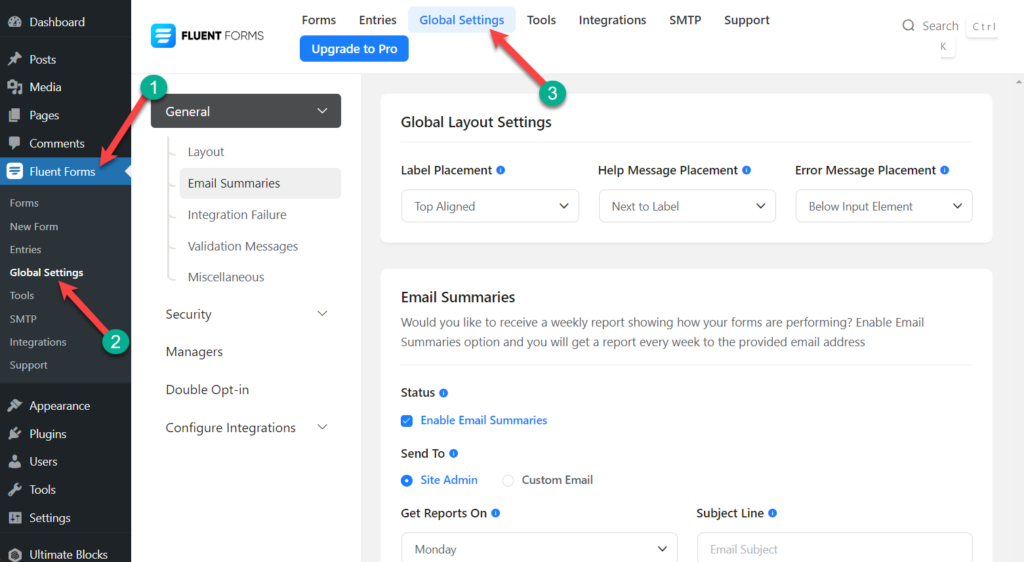
From here, you will be able to customize various types of settings. If you don’t understand leave it as it is.
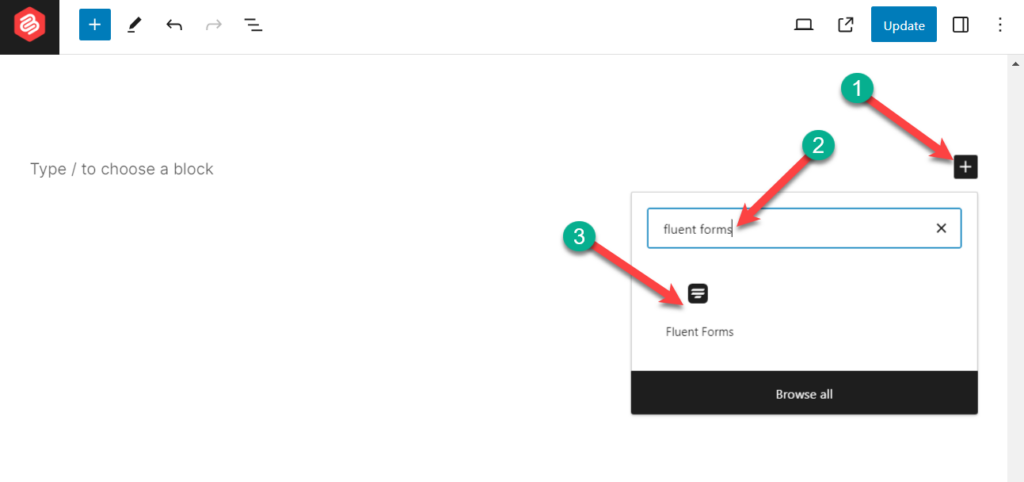
Step 4: Embed Contact Form to Your WordPress Page
To Embed Contact form to your page/post, open the page/post. Click on the add block button and search for ‘Fluent forms’.
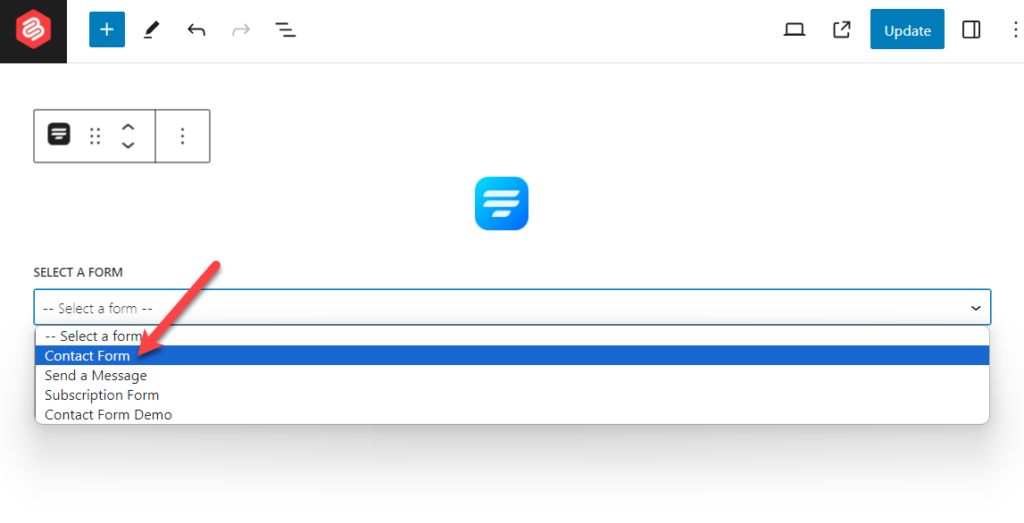
Now select the contact form that you created earlier.
Click on the Save or Update button on the top left.
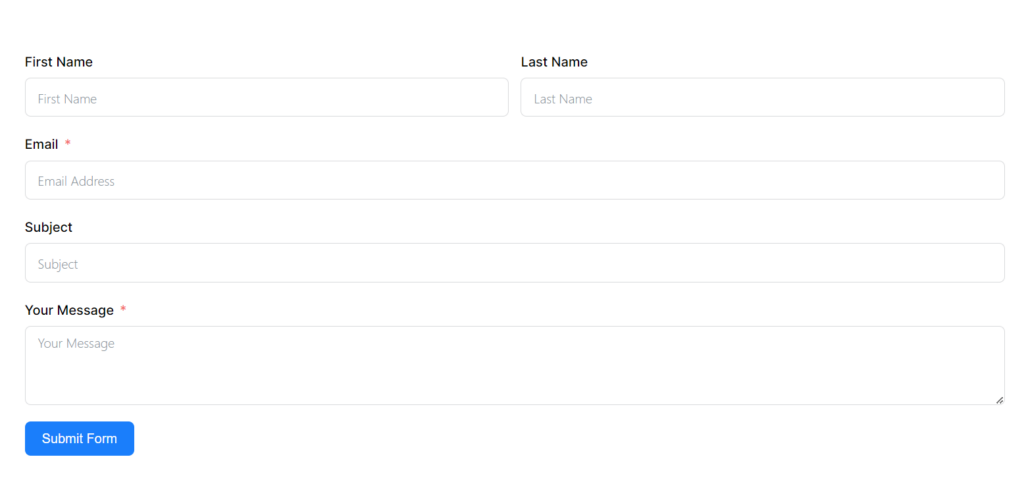
Your contact form is now successfully embedded on your website, and it will look something like the one above.
Conclusion
Adding a contact form to your WordPress site is a straightforward process with Fluent Forms. By following above steps, you can create a functional and customizable contact form that allows your visitors to reach out to you easily. If you face any problems, feel free to share them with me. If you liked the post, don’t forget to share it with your friends.


Leave a Reply