
Image plays a very important role in our website. But sometimes images don’t fit accordingly in the section where we want to insert it. Leaving the editor and then cropping the image may seem troublesome.
But if you know the process, you can crop your image directly in the WordPress editor. It’s very easy to crop an image in WordPerss. This guide shows you the process of cropping an image. Afterward, you will be able to crop all of your images very easily.
Here, I will show you two methods, to crop images.
Let’s start.
Method 1: Cropping an Image Using Toolbar
Here, the whole process is shown step by step. Make sure you follow all the steps and then try for yourself.
Step 1: Insert Image Block
First, insert the image block to add an image. Click on the Add block (‘+’) button and search for the ‘image’ block.
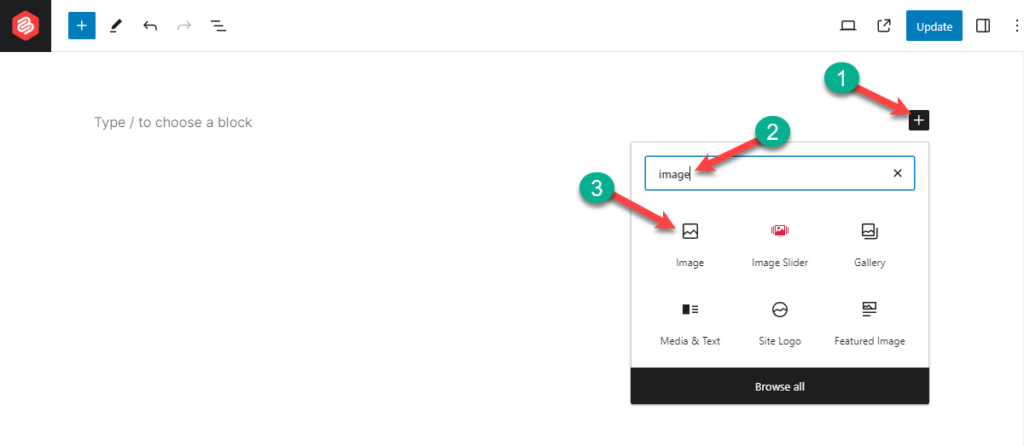
Insert the block by clicking on it.
Step 2: Insert an Image
You can insert an image by dragging it into the block or upload one by clicking on the Upload button.
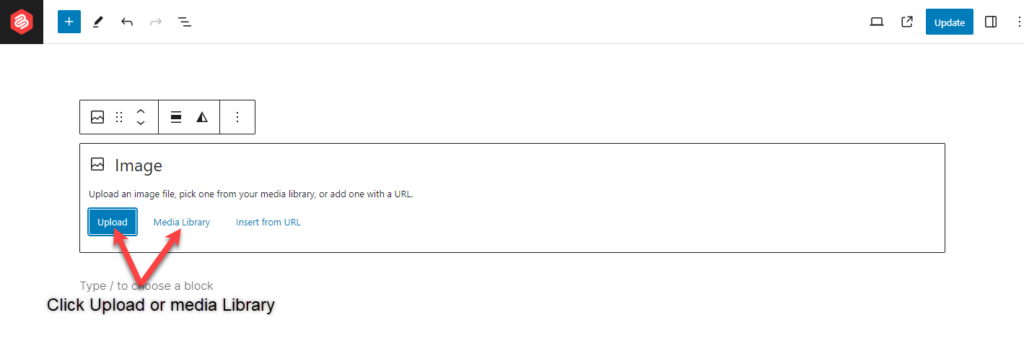
If you have any existing images, then you can also take the help of the Media Library.
Click on the media library and choose your image.
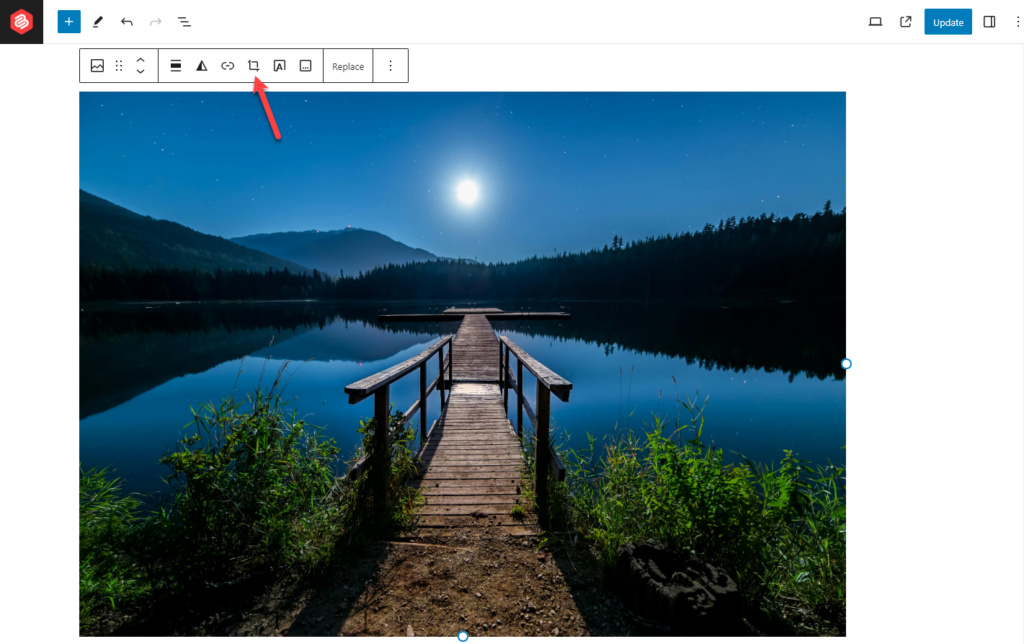
Step 3: Crop Image in WordPress
Click on your image and select the ‘crop’ option from the toolbar above.
You can zoom in or zoom out by using the zoom button, or you can scroll your wheel to do that.
You can also crop your image by using the aspect ratio option.
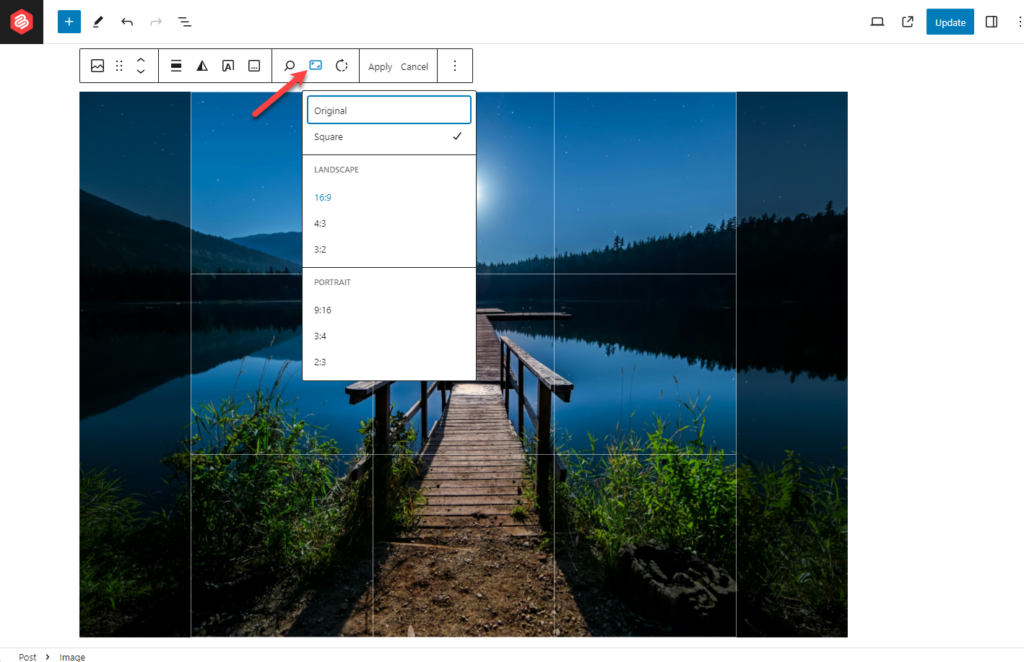
To do that first, select an aspect ratio first and then zoom in or zoom out.
When you are done, cropping the image, don’t forget to hit the Apply button.
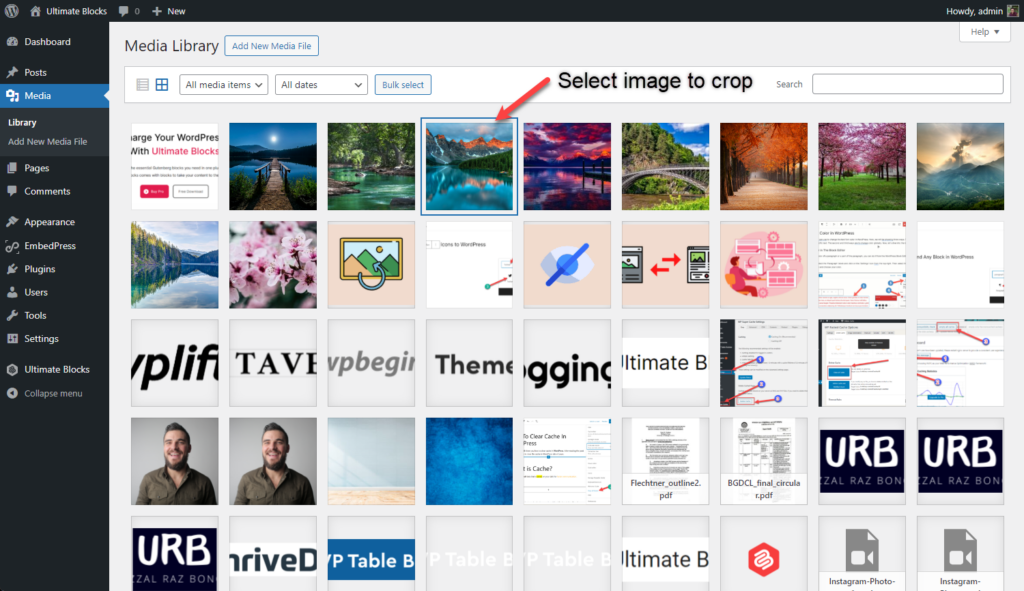
Method 2: Cropping an Image using Media Library
From your dashboard, navigate to your media library and select the image that you want to crop.
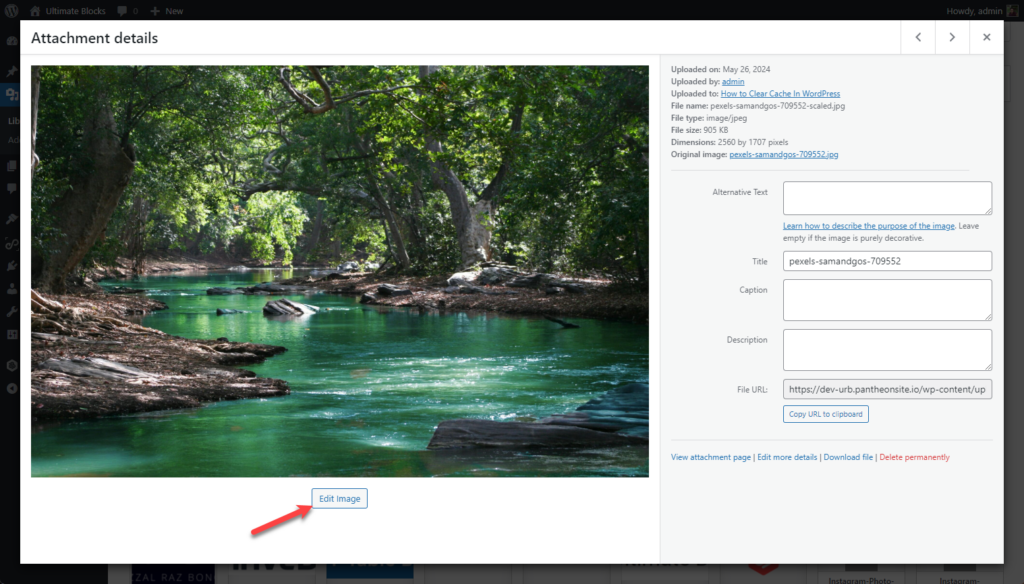
Click on ‘Edit Image’.
Drag little boxes to define how much area you want to crop.
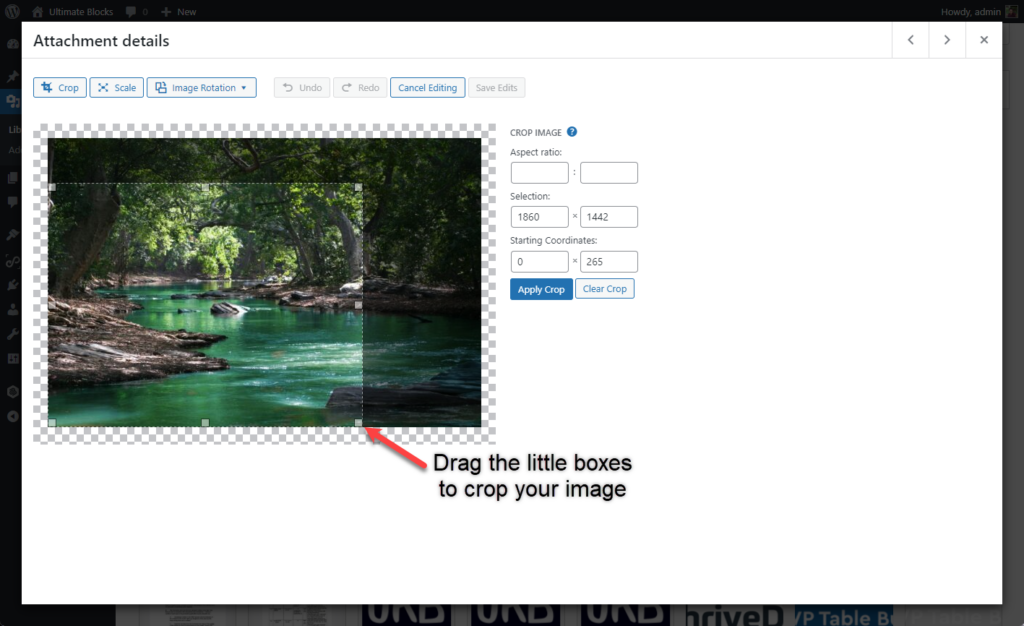
When you are done, hit the ‘Apply Crop’ button and then click on ‘Save Edits’.
Things to Consider While Croppping an Image
There are some common mistakes that people make while cropping an image. You have to be careful so that you don’t follow those people.
1. Try to Maintain Aspect Ratio
Aspect ratio is the balance between height and weight of the image. If you don’t maintain the aspect ratio then your image might not look good in specific puposes. WordPress allows you to crop images while maintaining the aspect ratio.
2. Maintain Image Proportions
You can always maintain image proportions while cropping an image. To do it, just hold the ‘Shift’ key while you are resizing your image. If you preserve proportions then your image will not get distorted and remain visually appealing.
3. Consider Images Compression
For your web performance, image compression is also important. Image compression reduces the size of your image without compromising the quality, thus it helps to load images faster in your website. Their are a lot of plugins tinypng, short pixel, available in the WordPress plugins directory. You may use any of those.
Final Words
Isn’t the whole process easy? You can learn more awesome WordPress how-to’s from the blog section. If you liked the post, don’t forget to share it with your friends and leave your thoughts in the comment box below.
Changelog
Updated on 2024-06-11 (Uzzal Raz Bongshi)
- Added second method.
- Added ‘Things to Consider While Croppping an Image’ section.
- Updated intro.
- Updated images.
- Updated meta description.


Leave a Reply