A website that takes more time than two or three seconds is considered slow. People don’t like to wait, but thankfully you can divert people’s attention by showing them preloader animation. You won’t have to work hard to add a preloader animation to WordPress site of yours.
In this post, I am going to show you how to add a preloader animation. All you have to do is follow the instructions and then you will be able to add your preloader animation by yourself.
A preloader animation is an attractive animation that shows up at the very beginning while all the elements of the website load in the background. The duration of the preloader animation may be short or long, depending on the website loading time. If a website is loaded very fast, then there is no need to keep the user’s attention for very long.
Add a Preloader Animation to WordPress
There are several preloader animation plugins is available in WordPress, but among those, Loftloader is popular and comes with many functionalities. I am showing the whole procedure with this plugin to add a preloader animation.
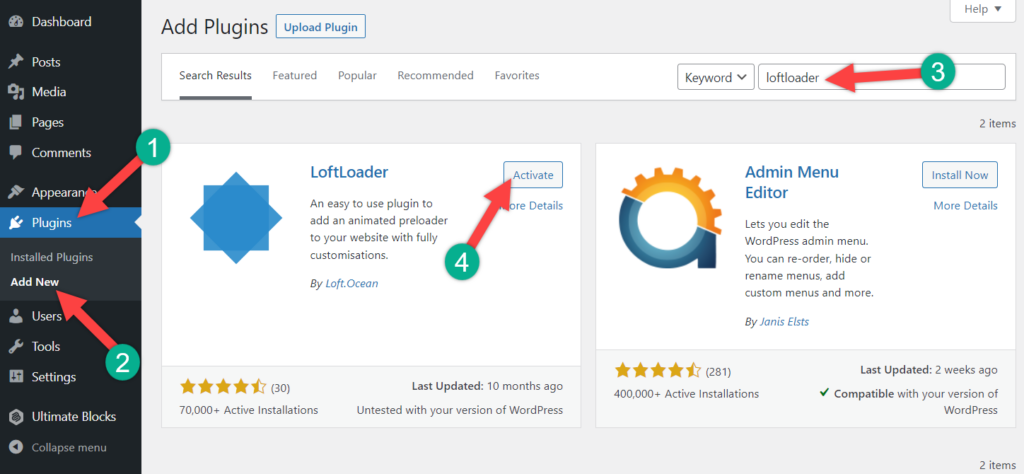
Step 1: Install LoftLoader Plugin
First, install and activate the LoftLoader plugin from the WordPress plugins directory.

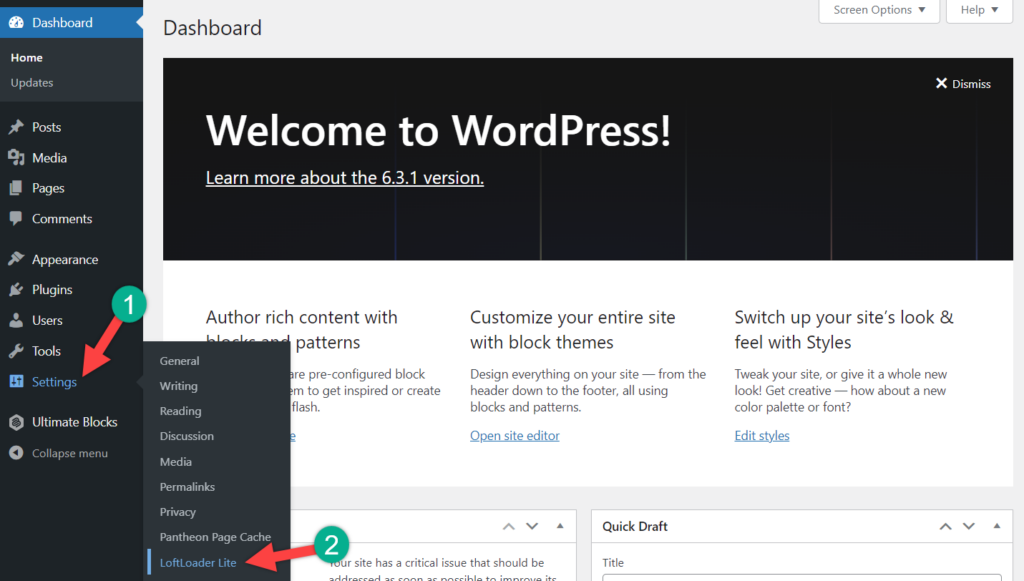
Step 2: Enable LoftLoader
Now navigate to Settings -> LoftLoader lite.

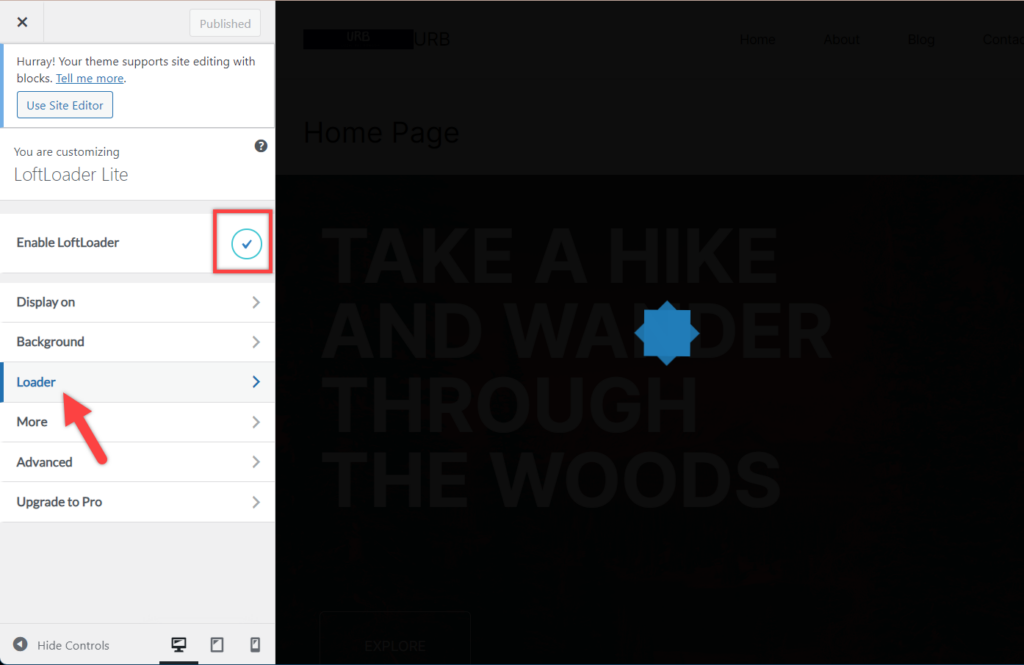
Make sure you have enabled LoftLoader by placing a tick mark on the Enable option.

Step 3: Set Loader Animation
Click on Loader and select the loader animation you like.
You can change color also from the ‘pick color’ option. If you like, you can also choose your custom image as the loader animation. Just click on the ‘image animation’ and upload your image by clicking on the ‘Change image’ button.
After that, you will be able to adjust the width of the image.
Step 4: Customize
There are some additional settings available for your preloader animation. You can either show the preloader animation on the Homepage only or sitewide. Choose this setting from the ‘Display on’ option.
You can also change the background color, opacity, and Ending animation from the ‘Background’ option. If you want some additional settings, you can access them from the ‘More’ option. From here, you will be able to set the maximum load time, close button, and whether to delete plugin data upon deactivation.
Finally, when you are done customizing your preloader animation, hit the publish button and see your preloader in action.
Last Words
Hope you successfully added a preloader animation in WordPress site of yours. If you have any difficulties to add a preloader animation, feel free to ask, I will be happy to help you. If you liked the post, share it with your friends, and don’t forget to share your thoughts in the comment box below.

Leave a Reply