Are you looking for a way to set a default image in WordPress site of yours? Well, you can set one very easily. A default featured image makes your post eye-catching and appealing.
After you set a default featured image, you won’t have to worry whether your authors upload a featured image or not. After reading this post, you will be able to add a default featured image on your own.
Images talk more than texts. But sometimes you may forget to upload a featured image, or you might have multiple authors who skip to adding a featured image.
A featured image catches the eyesight of your visitors; if it is not added to your website, then your visitors might skip your post without reading it. A featured image makes your post more engaging and increases conversion rates.
Set a Default Featured Image in WordPress
It’s very easy to set a default featured image. Just follow the procedure below.
Step 1: Install Default Featured Image Plugin
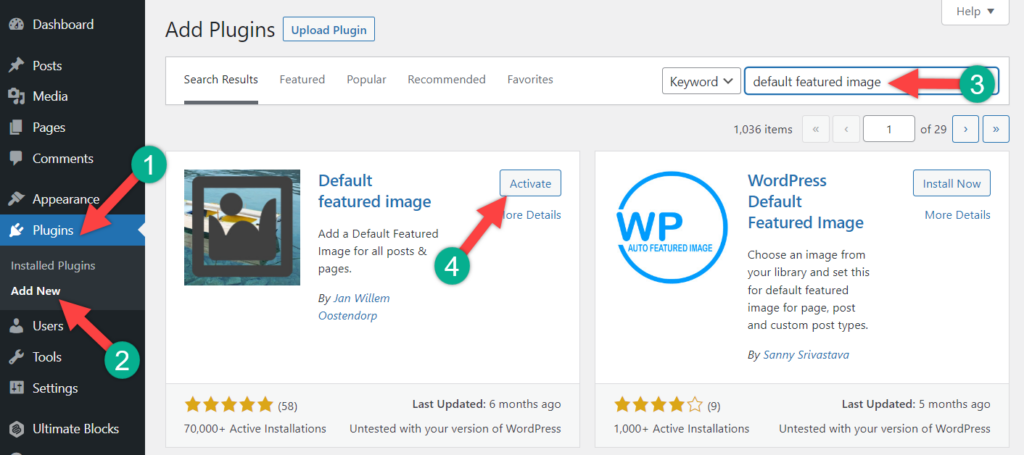
First, install and activate the Default Featured Image plugin on your WordPress website.

Step 2: Set Default Featured Image
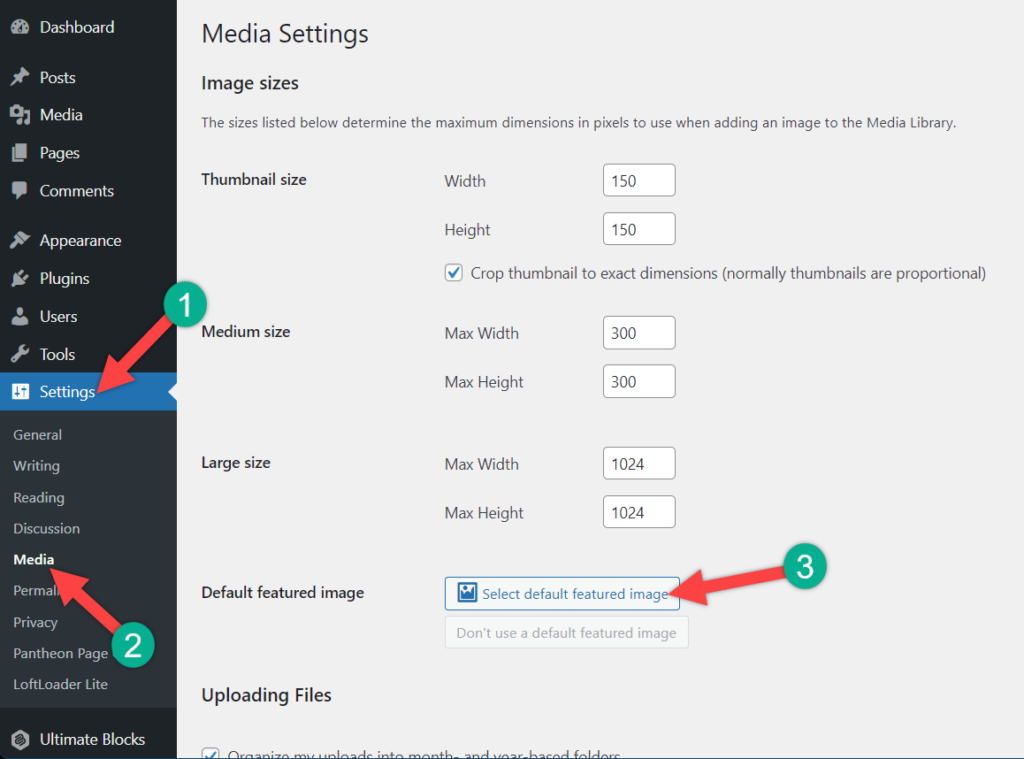
Now navigate to Settings -> Media and click on ‘Select default featured image’.

You will be taken to the media library. From there, upload or choose your featured image.
Step 3: Customize
If you want to customize the setting, then customize else, click on the save changes button.

Now you have successfully chosen your default featured image for any post.
Disable Default Featured Image
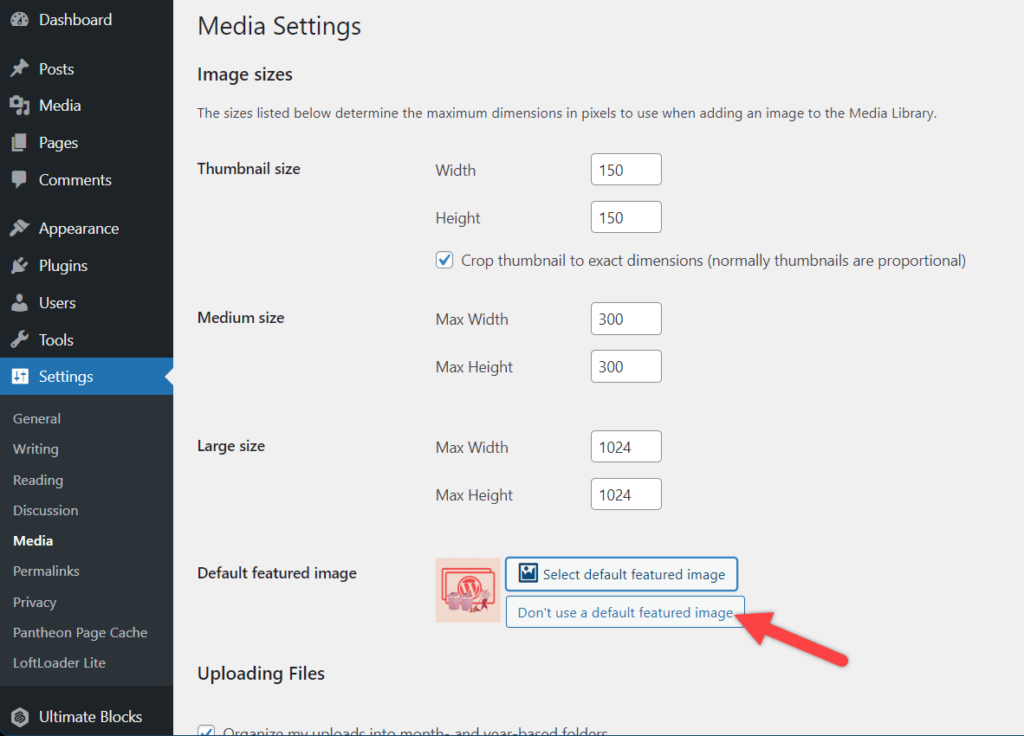
You will be able to change the default featured image at any time. If you do not want to use this function, then navigate to Settings -> Media and click on ‘Don’t use a default featured image’.

Last Words
I hope this post helped you to set a default featured image in WordPress site. If you face any problems, feel free to tell me. If you liked the post, please share it with your friends and leave your thoughts in the comment section below.

Leave a Reply