
Are you looking for a way to add a background image to your WordPress website? A carefully selected background image can instantly change the look of your WordPress website, creating a more engaging and immersive environment for your visitors.
It’s such a powerful design element that can enhance storytelling, focus on some of your brand’s major key points, and make your content pop. Whether you want to introduce a minimalist feel using neutral tones or add dynamic, eye-catching visuals, WordPress offers several ways to help you get the perfect backdrop.
In this post, I will show you three methods to add a background image to a WordPress website. After going through this post, you will be able to add a background image to your site on your own.
Let’s begin, then.
Method 1: Adding a Background Image Using Group Block
The best way to add a background image is by using the group block. It’s very easy and in this way you can change the background color of any block.
Step 1: Convert Your Block to Group Block
Insert your desired block and then select your block and convert it to the ‘group’ block.

When you click on the ‘Group’, your block will be converted.
Step 2: Add a Background Image
Now, open the block settings and switch to style tab.

Scroll a bit below and click on ‘Add a background Image’.

Upload image from your computer or choose one from the media library.
Step 3: Customize the Background Image
Now choose the image size. You can choose among ‘Cover’, ‘Contain’, and ‘Tile’.

Cover option will fully cover your block according to its size. If you choose Contain, the image will be contained in a small portion. The Tile option will set the original size of the image. Therefore it is better to use the ‘Cover’ option.
Then postion the background image as you like.
Method 2: Adding a Background Image Using Cover Block
You can easily add a backgournd image by using the default cover block of Gutenberg. This method doesn’t require any additional plugins. To add one, follow below steps.
Step 1: Add the Cover Block
Open the page/post, where you want to add a background image. Click on the ‘Add Block’ button and search for the ‘cover’ block.

Insert the block by clicking on it.
Step 2: Add Image to the Cover Block
Now, add a image to the cover block. You can upload one by using the ‘Upload’ button, or choose one from the ‘Media Library’.

After inserting the image, add title or any content you want.

Step 3: Add Your Desired Content Over Image Background
If you don’t want the title block then delete it and click on the add block button inside the cover block.

Insert any block that you wish for.

Method 3: Adding a Background Image Using Customizer
WordPress comes with custom background support. If your theme supports a custom background feature, this method is recommended for you to add a background image to your WordPress site.
Step 1: Navigate to Customize
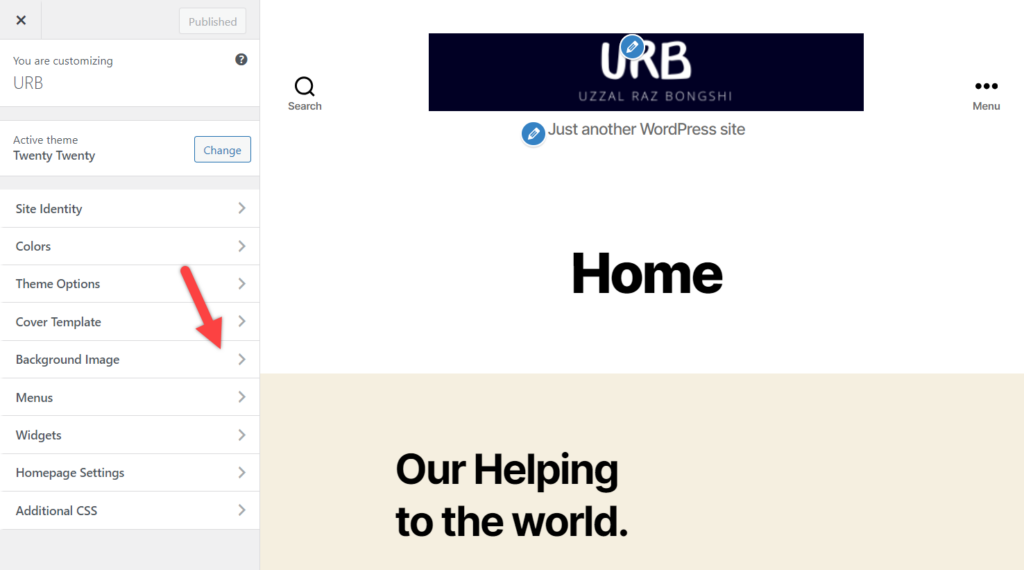
First, navigate to the Appearance -> Customize page from your admin dashboard.

Step 2: Open Background Image Option
Now click on the Background image.
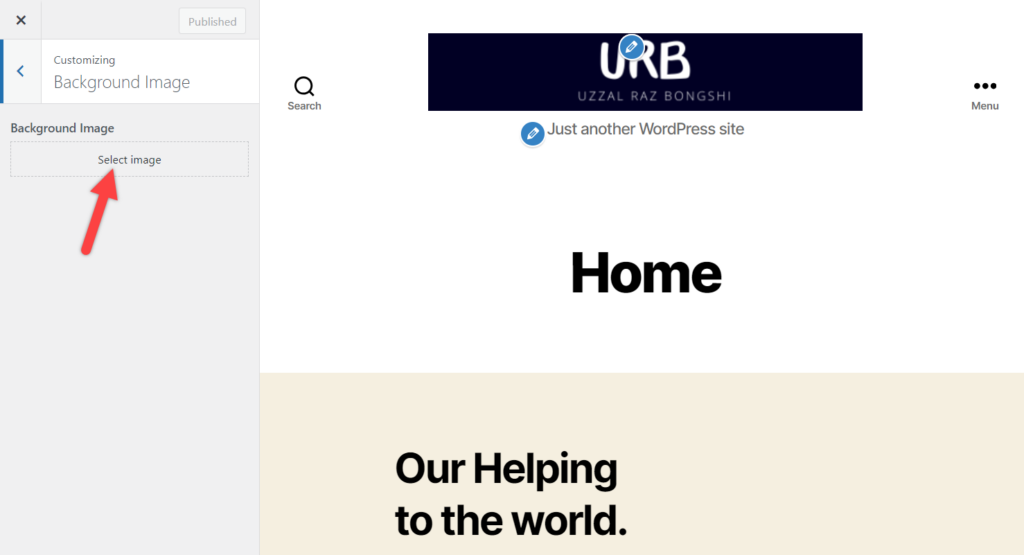
Step 3: Change Background Image
Then click on select image and select the image that you want to set as the background image.
This will open up a media uploader pop-up.
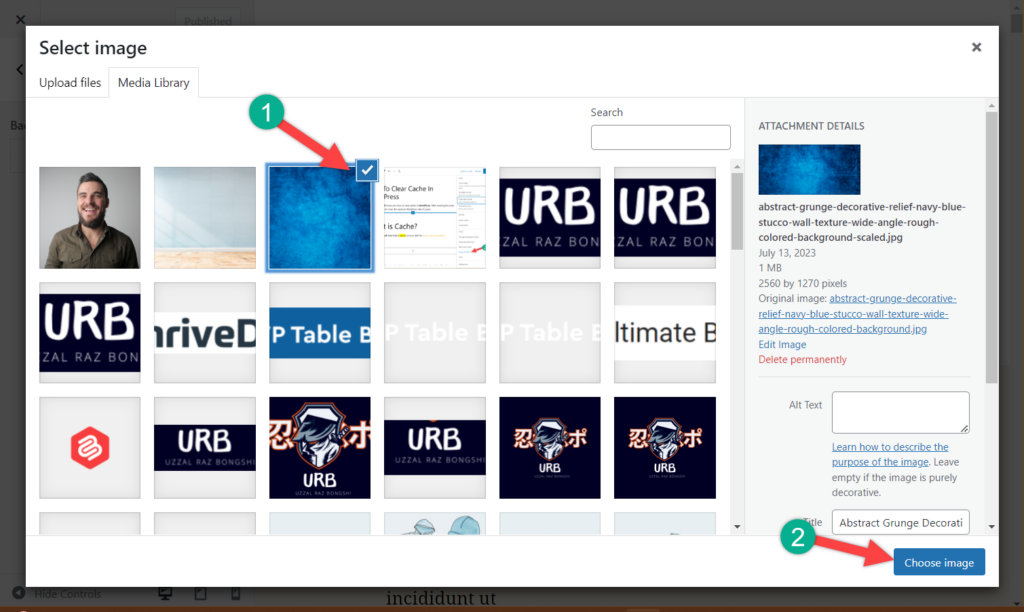
You can select any image from here. Drag an image to upload it here. Now select the image and click on the Choose image button. Your image will be added, just don’t forget to click on the Save & Publish button.
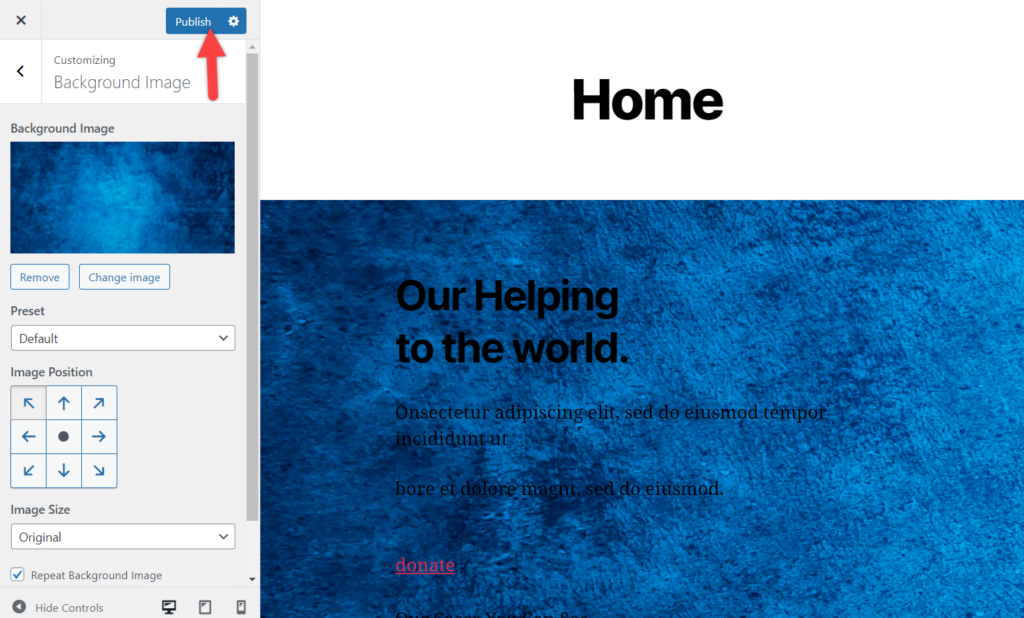
Then if you wish, you can choose any preset of WordPress, change image size, position, etc.
Final Words
There are other ways to do it too. You can add a background image also with a plugin called Full Screen Background Pro or do it with CSS. However, it is best to add a background image in the default way of WordPress.
If you liked the post, please share it with your friends. For any queries, feel free to ask me through the comment box below.
Changelog
- Updated on 2024-10-10 (Uzzal Raz Bongshi)
- Changed Intro.
- Added ‘Method 1: Adding a Background Image Using Group Block’ section.
- Added ‘Method 2: Adding a Background Image Using Cover Block’ section.


Leave a Reply