By default, WordPress doesn’t let anyone change his profile photo. Instead, it shows the gravatar image of the author as his profile photo. You are the user, and your real image is not shown, I know this is some kind of unfairness.
Well, if you like to change this image and like to add your own image as a profile photo, then this post is for you. All you have to do is follow this post; then, you will be able to do it all on your own.
See The whole Process in Seconds!
How to Add an Author Photo in WordPress
Step 1: Install One User Avatar
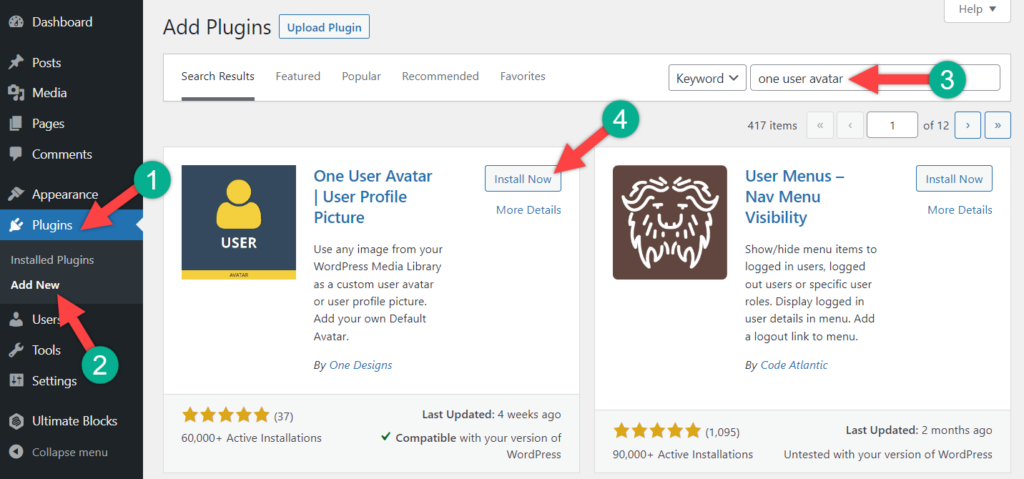
First log in to your WordPress dashboard with your credentials. Now install and activate the One User Avatar plugin from the WordPress plugins directory.

Step 2: Set Author Image
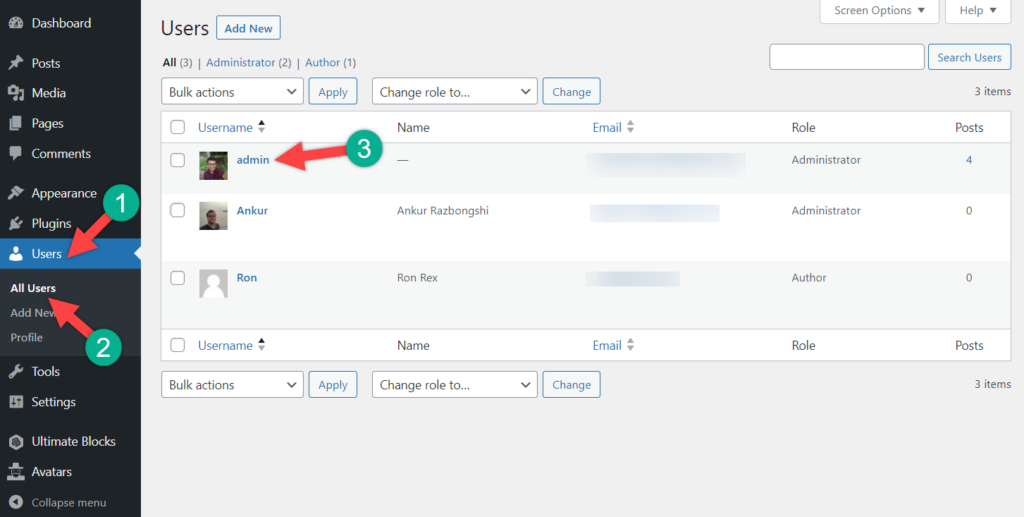
Now you will have options for your users to change their profile pictures. To change your profile picture, navigate to Users -> All Users. Then, click on your account.

Just click on the ‘Choose image’ and select the desired image.

After selecting your desired image, click on the ‘Update User’ button, and your user will be updated with the new profile picture.
In this way, your users will also be able to change their profile photo. Now check the user’s page, to make sure if your profile photo looks cool or not.
Upload Default Avatar
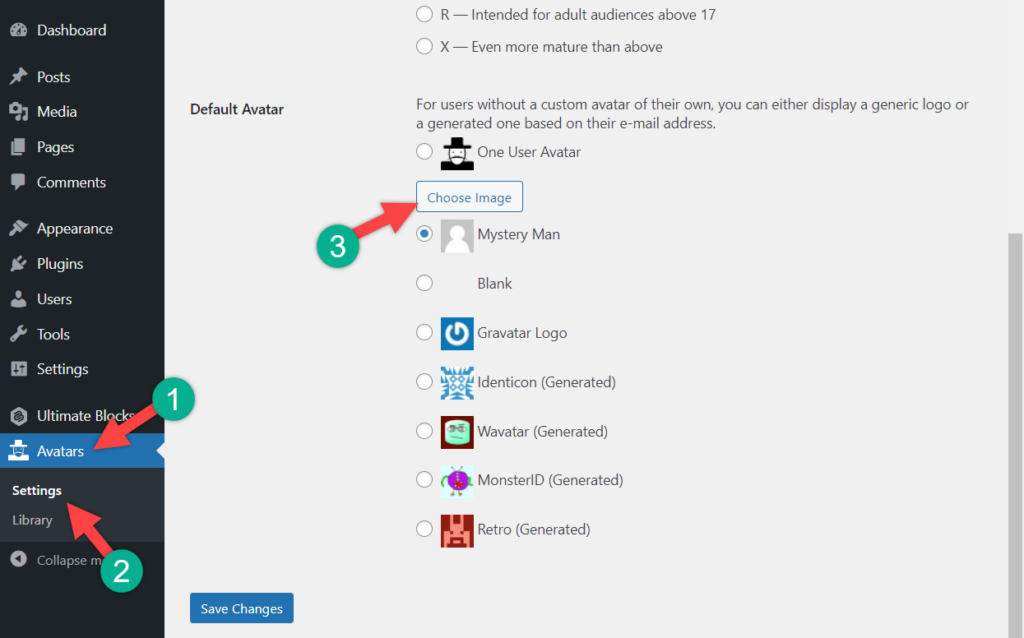
If you wish, you can also add a default avatar that will show for all the users you have on your website. To do this, navigate to Avatars -> Settings.

Now, choose your preferred image, and don’t forget to click on the ‘Save Changes’ button below.
Final Words
Now the latest image of the author will be shown everywhere. If an author or user doesn’t have any profile image, then it will show the default one that you chose from the settings. If you need more than this simple functionality, you may install and use the Profilepress plugin. Which will allow you to both change the author photo and manage the user profile along with membership.
I hope this post helped you to learn how to add an author photo in WordPress website. If you liked the post, then please share it with your friends. Don’t forget to leave your thoughts in the comments box below.

Leave a Reply