
Having proper Call-To-Action buttons can increase your conversion rates dramatically.
If you are using WordPress, you are in luck. WordPress has a default option to add Call-To-Action buttons to your posts/pages.
On top of that, there are a handful number of WordPress Call-To-Action button plugins available. You can use any of those plugins to add beautiful and conversion-optimized call-to-action buttons.
Before moving further, let’s learn a bit more about the Call-To-Action Button.
Adding A Call-To-Action Button Without Using Any Plugin
The new WordPress Block Editor has a default ‘Button’ block. The ‘Button’ block lets you insert call-to-action buttons to your WordPress posts/pages. Let’s see how to add a call-to-action button using the WordPress block editor.
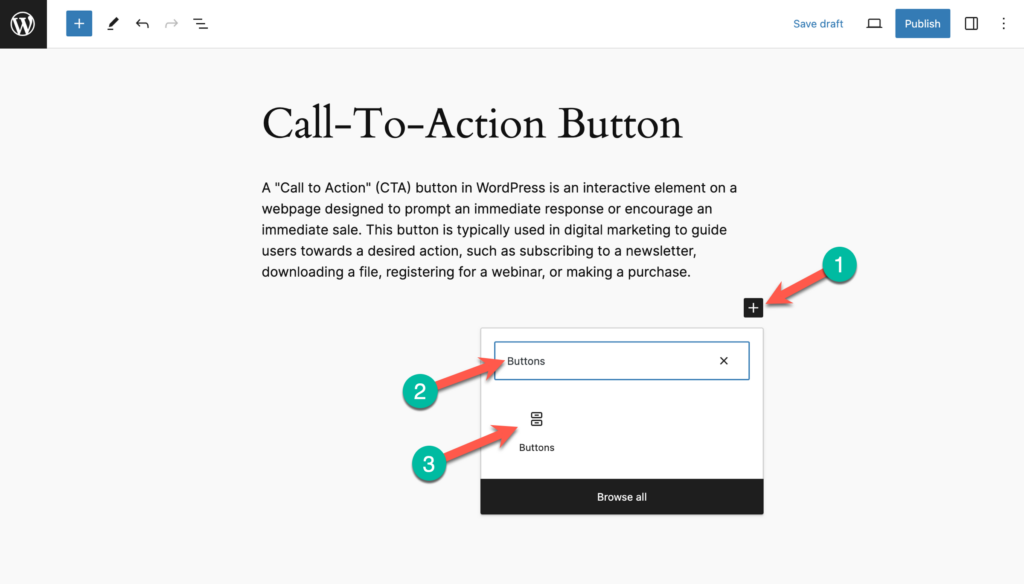
Step 1: Insert the Buttons Block
First, go to the post/page where you want to add the button. Now simply click on the ‘+’ sign and search for ‘Buttons’ block. Then insert it on the editor.
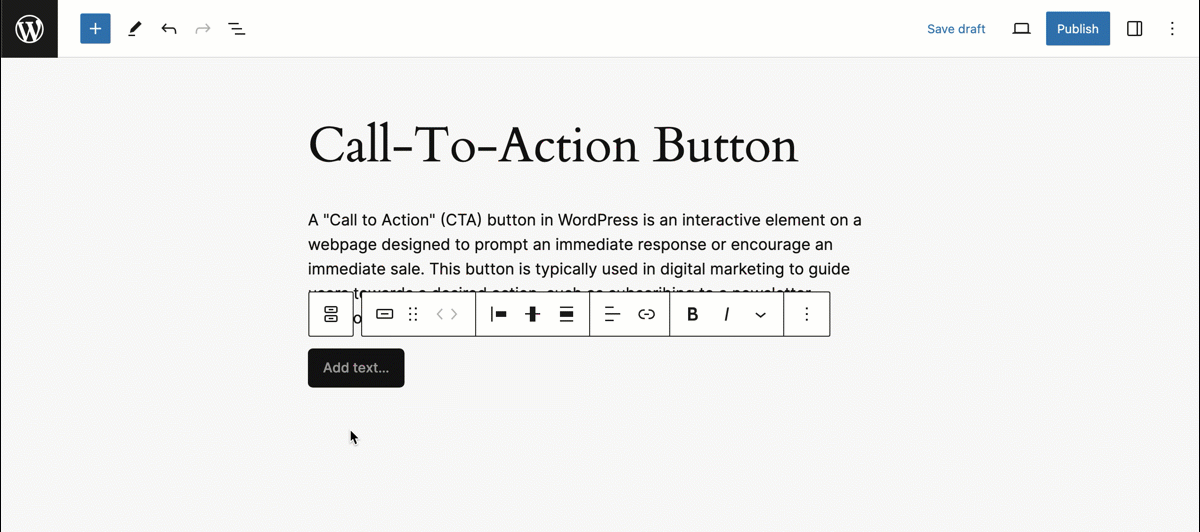
Step 2: Add Text to the Button
Then add text on the button. (Like Download Now, Sign Up, etc).
Step 3: Add URL to the Button
To insert a link, click on the link icon from the button toolbar and add the link there.

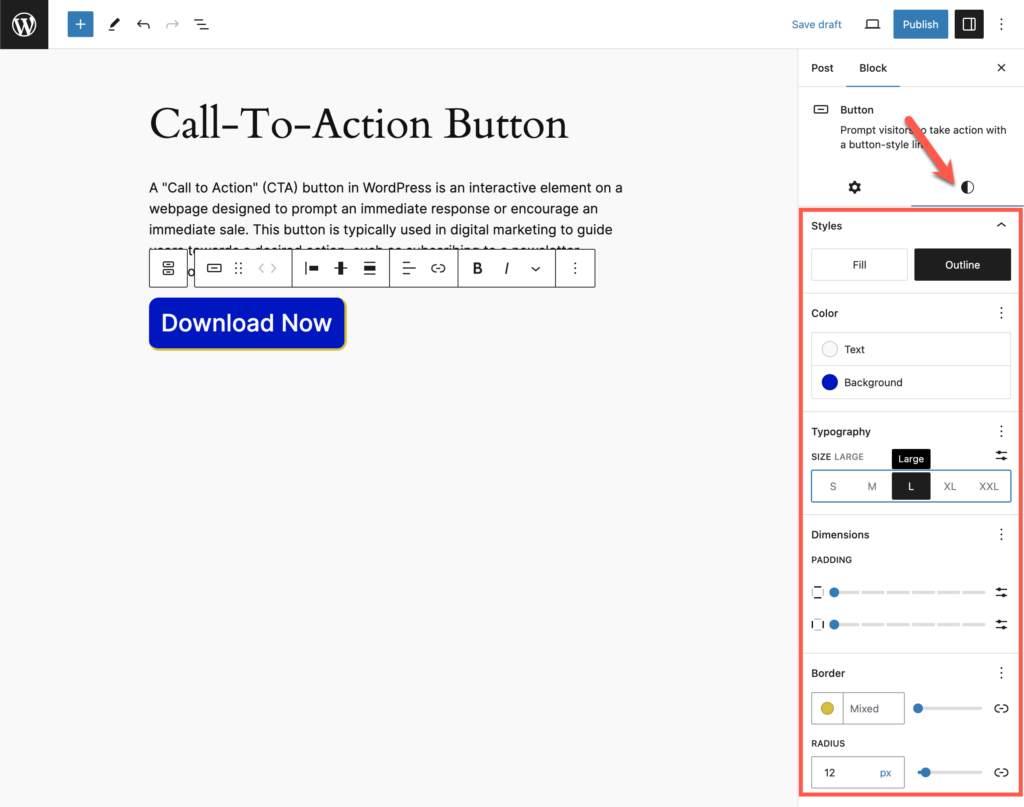
Step 4: Customize the Button
You can change styles, text color, background color, border radius, and link settings of the button from the ‘Styles’ tab of the block options.
That’s it. This is how you can add a simple call-to-action button using the default WordPress block editor.
Adding A Call-To-Action Button Using A Plugin
Now if you want to add more advanced call-to-action buttons, you need to use a button plugin. Ultimate Blocks is a WordPress Blocks plugin that comes with a Button block.
Let’s see how you can add a call-to-action button using the Ultimate Blocks plugin.
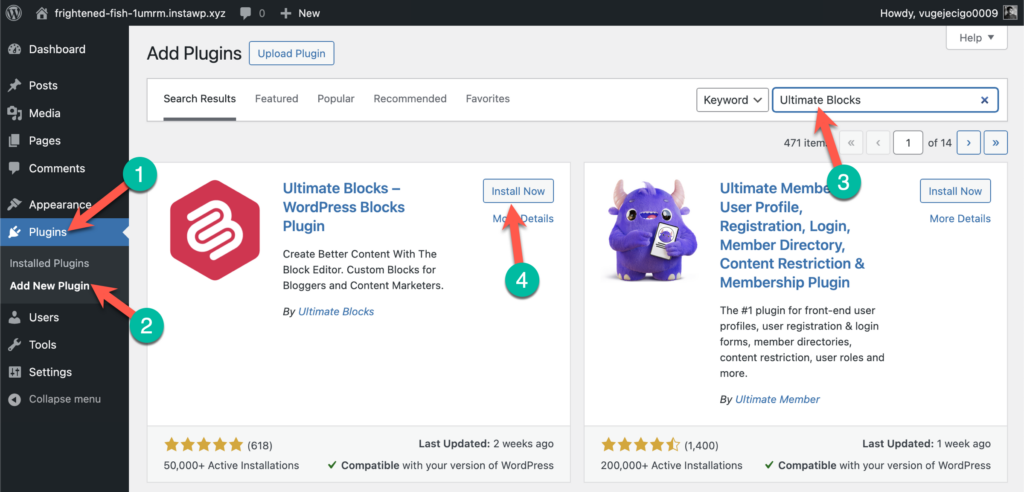
Step 1: Install the Ultimate Blocks Plugin
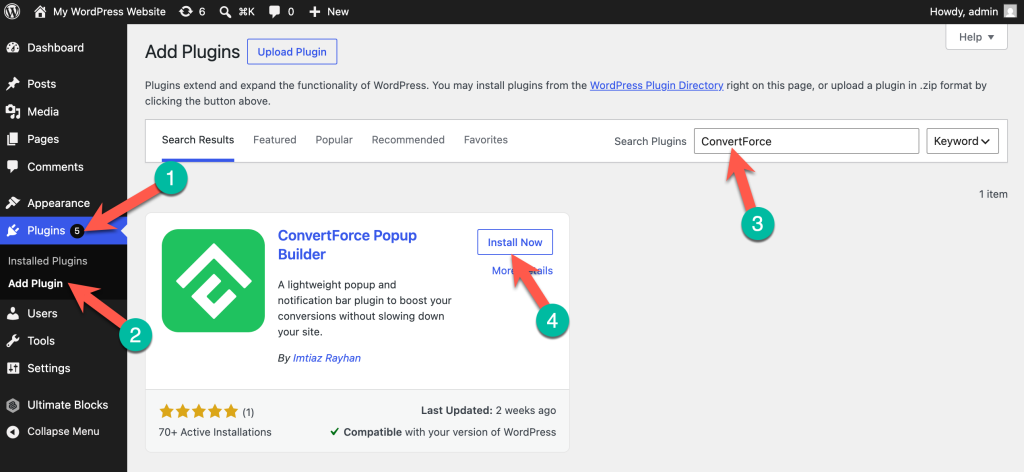
First, you need to install the plugin. Just go to WordPress Dashboard > Plugins (1) > Add New Plugin (2) and search for ‘ultimate blocks’ (3) and click on the ‘Install Now’ button (4).
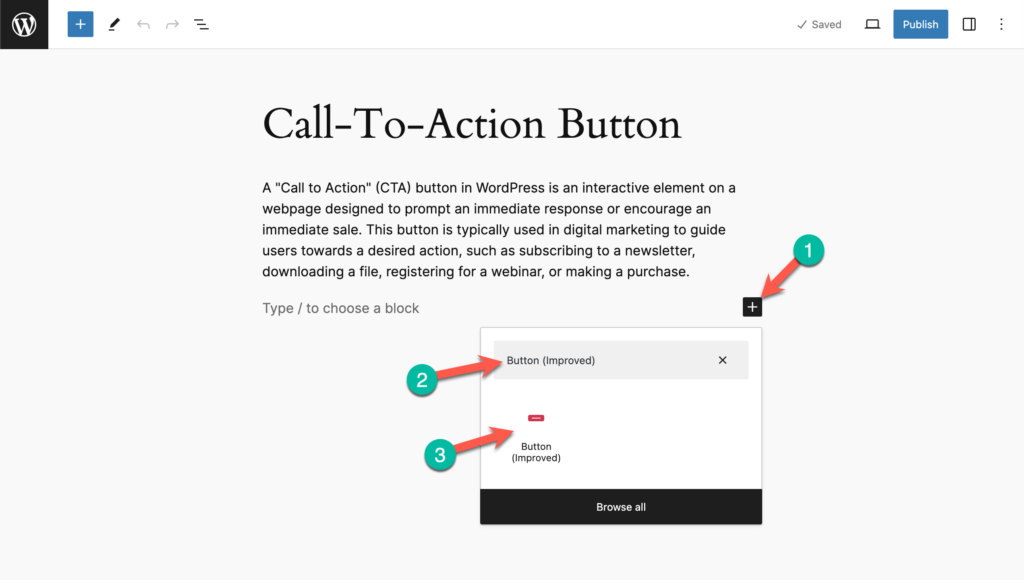
Step 2: Insert the Button (Improved) Block
Now go to the post/page where you want to add the call-to-action block. Then simply click on the ‘+’ sign and search for ‘Button (Improved)’ block.
Step 3: Add Text to the Button
After inserting the block, click on the button to edit text.

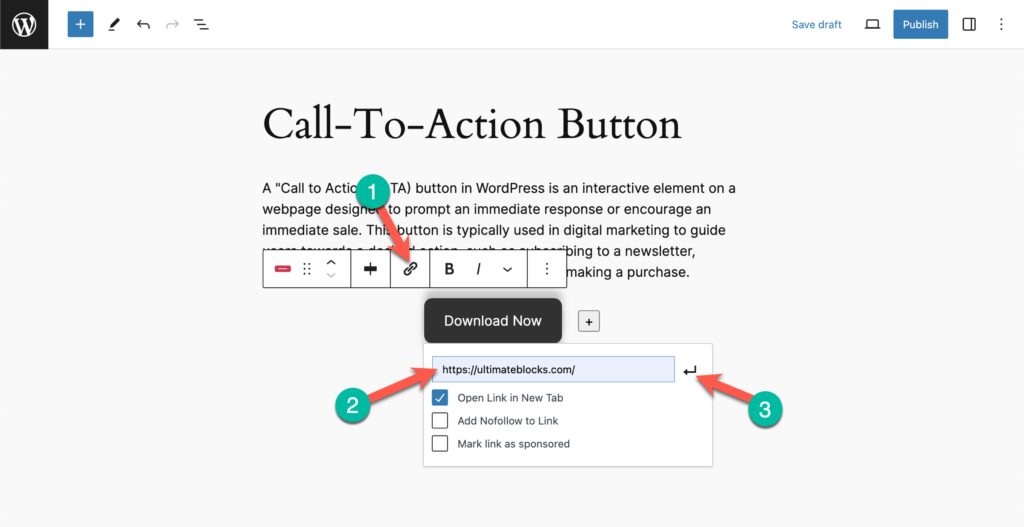
Step 4: Add URL to the Button
You can add a link on the button by clicking on the link icon from the button toolbar.
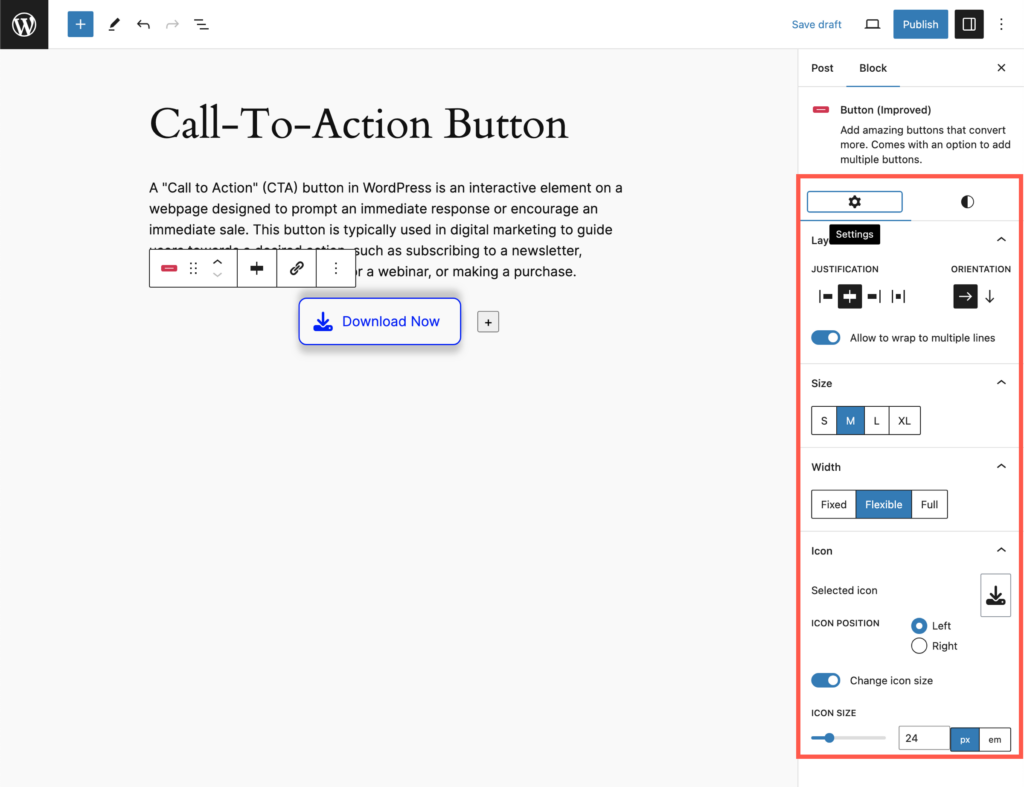
Step 5: Customize the Button
You can change button size, width, link settings, style, icon, colour, colour on hover, and more from the left-hand side options.
This way you can add more beautiful buttons using the ‘Ultimate Blocks’ plugin.
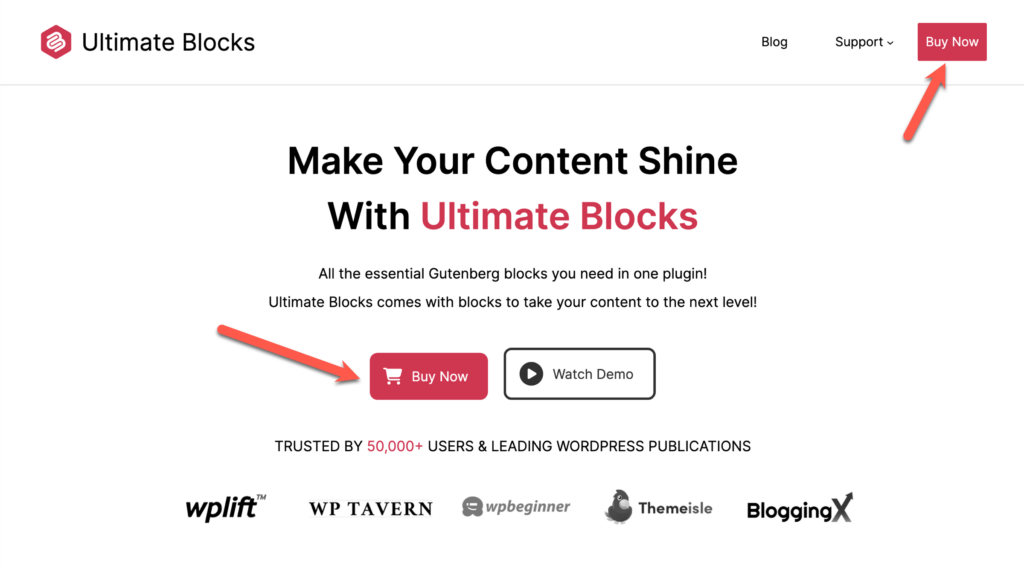
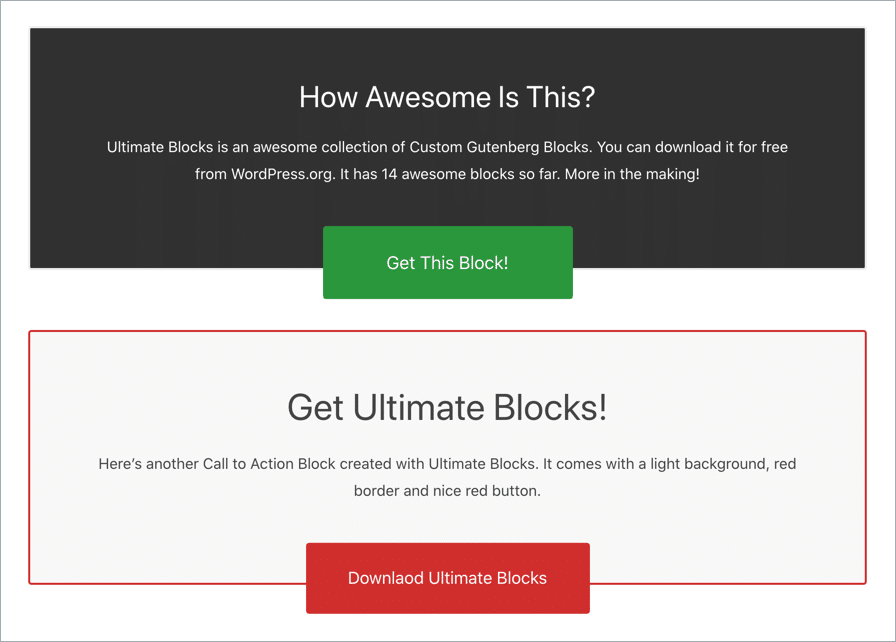
Another great thing about Ultimate Blocks is, it has a ‘Call To Action’ block that lets you add call-to-action buttons like this –
Taking CTA Buttons Beyond Posts and Pages with ConvertForce
The methods above are great for adding CTA buttons inside your posts and pages. But what if you want a CTA that appears across your entire site — not just on a single piece of content?
That’s where ConvertForce comes in. It’s a free, Gutenberg-native WordPress plugin that lets you create CTA campaigns that appear around your content:
- Notification Bars — a sticky top or bottom bar visible sitewide or on specific pages
- Popups — triggered by time delay, scroll depth, or exit intent
- Slide-ins — appear from the corner of the screen as visitors scroll
Think of it this way: Ultimate Blocks puts CTA buttons inside your content. ConvertForce puts them around it. They complement each other well.
Step 1: Install ConvertForce
Go to Plugins → Add New, search for ConvertForce, install, and activate. It’s free on WordPress.org.
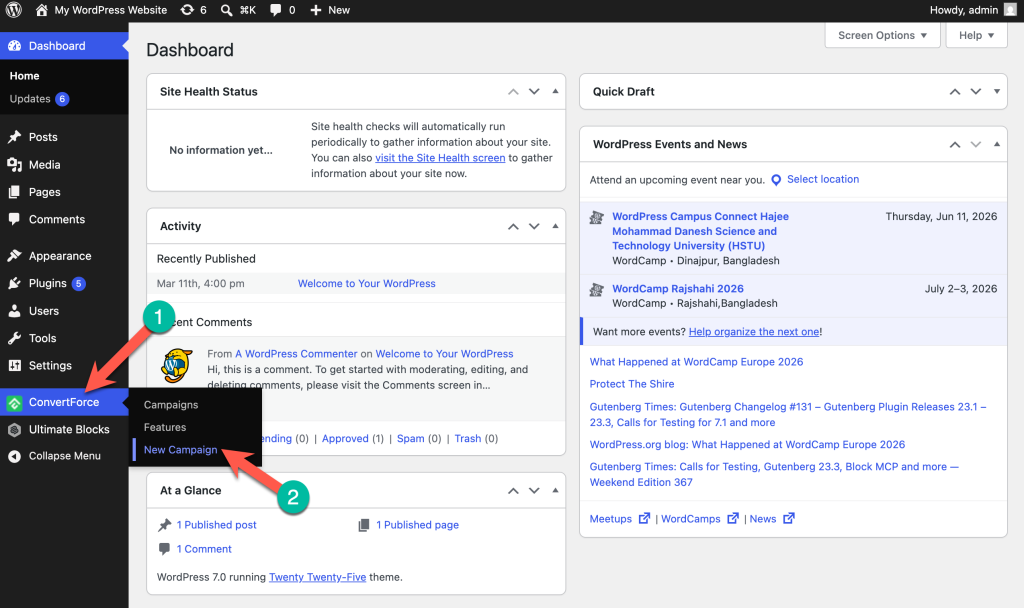
Step 2: Create a New Campaign
Go to ConvertForce → New Campaign.
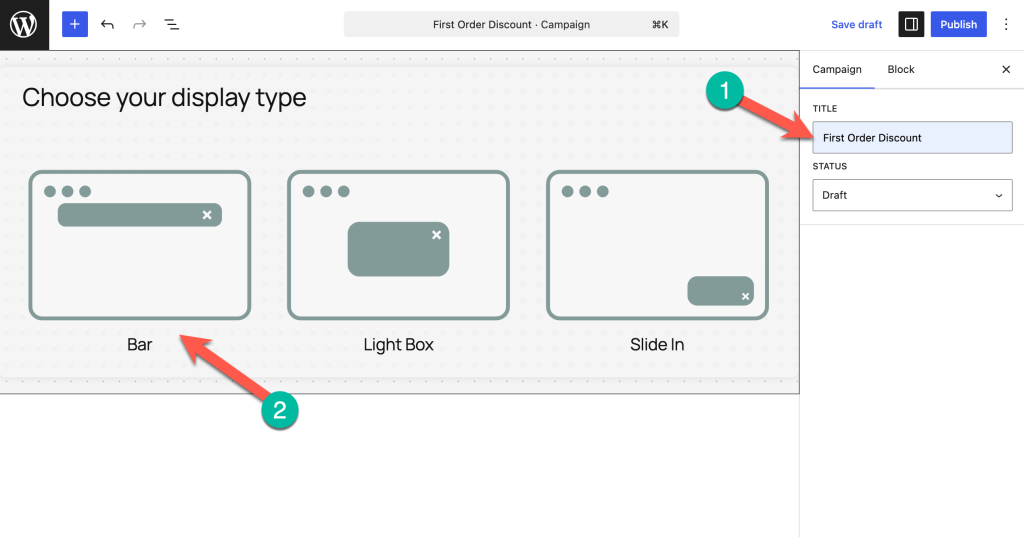
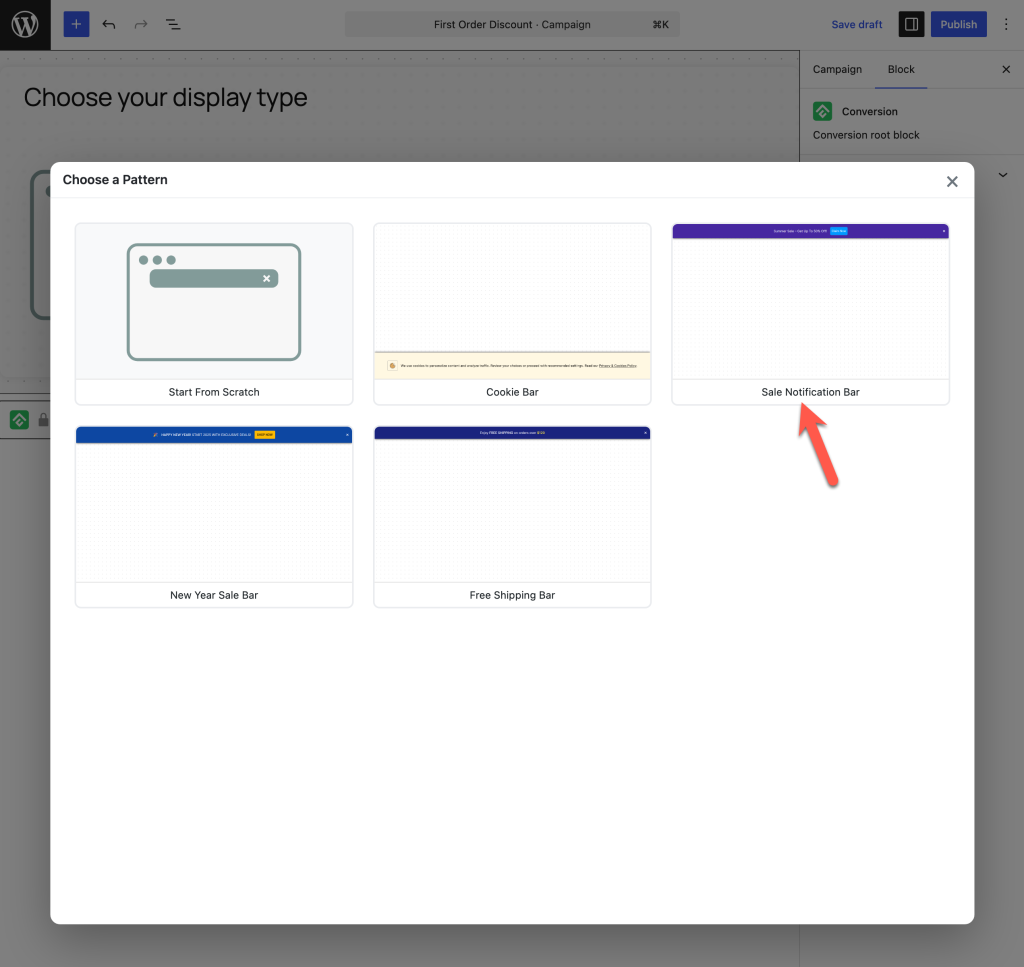
Name your campaign and select Notification Bar as the campaign type. (Popup and Slide-in follow the same process.)
Then choose a pattern with CTA button.
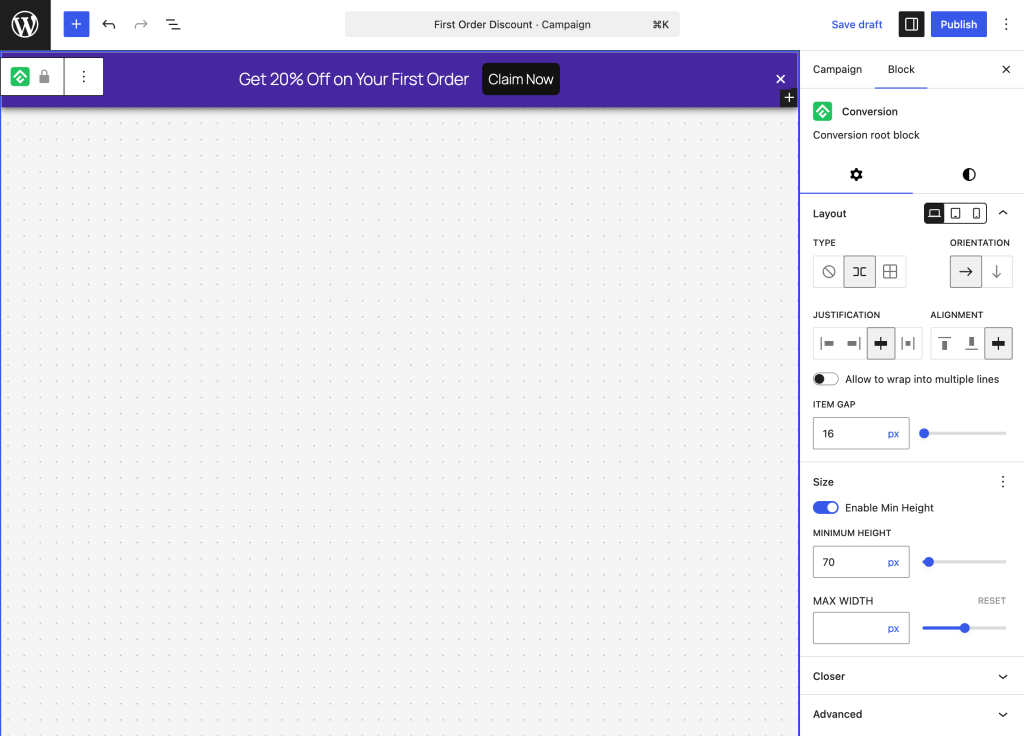
Step 3: Build Your CTA in the Block Editor
ConvertForce uses the standard Gutenberg editor — no separate builder. Add your message and a Button block, set the label and destination URL.
Step 4: Set Display Rules and Trigger
Choose where the bar appears (all pages, specific URLs, certain post types) and set your trigger. The free version includes a Time Delay trigger.
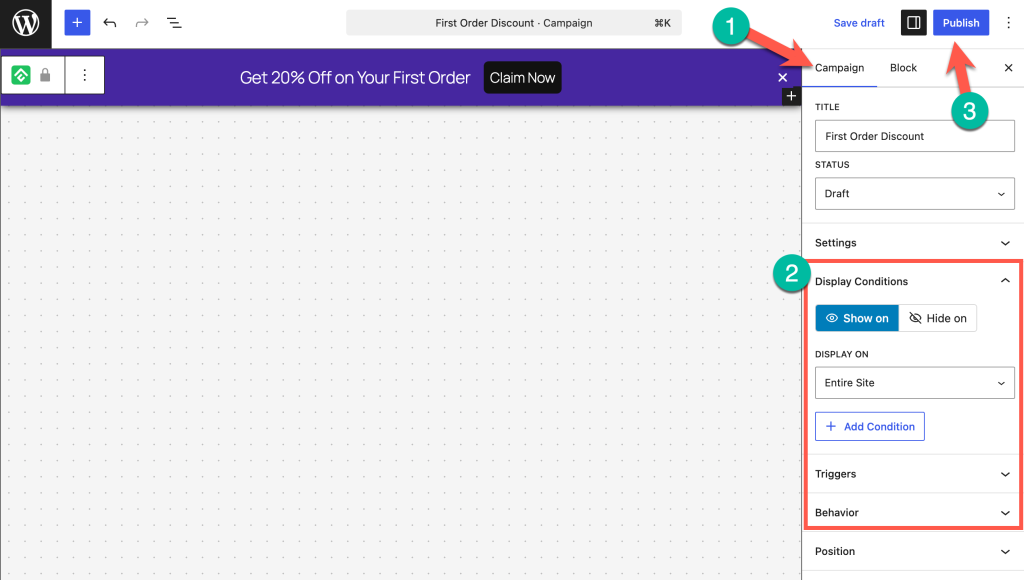
Step 5: Publish
Hit Publish. Your CTA bar goes live immediately across the pages you’ve targeted.
The big advantage over in-content buttons: you set it once and it runs everywhere. No editing individual posts every time you run a promotion or update your offer.
More Call-To-Action Buttons WordPress Plugins
If you want to add buttons with more functionality, you can consider using a dedicated button plugins. Here are some of the popular button plugins.
- MaxButtons: MaxButtons is the most popular WordPress button plugin that lets you customize buttons in many ways. It comes with a lot of beautiful button packs. And it’s integrated with the popular page builders.
- Buttons X: Buttons X is a powerful button builder plugin for WordPress. It comes up with a lot of button variations. It has some amazing features like tooltips, animations, dropdowns, etc.
- Forget About Shortcode Buttons: If you are using the Classic Editor, this is the best button plugin for you. It lets you add stylish buttons without any coding.
Video Tutorial
Conclusion
So this is how you can add call-to-action buttons to your WordPress posts/pages.
If you have any questions regarding this, feel free to ask us via comment. And if you’ve found this post useful, please consider sharing this post from your favorite social platform.
Related Posts:


Leave a Reply