
Have you ever visited a website and found yourself captivated by animated text that seems to dance across the screen? From eye-catching bounces to smooth fades and dynamic slides, these popular animation effects are visually appealing and play a crucial role in attracting and retaining visitor attention. If you’re wondering how to harness the power of these animations for your WordPress site, you’re in the right place.
In this post, we’ll dive into the surprisingly simple world of adding animated text to your WordPress site. Whether you’re a seasoned webmaster or a beginner, you’ll find the steps easy to follow. We’ll explore a variety of effects and tools, ensuring that by the end of this guide, you’ll be equipped to bring your website to life with beautifully animated text.
So, are you ready to transform your site with engaging animations? Let’s get started!
Adding Animated Text in WordPress Using Ultimate Blocks Plugin
Adding an animated text is quite easy with the Ultimate Blocks plugin. Here, we will use the ‘Advanced Heading’ block of the Ultimate Blocks plugin. Follow the below steps to do it:
Step 1: Install the Ultimate Blocks Plugin
Even though Ultimate Blocks has a free version, this specific ‘animateion feature of the Advanced Heading block is only available in the Pro version.
To get the pro version, head to Ultimate Block’s website and get your desired plan. Once you’ve bought the plugin, go to your email inbox and download the plugin.
Now go to your WordPress Dashboard, navigate to Plugins > Add New Plugin, and click on the ‘Upload Plugin‘ button.

In the next step, select the plugin file from your computer and click on the ‘Install Now‘ button. And activate the plugin.
Then click on the ‘Complete Ultimate Blocks Pro Activation Now’ link and enter your license key. Then activate the key.
Step 2: Insert Advanced Heading Block
Open the page/post where you want to add animated text. Click on the ‘Add Block’ button and search for the ‘Advanced Heading’ block.

Write whatever you like to in the text field.

Step 3: Animate the Text
Now, open the block settings and click on the animation option.

Choose your desired animation.

As you add the animation, you will be able to customize the settings for the animation.

When customizing the animation, make sure you preview it. When you are done, your animated text will look something like below.

Adding Animated Text in WordPress Using Animated Text Block Plugin
Follow these simple steps and create an animated text on your WordPress site.
Step 1: Install the ‘Animated Text Block’ Plugin
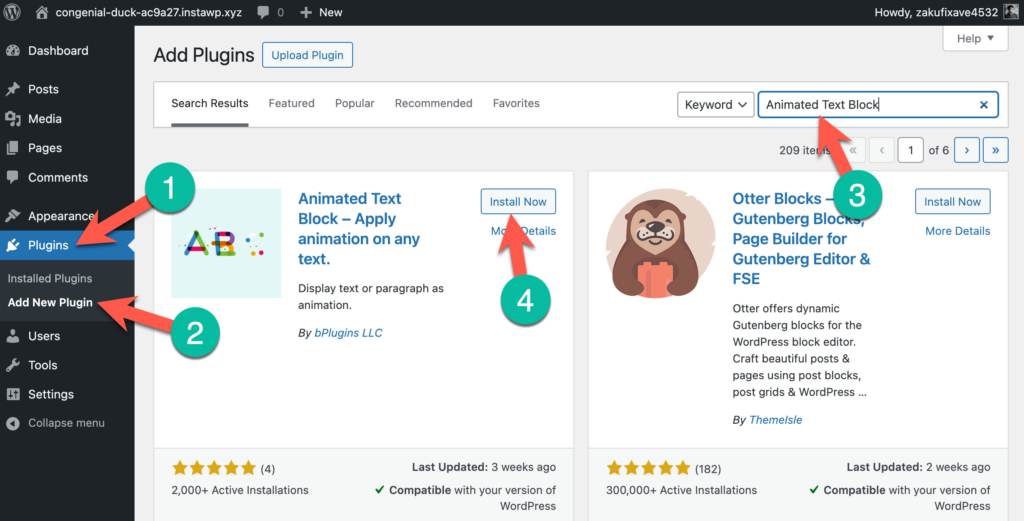
Go to your WordPress dashboard and navigate to Plugins > Add New Plugin. Then search for ‘Animated Text Block’ and install & activate the plugin.
Step 2: Add the Animated Text Block
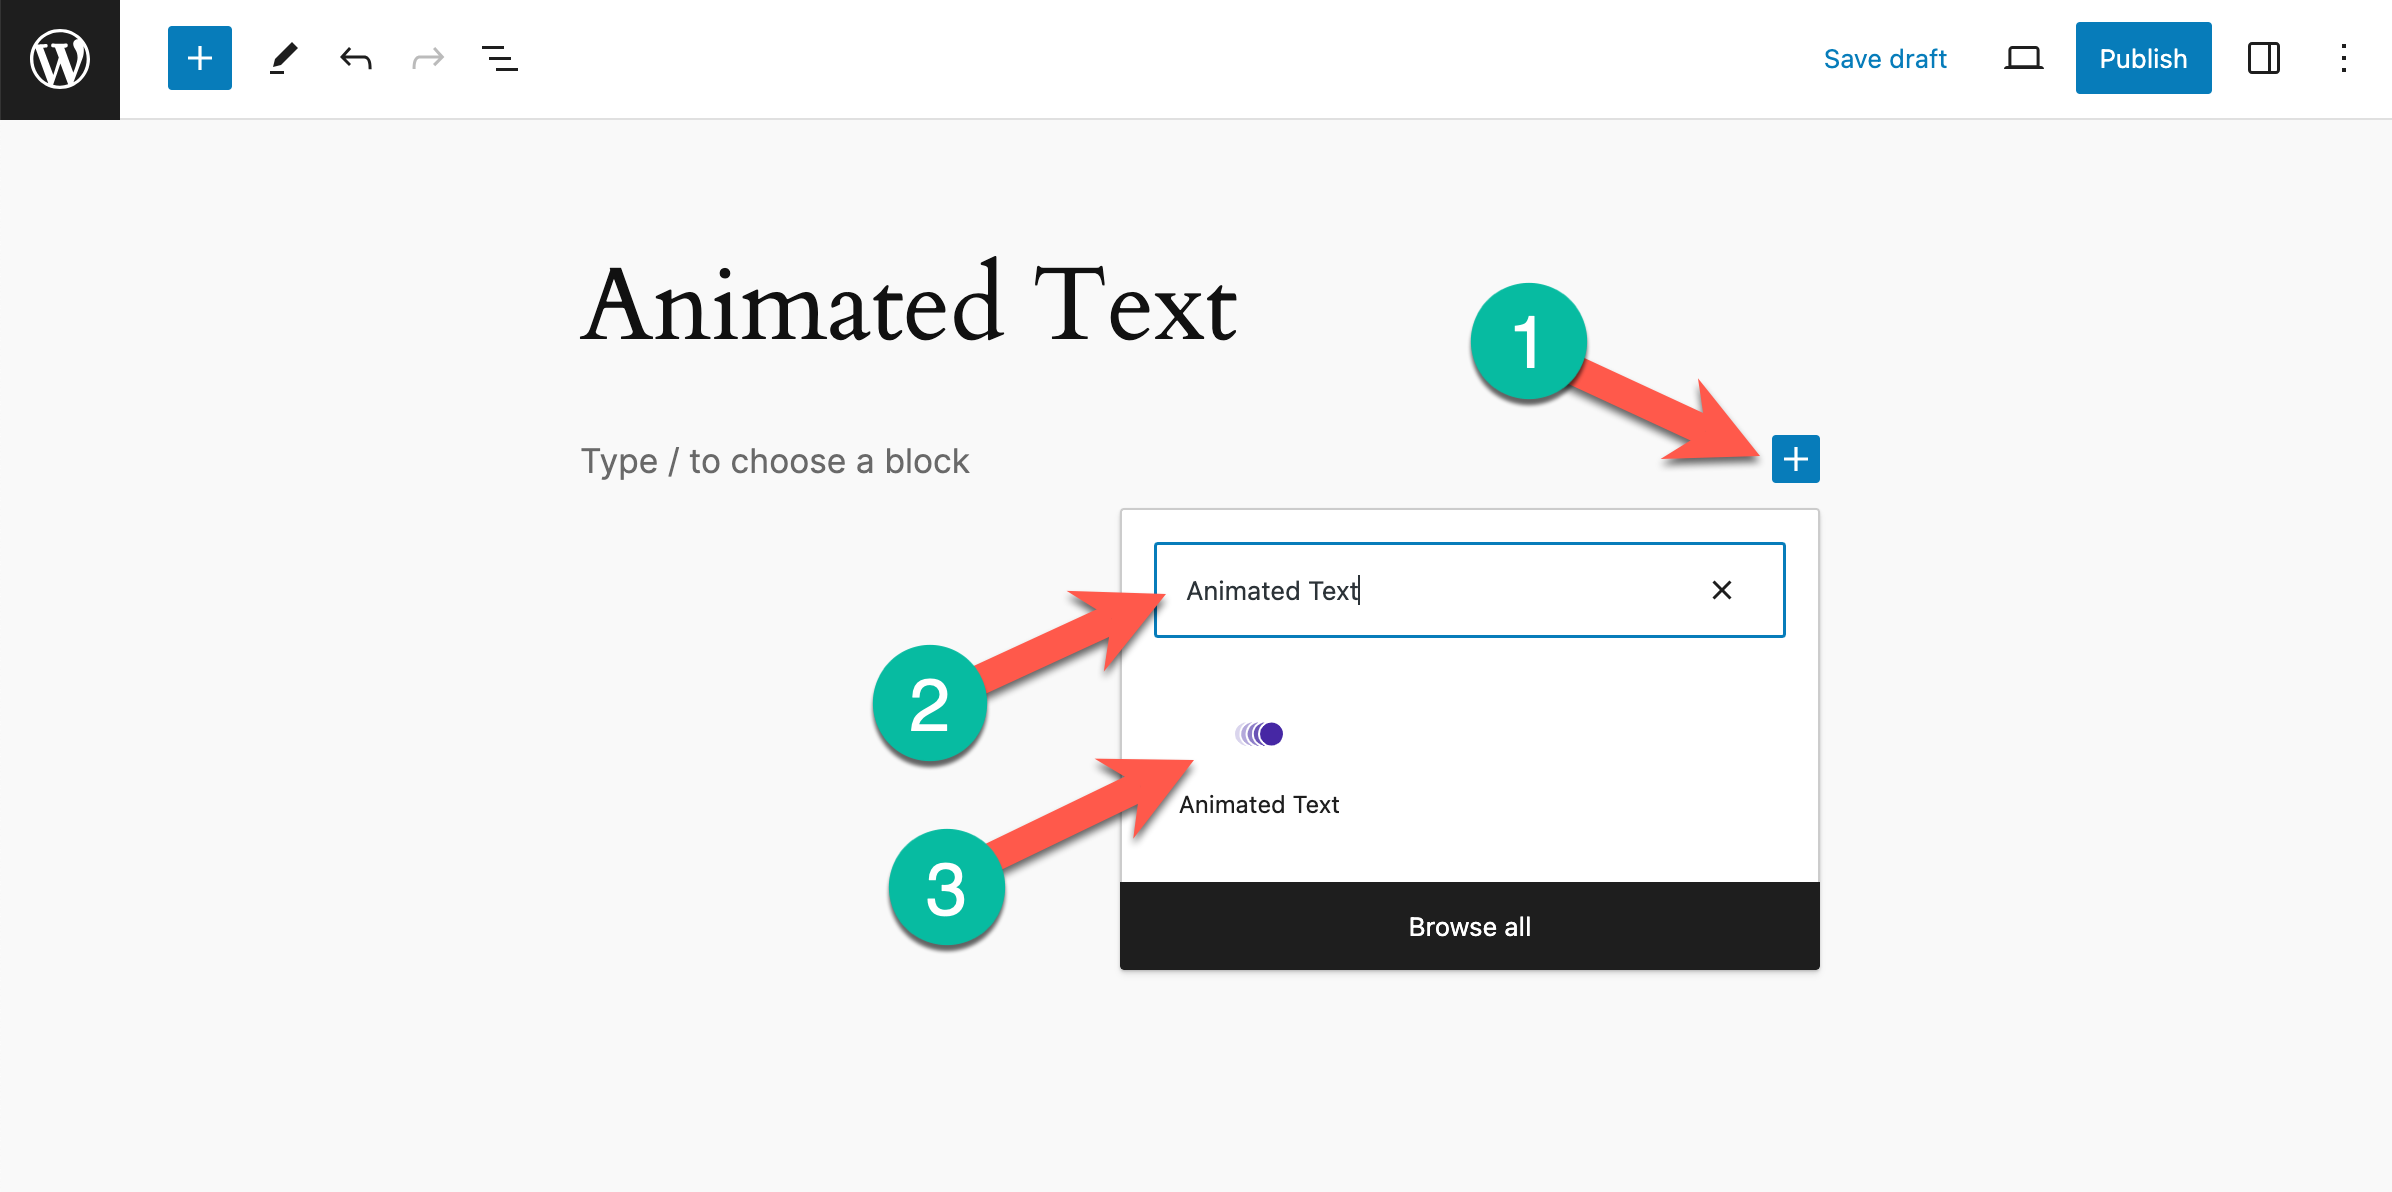
Now go to the post/page where you want to add the animated text. Then click on the + sign and search for ‘Animated Text’ and click on it to insert the block.
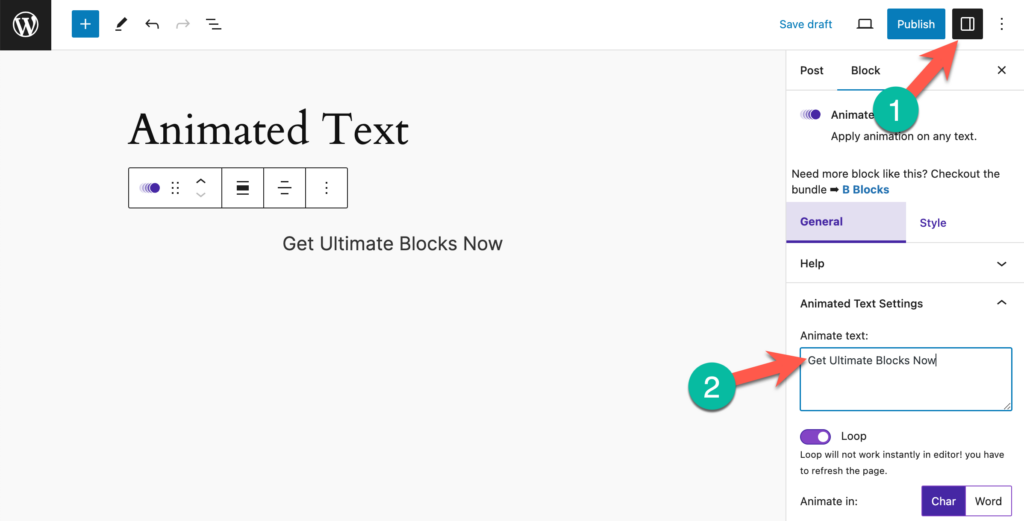
Step 3: Add Your Desired Text & Customize the Settings
Now, click on the settings icon from the higher right-hand side corner. Then add your desired text to the ‘Animate Text’ field.
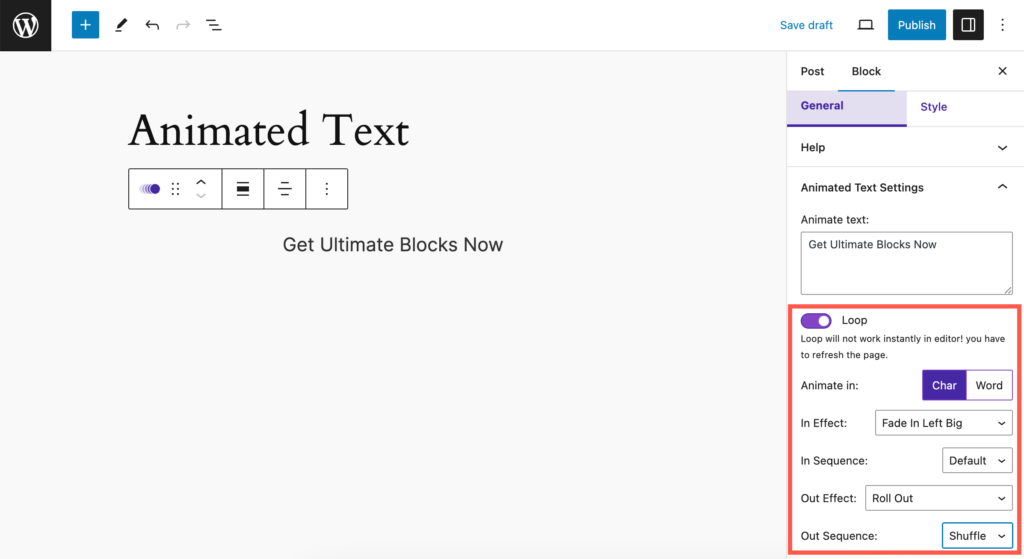
Afterward, you can customize your animation. There is a lot of options to style your animation. You can loop your animation, animate characters or words, and put different in or out effects.
You can also customize the background color, typography, color of animation, padding, border, etc. All these options are available in the Style tab.
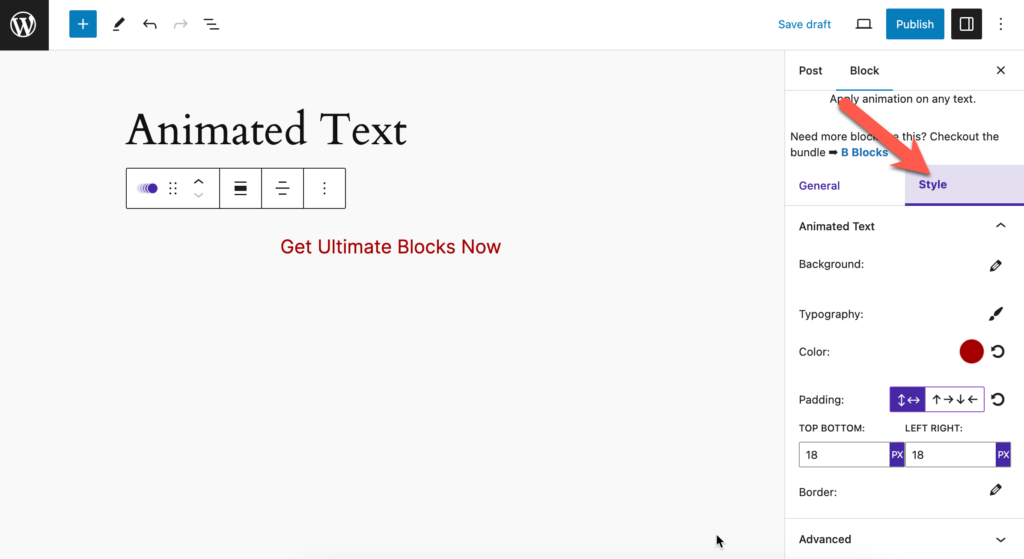
Afterward, save your changes and you will see beautiful animated text on your website.
Final Words
Hope you have understood both processes; choose whichever you like. Now, animate as many texts as you want in your WordPress website. If you have any problems understanding the process, ask me, and I will help you to animate your text.
If you liked the post, please share your post with your friends, and don’t forget to share your thoughts in the comment box below.


Leave a Reply