
A hero section is one of the important sections of any website. It’s the perfect place to grab the attention of viewers and encourage them to explore further. Creating an exciting hero section is always challenging.
If you don’t know how to create one, then this guide is for you. Here, I will show you how to create a stunning hero section. After then, you will be able to create one by yourself.
Let’s start.
Creating a Hero Section in WordPress
Here, I will use the WordPress default editor ‘Gutenberg’ to create a hero section. I am showing the full process step by step.
Step 1: Create a New Cover Block
First, create a new block by clicking the ‘Add block’ button (or plus ‘+’ button). Type ‘cover’ in the search field and insert the block by clicking on it.
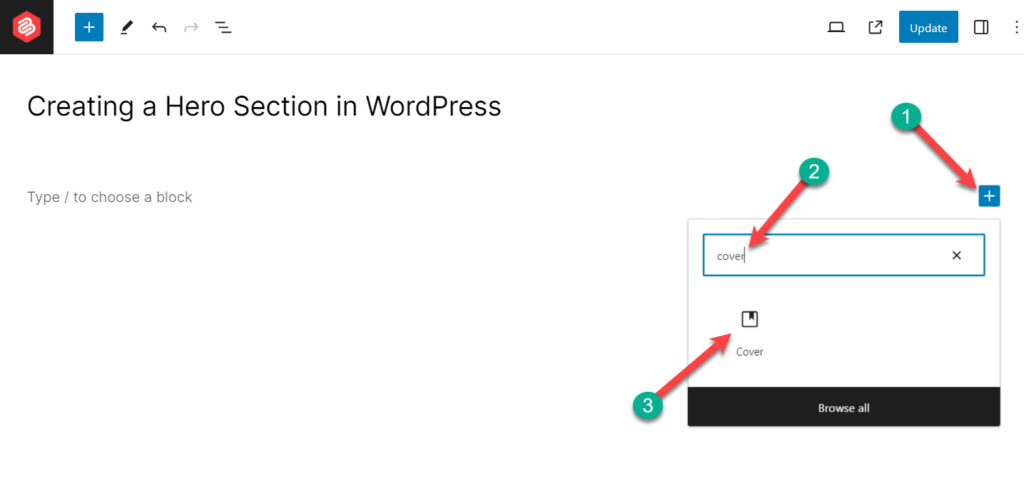
Or you can press the ‘Enter’ button and then type ‘/cover’ and again press Enter to insert the block.
Step 2: Add a Background Image
After creating the cover, it’s time to add a background image. You can either drag an image to the block area or click on the Upload button and upload your preferred image.
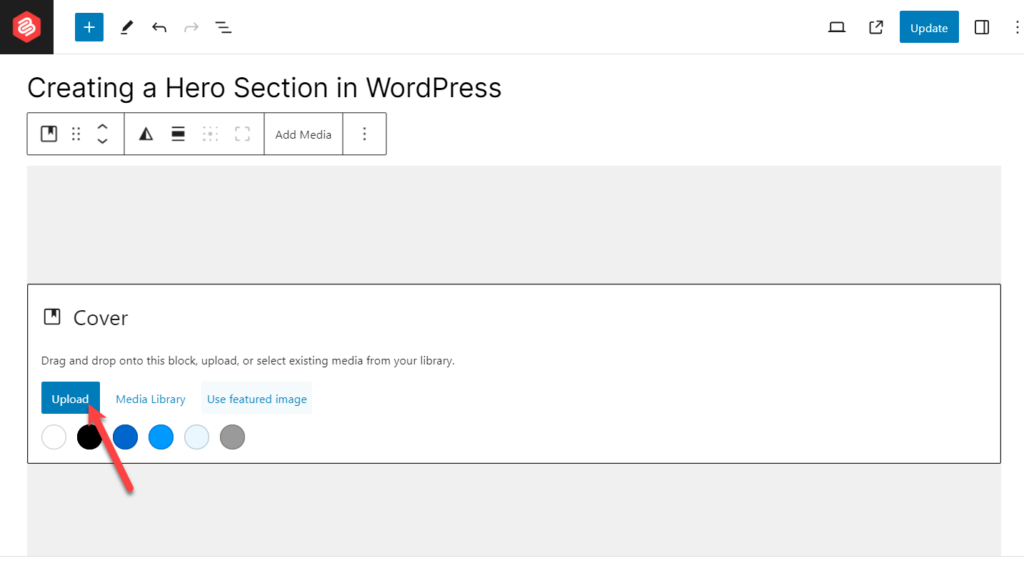
If you already have your preferred image uploaded on the website, then click on Media Library and select the image.
(If you like to use any color as the background color, then click on any color, and it will be applied on the background.)
Click on the block, and the toolbar setting for the block will be revealed. From there, you will be able to change position, alignment, height, duotone, and other adjustments.
There are other options in the settings panel. Click on the settings button on the top right, and you will find all the settings options.
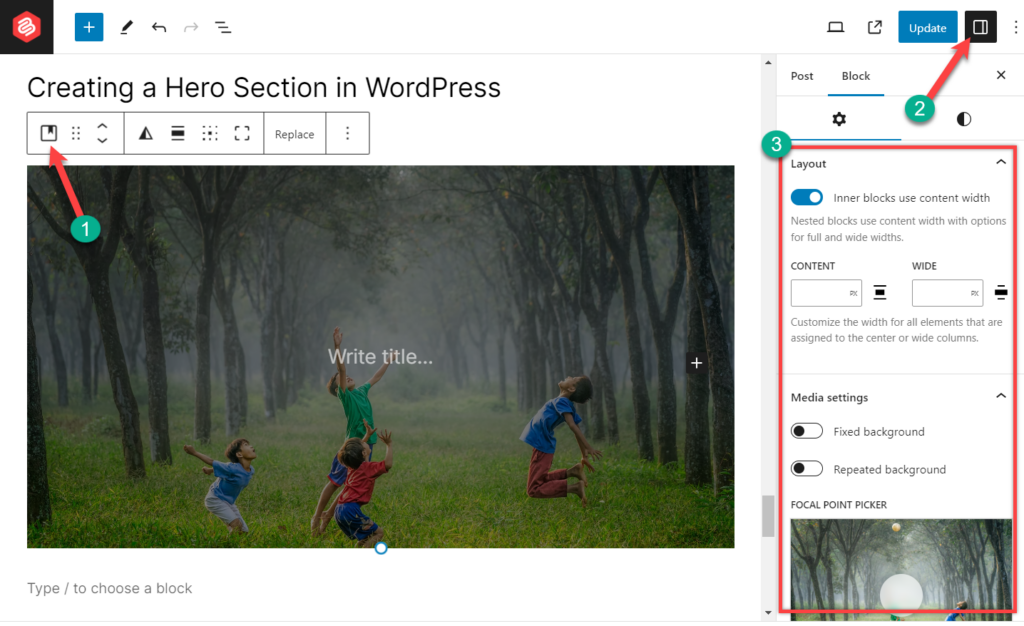
The fixed background option allows you to have a parallax effect which allows it to stay fixed behind the overlaid text when scrolled.
A repeated background option will shrink the image and will focus on one part only. You can choose where to focus from the ‘Focal point picker’. There is also advanced options, if you like you can use those.
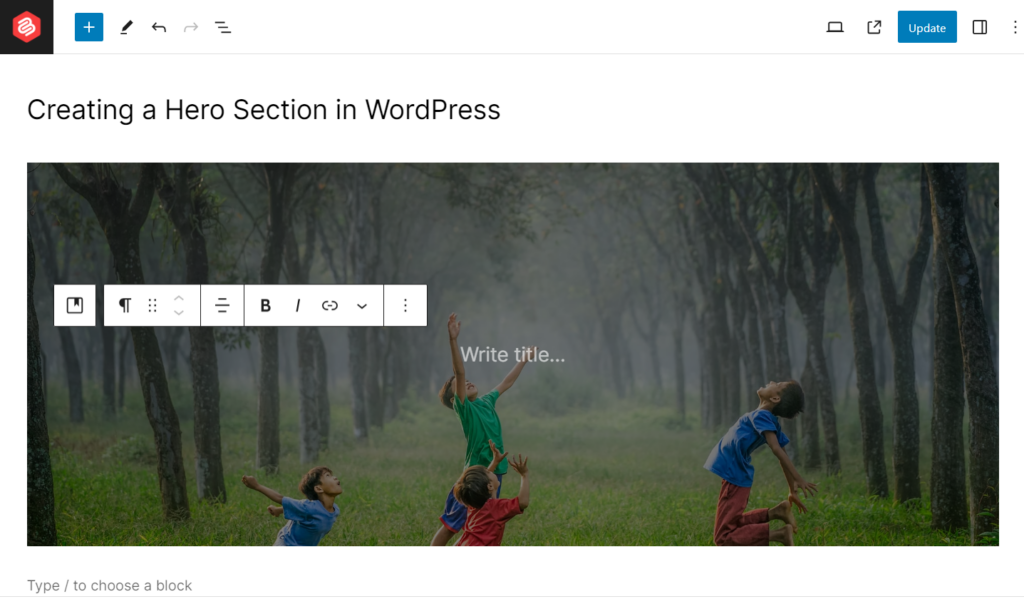
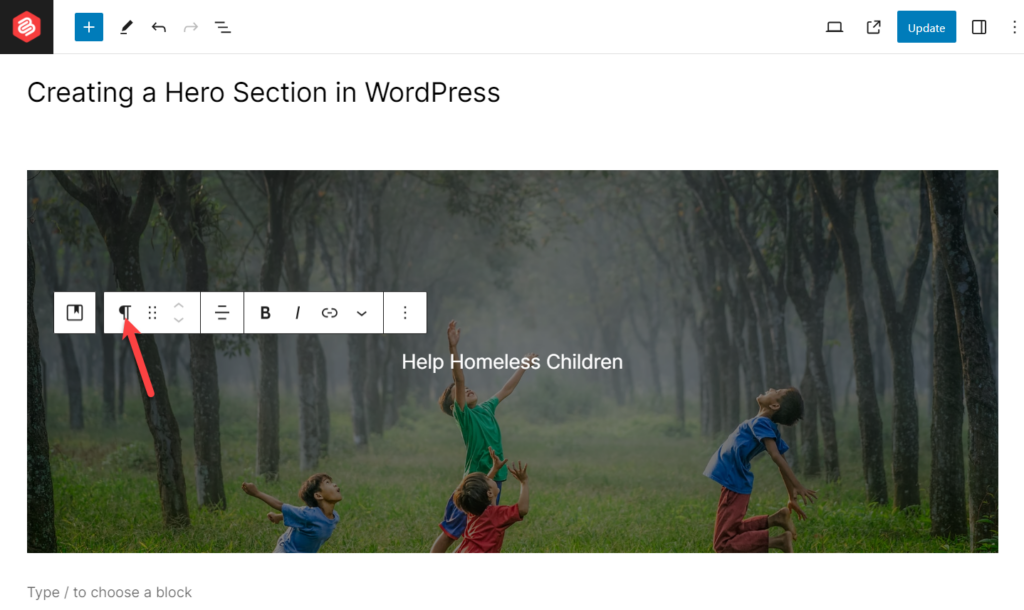
Step 3: Add a Headline
After customizing the background, it’s time to add a headline. You will find a text in the middle saying ‘Write title’; click here and add your headline.
After adding the headline, click on the ‘Transform To’ button and select ‘Heading’.

Now change the heading size to H2 (you may select any heading size) and then customize the settings of the heading block.
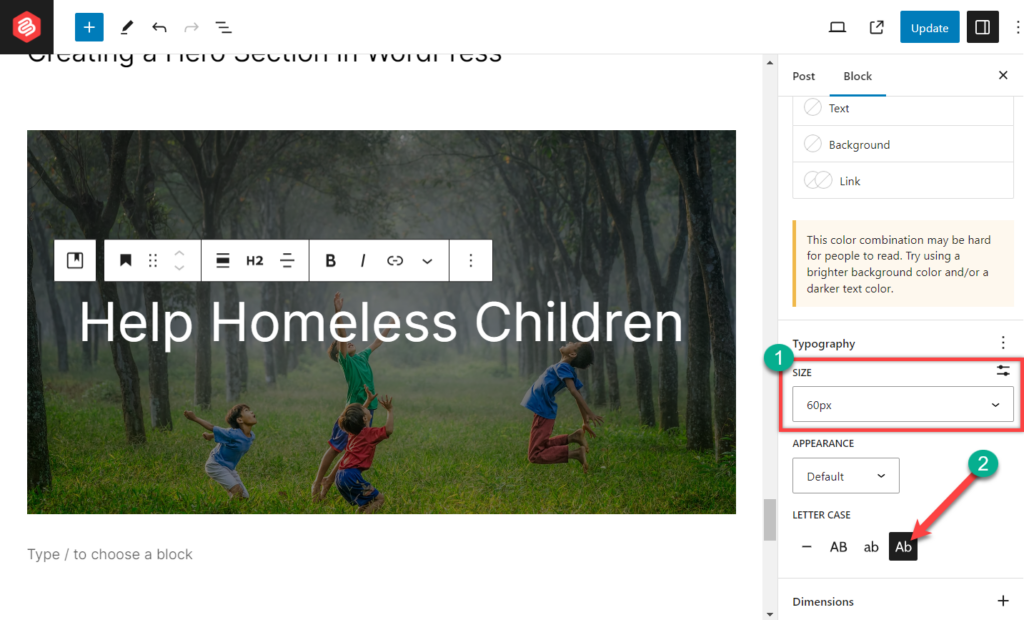
For the hero section, it is recommended to set the typography as extra large and the letter case as ‘Ab’. You may customize the appearance and dimension according to your wish.
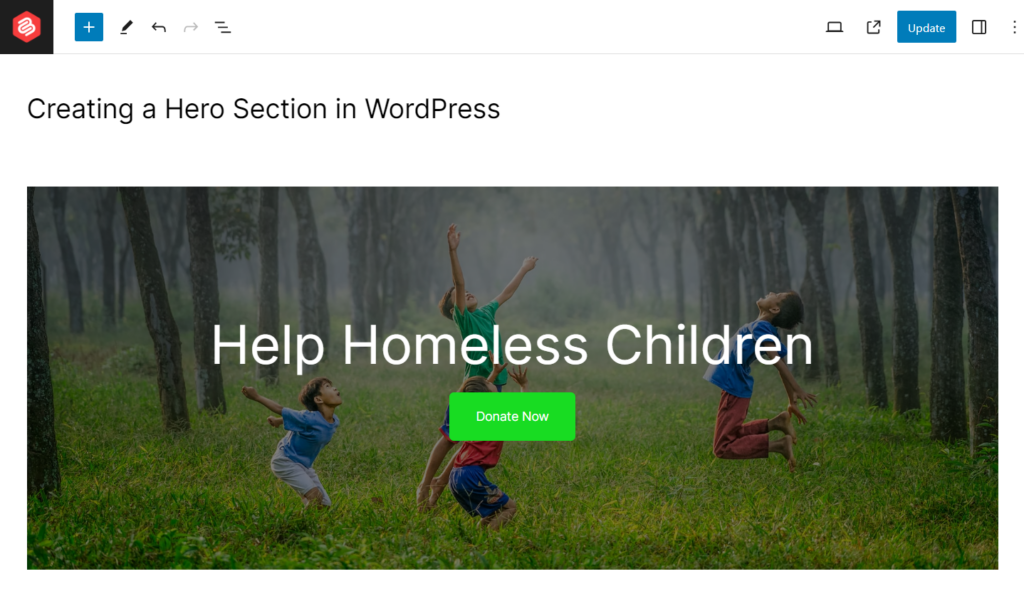
Our hero section has been created this far.

Step 4: Add a Call to Action Button
Now all we have to do is add a call to action button, and our hero section will be ready.
After the heading section, hit the ‘Enter’ button or click on Add block button. Search for the ‘button’ block and insert it by clicking on it.
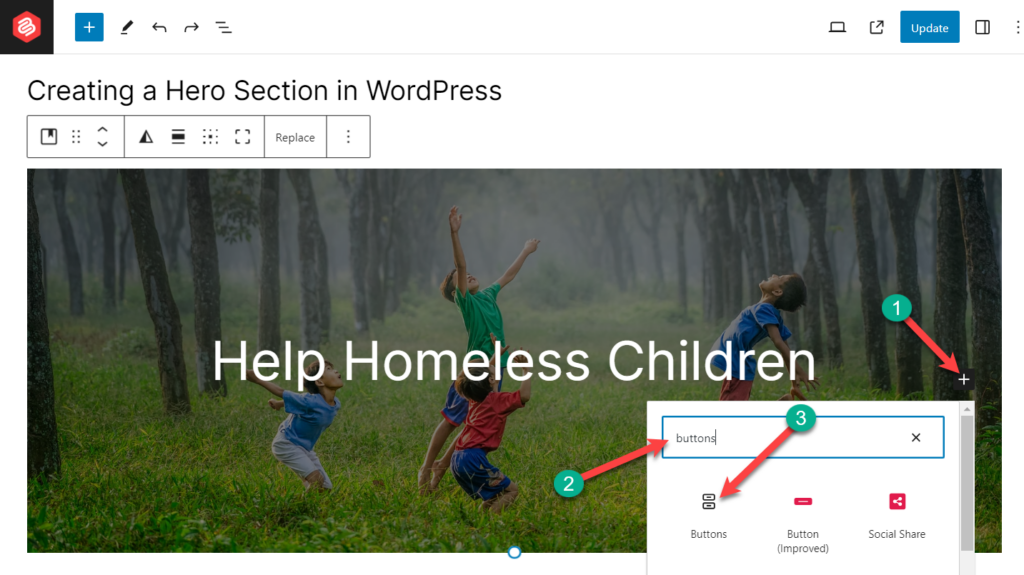
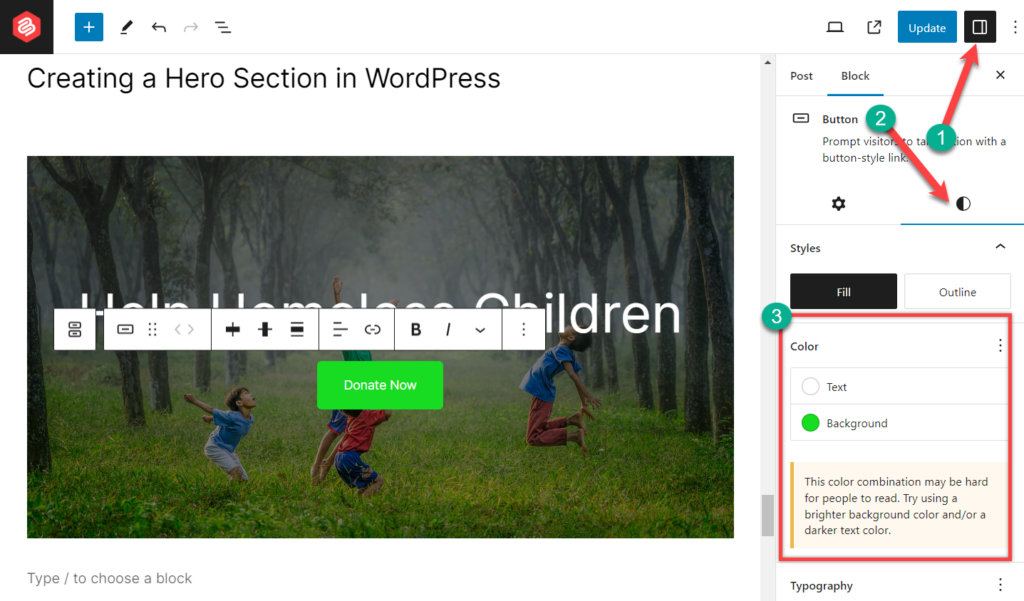
Type the text for your button. I am naming the button ‘Donate Now’; you may give any name according to your context.
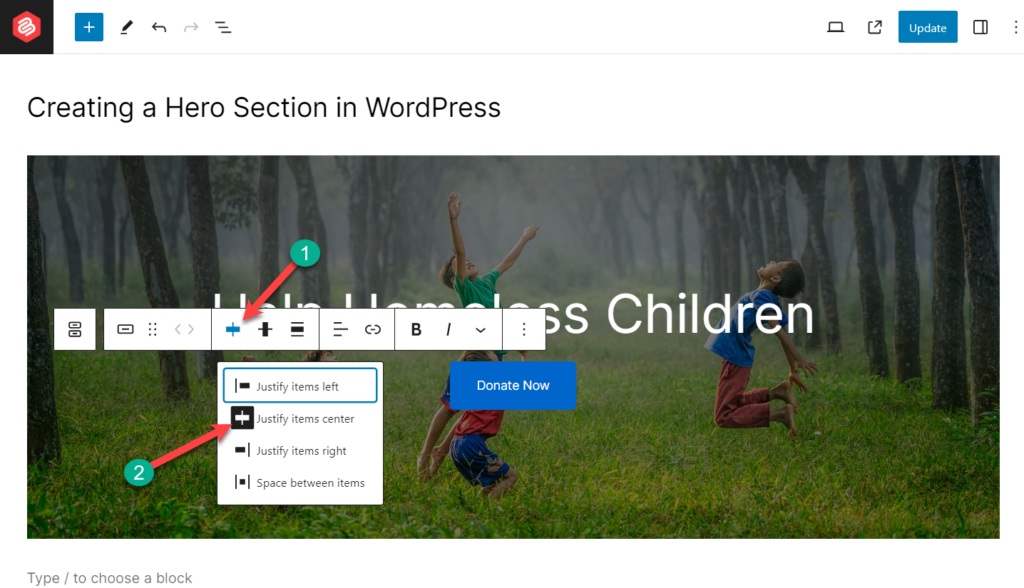
Click on the justify button and justify items center. This will bring your button to the center of the hero section. But you may choose any of the options according to your need.
To customize the button further, click on the setting and then ‘Styles’. From here, you can customize text color, text background, typography, etc.
After the customization, our Hero section looks like this.
Final thoughts
Creating a hero section with Gutenberg is simple and very easy except for customization limitations.
Isn’t it easy to create a Hero section? It’s time for you to create one. You can also create a hero section using page builders or any other plugins. But it may slow down your website or have an impact but it provides you with lots of customization options.
If you liked the post, then share it with your friends, and don’t forget to leave your thoughts in the comment box below.


Leave a Reply