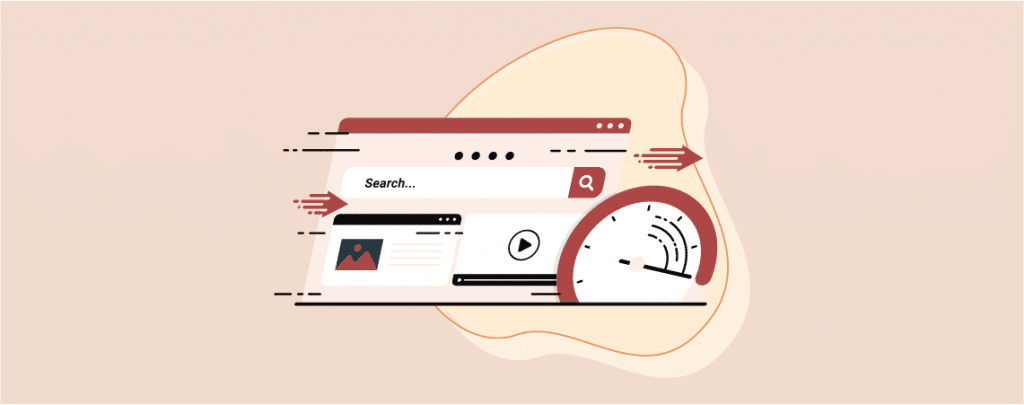
Website feeling sluggish? Slow loading times can frustrate visitors and hurt your search ranking. Well, this may be happening due to page speed. If your website takes too long to load, then your visitor might exit your site without browsing.
Your page load time depends on several factors, and browser caching is one of those. If you don’t know much about browser caching and fix leverage browser caching warnings, then this post is for you. This post unveils the secrets to fixing these warnings, unlocking faster page speeds and a happier user experience. Get ready to boost your website’s performance and watch your visitors stick around!
Well, let’s check it out.
What is Browser Caching?
Caching is saving data so that it can be used at a later time for faster data access. Browser caching is one type of way to improve website loading speed. When browser caching is enabled, a copy of your browser pages is saved locally.
This makes the loading of the website very much faster and reduces the server load.
Where to Check For Fix Leverage Browser Caching Warning?
Fix leverage browser caching warning will occur when you run a website speed test. If you don’t know where to run a speed test, then check this detailed guide. If your browser caching is enabled, then you won’t get any messages. Otherwise, you will get a warning.
Sometimes, you might also get a warning saying that your efficient cache policy is not working. Both of these warnings are the same. Enabling the cache will solve the problem.
Fix Leverage Browser Caching Warning Easily
To easily fix leverage browser caching warnings, you can try two methods. You can either use a plugin or do it manually by using custom coding. Custom coding can take time, and if you do something wrong, your website may stop working.
Therefore, I recommend using the plugin, and it will take only a second. You can use any caching plugin, but LiteSpeed Cache is very popular.
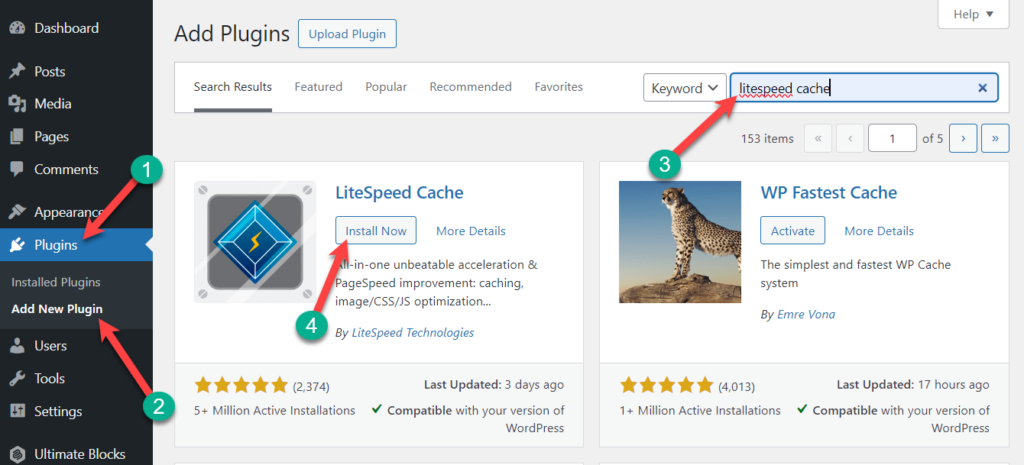
Step #1: Install LiteSpeed Cache Plugin
First, install the LiteSpeed Cache plugin from the WordPress plugins directory. Don’t forget to activate it.
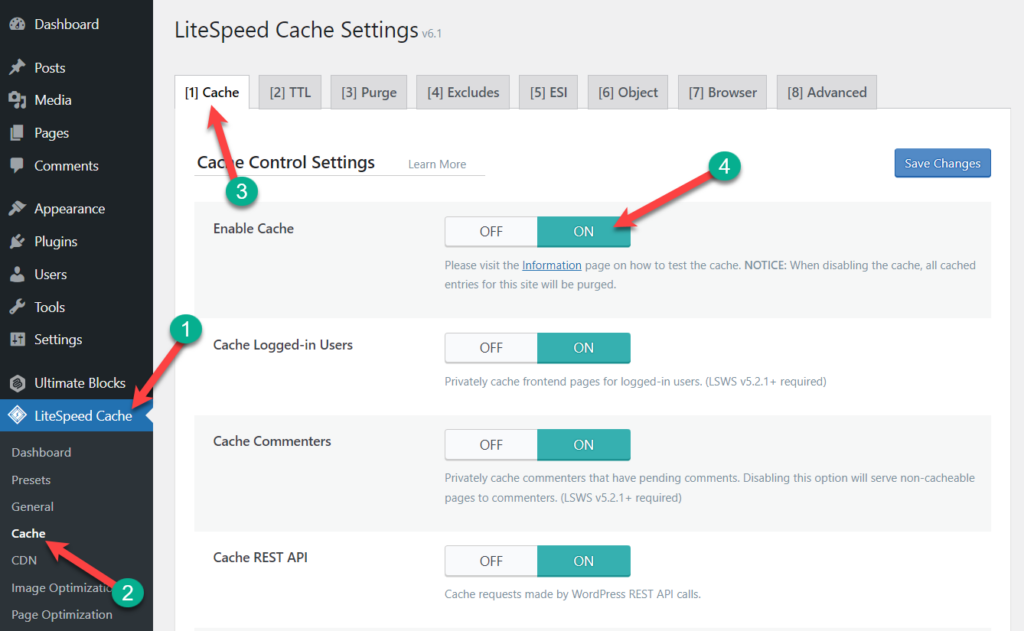
Step #2: Enable Cache Option
Now navigate to LiteSpeed Cache -> Cache. Make sure you enable the cache option and cache mobile option.
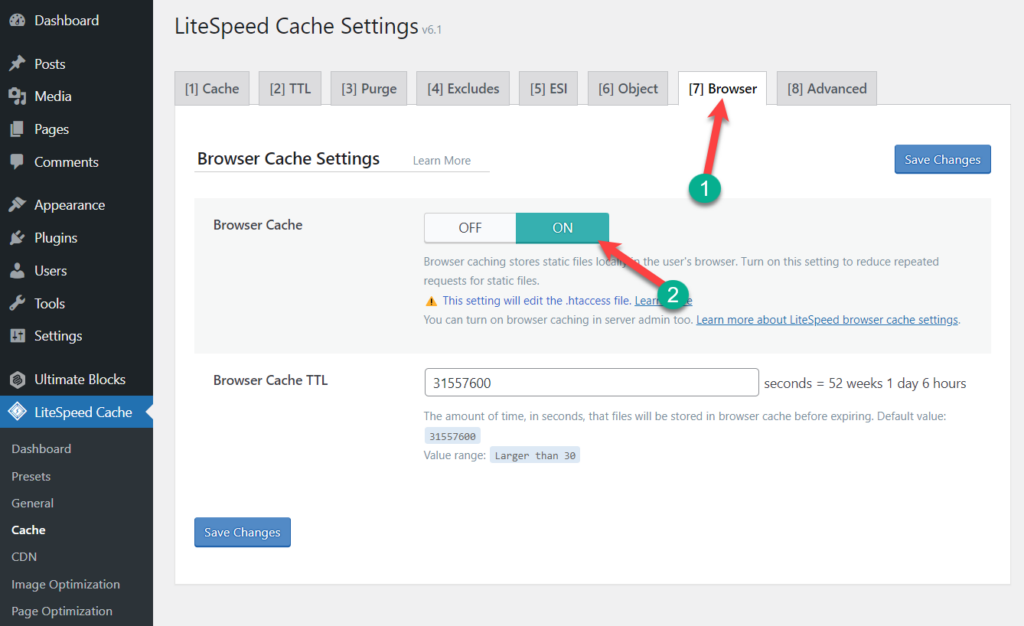
Now toggle to the browser tab and enable Browser cache. Don’t forget to click on the save changes button.
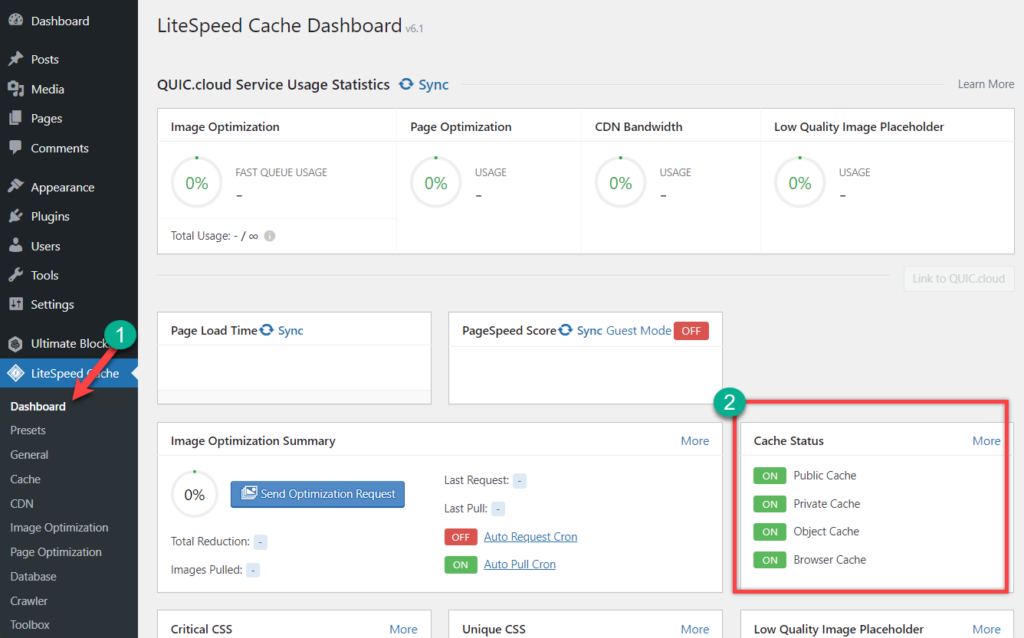
Step #3: Check Status
Upon successful cache activation, you will see the green status of the cache in the dashboard of LiteSpeed Cache.
Final Words
That’s it, now your site will perform faster, and I hope you have learned how to fix leverage browser caching warnings in WordPress. If you liked the post, then please share it with your friends. Don’t forget to share your thoughts in the comment box below.


Leave a Reply