A WordPress page is a specific type of content created to display static and evergreen content on a website. WordPress is widely known as a popular blogging platform where users regularly publish new posts with time-sensitive information.
But pages are something different than that. They hold some particular information on a website that doesn’t change much and stays the same for a long time. For example, about us, contact page, legal information, privacy policy, terms of service, etc.
If you are new to the CMS and don’t know the way to add new pages, no worries! This article will cover the easiest guide on how to add a new page in WordPress. Ready, set, go!
How to Add a New Page in WordPress
WordPress offers a straightforward way to add and publish new pages. Knowing how to do this is a must-have skill for anyone involved in website management.
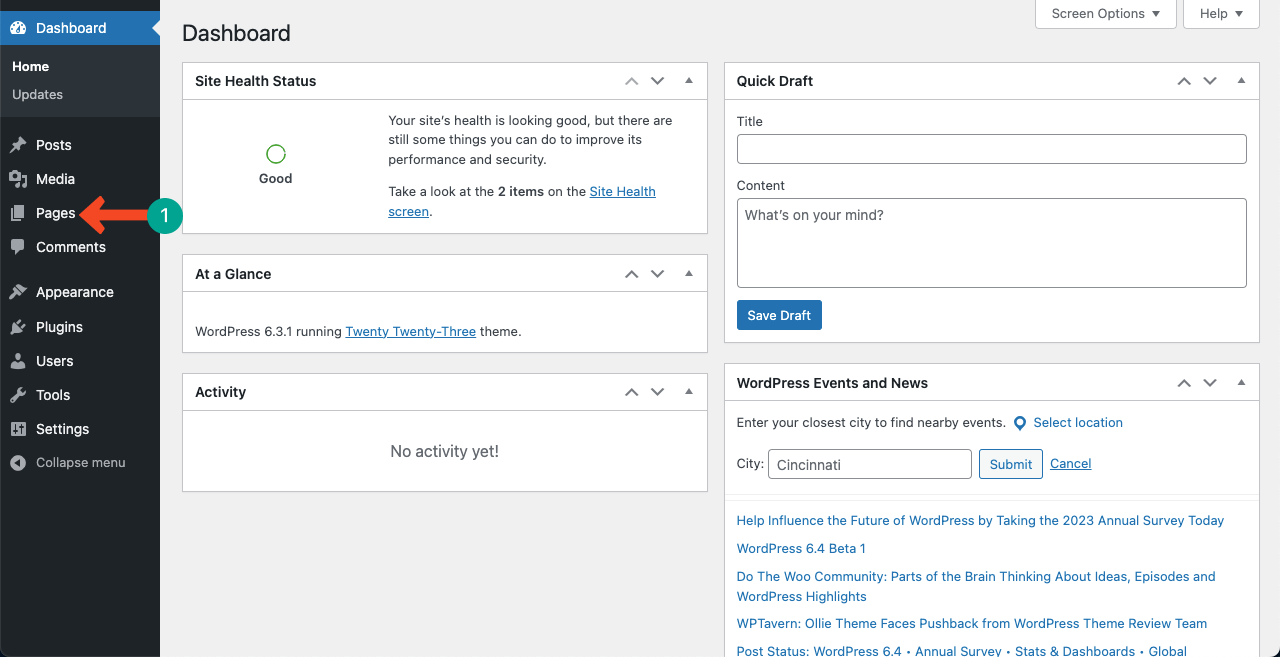
Step 01: Go to the Page Section from the WordPress Dashboard
Log into your WordPress dashboard first. Click on Pages on the left-side menu bar. This will take you to the page section.
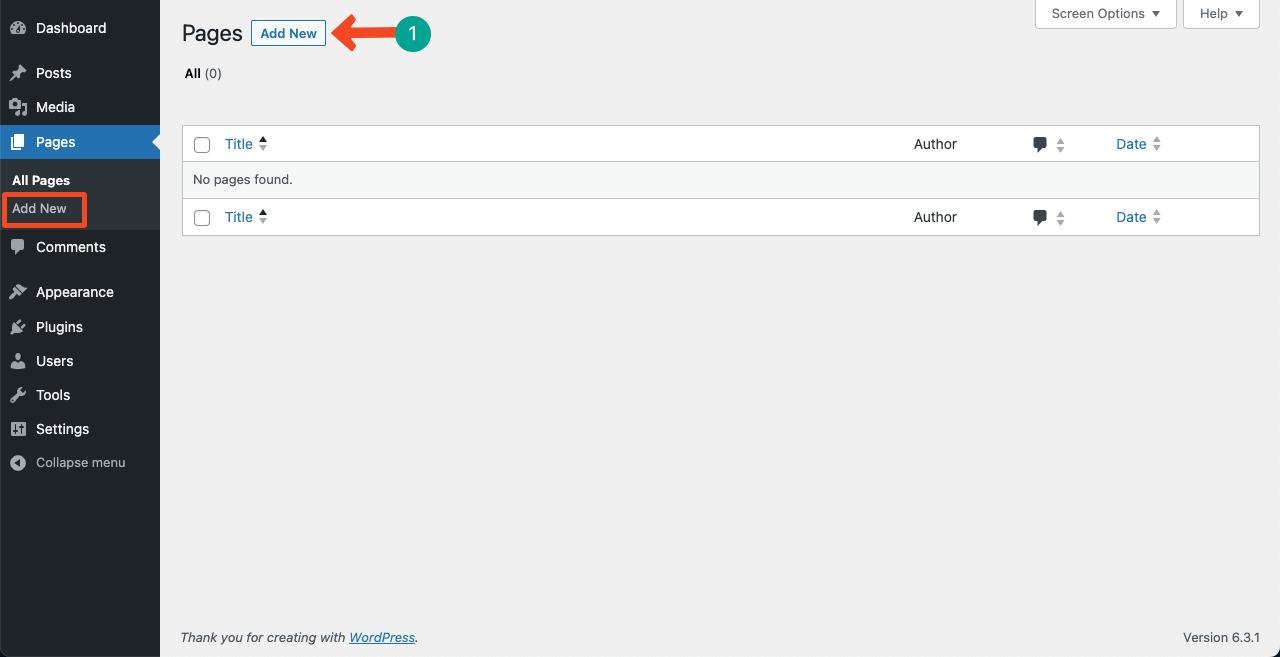
Step 02: Create a New Page by Press the Add New Button
You’ll see the Add New button in two places: on top and the menu bar. You can add a new page by clicking any of these buttons. So, click anyone.
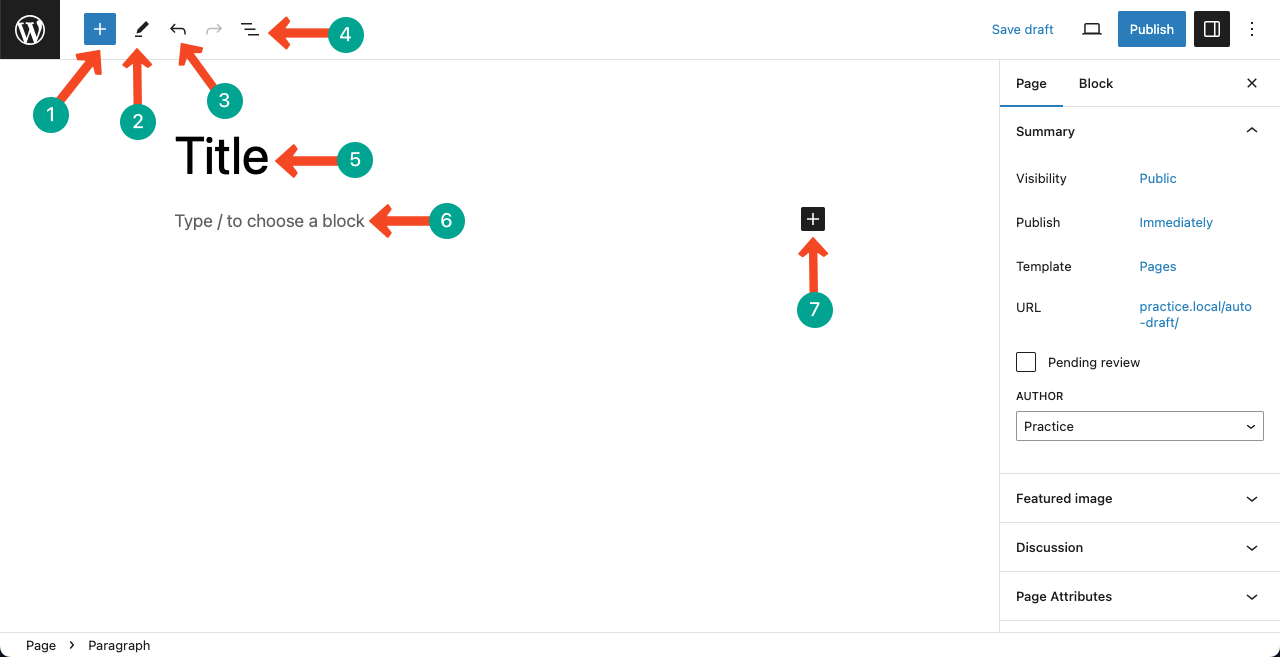
Step 03: Entire Title and Explore All the Options
You’ll find lots of options in the page editor section. You must thoroughly understand each of these options to design a robust page. We have pointed out each of these options numerically on the image. We’ll now briefly explain them below in serially.
1. Block Inserter: Using the Plus (+) icon, you can add new content blocks to the page.
2. Tools: It provides various interactions to select, navigate, and edit blocks.
3. Undo and Redo: You can undo or redo any content or changes on the page.
4. List View: You can see the list of all the content and paragraphs on the page.
5. Title: Write a title for the page. It carries the H1 tag.
6. Description: You can add different types of blocks to curate your page content.
7. Another Block Inserter: You can also add new content blocks to the page using this Plus (+) icon.
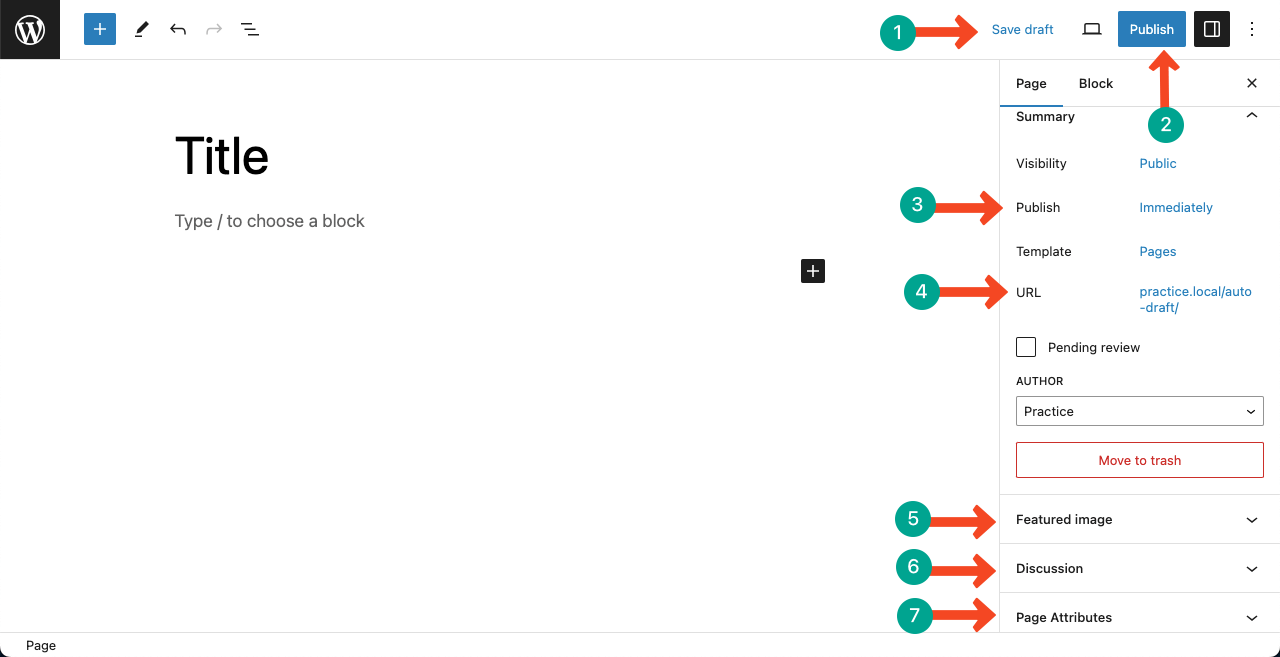
Like the page editor on the left side, the right sidebar also has several important options you should know. Let’s serially explore them as well.
1. Save Draft: You can draft the page to edit it again before finally publishing.
2. Publish: Make the page live by clicking this button.
3. Publish (Immediately): You can schedule the page to publish at a specified time automatically.
4. URL: Set permalink for the page (don’t change after publishing the page as it can affect the SEO score).
5. Featured Image: Use this option if you really want to feature any image for the page.
6. Discussion: Go here to allow the commenting option.
7. Page Attributes: Use the page attributes option to specify the parent page and ordering.
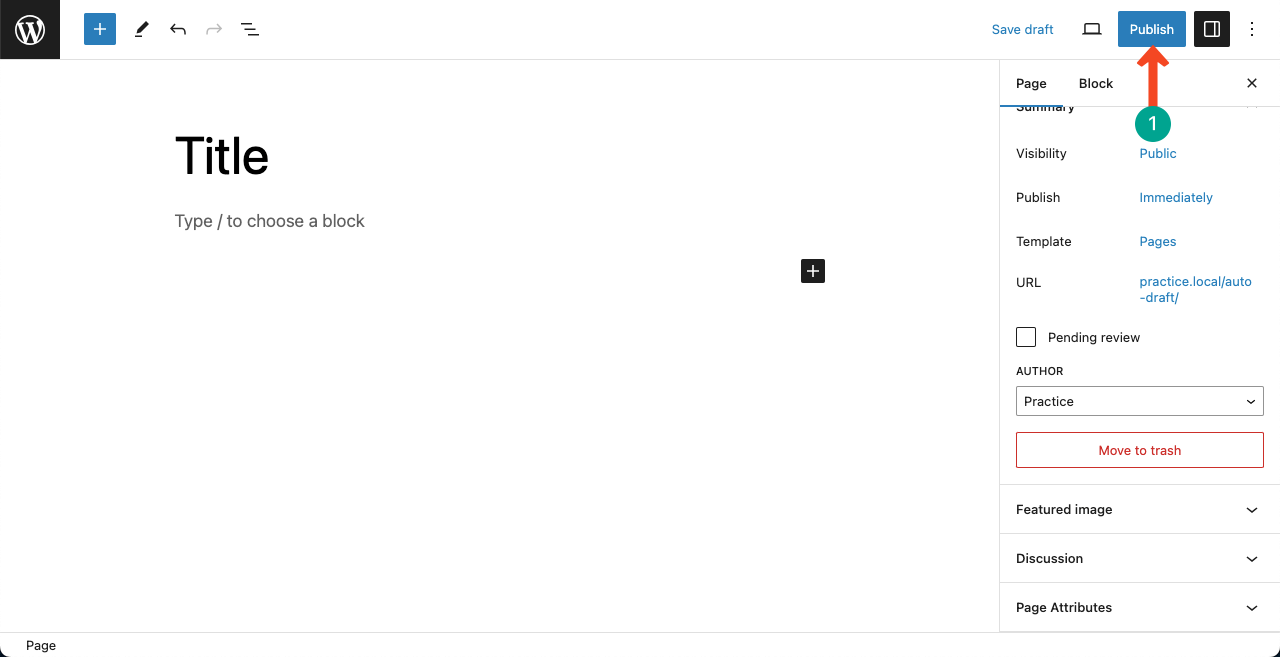
Step 04: Publish the Page
Once all your editing and customizations are done, hit the Publish button to make the page live. Search engines will start crawling and indexing your page after that.
Thus, you can add and create new pages in WordPress.
Conclusion
We have only shown in this article how to create new pages on WordPress using its different options step-by-step. But it’s impossible to create a visually beautiful page by using all these default options.
You need additional plugins to create stunning pages. If you want to design pages using the Gutenberg plugin, you recommend you try Ultimate Blocks. But if you want to apply robust and complex customization, better try out Elementor.
We have already covered lots of articles on these plugins on this website. You’ll find them easily on the blog archive page.


Leave a Reply