
Adding business hours to websites is extremely important for any online business or agency to accurately showcase information about their availability to customers and web visitors. Otherwise, it will be difficult for them to reach you conveniently.
Whether you are running a restaurant, brick-and-mortar store, hospital, or social care, displaying business hours can help you decide on a suitable time to contact you. Often, the business hour displaying option comes by default with WordPress themes.
But no worries if your theme doesn’t have the option. In this article, we’ll spell out a comprehensive guide on how to add business hours in WordPress without much technical hassles. Let’s begin!
How to Add Business Hours in WordPress
There are numerous plugins by which you can easily create a business hour table and publish it to your website. Business Hours Indicator is one of the best of them. We’ll spell out this tutorial using this plugin.
Step 01: Install and Activate the Business Hours Indicator Plugin
Go to the WordPress dashboard. Navigate to Plugins > Add New. Type the Business Hours Indicator in the search box in the top-right corner.
Install and activate the plugin after it appears below.

Step 02: Go to the Business Hours Indicator Section
After installing the plugin, a new section will be created under the settings menu. Go to Settings > Business Hours Indicator.
You’ll see the business hour configuration on the page. Here, you’ll be able to create business hour tables and shortcodes to display the table on your website.
Step 03: Create a Business Hour Table
You have to complete several tabs one by one to prepare the business hour table. Let’s do it with us.
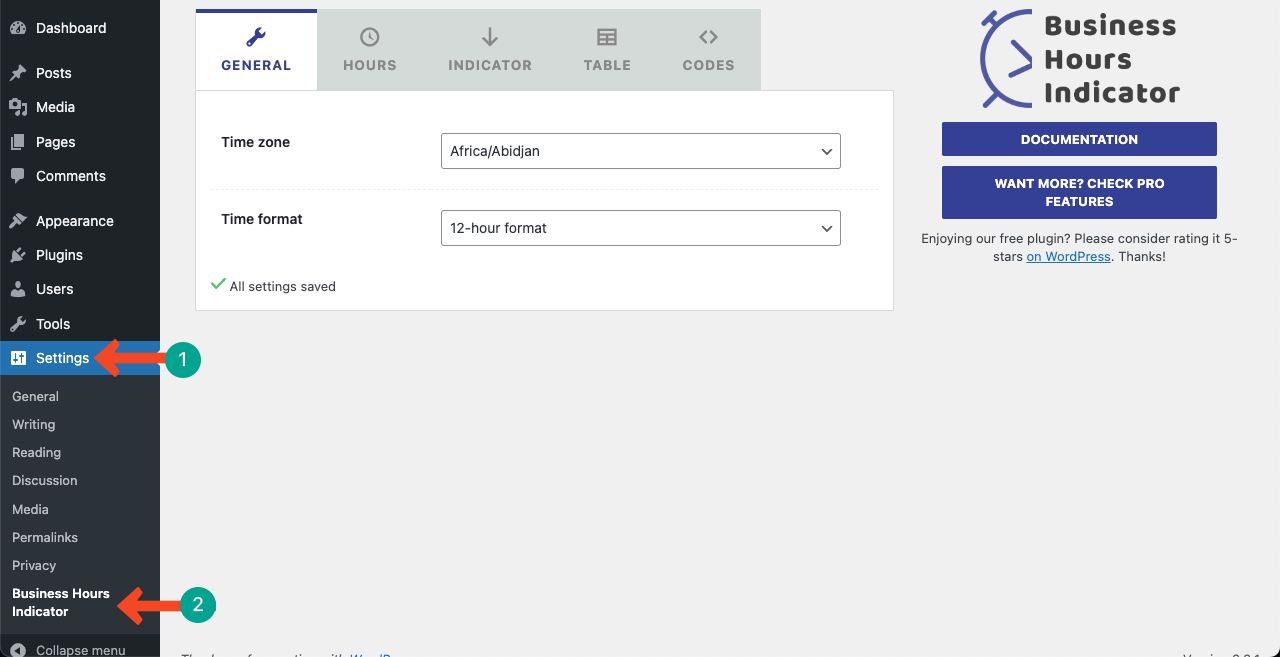
# General Tab
First, go to the General tab. You’ll get two options on the tab. They are Time zone and Time format. Each one has a dropdown list. Select your desired time zone and time format from the dropdown lists.

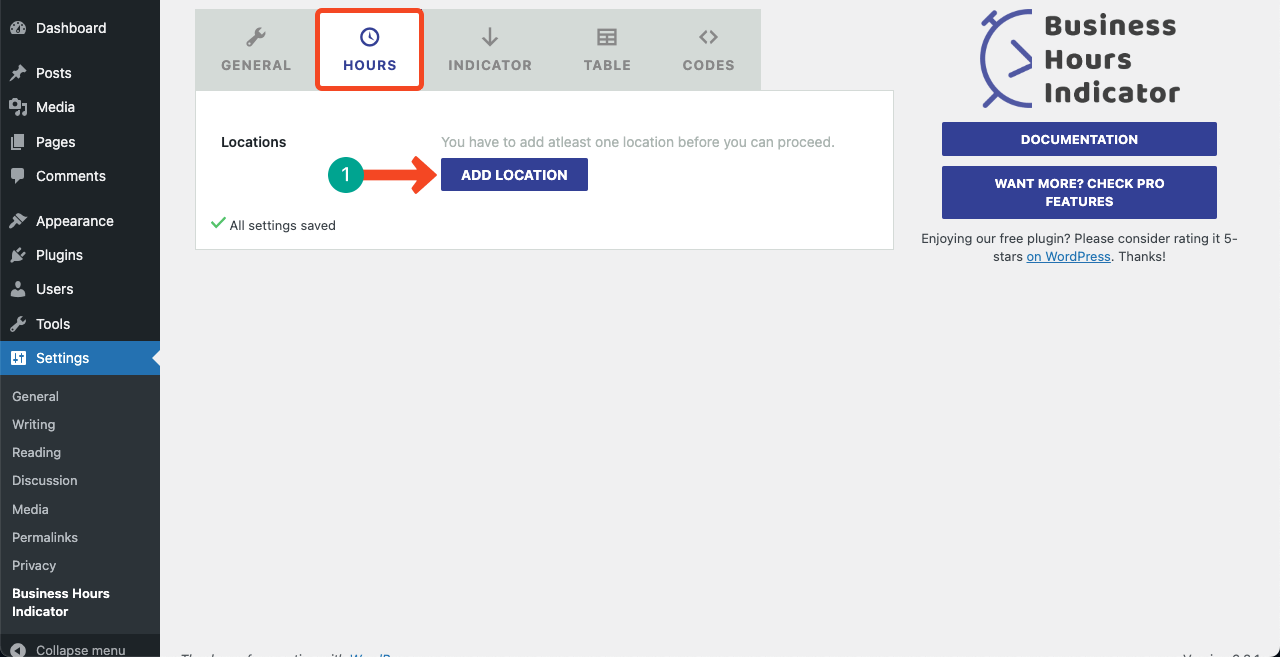
# Hours Tab
Press the Add Location button. This will open a pop-up.
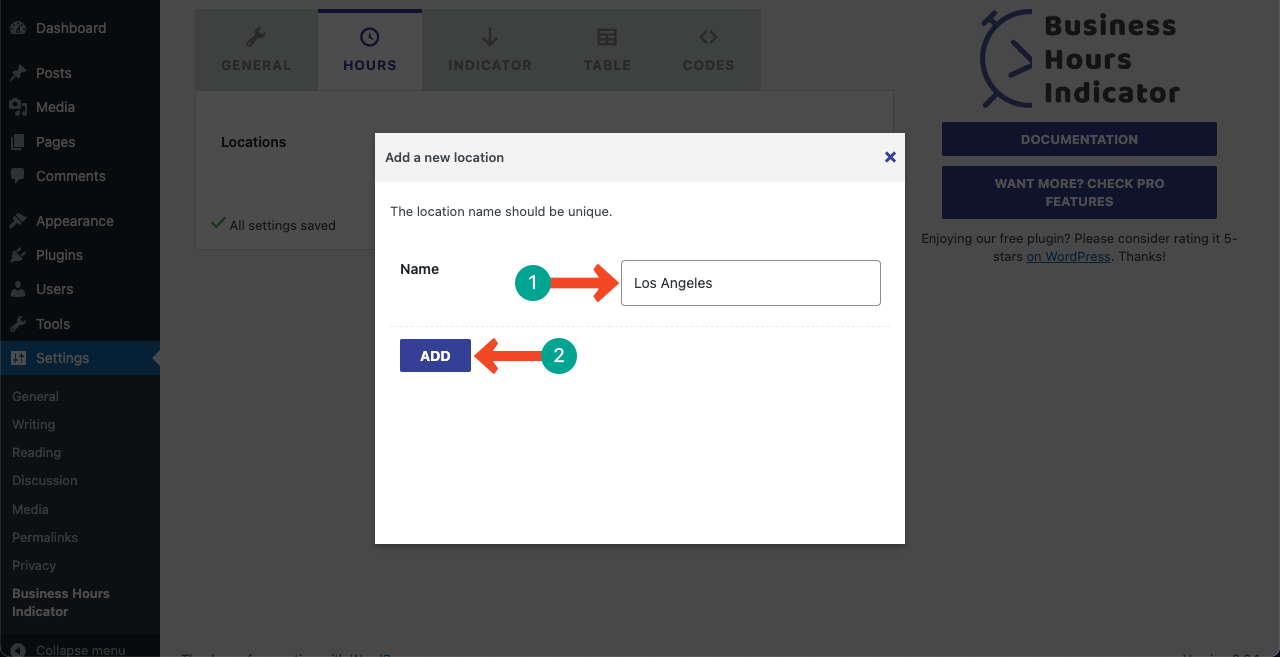
The pop-up will allow you to name your location. Not necessarily; you have to type your exact store location. You may type your business name as well.
But whatever you type will be used in the shortcode at the end. However, we have typed Los Angles in the box. Press the ADD button once the name is typed.
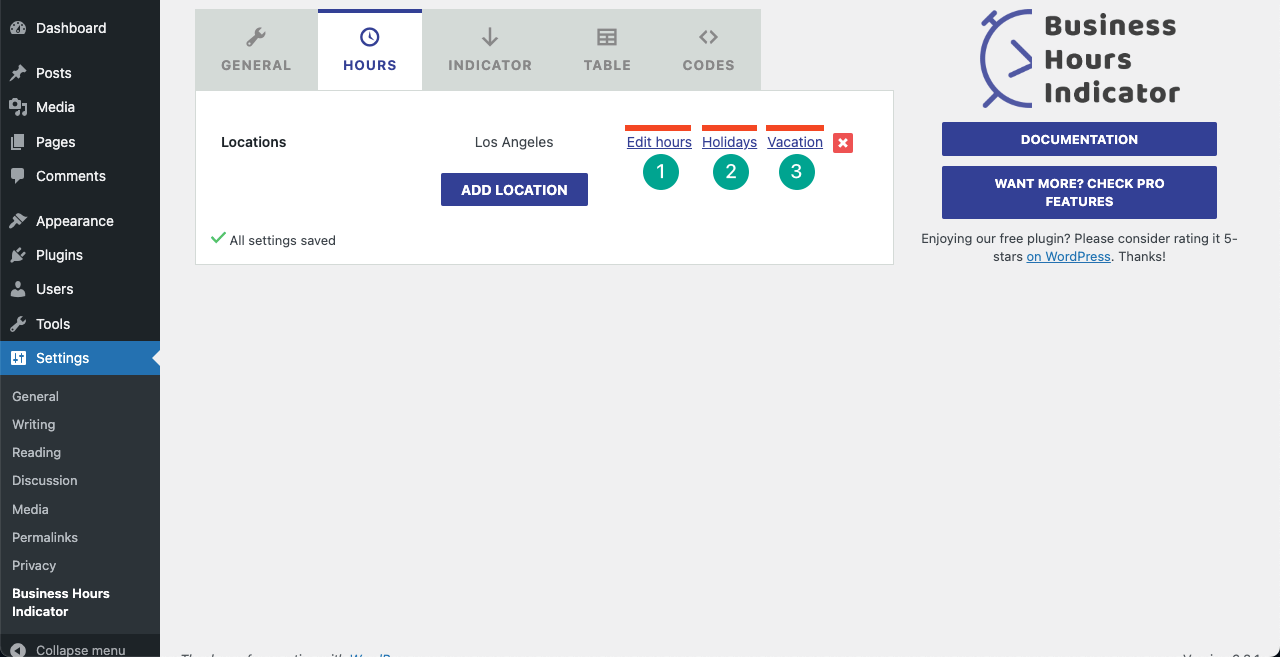
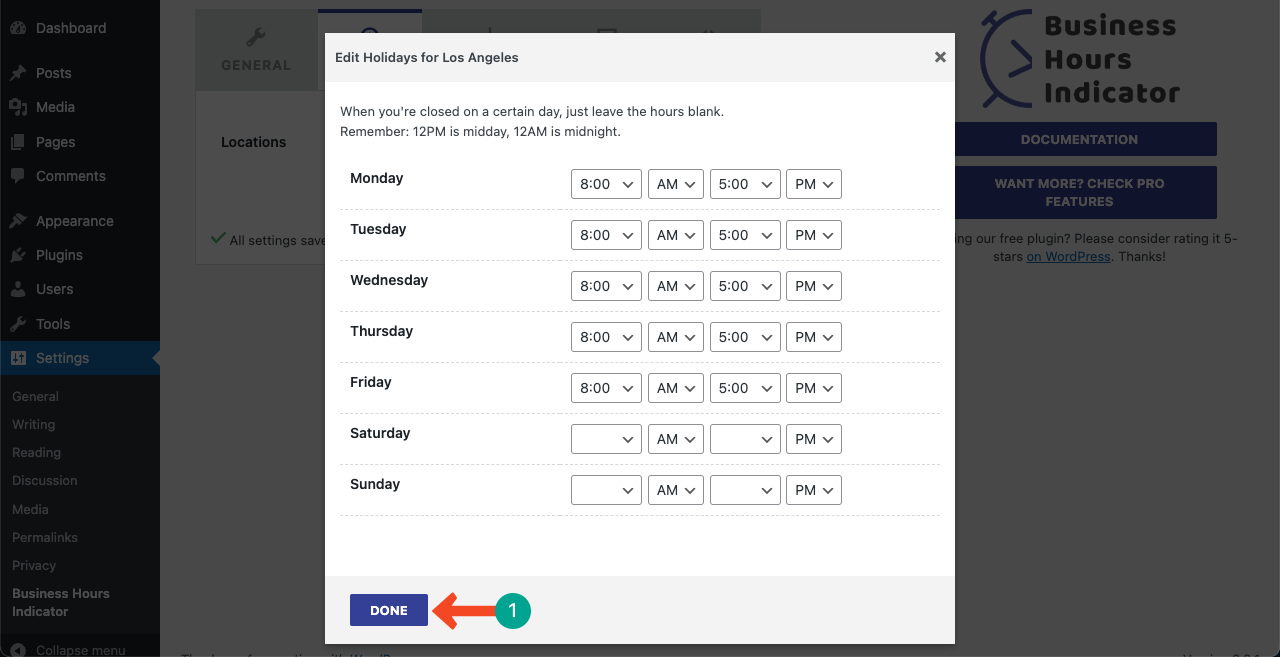
Next, you have to edit hours, holidays, and vacations for the table. You’ll find each of these options on the Hours tab. Let’s start with Edit hours. Click on the option.
After clicking the Edit hours, a table like the one below will open on your screen. Specify hours of the days of the week when your business will be open. And no need to specify hours on the weekends.
Press the Done button after the editing is completed.
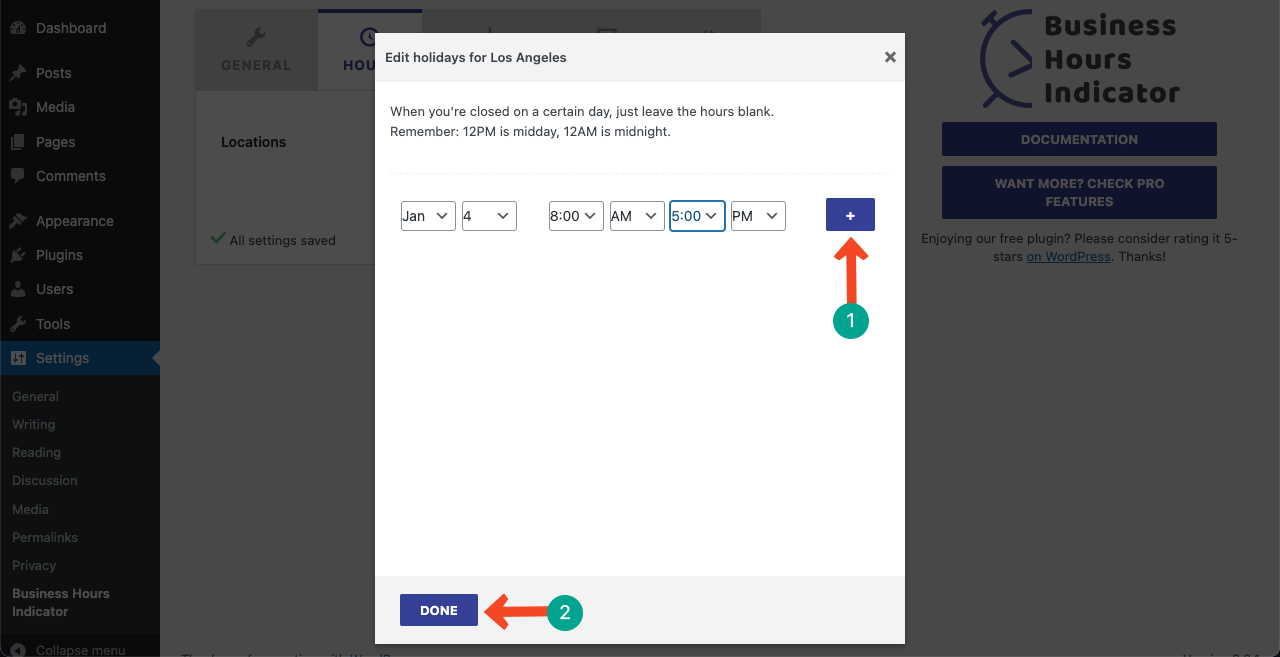
Next, press the Holidays option.
Specify the days on which your business will be closed on public holidays. You can increase the holiday-adding option by clicking the Plus (+) icon if there are multiple holidays. Click the Done button at the end.
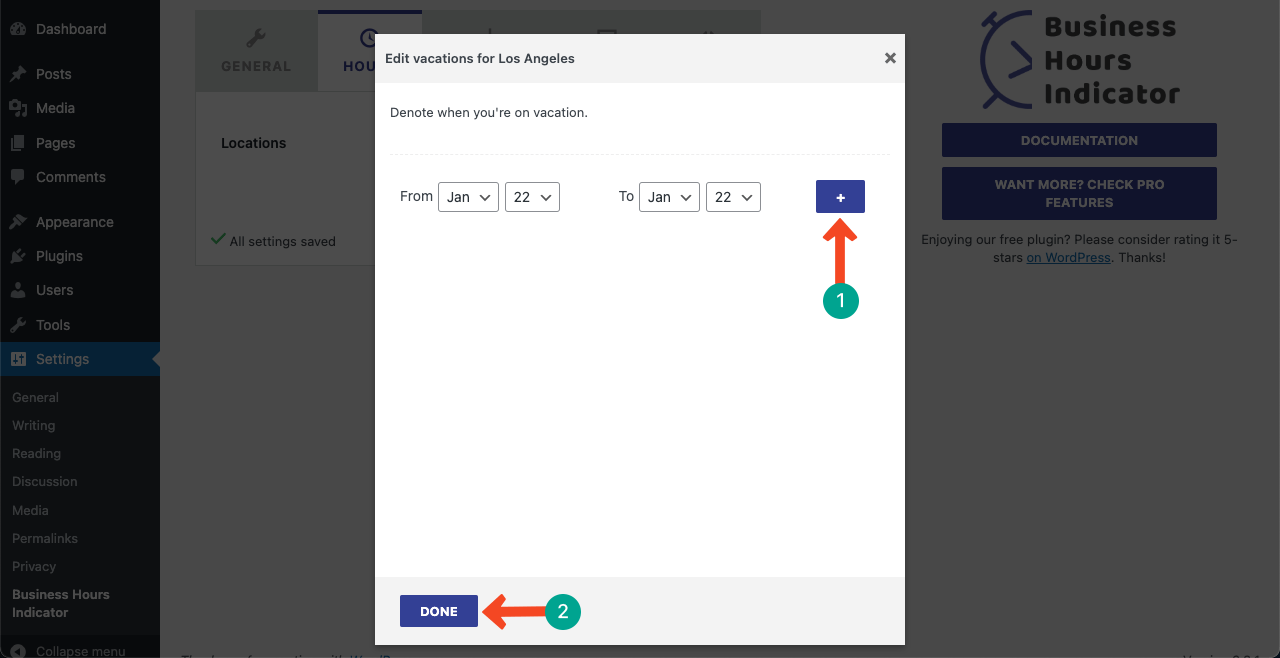
Finally, press the Vacation option.
If your business is closed on any day other than weekends and holidays, you can specify it as a vacation option. This pop-up is completely similar to the holiday pop-up. Do the configuration as needed.
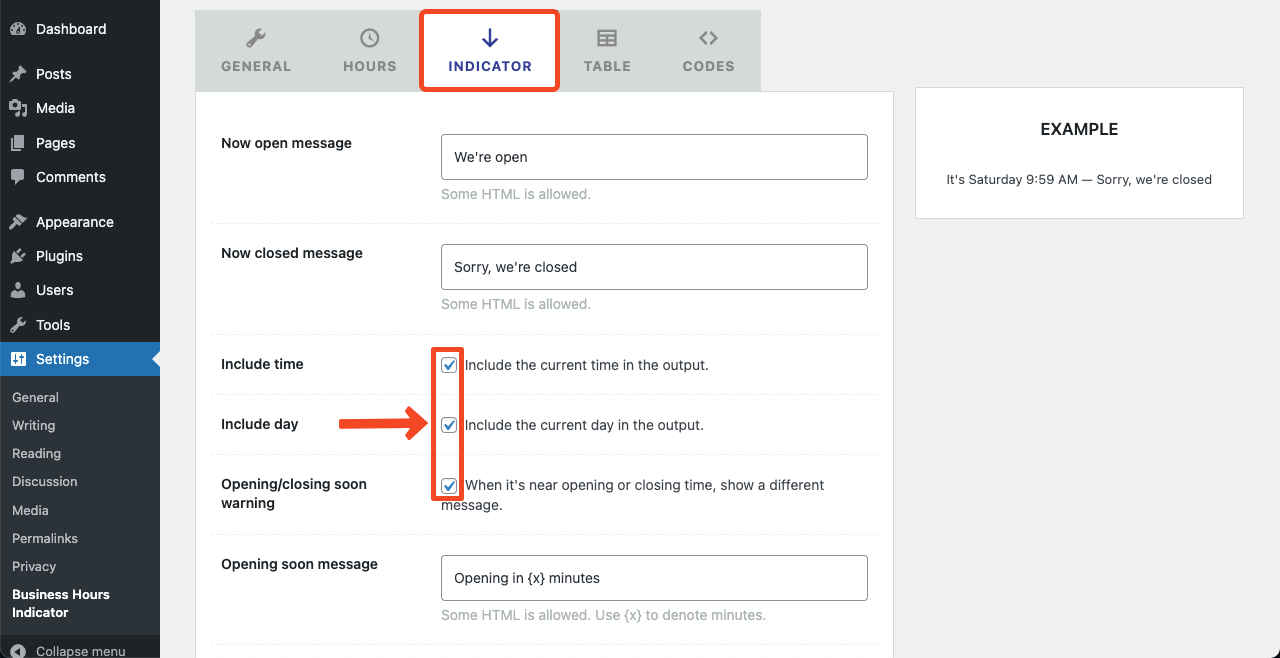
# Indicator Tab
Go to the Indicator tab. You’ll get options to customize the open and closed messages on it. By default, the open and closed messages are ‘We’re open’ and ‘Sorry, we’re closed’ respectively.
You may leave them as they are. But make sure to tick mark all three checkboxes: include time, include day, and opening/closing soon warning.
# Table Tab
Come to the Table tab. From here, you have to select how you want to display your table. The Display mode includes two options: normal and consolidate. The Output section also includes two options: table and inline.
Please explore them. You’ll see the preview on the right side of whatever option you select. We recommend you leave the settings as they are. But make sure to tick mark the two checkboxes on the tab.

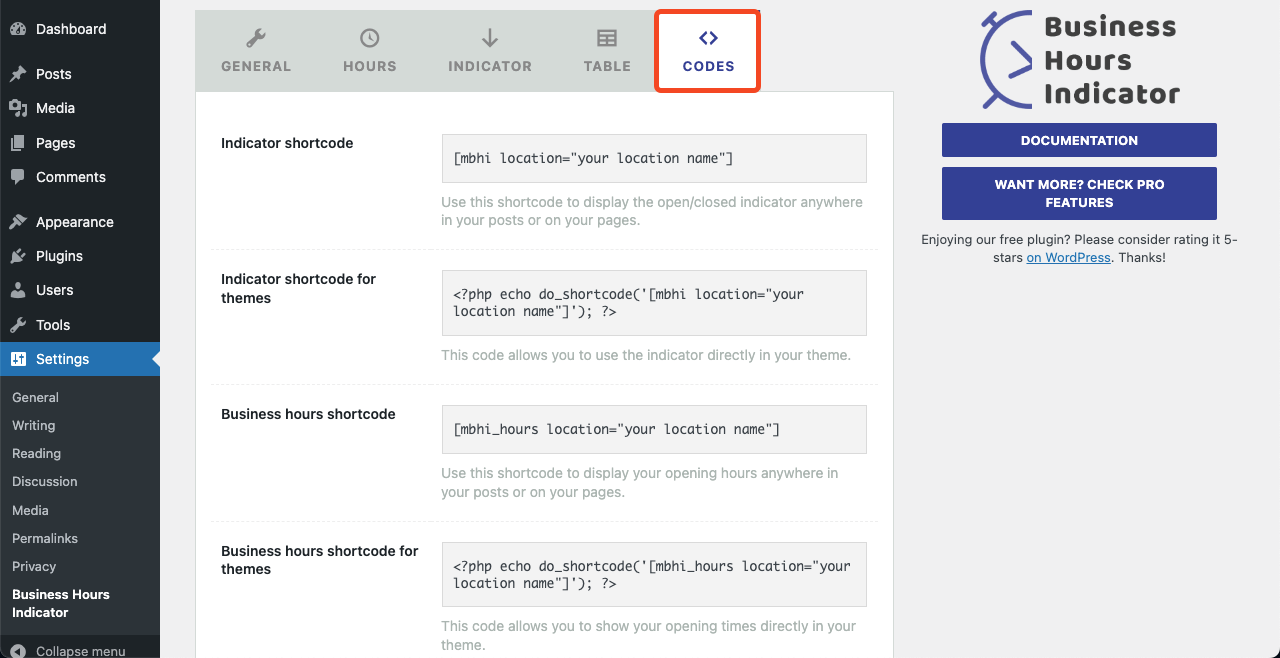
# Code Tab
Come to the Code tab. Here, you’ll get six different shortcodes. Each one carries different types of information about the business hours. You have to copy-paste them on your respective web pages.
But whichever code you copy-paste, make sure to replace “your location name” with the store name you created in the Hour tab.
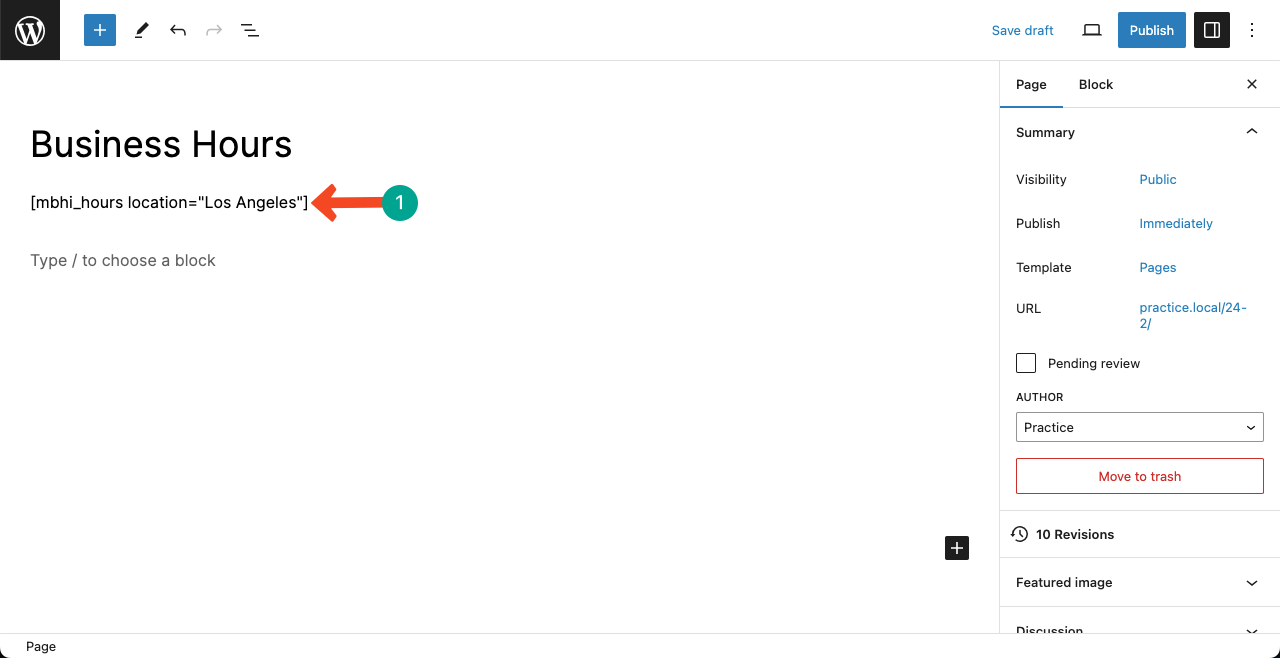
Step 04: Copy and Paste the Shortcode on Your Web Page
Suppose we are copy-pasting the third shortcode on our web page. You can see we have replaced “your location name” with the store name “Los Angles”.
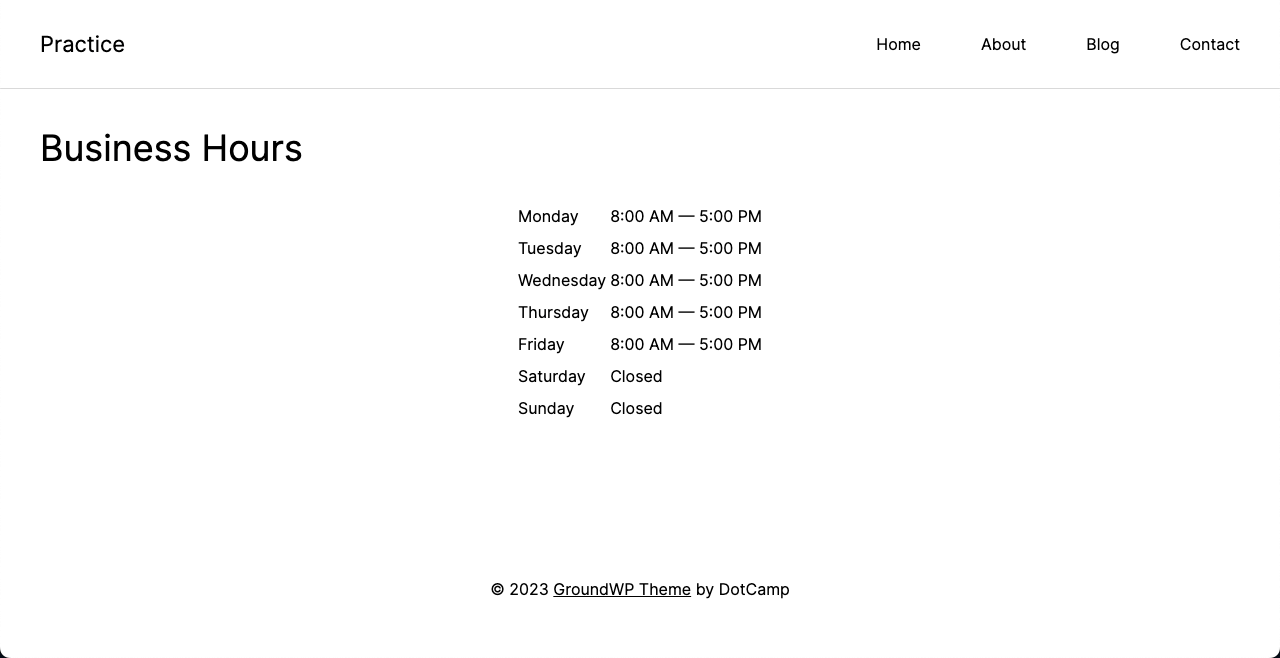
Step 05: Preview the Page
Whether you draft or publish the page, go to the frontend to preview the page. You can see the business table is working fine on our end. Hope it works well on your end as well.
Final Words!
Although creating and publishing a business hour table on WordPress websites is a bit time-consuming, it will never give you a boring feeling. Whenever you need to customize information on it, you don’t have to create the table from scratch every time.
What you have to do is just change information on the backend. After you refresh the frontend, the respective information will automatically be updated. If you run multiple businesses under the same website, creating multiple business hour tables is better.
Hope you have benefitted from this article. If you wish to learn more about the topic or anything else on WordPress, type your question in the comment box. We’ll try to cover a discussion on it soon.


Leave a Reply