
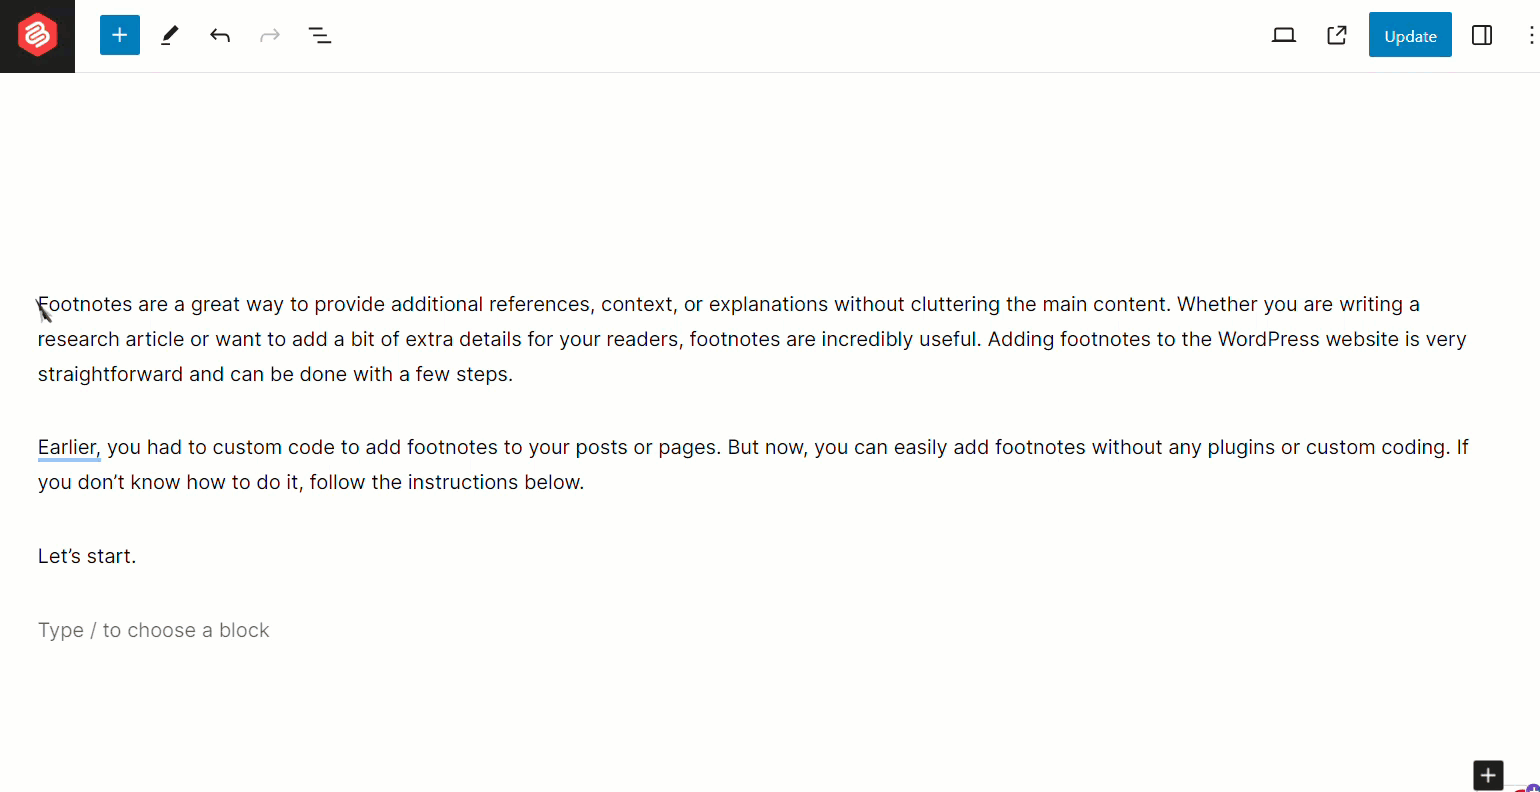
Footnotes are a great way to provide additional references, context, or explanations without cluttering main content. Whether you are writing a research article or want to add a bit of extra details for your readers, footnotes are incredibly useful. Adding footnotes in the WordPress website is very straightforward and can be done with a couple of steps.
Earlier, you had to custom code to add footnotes to your posts or pages. But now you can easily add footnotes with/without any plugins. If you don’t know how to do it, follow the instructions below.
Let’s start.
Method 1: Adding Footnotes in WordPress Without Using a Plugin
You can add footnotes in WordPress with the default block of WOrdPress. Just follow these steps, and you will be able to add footnotes in WordPress on your own.
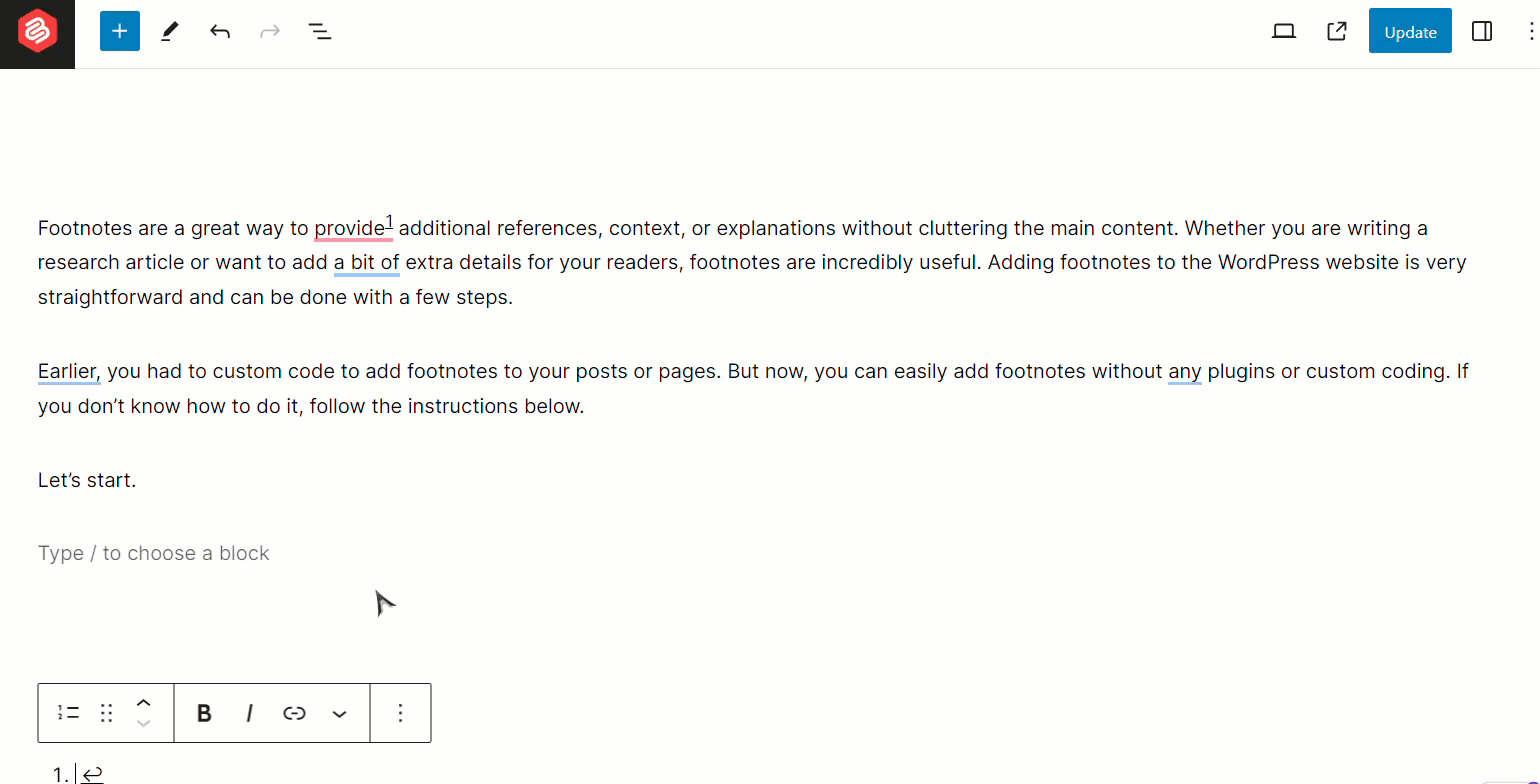
Step 1: Add Footnote Into Your Text
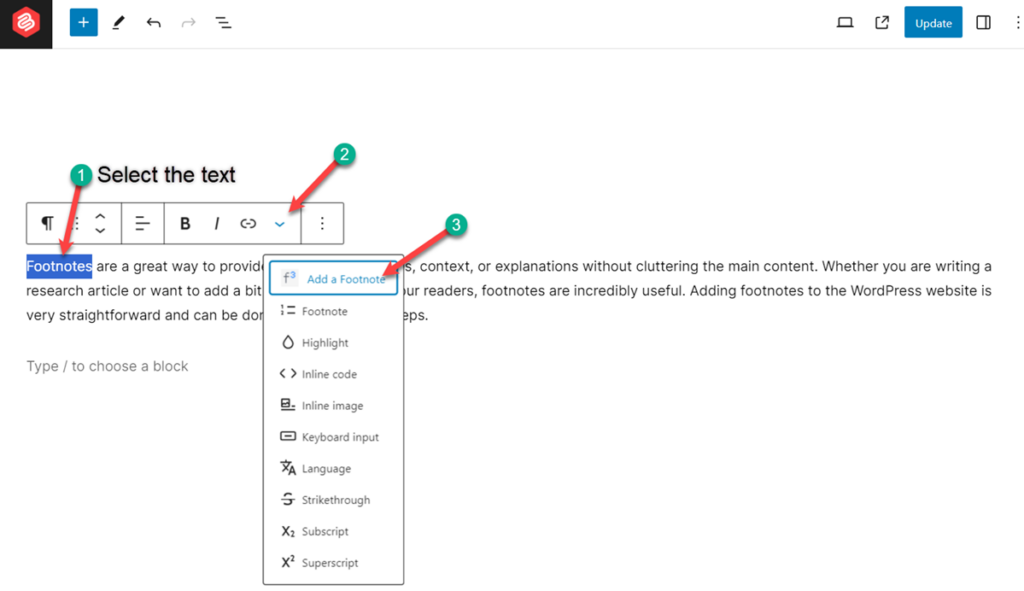
Open1 the page or post or write your desired text. Then select the text, after which you want the footnote number to appear.
Click on the ‘More’ option from the toolbar above and select ‘Footnote’. You will see that your selected text got a footnote number. The footnote reference number is generated automatically. Add footnotes as many as you want.
Now, all you have to do is write the references.
Step 2: Editing The References
After inserting the footnotes, you will see the references at very below.
Write the references according to your footnote numbers.
Method 2: Adding Footnotes in WordPress Using a Plugin
If you want more control over your footnotes, then it is recommended that you use a plugin. Here, I will be using Modern Footnotes plugin. To add a footnote,
Step 1: Install Modern Footnotes Plugin
From your WordPress dashboard, navigate to Plugins -> Add New and search for ‘modern footnotes.
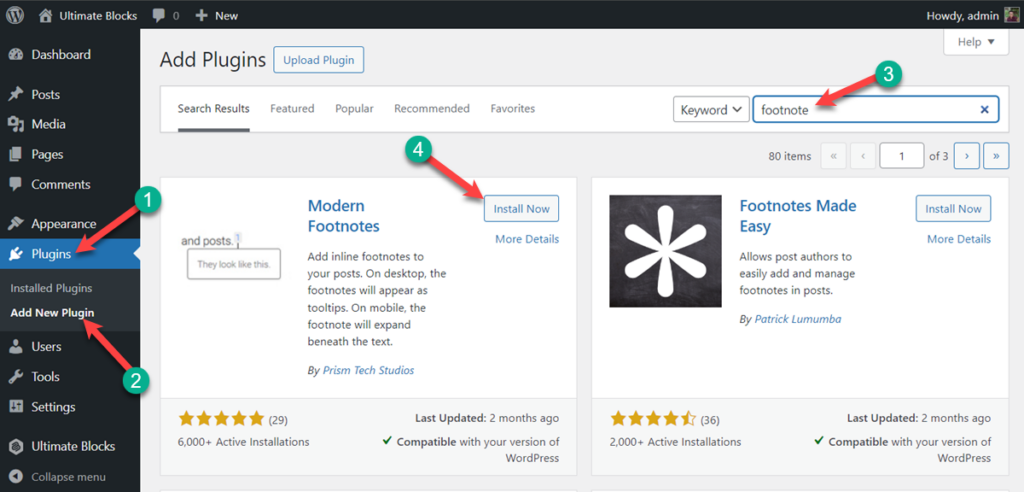
Install the plugin and don’t forget to activate it.
Step 2: Configure Plugin
If you like to change any settings of the plugin, then navigate to Settings -> Modern Footnotes.
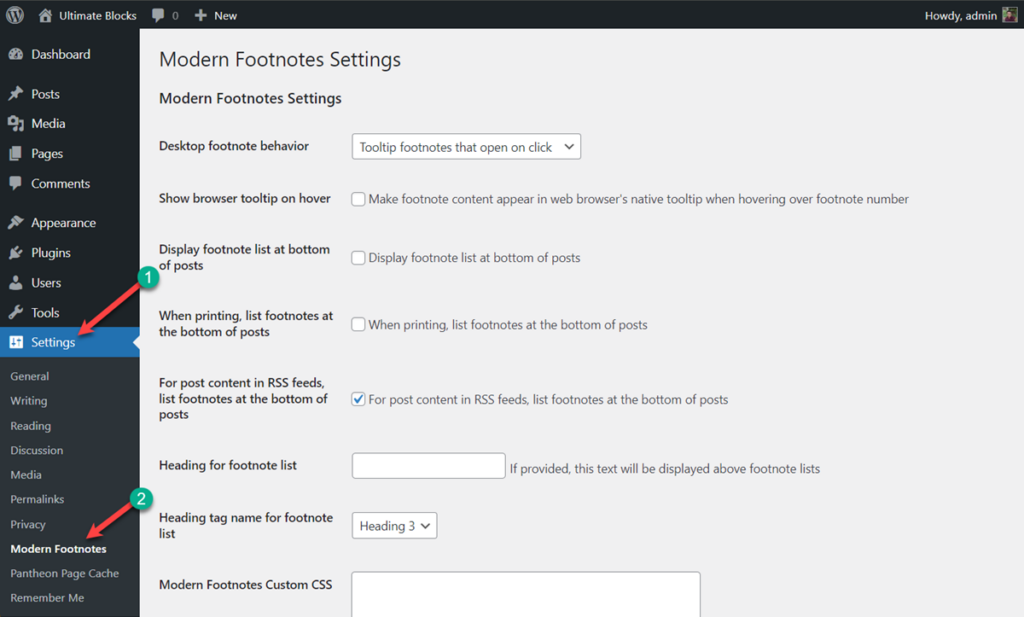
From here, you will be able to configure, footnote behavior, tooltip, heading tag, CSS, and other settings. When you are done, customizing the settings, hit the ‘save changes’ button.
Step 3: Adding Footnotes
To add a footnote, select the text and then click on the arrow sign on the toolbar.
From here, select ‘Add a Footnote’ and your footnote will be added.
When you have added footnote successfully, you will have it in your website like below.

Last Words
I hope you can now add footnotes in WordPress on your own. If you have any trouble adding footnotes, tell me, and I will help you. If you liked the post, then please share it with your friends and leave your thoughts in the comment box below.
For you, I have given an example of a footnote (created with block editor) below.
- This is an example of a footnote. ↩︎
Changelog
Update on 2024-06-16 (Uzzal Raz Bongshi)
- Added ‘Method 2: Adding Footnotes in WordPress Using a Plugin’.
- Updated all images.
- Updated meta description.


Leave a Reply