
If you want protection from spam, then it is necessary to add reCAPTCHA to your website. reCAPTCHA is an essential asset for any website. It acts as a protective layer to your site against spam and abuse. It is a free service that implements risk analysis techniques to distinguish between humans and bots.
If you don’t know how to add reCAPTCHA, then I am here. It will take only some minutes to add reCAPTCHA to WordPress site of yours. But first, let’s know about reCAPTCHA.
What is Google reCAPTCHA?
ReCAPTCHA is one of the advanced forms of CAPTCHA that can easily differentiate between human users and robots. CAPTCHA is the acronym for “Completely Automated Public Turing Test to tell Computers and Humans Apart”.
After acquiring this technology in 2009, Google rebranded it as reCAPTCHA. They have also made it easy for humans to easily pass the test.
When reCAPTCHA occurs, placing a tick sign is enough. If a lot of traffic is detected, then google shows an image captcha. Where you have to click on matching objects to pass the test.
By enabling reCAPTCHA one can easily get protection from spam.
Adding reCAPTCHA to WordPress
To add reCAPTCHA to your website follow these instructions and then apply it on your website.
Step 1: Install reCaptcha by BestWebSoft Plugin
Install and activate the reCAPTCHA by BestWebSoft plugin from the WordPress plugins directory. To do it navigate to Plugins -> Add new and search for ‘recaptcha by bestwebsoft’.
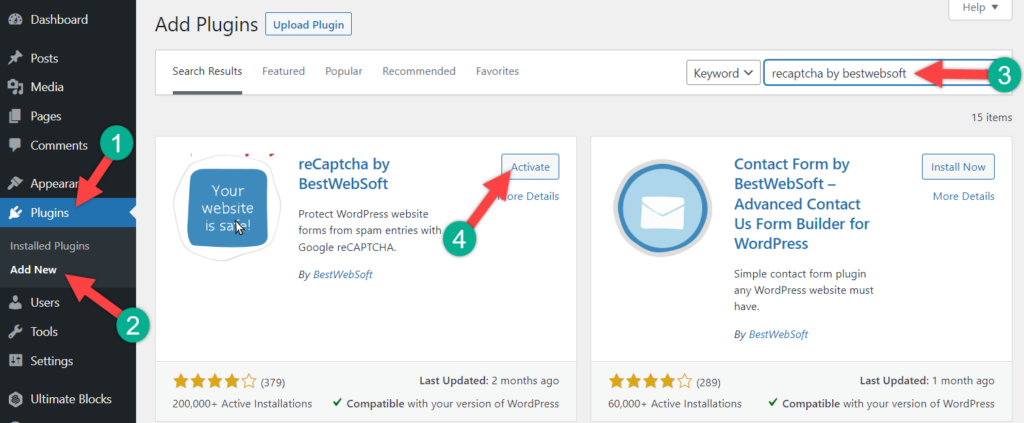
Install the plugin and don’t forget to activate it.
Step 2: Register Your Website for Google reCAPTCHA
Now, you need to register your website. Navigate to Google reCAPTCHA. Make sure you are logged in to Google; if you are not logged in, then you will be redirected to log in first.
Now put your label and select the captcha type. You can select any type of captcha; if you want it challenging, then select v2, else select v3.
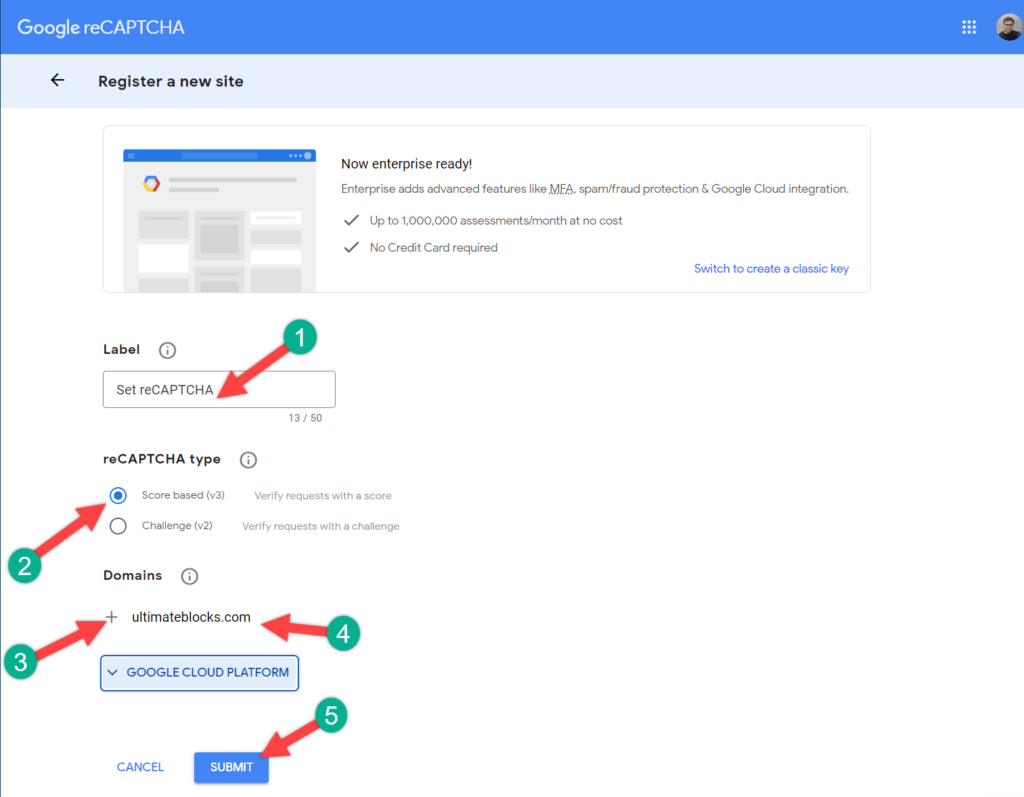
Next, write your domain name in the “Domains” box. Don’t forget to accept the reCAPTCHA terms of service.
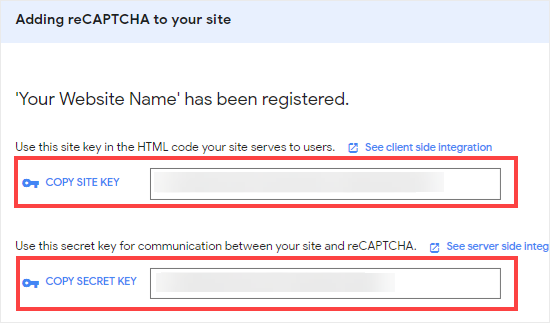
Now, hit the SUBMIT button. Once you are successfully registered, Google reCAPTCHA will show you a success message along with the secret key and site key. Keep a note of these keys.
Step 3: Enabling reCAPTCHA in Your Website
Now head back to your WordPress website and navigate to reCAPTCHA -> Settings.
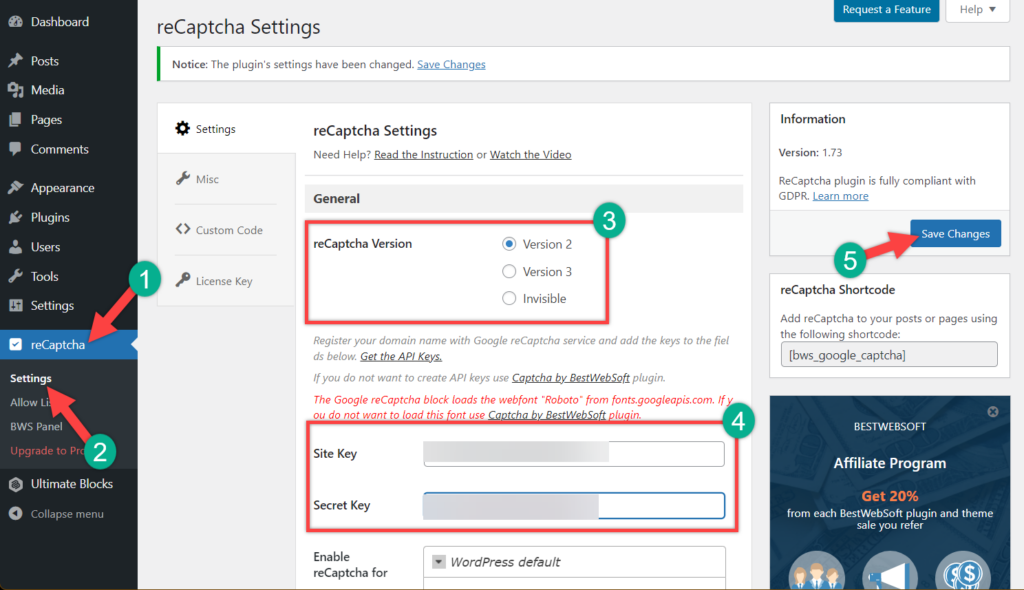
Select the reCAPTCHA version and then paste the site key and secret key that you got earlier. Don’t forget to click on the Save Changes button.
Congrats! You have successfully added reCAPTCHA to your website. The ReCAPTCHA checkbox will be only shown to logged-out users. If you want to see reCAPTCHA, you have to log out of your browser.
If you want to customize your CAPTCHA, there are additional options available.
Conclusion
Google offers reCAPTCHA and reCAPTCHA Enterprise to help protect your website against fraudulent activity, spam, and abuse. Therefore, it is necessary to enable reCAPTCHA on your WordPress website.
I hope this post helped you to add reCAPTCHA to WordPress site of yours. If you liked this post, then please share it with your friends, and don’t forget to leave your thoughts in the comment box below.


Leave a Reply