
WordPress lets you customize your website’s look and appearance in any way you want. With so many themes out there, you can not only choose a design that matches your needs but also customize it according to your brand’s style guide.
Just like the various elements you customize on your website, the header menu is also a highly customized aspect of any WordPress site.
There are many WordPress themes that let you build custom and advanced menus on your website.
But what if you simply want to change the header background in WordPress?
That’s exactly what I’m going to show in this short tutorial.
Let’s get started.
How to Change Header Background Color in WordPress
The process of changing the header background color in WordPress varies theme by theme. It’s comparatively easy when you use a block theme. In this post, we will cover both block and classic themes.
Changing Header Background Color For Block Themes
Step 1: First, navigate to Appearance -> Editor and select Template Parts.
Click on Header.
You will see your header or navigation menu on the page, click on it.
Step 2: Open the settings panel.
Click on Styles and select the Background option.
It will open the color palette for you. Choose any color that you prefer for your header background. Then hit the Save button on the top right.
Changing Header Background For Classic Themes
When the theme doesn’t provide any option to change the header background color, you’ll have to do it manually by adding custom CSS.
Don’t worry, though; It’s very simple to add custom CSS to change your menu header background.
Here are the steps you need to follow:
Step 1: Visit your website on your browser and right-click on your mouse and click on Inspect.
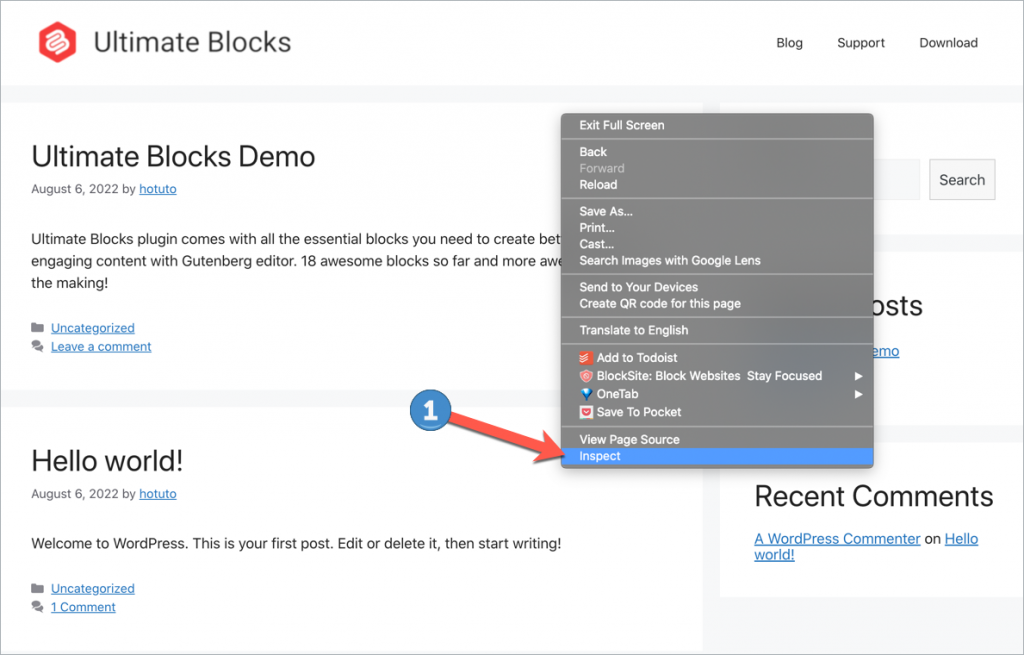
This opens a new window inside your browser that displays the HTML elements on the page.
Step 2: Find the CSS class of your header by expanding the lines of code in the Elements window. The CSS class for the header will most probably be like “site-header” or “menu-header”.
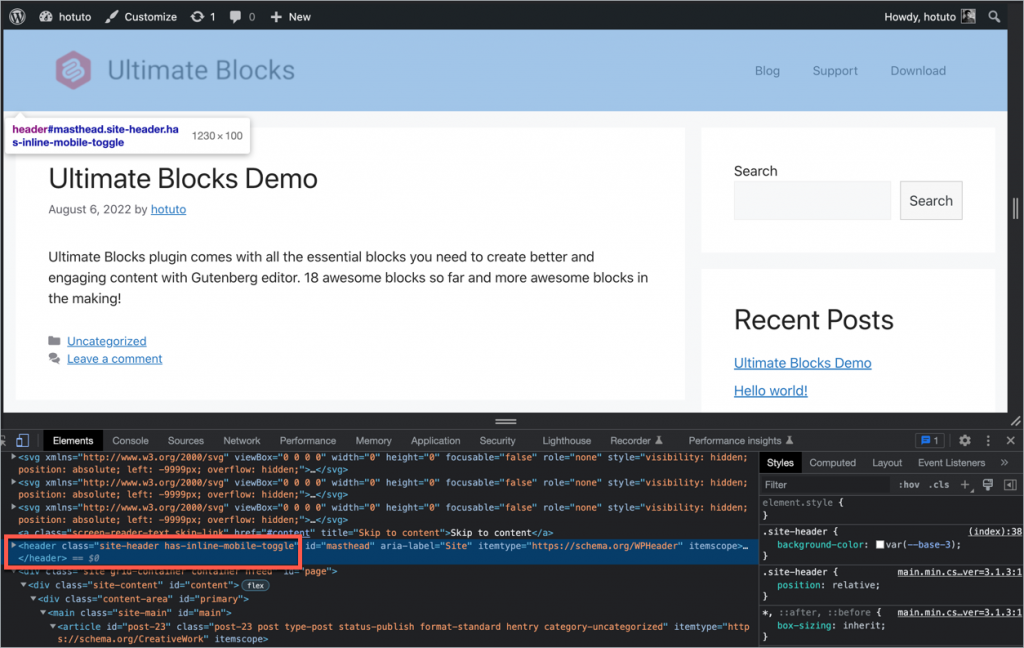
In my example, I’m using the GeneratePress WordPress theme, which has the header CSS class as “site-header”.
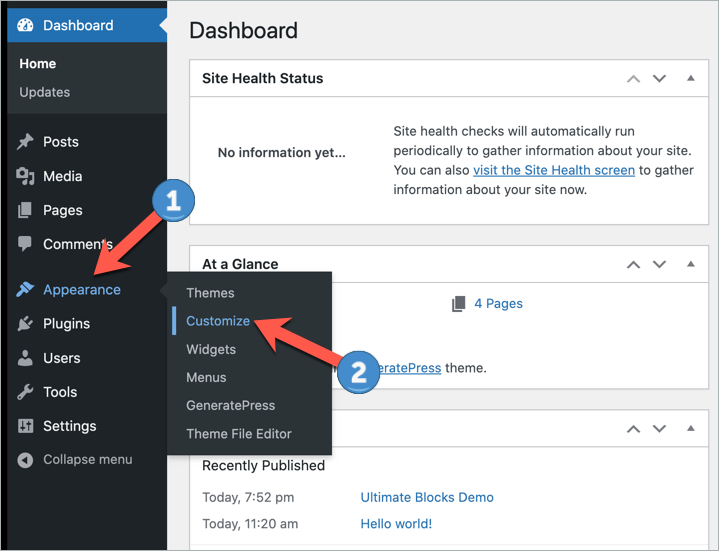
Step 3: Go to your WordPress dashboard > Appearance > Customize. This will take you to the theme customizer.
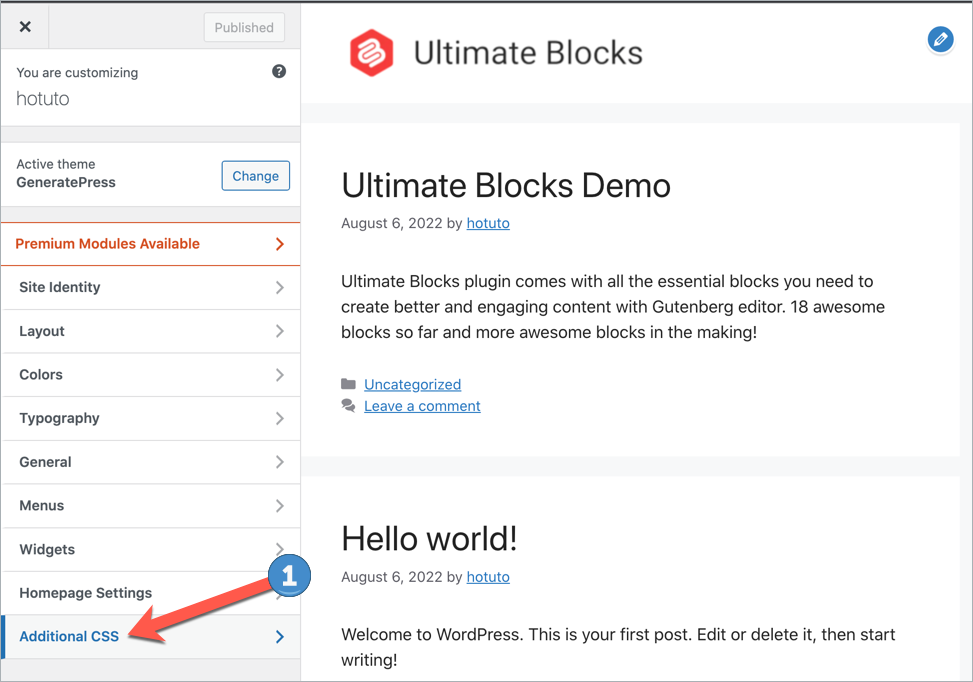
Step 4: Go to the Additional CSS settings in the theme customizer. This is where you can add custom CSS to your website.
Step 5: In the CSS editor, paste the following code:
.site-header {
background-color: #F0F1F8;
}
Replace “#F0F1F8” with your desired background color’s hex code. Also, if your theme has a different site header class, replace it with “site-header”.

Now click on the ‘Publish’ button to save your changes.
As you can see, the header background color of the website has been changed.
But there’s one problem. The menu items still have a white background color which doesn’t look very good.
How To Change The Header Menu Items Background Color In WordPress
The process of changing the background color of menu items is the same. Here are the steps you should follow:
Step 1. Visit your website and find the CSS class of the menu items.
As you can see, the CSS class for the menu navigation is titled “main-navigation”. Copy the name of this class.
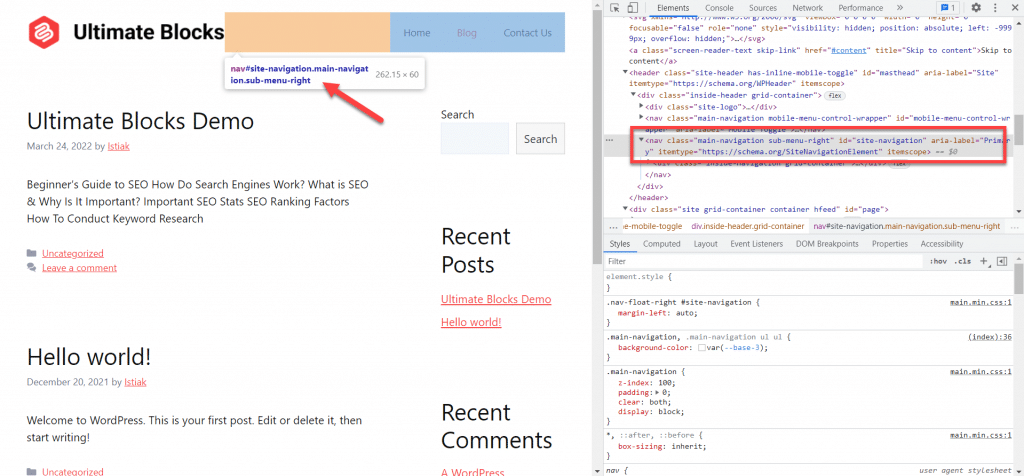
In many themes, you can also use the “menu” CSS class to change its background color. You can use either of the above two classes for this purpose.
Step 2. In the Additional CSS page, paste the following CSS line:
.menu {
background-color: #F0F1F8;
}
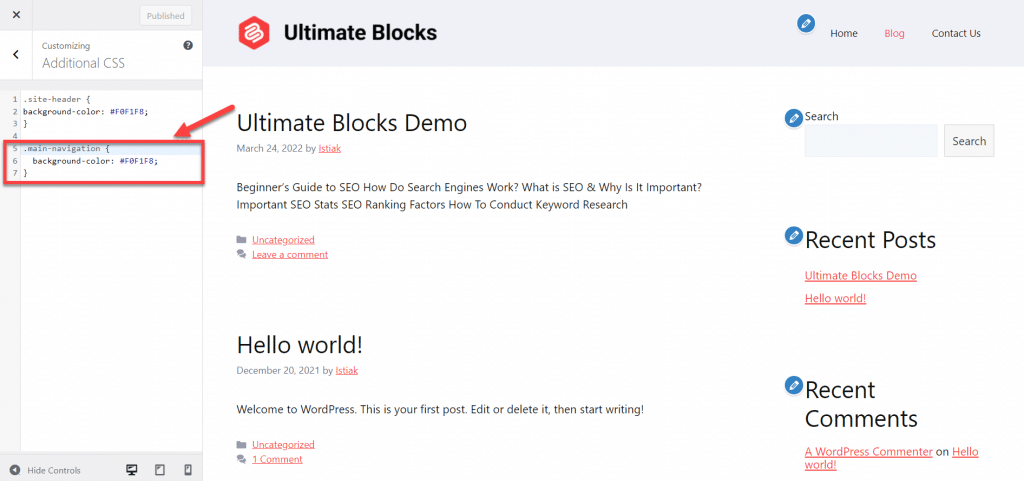
This will make the background color of the menu items the same as the header background color.
Conclusion
So, that’s how you can change the header background color in WordPress. I hope you found this tutorial helpful and can change your site’s header background colors with ease.
If you have any questions regarding this tutorial, feel free to ask your questions in the comments below. Also, don’t forget to browse more WordPress tutorials and guides on our blog.

Leave a Reply