
While text is a powerful tool for communicating your message, sometimes words alone just don’t cut it. That’s where image boxes come in! These versatile elements combine eye-catching visuals with concise text, creating a visually appealing and informative package for your WordPress content.
But how do you create these captivating image boxes? Worry not! This post unveils a way to add image boxes to your WordPress website, catering to different skill levels and preferences.
Let’s begin.
Creating an Image Box in WordPress
To create an Image box, you don’t need to take the help of any additional plugins. Just follow these steps and do it by yourself.
Step 1: Insert Cover Block
Click on the ‘Add Block’ button and search for the ‘Cover’ block.
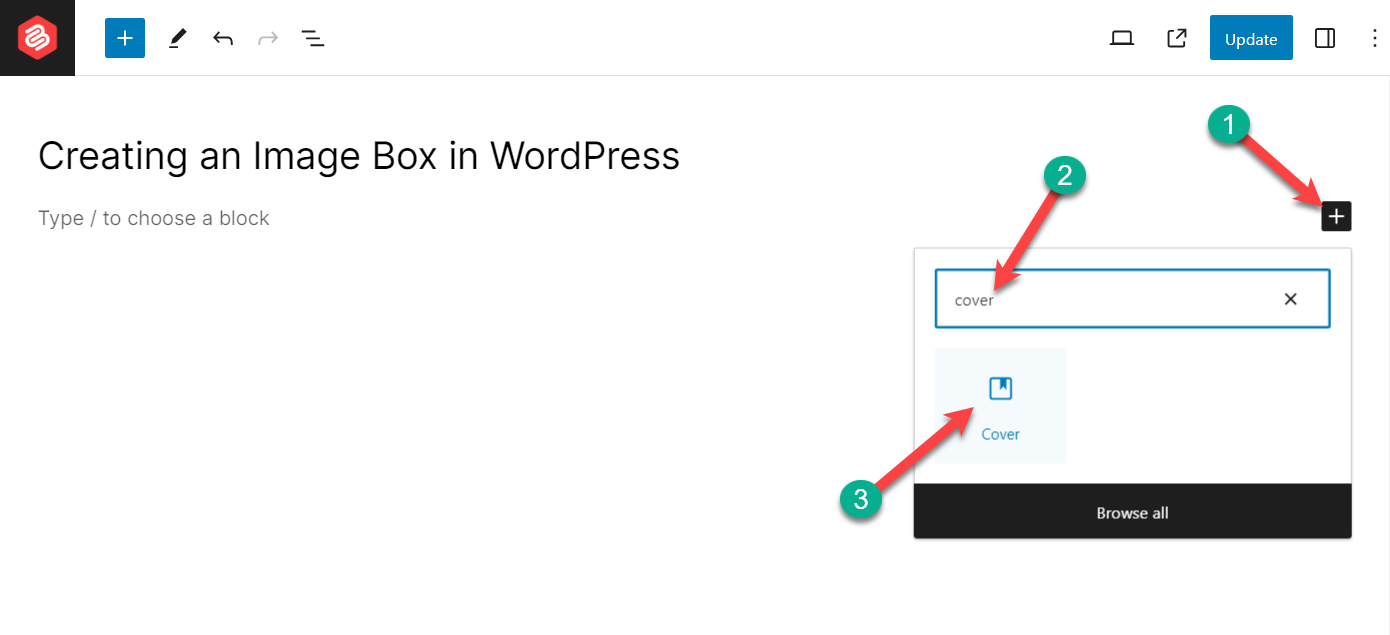
Insert the block by clicking on it.
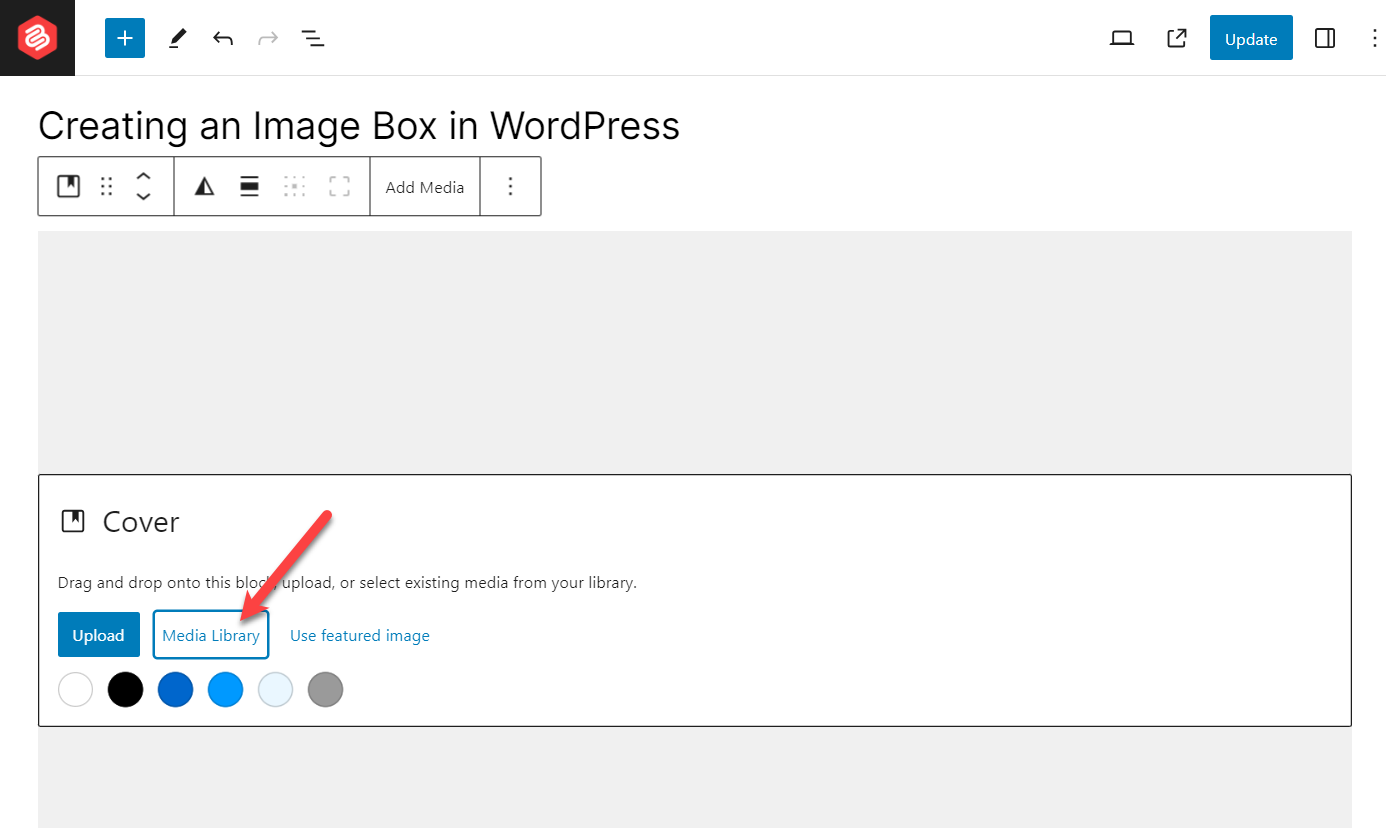
Step 2: Insert Your Image
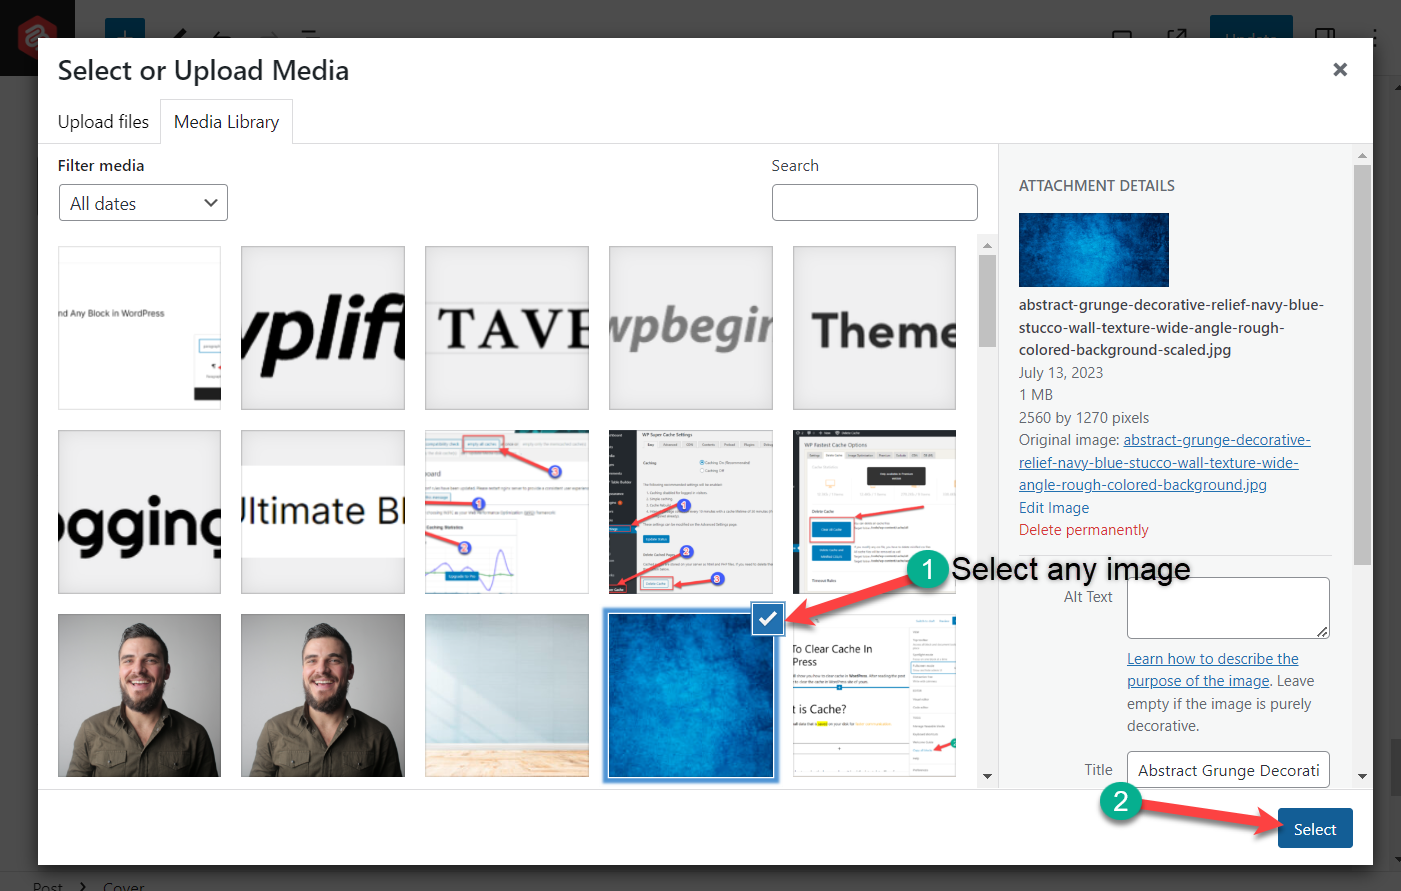
Now, upload your image or choose one from the Media Library.
Choose your image and insert it.
Step 3: Write Your Title
Write your desired title in the ‘write title’ field.
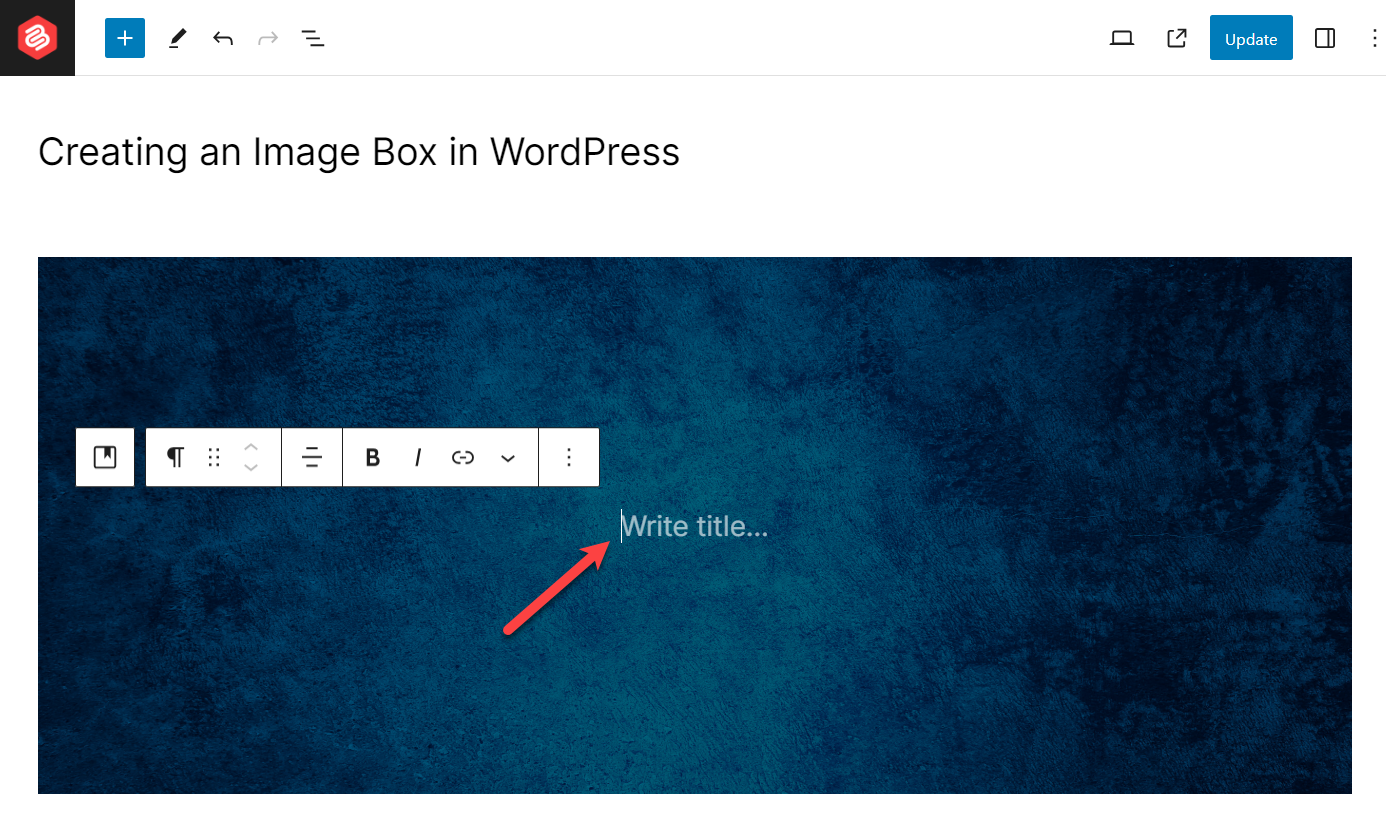
In this way, you can create an image box in WordPress very easily.
Step 4: Customize
If you would like to customize your image box, then head over to the block settings and customize as you like.
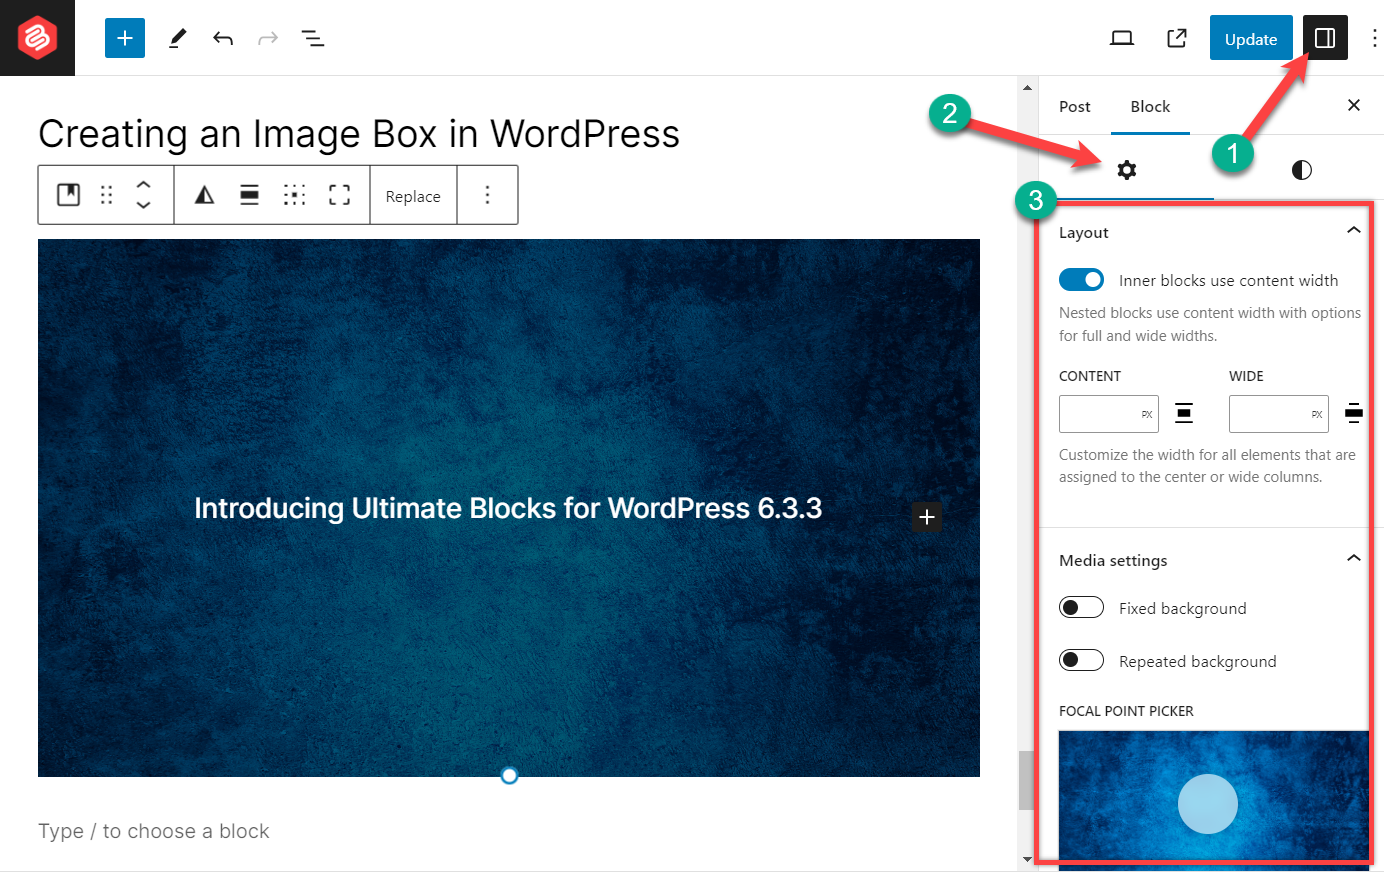
From here, you will be able to set width, fixed background, repeated background, focal point, etc. For styling your image box, the Style tab is just a toggle away.
Final Words
Experiment with different image box layouts, colors, fonts, and hover effects to find what resonates with your brand and content.
With this option at your disposal, you can transform your WordPress content from plain text to visually engaging and impactful experiences. So go forth, unleash your inner designer, and let your image boxes captivate your audience!


Leave a Reply