
Block Editor is getting enriched daily as block editor plugins are increasing significantly.
Using the Block Editor, you can do almost everything. But learning may take some time.
As we often provide small guidelines on WordPress tips and tricks, today, we will share a small guideline on “How To Add Hotspots On An Image In WordPress.”
Before that, let’s learn about Image Hotspots.
What are Image Hotspots and their Benefits?
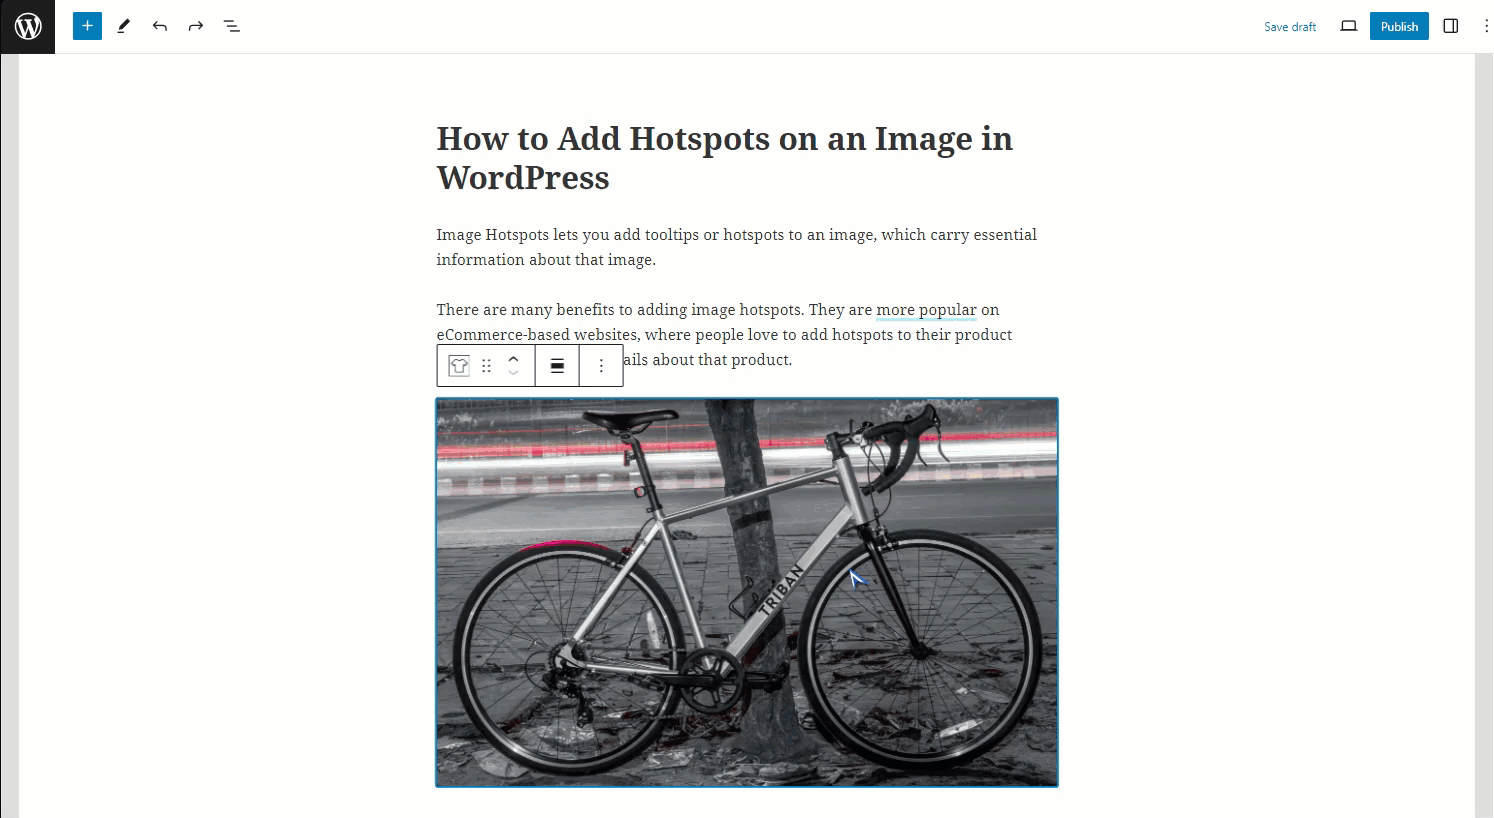
Image Hotspots, a tool that empowers your creativity, allows you to add tooltips or hotspots to an image, giving you the control to customize and enhance the user experience with essential information about that image.
Image hotspots are a versatile tool that is not confined to eCommerce-based websites. They can be used in various contexts, such as educational websites, to provide detailed information about specific areas of an image, sparking your curiosity about its potential.
By strategically placing hotspots in specific areas of your product’s image and information, you can revolutionize your image, turning it into an interactive and engaging experience for your users.
How to Add Hotspots on an Image in WordPress
By default, the block editor does not allow adding hotspots to images. To do so, you must install the Image Hotspot Block plugin.
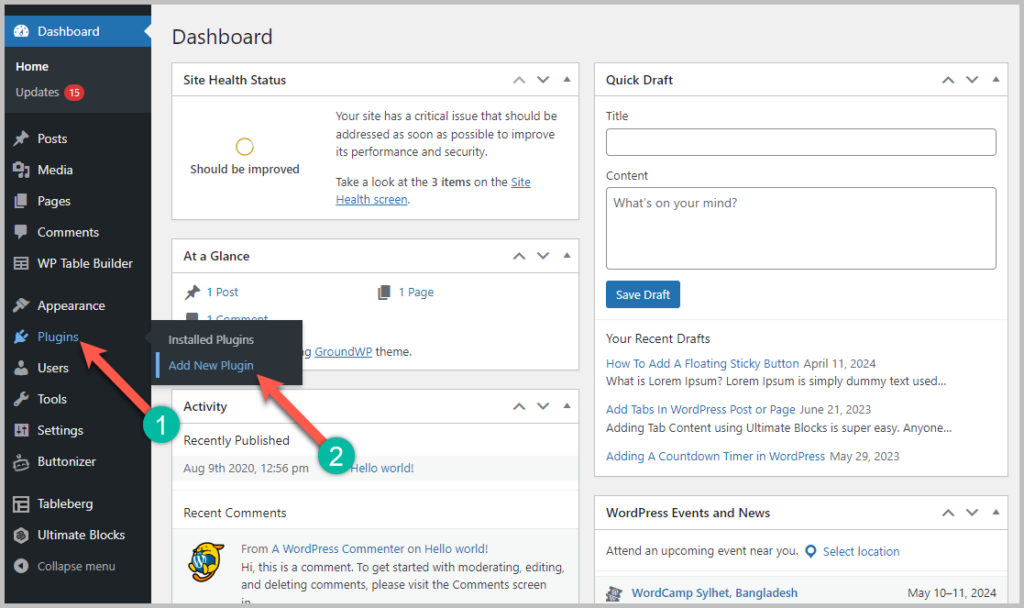
Step 1: Install the Image Hotspot Block Plugin
Navigate to your WordPress Dashboard > Plugins > Add New Plugin.
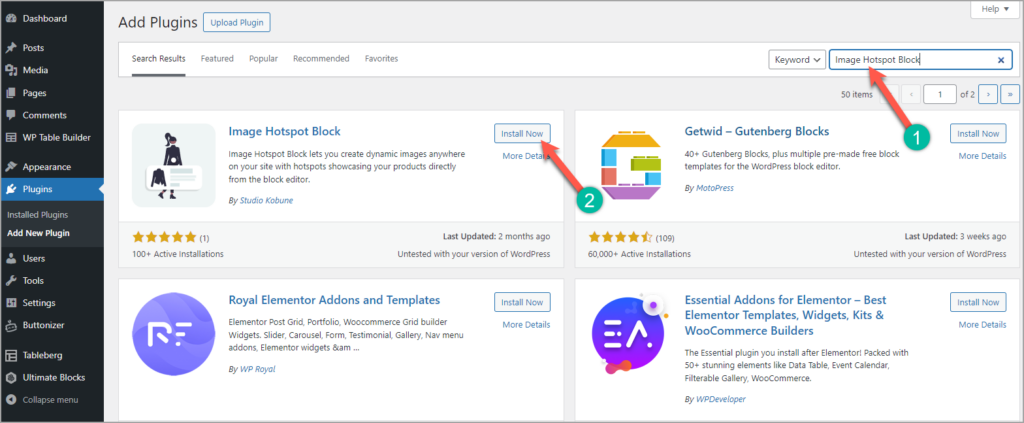
Now type “Image Hotspot Block” and click the “Install” button when it appears. After installing the plugin, activate it by clicking the “Activate” Button on the same page.
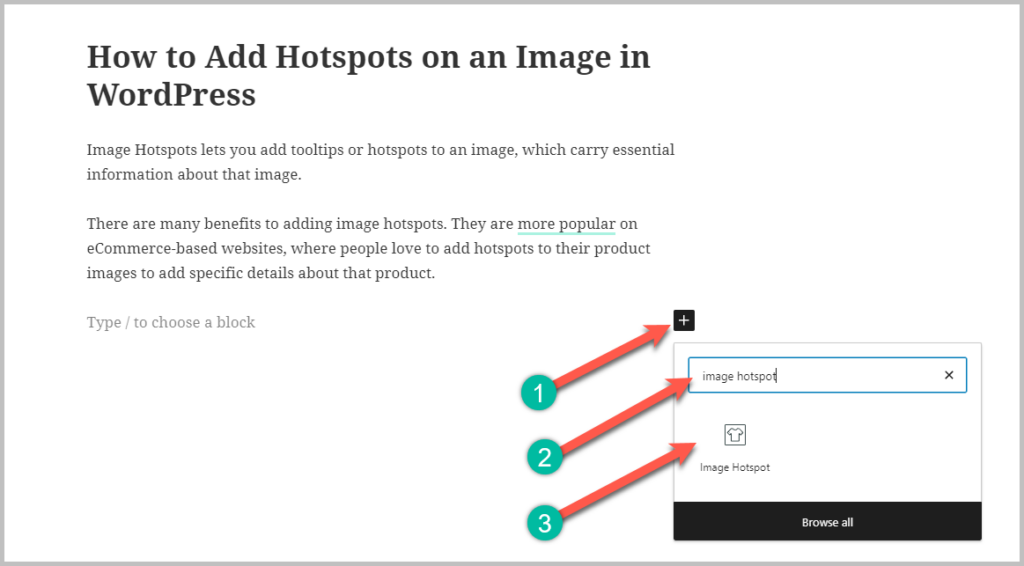
Step 2: Add Images
Go to your post or page using the Gutenberg Block Editor and add the “Image Hotspot” block in the editor.
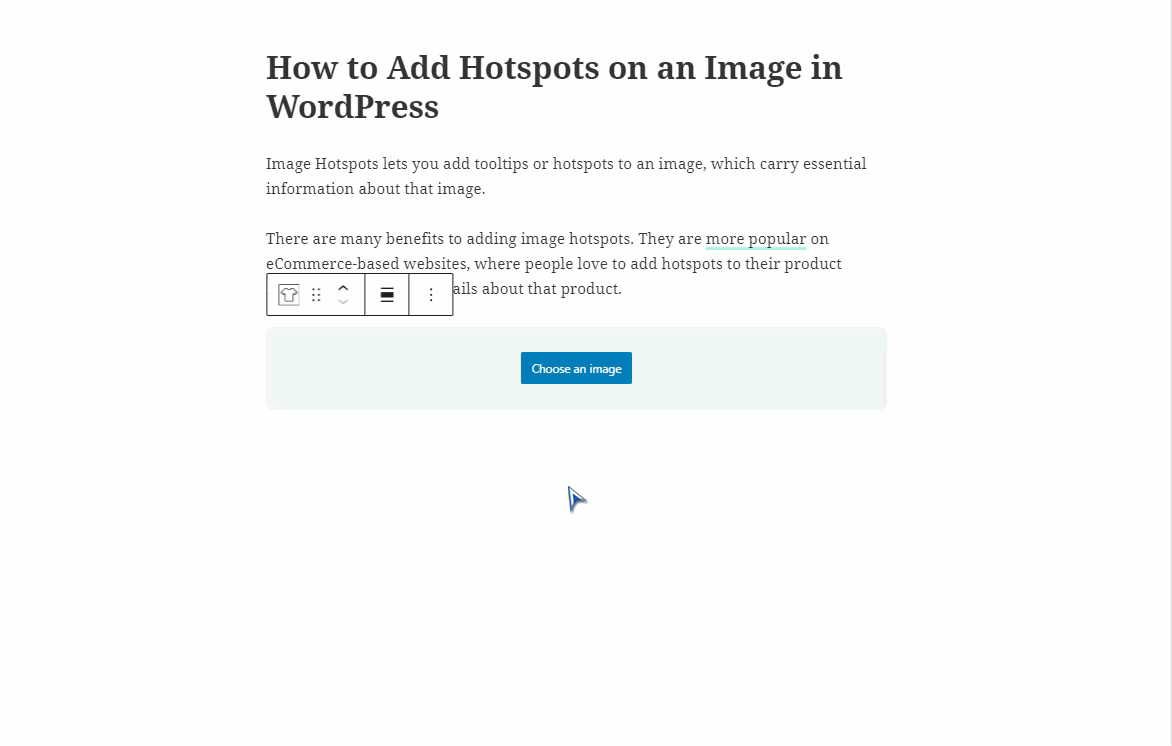
You can add an image by clicking the “Choose an image” button. Then, select your image file and click the “Select” button.
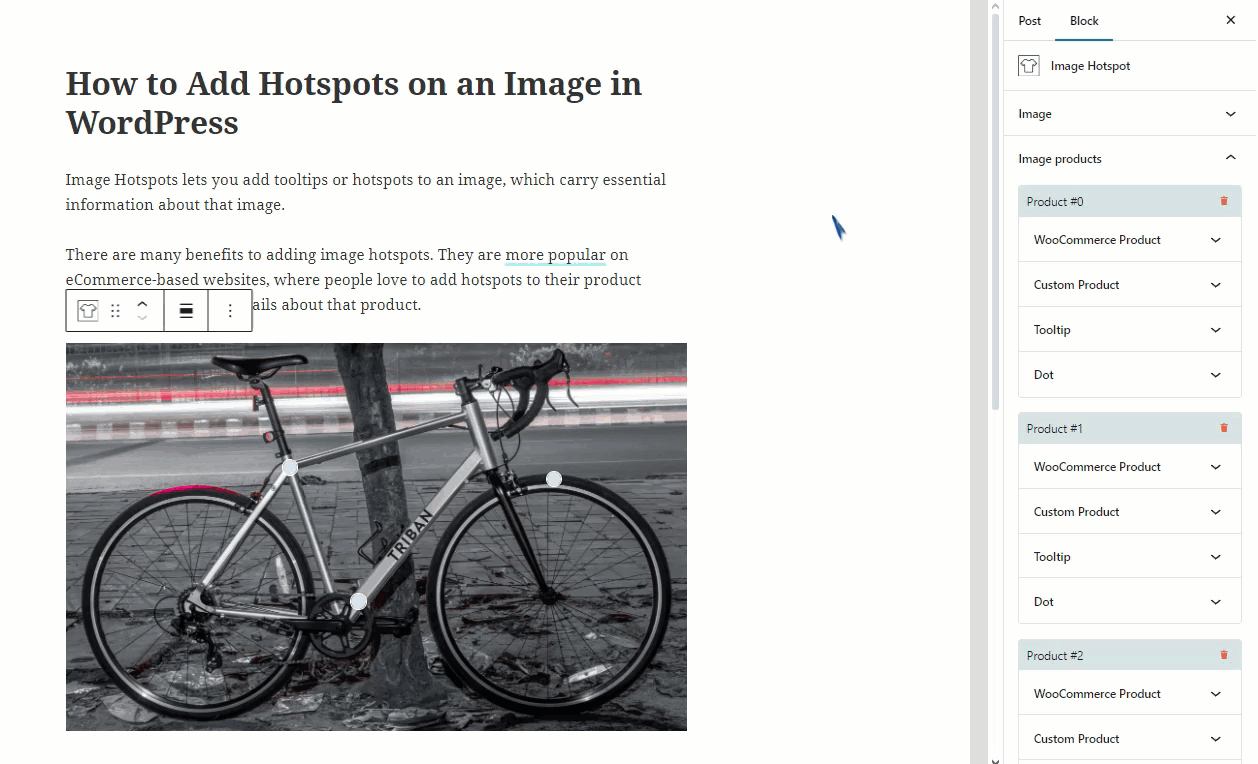
Step 3: Add and Position Your Hotspots
Go to Settings at the top right side of the editor, select Block, and click the “Add a Product” button. (Note: click the “Add a product” button several times to add several hotspots).
Use the cursor to select hotspots one by one. To position the hotspots, drag the mouse cursor and simultaneously click the CTRL or CMD button from the keyboard.

You can load your product from the WooCommerce Product list or create a custom product.
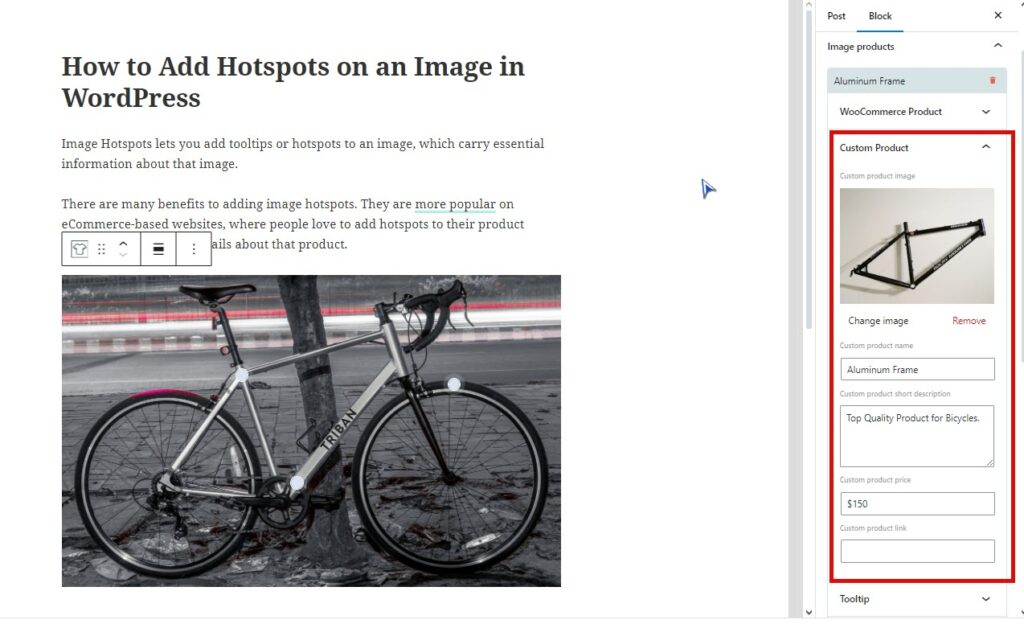
To create a custom product, you must add an image, product title, product description, price, and link.
If you click on the hotspot after inserting the product information in the Custom Product box, it will also show you a live preview of your hotspot.
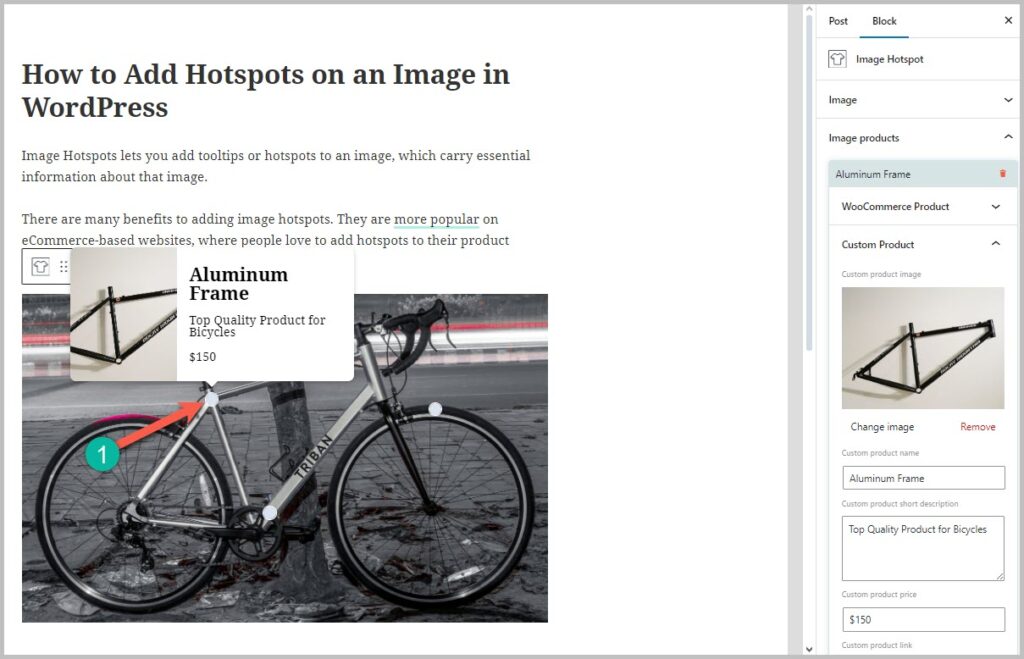
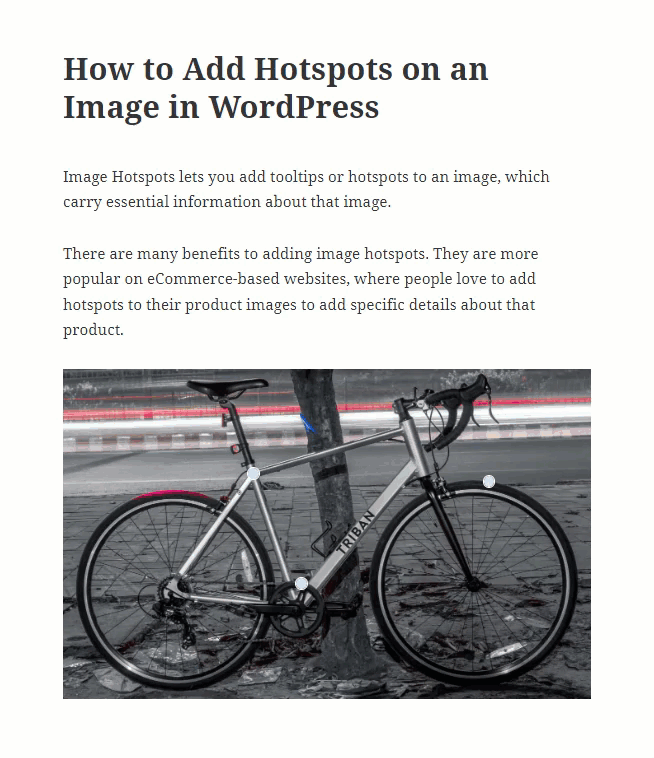
This is the final preview of the product hotspots in an image.
Conclusion
I hope you’ve learned from this small WordPress tutorial. If you face problems creating image hotspots using our guide, let us know in the comment section below. We would love to help you out.
Related Posts
- How to Use WebP Images in WordPress & Make Website Loading Faster
- How to Hide Post/Page Titles in WordPress (3 Ways)
- How to Add a Logo Slider in WordPress (Easiest Way)


Leave a Reply