
One of the most significant advantages of using WordPress is the versatility and control you get over your website.
You can not only configure your site however you want but also make any changes anytime without many problems.
Whether you want to redirect a URL or change some PHP settings, you can do it easily in WordPress.
Most of these changes can be made using the .htaccess file which is available in every installation.
In this article, I’ll show you step by step how to edit the .htaccess file in WordPress safely and easily.
Since the .htaccess file is a crucial file, it’s important to edit it carefully to avoid any errors on your website.
That being said, let’s get started.
What is a .htaccess File?
.htaccess (or Hypertext Access) is a file located at the root of your WordPress installation. It’s a configuration file that lets you edit various configurations on your website.
Things like 301 redirects, SSL configuration, access rules, etc can be managed using the .htaccess file in WordPress.
It’s crucial to edit the .htaccess file with caution as any error or wrong configuration can cause your website to crash.
We always recommend taking a backup of your .htaccess file before making any changes to it.
Let’s now take a look at the different methods of editing the .htaccess file.
How to Edit .htaccess File in WordPress
The .htaccess access is a hidden file and cannot be viewed easily. Whether you’re viewing your website files in a file manager in cPanel or using any plugin, you won’t be able to see this file unless you set all hidden files to be visible.
There are many different methods of editing the .htaccess file on your site. Here are three safe and simple methods of doing it:
Method 1: Using A Plugin
The fast and easy way of editing the .htaccess file on your website is by using a WordPress plugin.
There are many plugins that let you do this but our recommendation is the Htaccess File Editor plugin which has over 60,000 installations with 5-star reviews.
Here are the step-by-step instructions on how to edit the .htaccess file using this plugin:
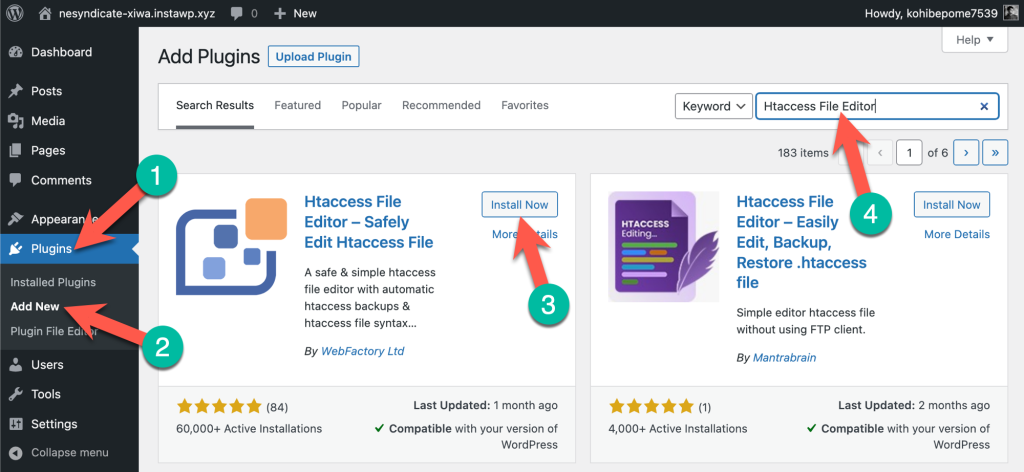
Step 1. Go to your WordPress Dashboard and navigate to Plugins > Add New. Then search for ‘Htaccess File Editor’ and install & activate the plugin.
Step 2. After installing and activating the plugin on your website, you’ll find the plugin settings under the Settings menu in your WordPress dashboard.
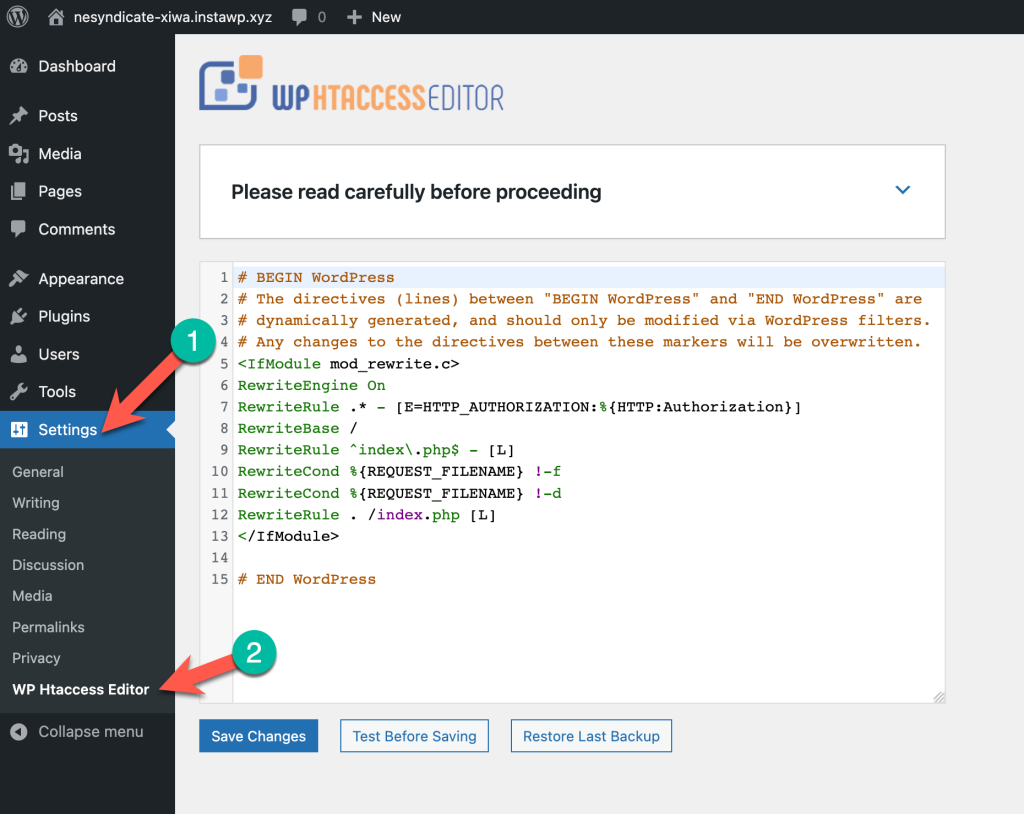
In the text editor, you’ll notice there is already some text. This is the default configuration of your .htaccess file.
Step 3. Insert your code snippets in the editor. Before clicking on the Save button, first, click the Test Before Saving button.
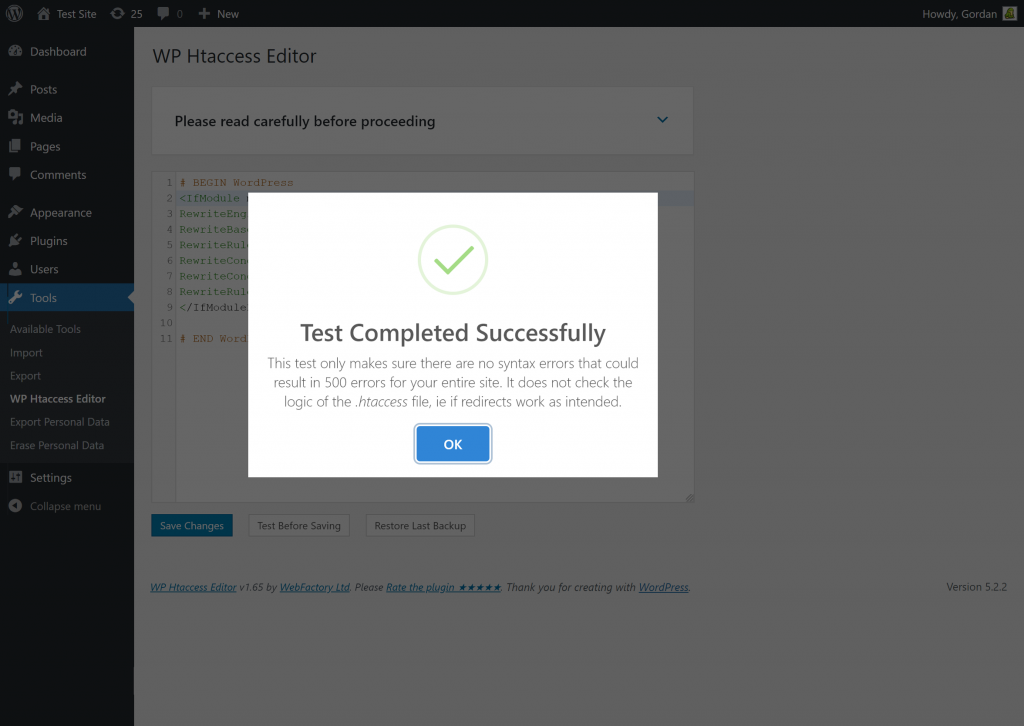
This will first test the .htaccess file for syntax errors which prevents you from causing any errors in your file which could crash your site.
Step 4. Once you’ve successfully tested the syntax of the file, save the changes on your .htaccess file.
One great feature of this plugin is that it automatically creates a backup of your .htaccess file every time you make any change to it.
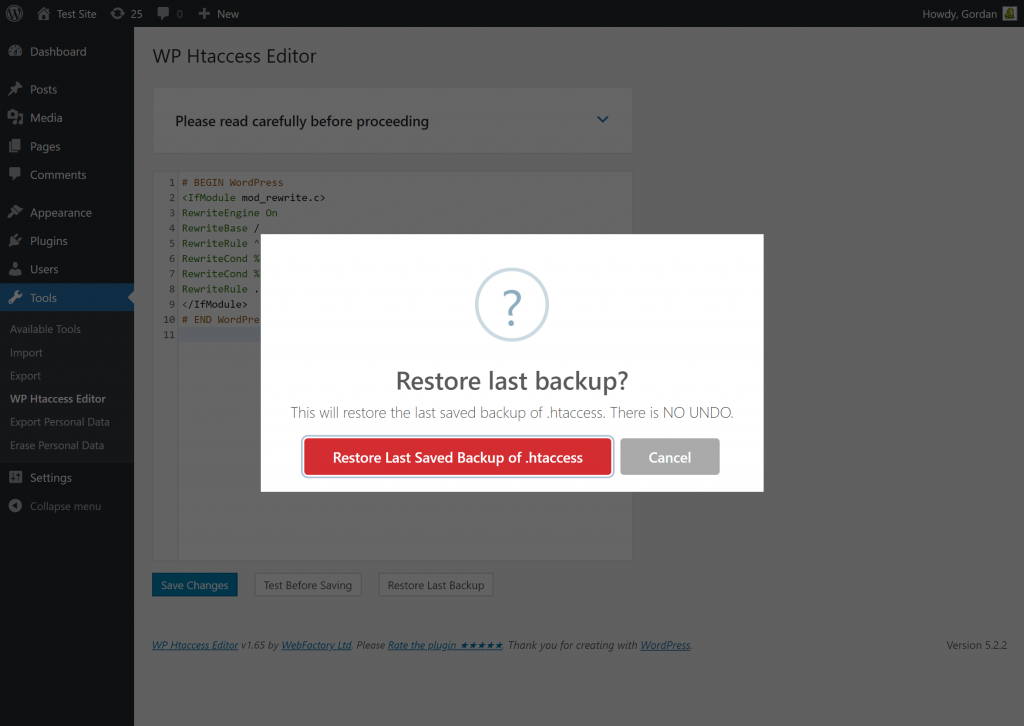
And you also have the option to restore the last saved backup of your .htaccess file.
Using a WordPress plugin like Htaccess File Editor for editing your .htaccess file is a perfect option for beginners as it’s safe and easy.
Method 2: Using cPanel
The second method of editing your .htaccess file is by using the cPanel of your hosting. By this method, you locate the .htaccess file in your file manager and edit it directly from there.
Let me walk you through the process step-by-step.
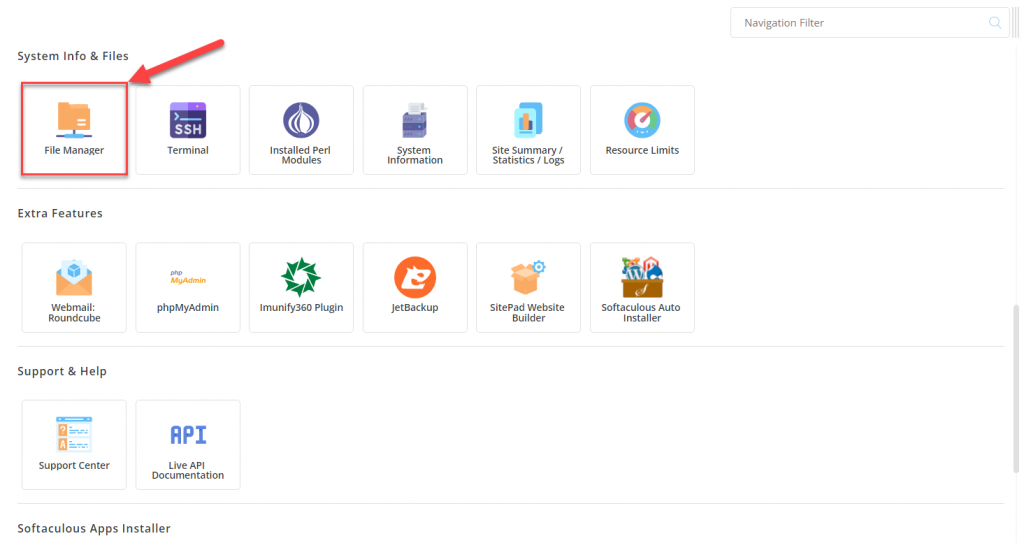
Step 1. Login to your cPanel and locate the file manager.
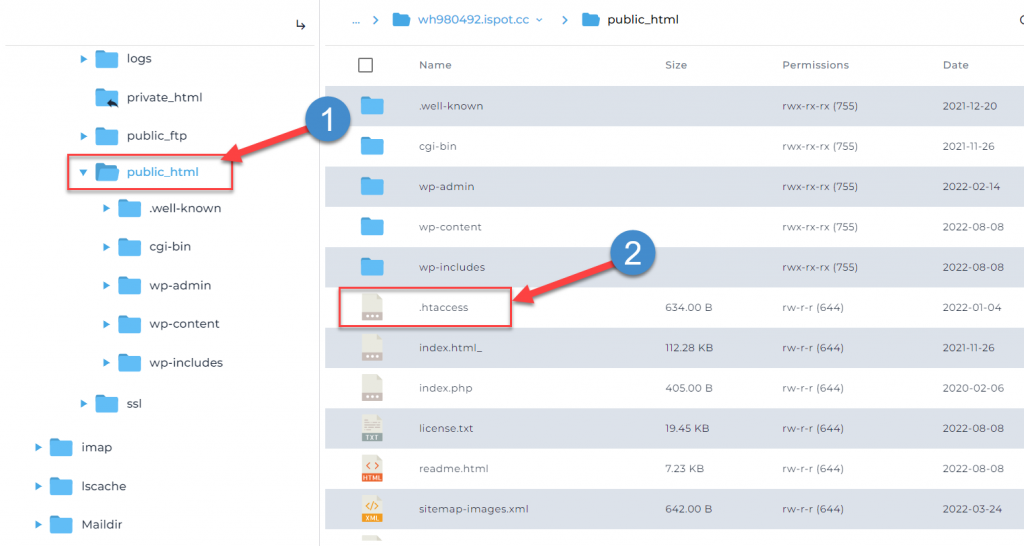
Step 2. Navigate to your site’s root folder. This is usually named public_html. In this folder, you’ll find the .htaccess file.
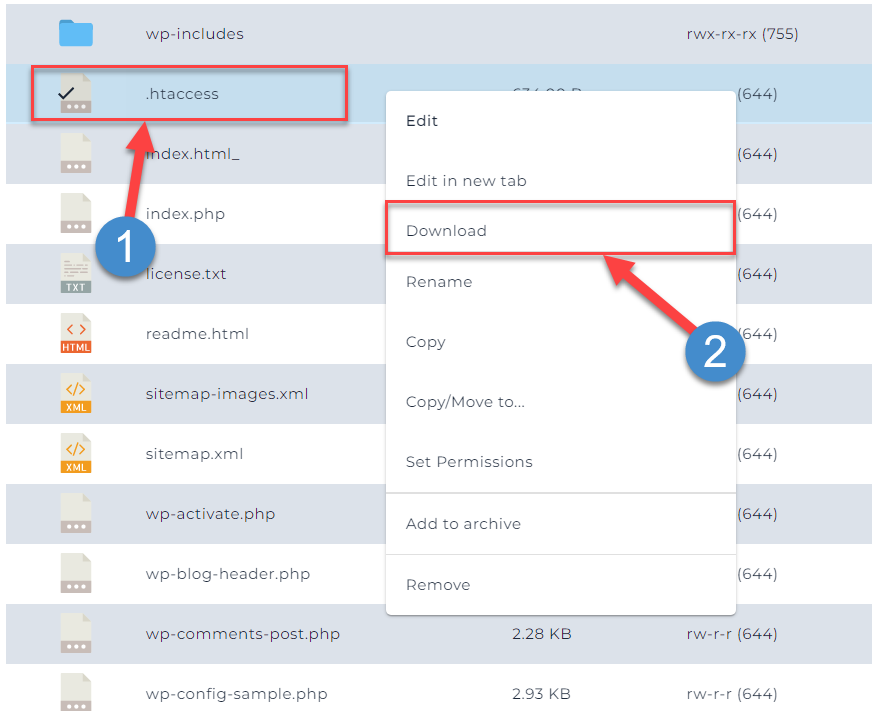
Step 3. Right-click on the .htaccess file and download it to save a copy of it before making any changes to it.
Step 4. Once you’ve downloaded the file, right-click on the .htaccess file again and click on the Edit button this time.

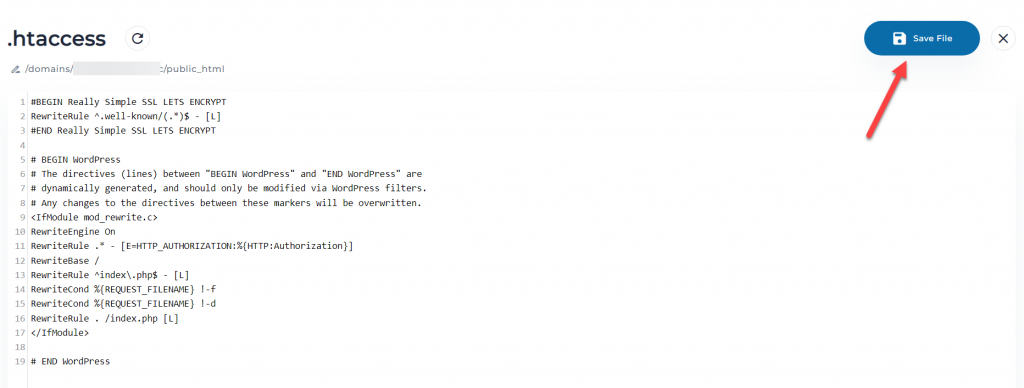
Step 5. The editor will open up in a popup where you can edit the .htaccess file. Insert your code snippets into the file and click save once you’re done.
That’s all you have to do to edit your .htaccess file using cPanel. Keep in mind that, unlike the WordPress plugin, there are no syntax checks while you’re editing in cPanel.
So, if there are any errors in the code snippet you paste, the site could crash. That’s why it’s important to download a backup of the file before making any changes to it.
Method 3: Using FTP Clients
The last method of editing the .htaccess file is using FTP clients. For this method, you’ll need an FTP client to access your website along with the hosting credentials to log in to your hosting account.
Here are the steps to edit your .htaccess file using FTP clients.
Step 1. Download and install FileZilla on your computer. FileZilla is one of the most popular FTP clients and is completely free.
Step 2. Your next step is to connect your website to FileZilla. For this, you’ll need the FTP credentials of your website. If you don’t have these credentials, you can contact your hosting provider.
You’ll need 4 things:
- Hostname
- Username
- Password
- Port Number
Enter these details in the Quick Connect bar at the top. This will connect FileZilla with your website.

Step 3. Once your site is connected, your website files will be loaded in FileZilla. Locate the .htaccess file in the public_html and click on edit.
Edit the .htaccess file by inserting any snippet you want and save the file.
That’s how you can edit your .htaccess file using FTP. Just like editing using cPanel, it’s always recommended to take a backup of the file before making any changes.
Conclusion
So, that’s all about editing the .htaccess file in WordPress safely. I hope you found this tutorial useful.
Editing the .htaccess file of your site should be done in a very careful and safe manner. With the methods shared above, you will be able to do it easily and without any issues.
If you have any questions regarding this tutorial, feel free to leave questions in the comment section below.


Leave a Reply