The Heading block is a fundamental text type used to break up large a piece of content into different sections and sub-sections. Headings are typically displayed in larger and bolder fonts, making them stand out from the rest of the text.
It helps you create a hierarchical structure for your post and page content, improving the overall readability and search engine optimization. The Gutenberg block editor comes with a default Heading block, including six types of headings.
You can change the heading types as per the content needs and apply customizations to them. This article will explain to you how to use the Heading block in WordPress.
How to Use the Heading Block in WordPress: Step-by-Step
Since Heading is a default Gutenberg block, you need to rely on a separate plugin. You can use six different heading types, ranging from H1 to H6, using this default version. Here’s how to use the Heading block.
Step 01: Open Any Post or Page
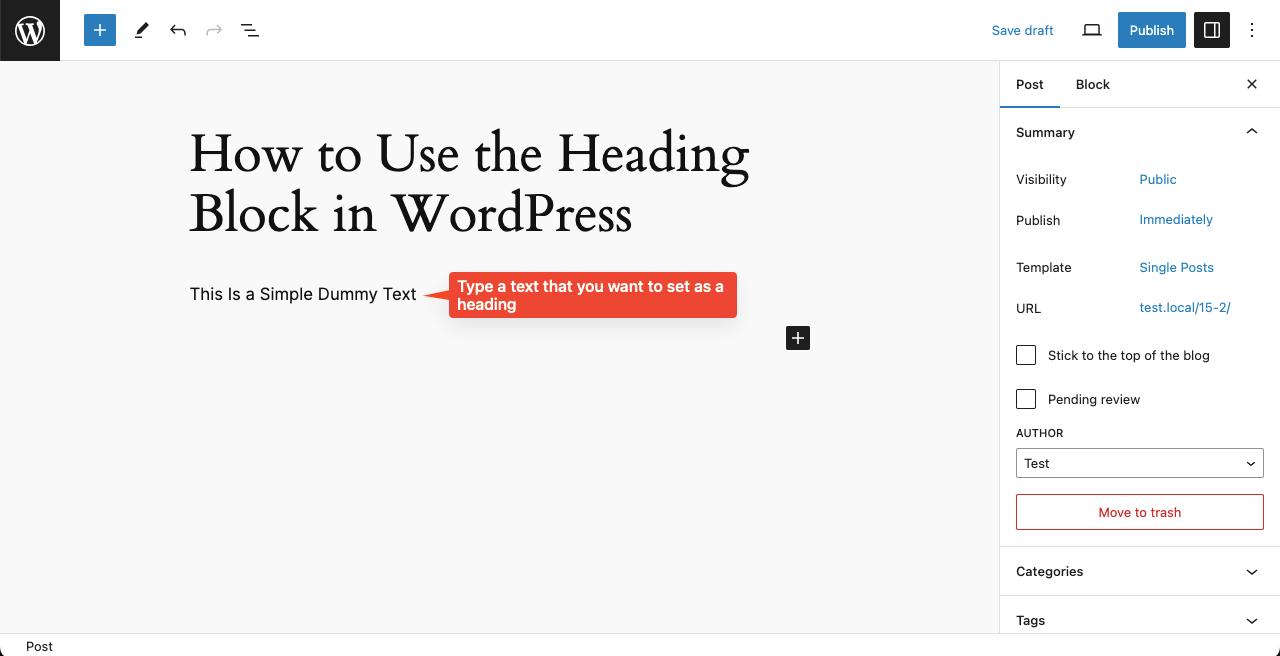
Open the post or page where you want to use the Heading block. Type any text on the editor that you want to set as a heading. Write the heading as briefly as possible. Better if you write it in one single sentence
For example, we have written – This Is a Simple Dummy Text.
Step 02: Select the Heading Block for the Text
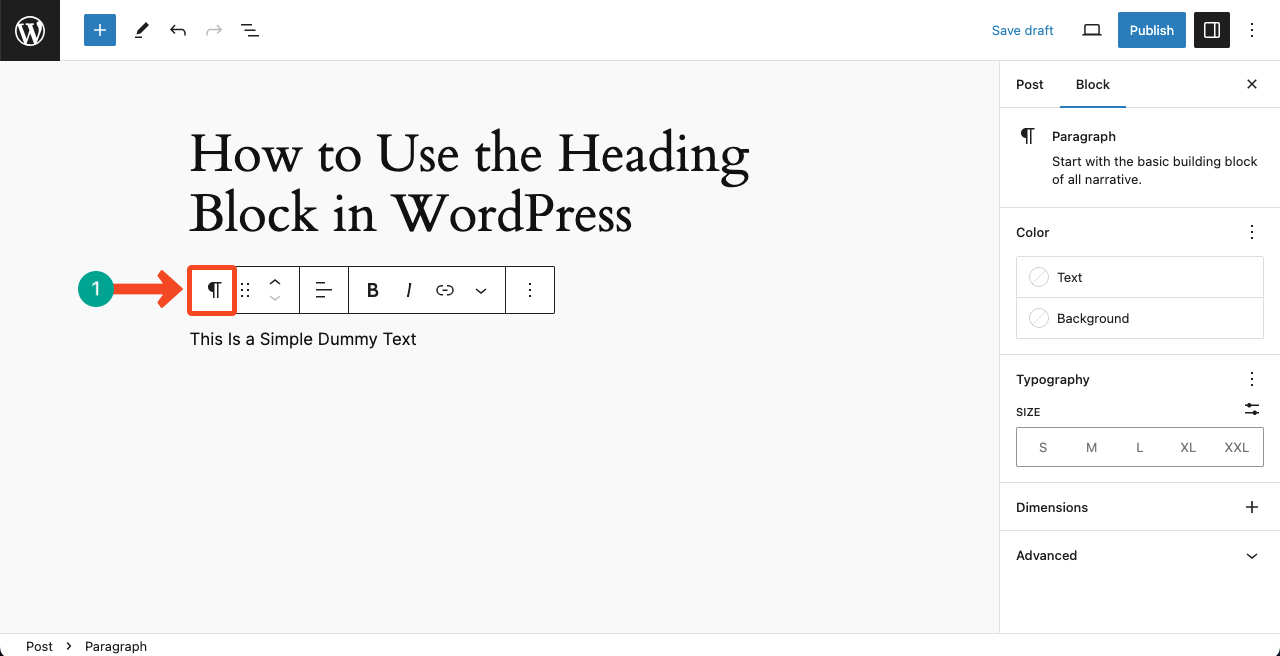
Select the text by clicking on it using your cursor. A top toolbar will instantly appear on top of the text. Click the icon on the far left icon, which is the paragraph block by default.
A list of various blocks will immediately appear on your screen. Take your cursor on the Heading block and click it.
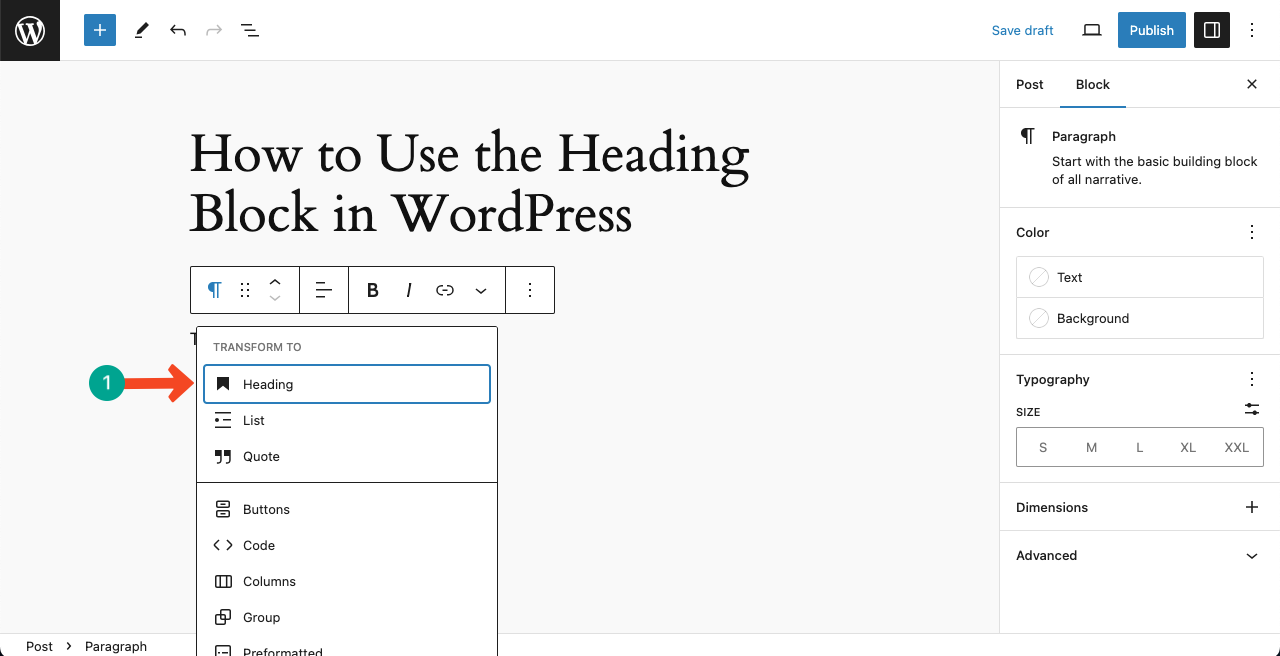
The selected text will then be set as the heading.
Step 03: Change the Heading Type
By default, the H2 heading type will be set on your selected text. You can see H2 on the top toolbar.
To change the heading type, click on H2. You’ll get a list of heading types. Click on the type you want to apply in the text.
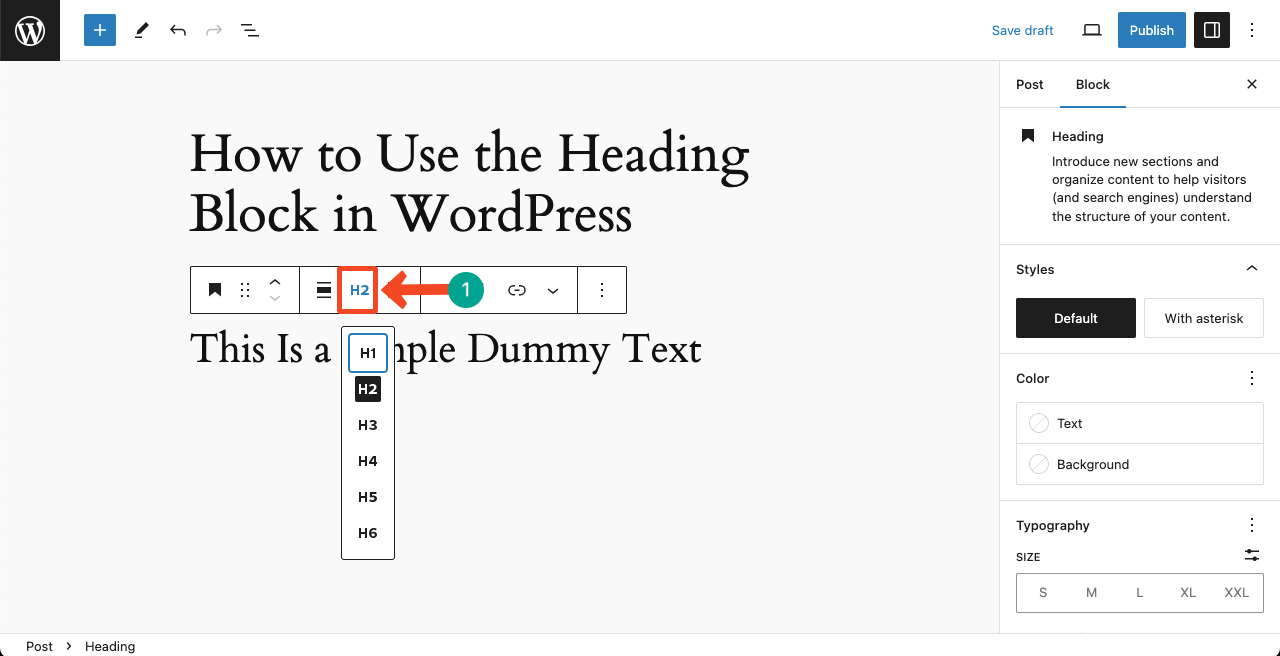
Thus, you can easily change the heading type.
Step 04: Stylize the Heading Block
Come to the Block tab on the right sidebar. You’ll get several stylization options under this tab. Here’s what you can do with these options.
- Color – Change the text and background color of the block
- Size – Scale up or down the font size of the text
- Appearance – Make the text light, medium, semi-bold, or bold
- Letter Case – Set the uppercase or lowercase letters for the text

Step 05: Customize the Typography of the Heading Block
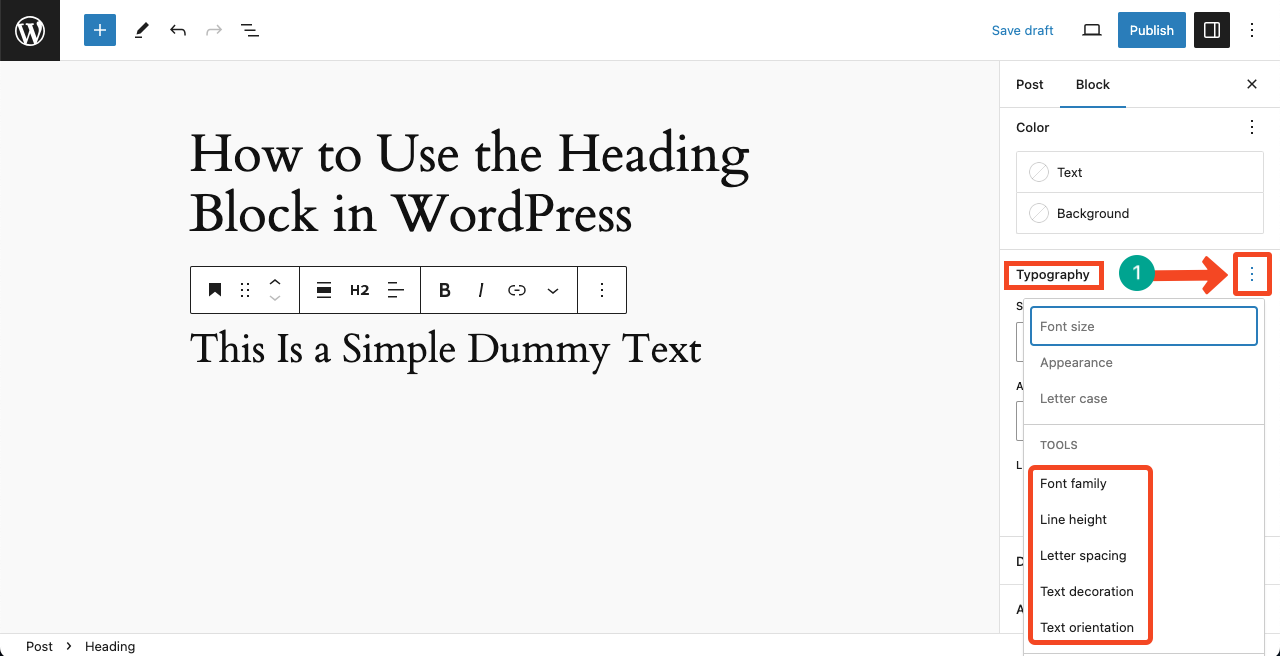
You’ll get one more option ‘Typography’ under the block tab. Press the three-dotted icon next to Typography.
A new list with several more options will appear below. Using these options, you can customize the Font family, Line height, Letter spacing, Text decoration, and Text orientation of the heading text.
Final Words
We hope you now know everything about the Heading block. However, there are some best practices you must care about while using this block. Ensure you are maintaining a logical hierarchy of the heading, meaning you should follow the sequential order in using the heading type.
Don’t use the H1 heading tag multiple times. From the SEO best practices, you can use this block only once in a post or page. But if you already use the default title option to set a title for the post or page, you don’t need to use the H1 tag.
Thus, you can find out some more best practices of the block online. This will help you make the best use of the Heading block.


Leave a Reply