
WordPress is a go-to platform for millions of users due to its user-friendly interface and tons of handy features. The List View option is one of them. It allows you to see the list of all the blocks at a time, used in the Gutenberg editor.
You can move specific blocks up or down and apply some basic-level customizations on this list. To become a great content editor, you must have an of how to use the List View in WordPress Block Editor.
This article will cover a step-by-step guide on this topic. Get started!
Supercharge Your WordPress Block Editor!

How to Use the List View in WordPress Block Editor
This List View is a default option in the WordPress Block Editor. Follow the steps explained below.
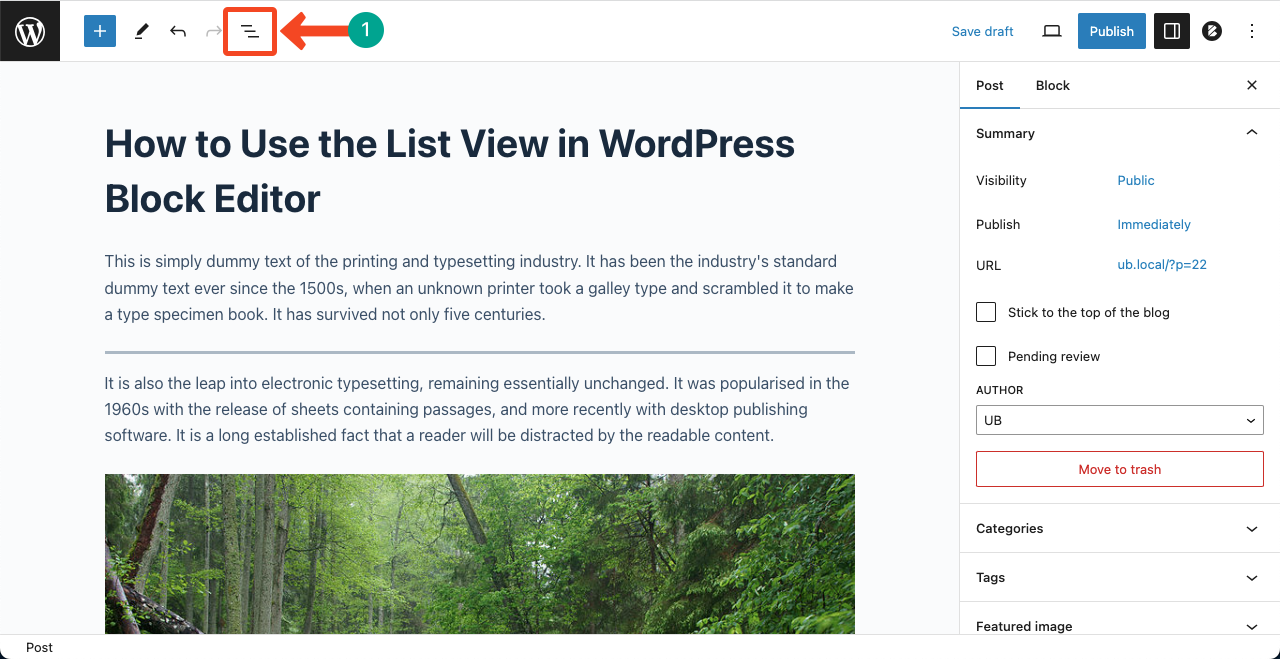
Step 01: How to Find the List View Option
Open any of your WordPress posts or pages. Come to your top toolbar. Click on the three-dashed line on the toolbar. This is the List View option.
Step 02: How to Open and Close the List View Option on WordPress
Clicking it will open up the list of all the content blocks used on the post/page. Clicking on the same three-dashed lines will close the List View option again.
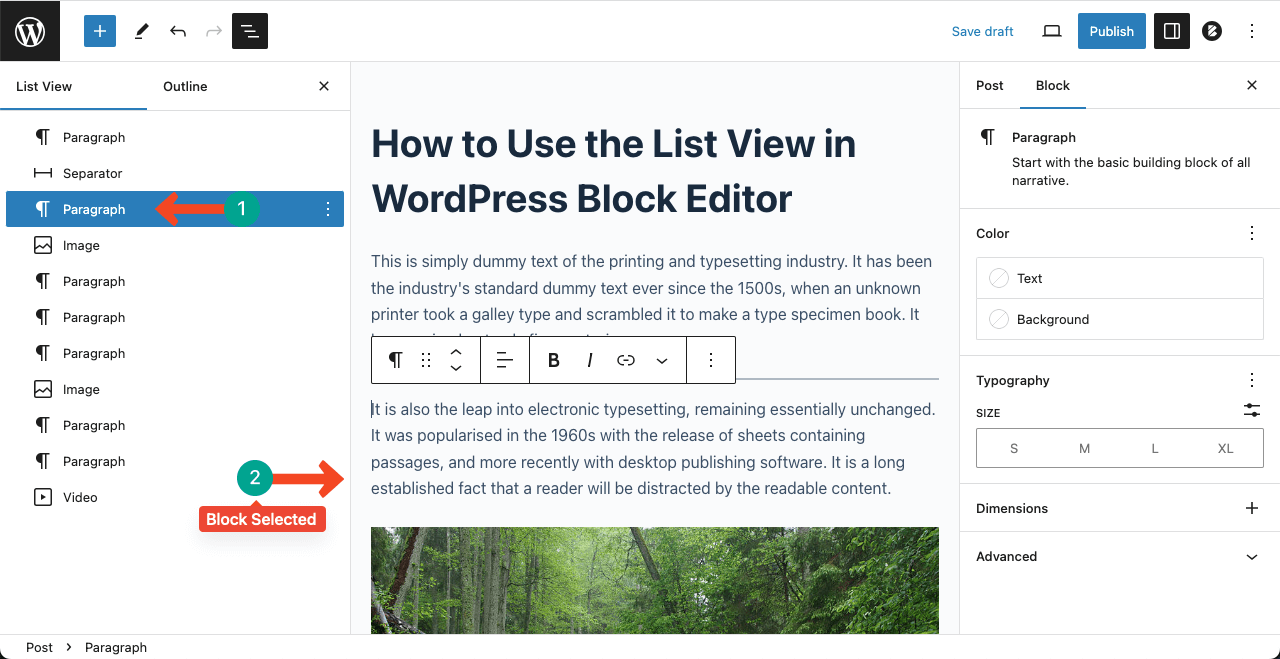
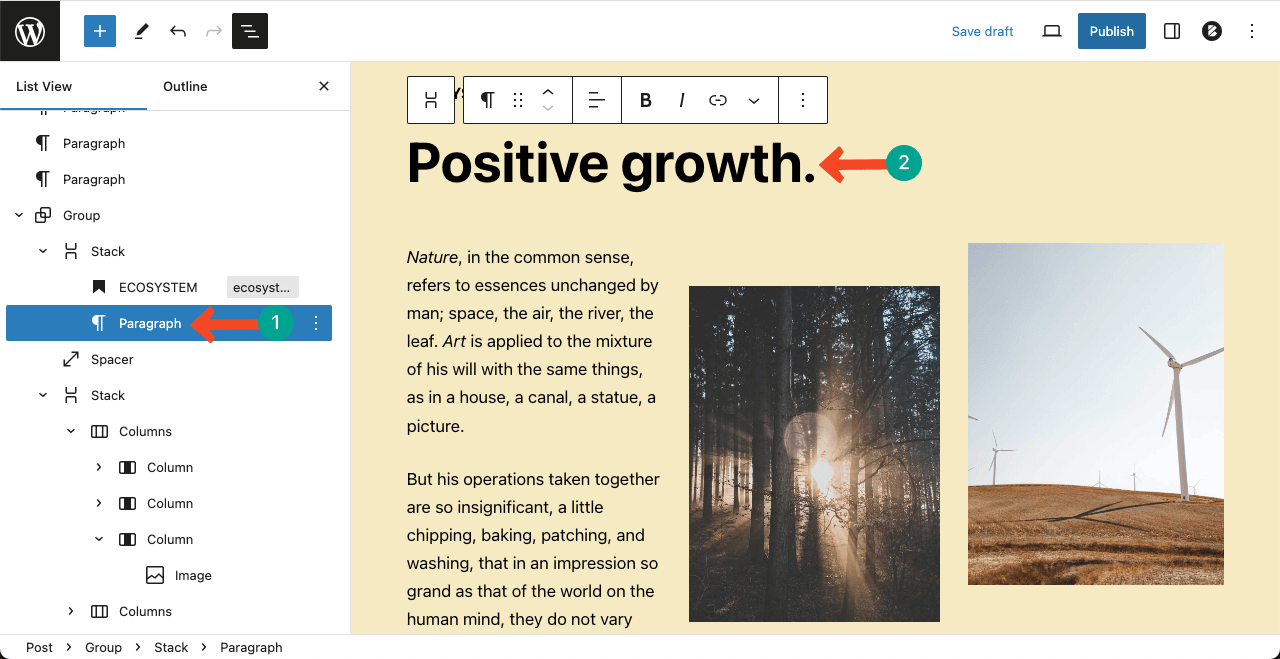
Step 03: How to Select Any Block Through the List View Option
Open the List View option. Click on any block you want. The block will be selected on the Gutenberg editor.
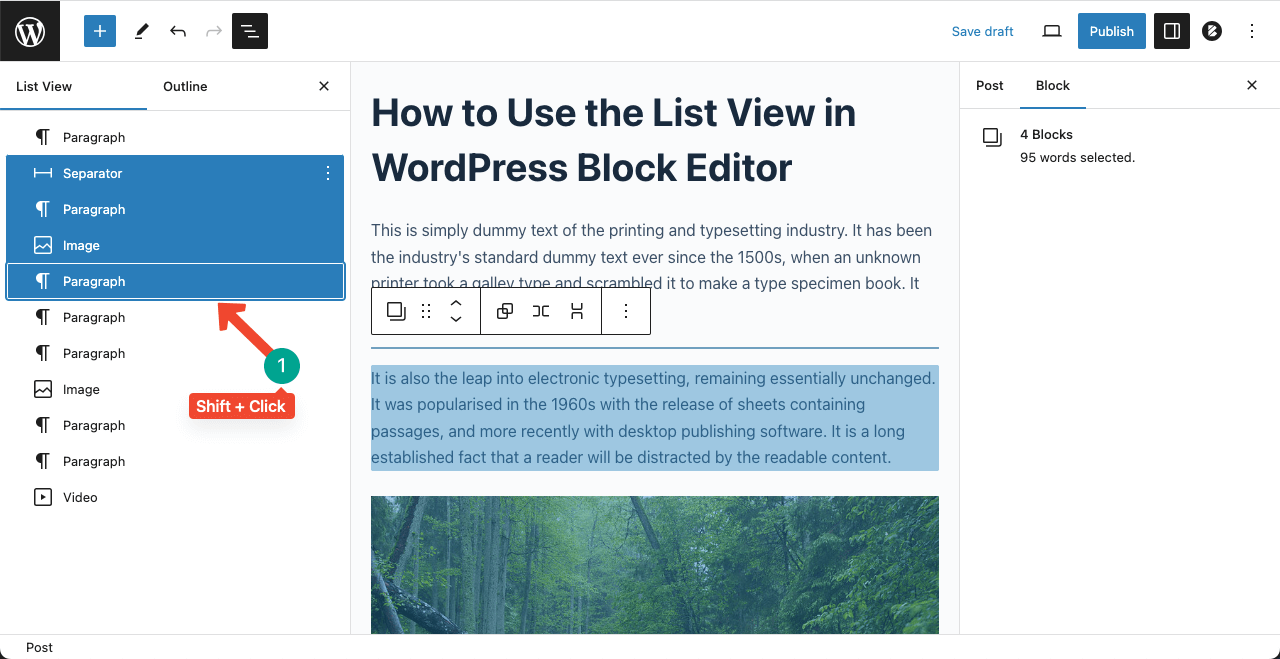
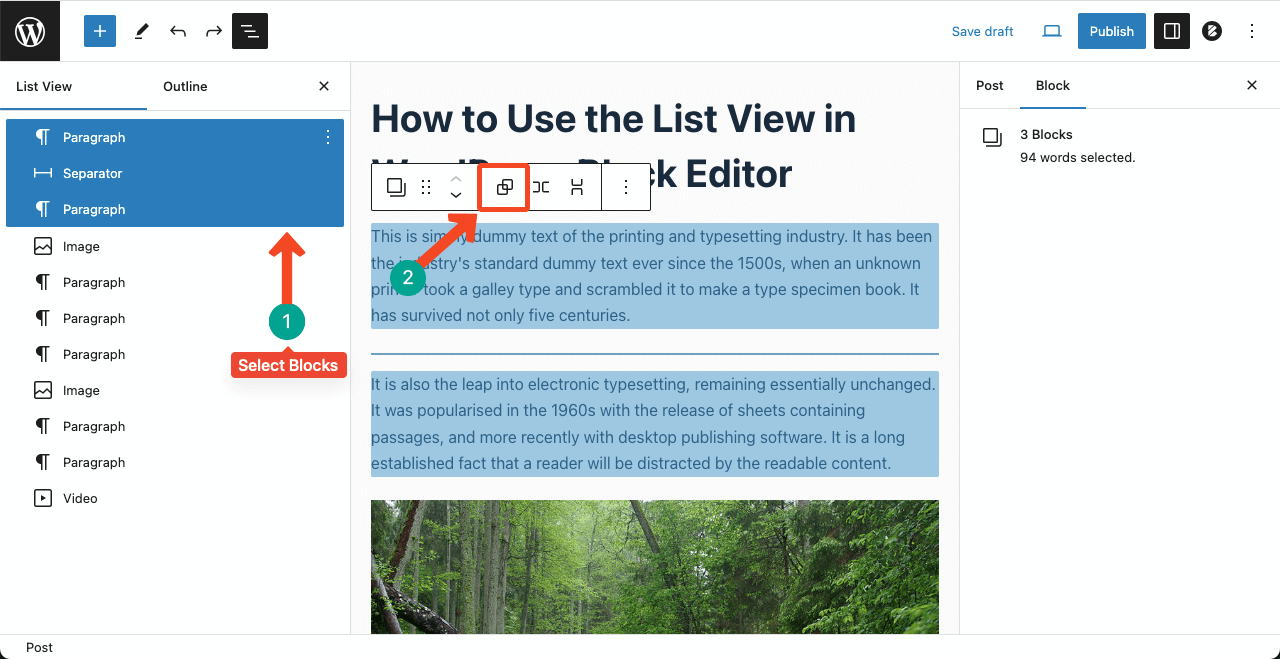
Step 04: How to Select Multiple Blocks on the List View Option
Open the List View option. Hold down the Shift key and click on the desired blocks sequentially, one by one, with the left mouse button. (Shift + Click with the left mouse button)
Step 05: How to Drag and Drop Blocks on List View
Open the List View option. Select as many blocks as you want. Hold them down and move the mouse to place them above or below another block.
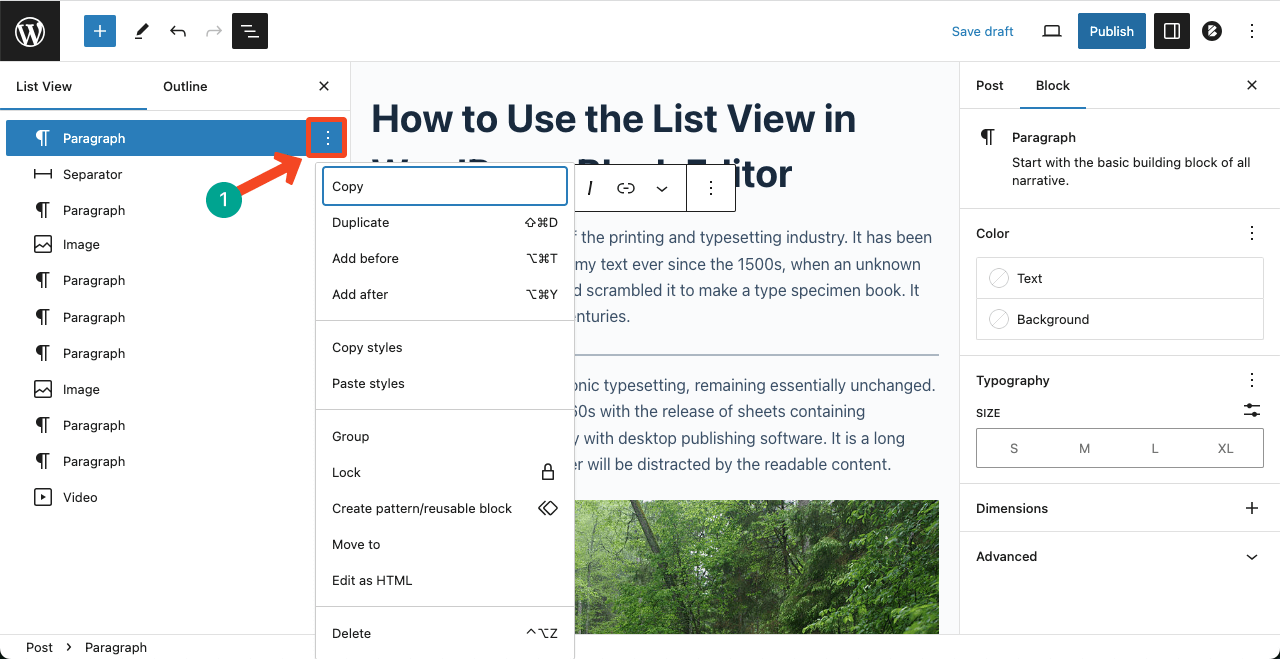
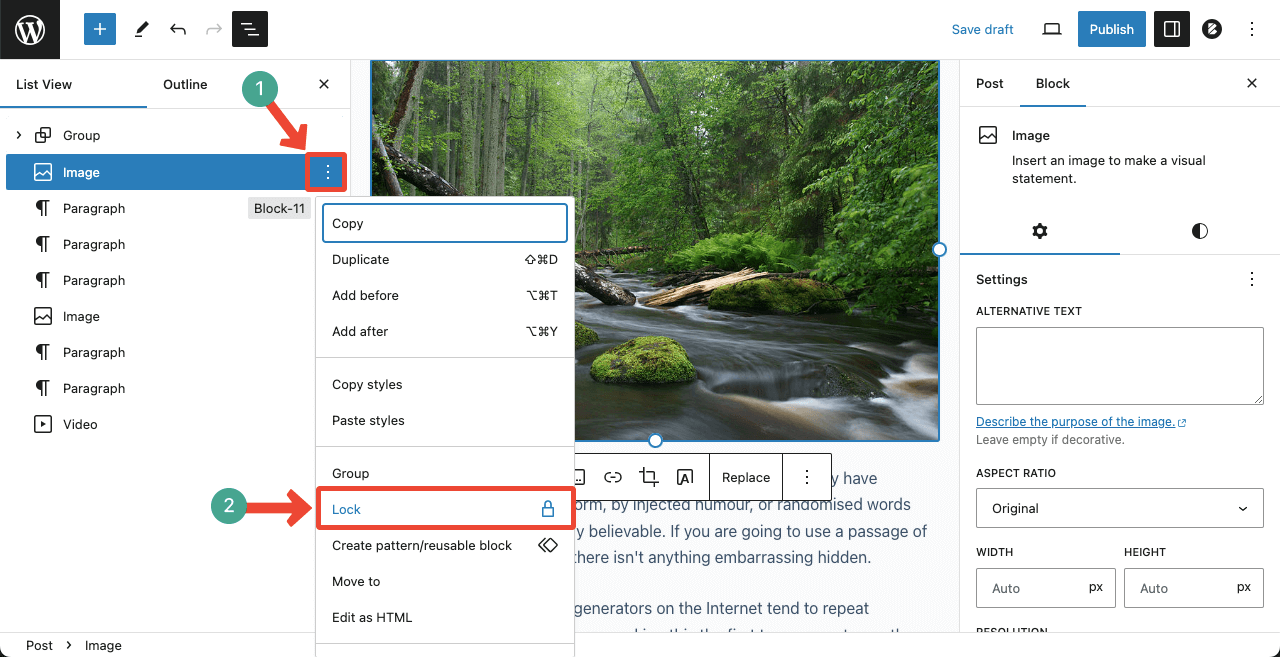
Step 06: How to Make Changes to Individual Blocks on the List View
Each block comes with a three-dotted vertical line. Clicking on it will open up a list where you’ll find options like Copy, Duplicate, Add before, Add after, Copy styles, Paste styles, Group, Lock, etc.
Use these options to make necessary changes to the blocks as you wish.
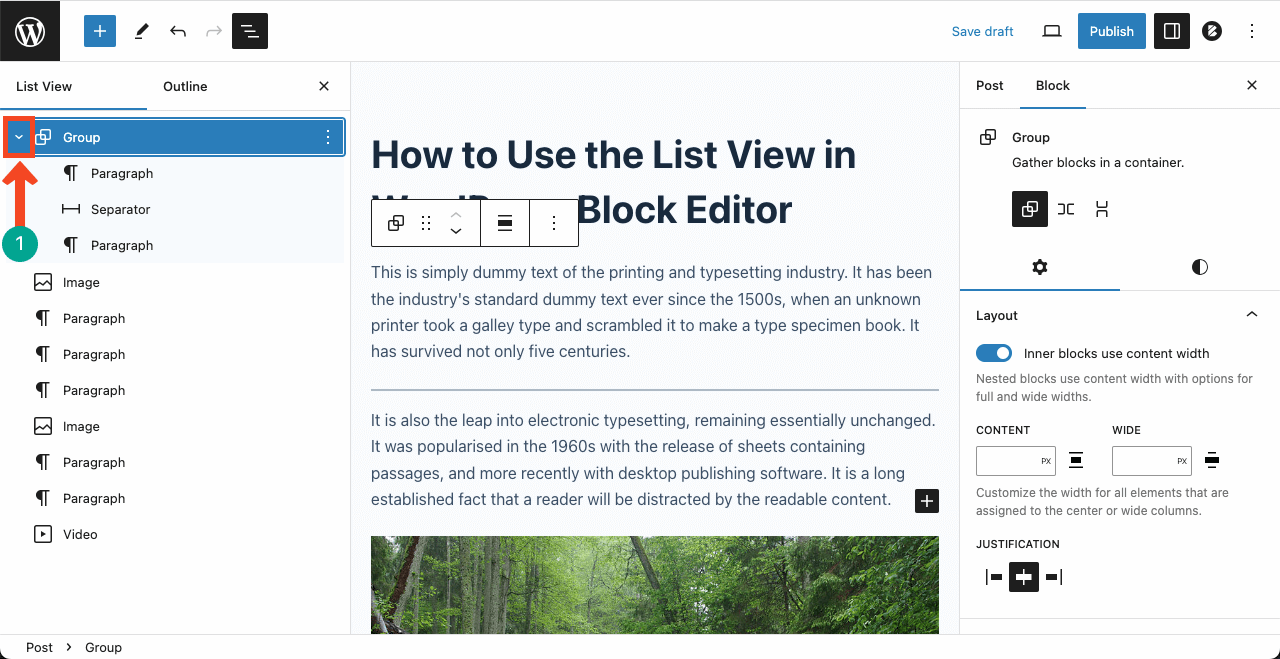
Step 07: How to Group and Collapse Blocks
You must create a group of blocks first to collapse or hide them.
Select the multiple blocks as you wish. A toolbar will appear on the Gutenberg editor. Press the Group icon on the toolbar. The selected blocks will be grouped.
You’ll see an arrow icon next to Group on the List View. By clicking the arrow icon, you can collapse or hide the blocks you have grouped.
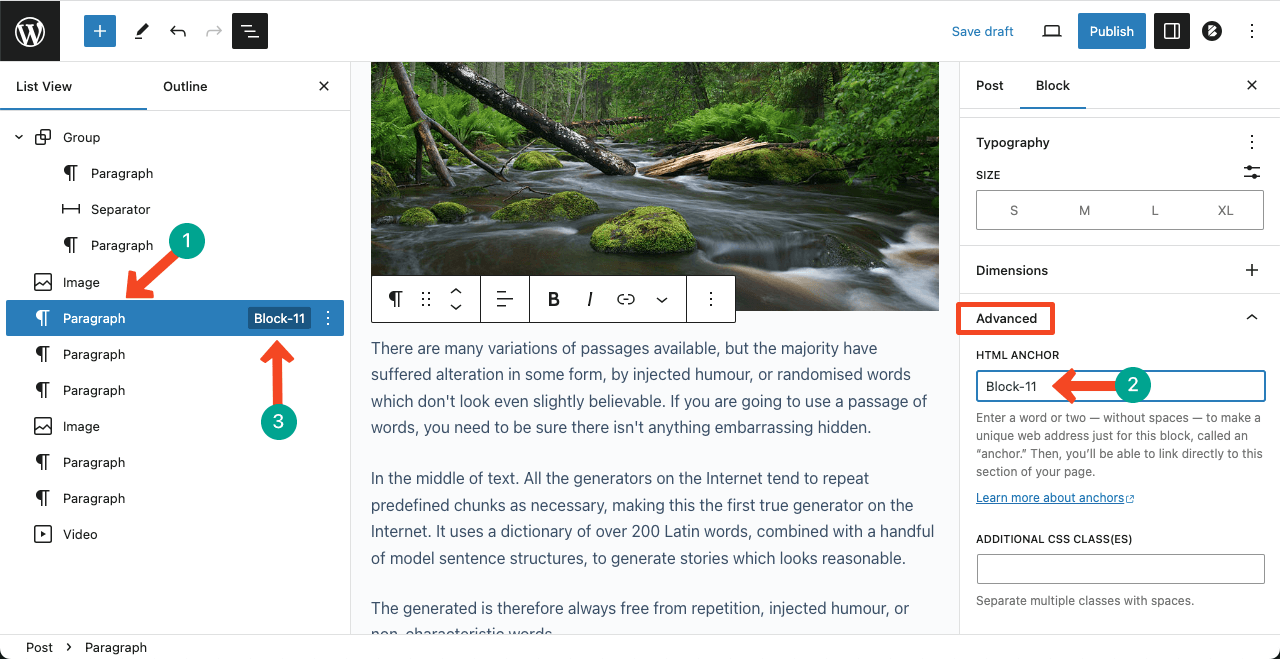
Step 08: How to Make Blocks Distinguishable on the List View
You must set an HTML Anchor to particular blocks to make them distinguishable on the List View.
To do this, select the block first. Go to Advanced > HTML ANCHOR on the right sidebar.
Type any keyword/note in the box, which you’ll see appearing on the List View next to the particular block in real time.
Thus, you can make any blocks easily distinguishable.
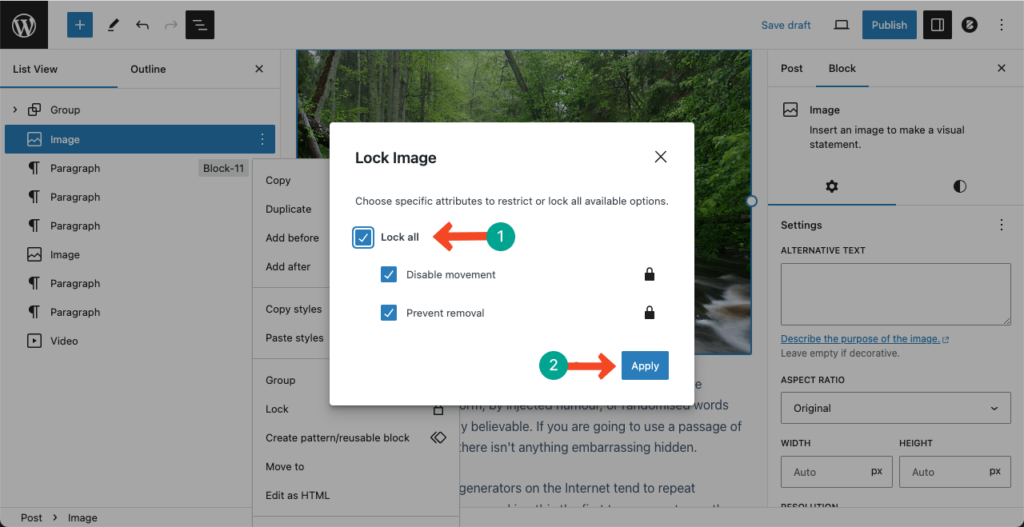
Step 09: How to Make Any Block Locked on the List View
Press the three-dotted vertical line on the List View. Find and click the Lock option on the opened-up list.
A new popup will open. Tick the options you want to lock up. Press the Apply button at the end.
Step 10: How to Edit Template/Pattern Blocks Using the List View Option
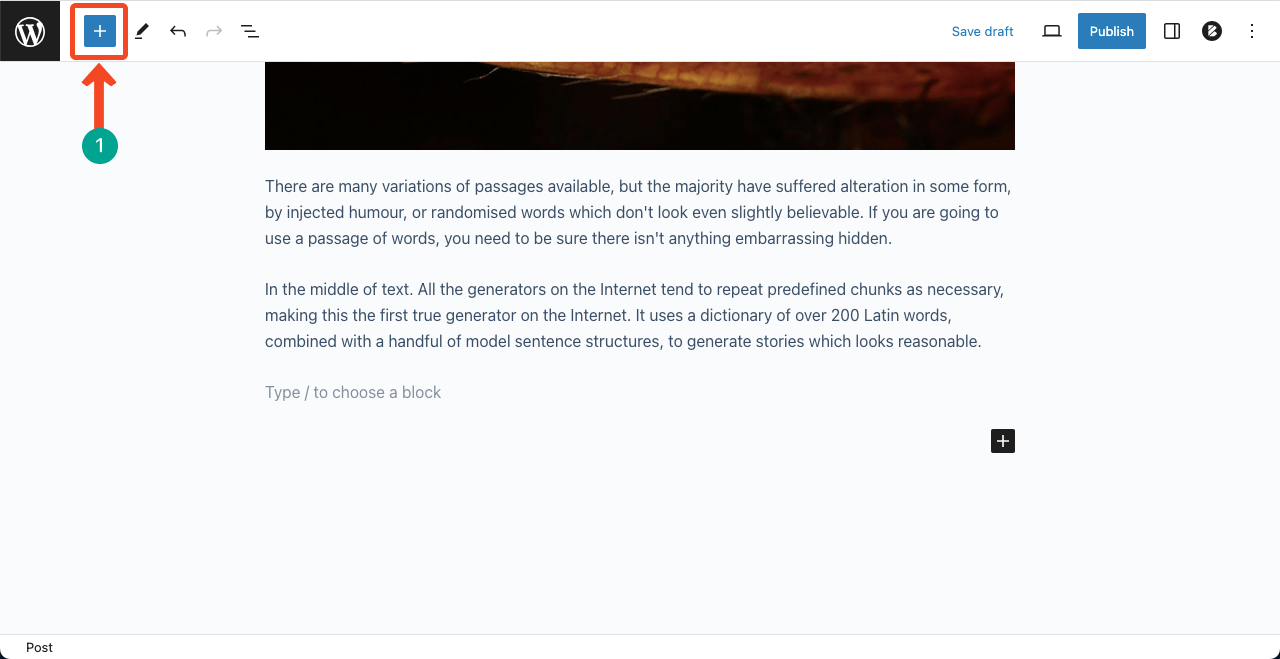
To use this option, you must import a template/pattern into the editor first. WordPress offers you a good number of default templates/patterns. Let’s import one for the tutorial. Press the Plus (+) icon on the top toolbar.
Come to the Patterns tab. You’ll get a list of various pre-built patterns. Import anyone you like.

Open the List View again. You’ll get a list of all the blocks used in the pattern. You can customize or modify them as you wish by following the above-mentioned steps.
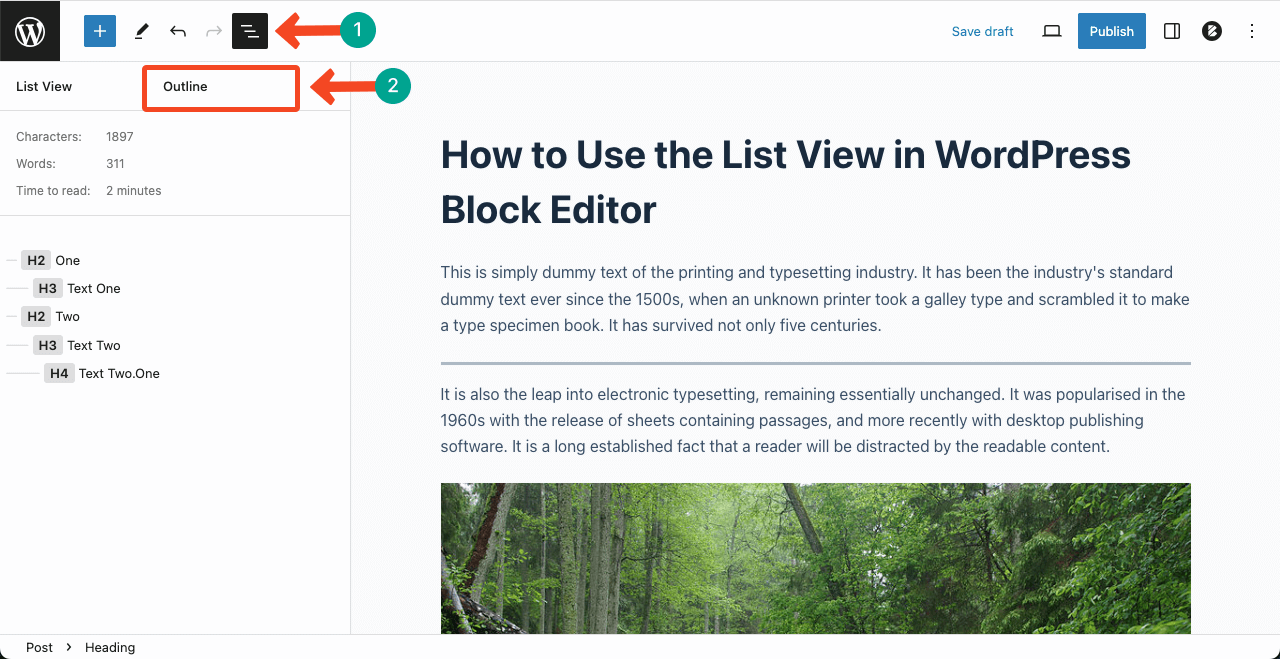
Step 11: How to View Outline
You’ll get the Outline option next to the List View option. Here, you can see all the Headings (H2…..H6) you have used throughout the content at a glance.
Conclusion
Although most WordPress content creators, especially writers, don’t know much about the List View option, you must have a proper idea about it to manage your content well. This can be a secret weapon for efficient and organized content creation in WordPress.
Hope you have benefited from this article. Explore our website to read more educational articles like this one.


Leave a Reply