Captivating the attention of web visitors and users in the shortest possible of time has become a must-have skill for any website owner today. After a new visitor lands on your website, he will give you a maximum of 5-7 seconds.
Unless you can engage him within the time, he is sure to move away. The WordPress Cover block can be a handy way to do this. The block allows you to add a solid color, image, or video in the background and text in the foreground.
This article will provide a guide on how to use the WordPress Cover block properly to create attention-grabbing sections on your website. Let’s dive in.
How to Use the WordPress Cover Block
The WordPress Cover is a default Gutenberg block. This one also has some unique features and options like the other WordPress. Explore step by step how to use the WordPress cover block in the following discussion.
Step 01: Add the Cover Block to Your Post/Page
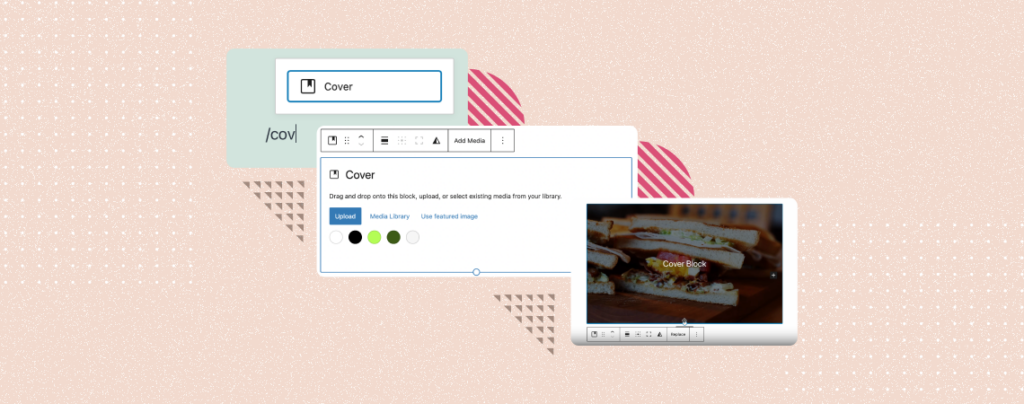
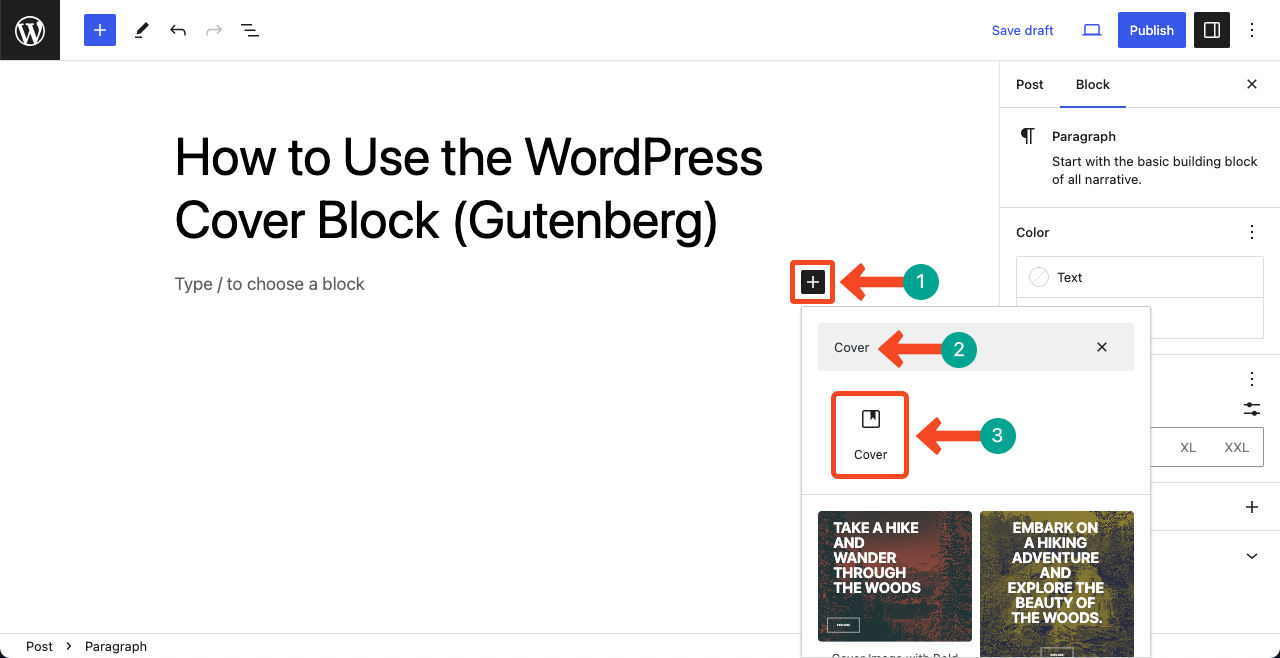
Get into the post or page where you want to add the Cover block. Open the Gutenberg editor by pressing the Plus (+) icon. Type Cover in the search box. Once the respected block appears below, click on it.
Step 02: Add a Solid Color or Image to the Background
Once the block is added, you’ll get options to add a solid color or image to the background. For the tutorial, we’ll add an image to the background. You can do it whether using the Upload or Media Library button.
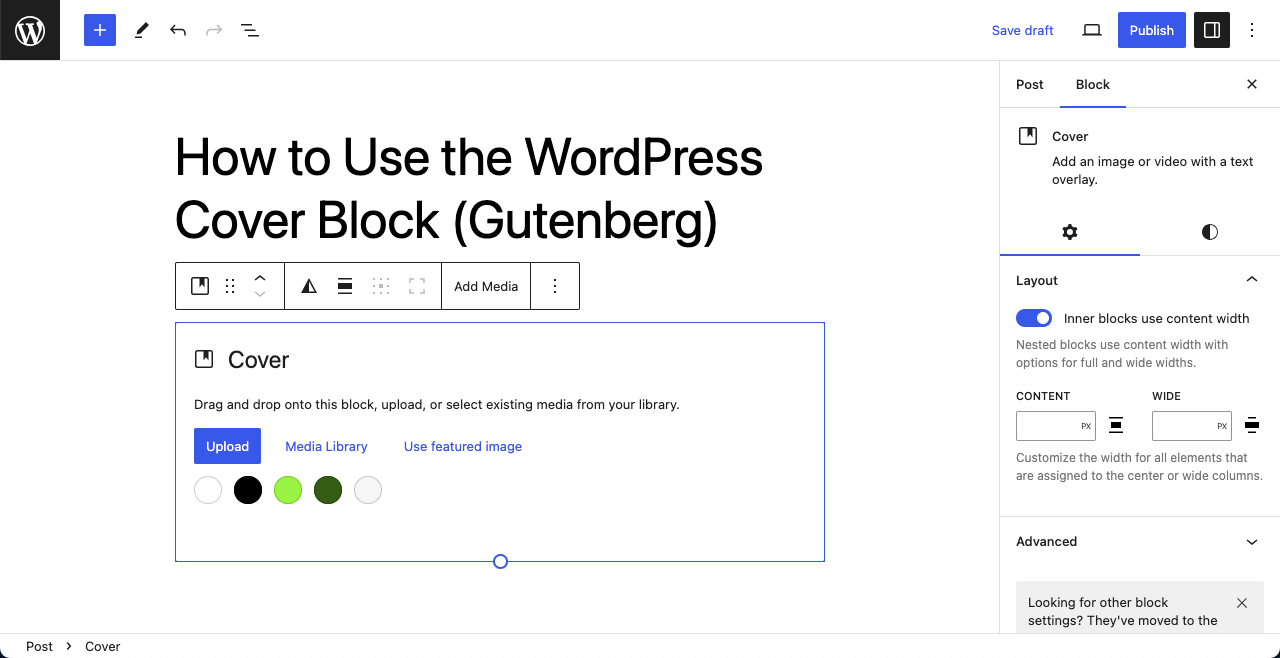
You can see the image has been added to the background of the Cover block.
Step 03: Customize the Image Added to the Block
Yes, you can add text and many other content on the image added to the Cover block. But before that, you can customize the appearance of the block. Take a look at how to do this.
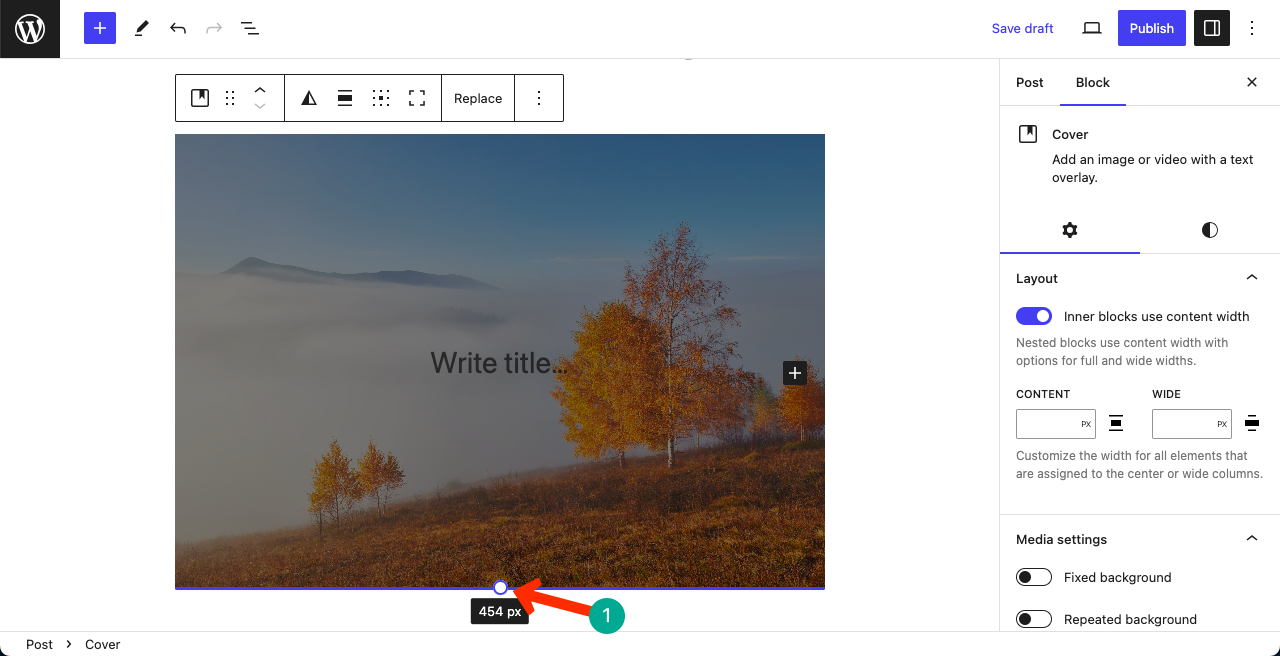
# Resize the Image
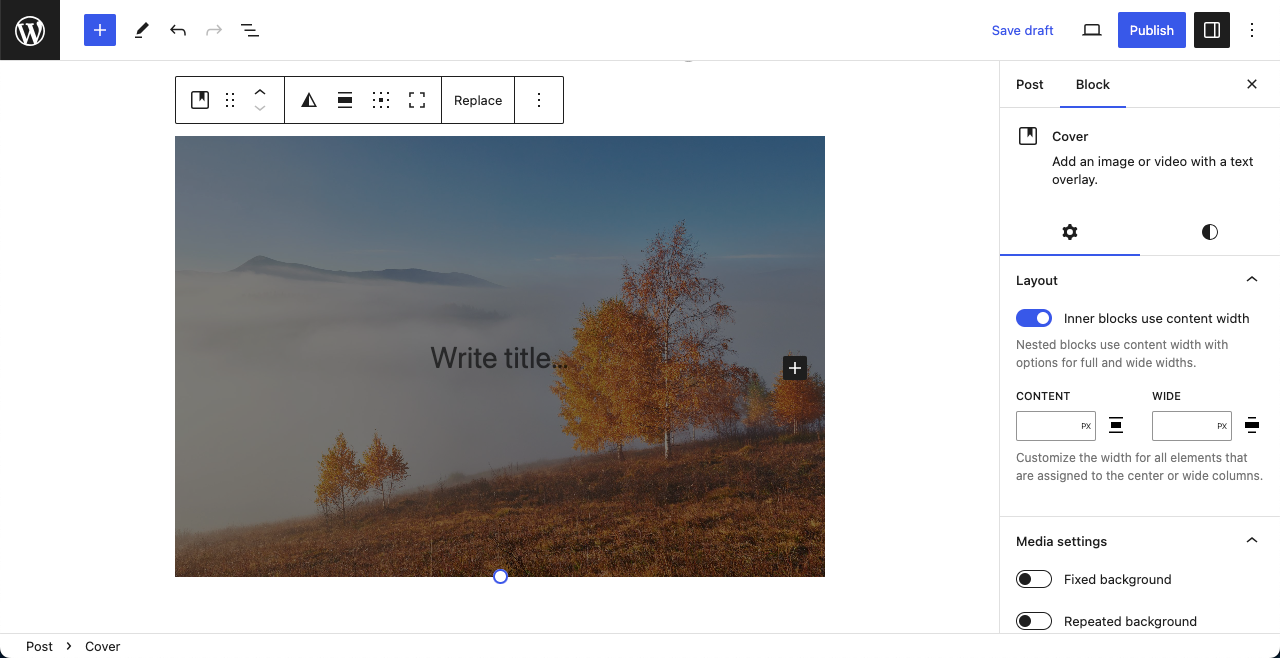
Take your cursor to the bottom line of the image and hover on the circular point. You’ll be able to resize the image by dragging. You can use it to reduce or enlarge the image size if you want.
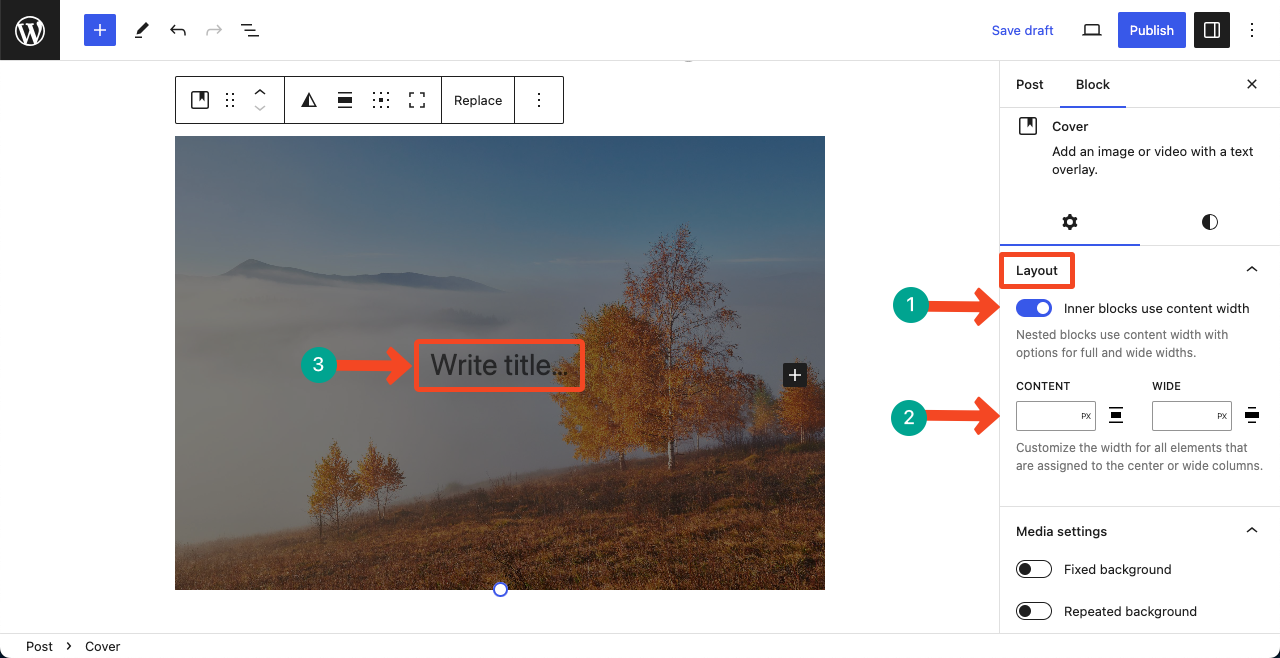
# Define the Inner Content Layout
Come to the Layout option under the Settings tab on the right sidebar. Toggle on Inner blocks use content width.
You’ll see two more boxes appearing below where you can put values to define the content layout inside the Cover block. You may leave the layout as it is or set a desired value.
Scroll down the sidebar a bit more. You’ll get the following more options.
# Media Settings
Toggling on the Fixed Background option will remove the Focal Point Picker. The present image position will be set for the block.
Toggling on the Repeated Background will apply the present Focal Point over the entire block.
# Focal Point Picker
If you want a particular point of the image to be focused on the block, you can pick from here using a picker on it.
# Alternative Text
Hope you already know about what the alternative text is. We recommend you add an alternative text to the box for leveraging SEO benefits.

Step 04: Stylize the Cover Block
Come to the Styles tab. Below is the list of things you can do here.
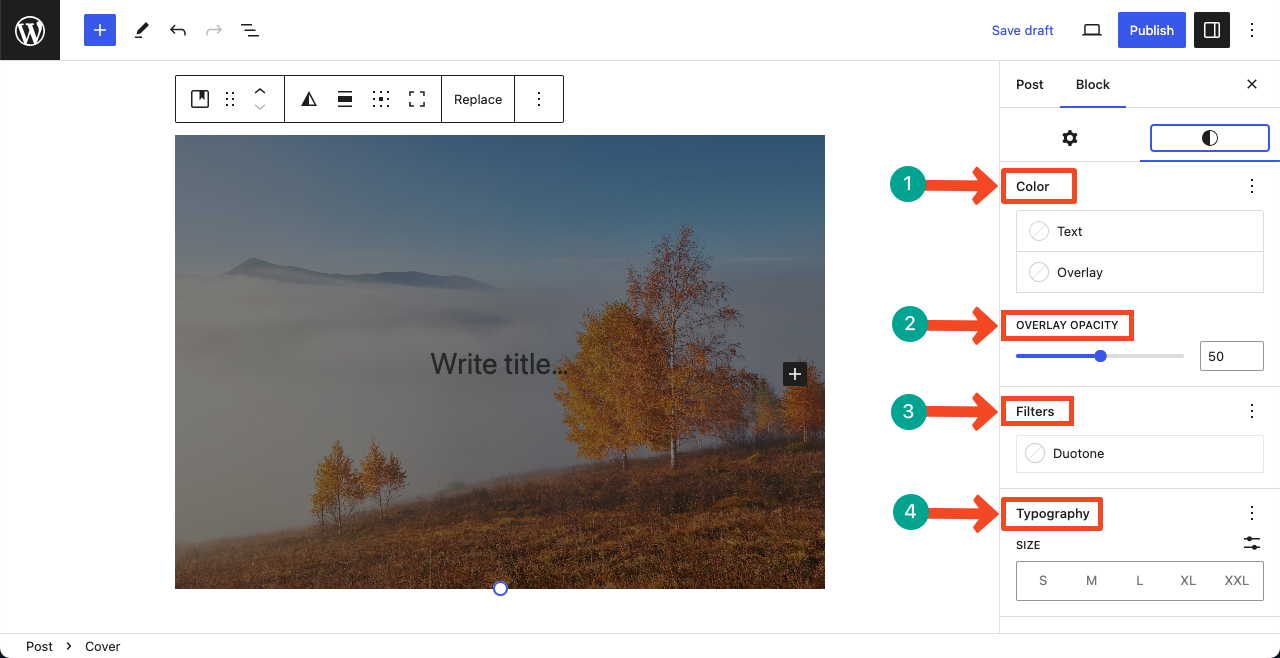
# Color
You can select a suitable color for the text. Try to select a contrasting color so the text becomes easily on the background. Overlay refers to an additional color added to the image for an extra flavor of stylization.
# Overlay Opacity
The background image may be invisible if you select a solid overlay color. Reducing Opacity can make the image visible.
# Duotone
Duotone is kinda similar to the Gradient color option. You can apply a combination of two color modes on the block.
# Typography
You can customize the font and font size for the text to be added to the block.
In addition, you’ll find several other options like Padding, Margin, Black Spacing, Border, and Radius under the Styles tab. Hope you can explore them alone.
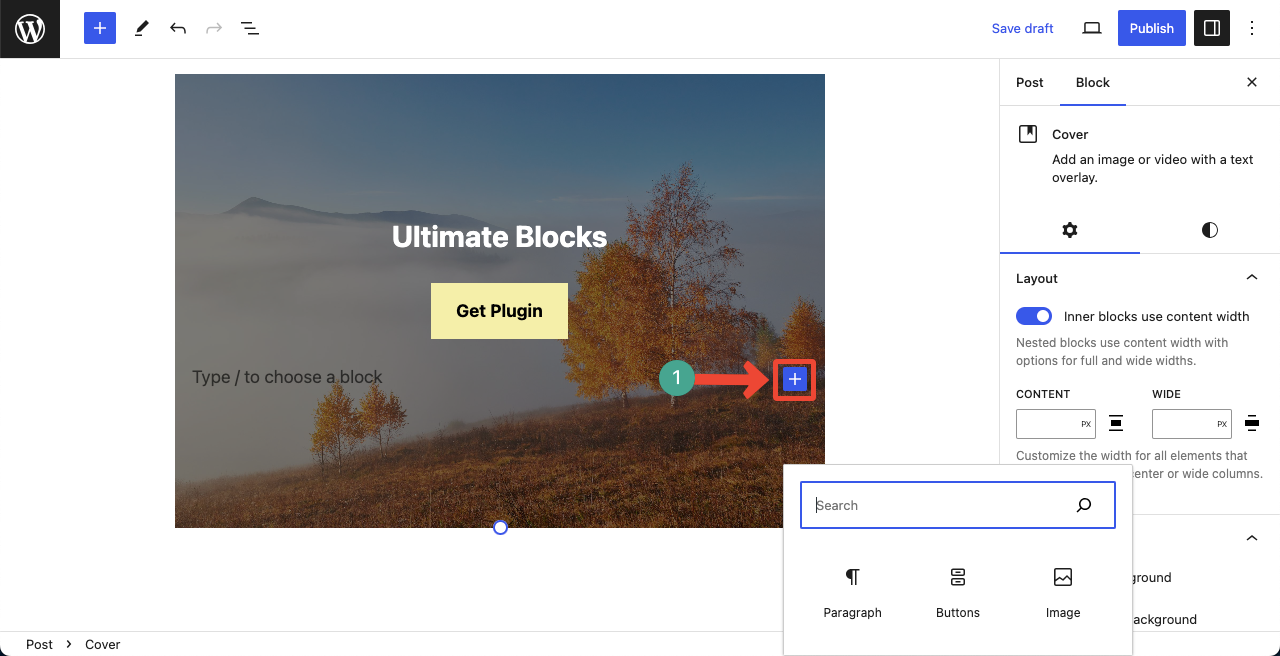
Step 05: Add Text and Other Content to the Block
By default, you’ll be allowed to add Text content on the block. To add more blocks, press the Enter button on your keyboard. The Gutenberg Plus (+) sign will appear.
By clicking the Plus (+) sign, you can search and add new blocks on it. You can see that we have added the Button block in the below image.
Conclusion
Each Gutenberg blog on WordPress has its own unique future and advantages. And if you have enough knowledge on how to use each of these blocks, you can create amazing content using your imagination.
Hope this article gave you enough knowledge on how to create content wonderful content using the Cover block. Keep visiting our website regularly for more exciting new tutorial posts.


Leave a Reply