
There may be uncountable reasons to remove header and footer in WordPress page. If you are looking for a way, then you are in the right place.
In this post, I have shown some different ways to remove header and footer in WordPress page. You may use any of these methods. All you have to do is go through the post, and then you will be able to do it all by yourself.
You can remove header and footer in WordPress with a few methods. Here, I will cover three different methods.
- Page Template
- Theme specific
- Custom CSS
Let’s begin.
Supercharge Your WordPress Block Editor!

Remove Header & Footer Using Page Template
You can edit your page template to remove the header and footer from every post.
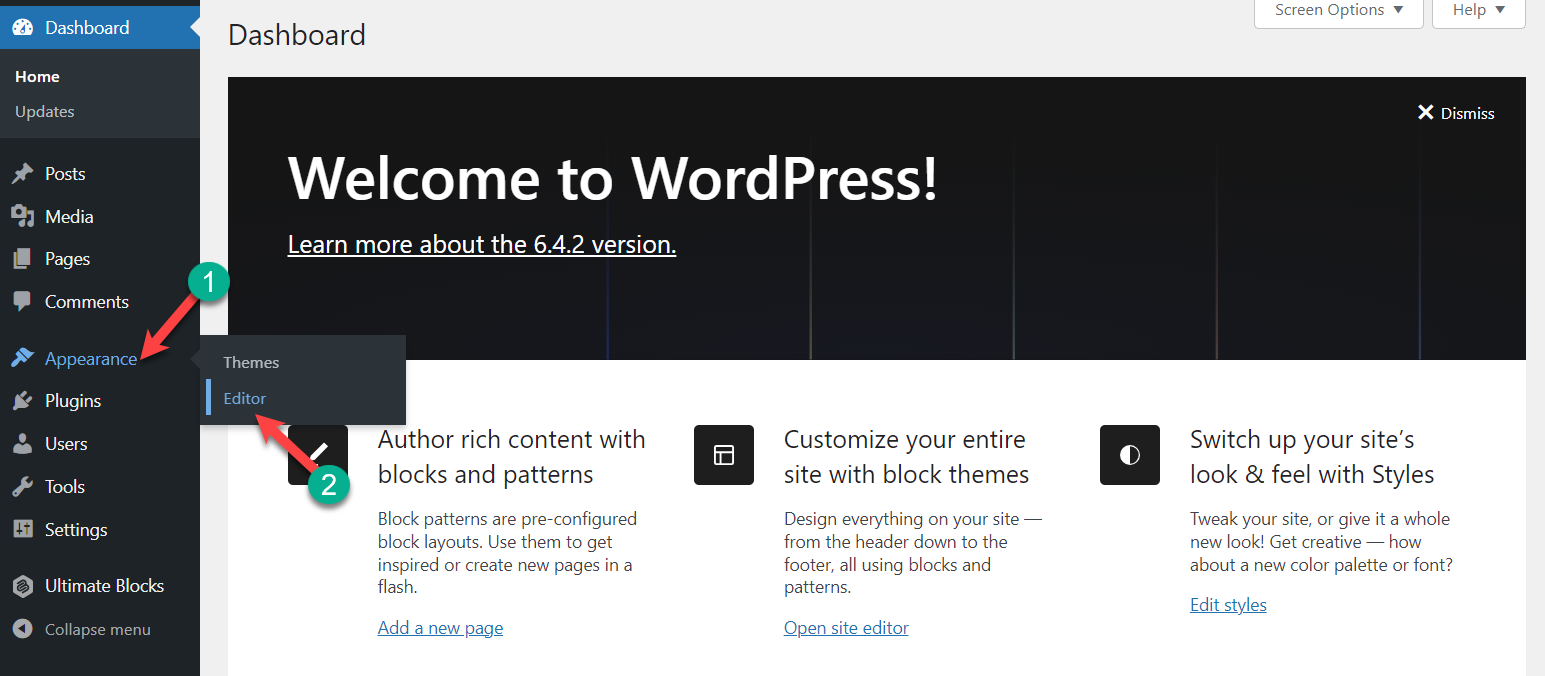
Step 1: Open Editor
Login to your dashboard and navigate to Appearance -> Editor.
Step 2: Edit Single Post Template
Now, click on templates.

Select ‘Single Posts’.
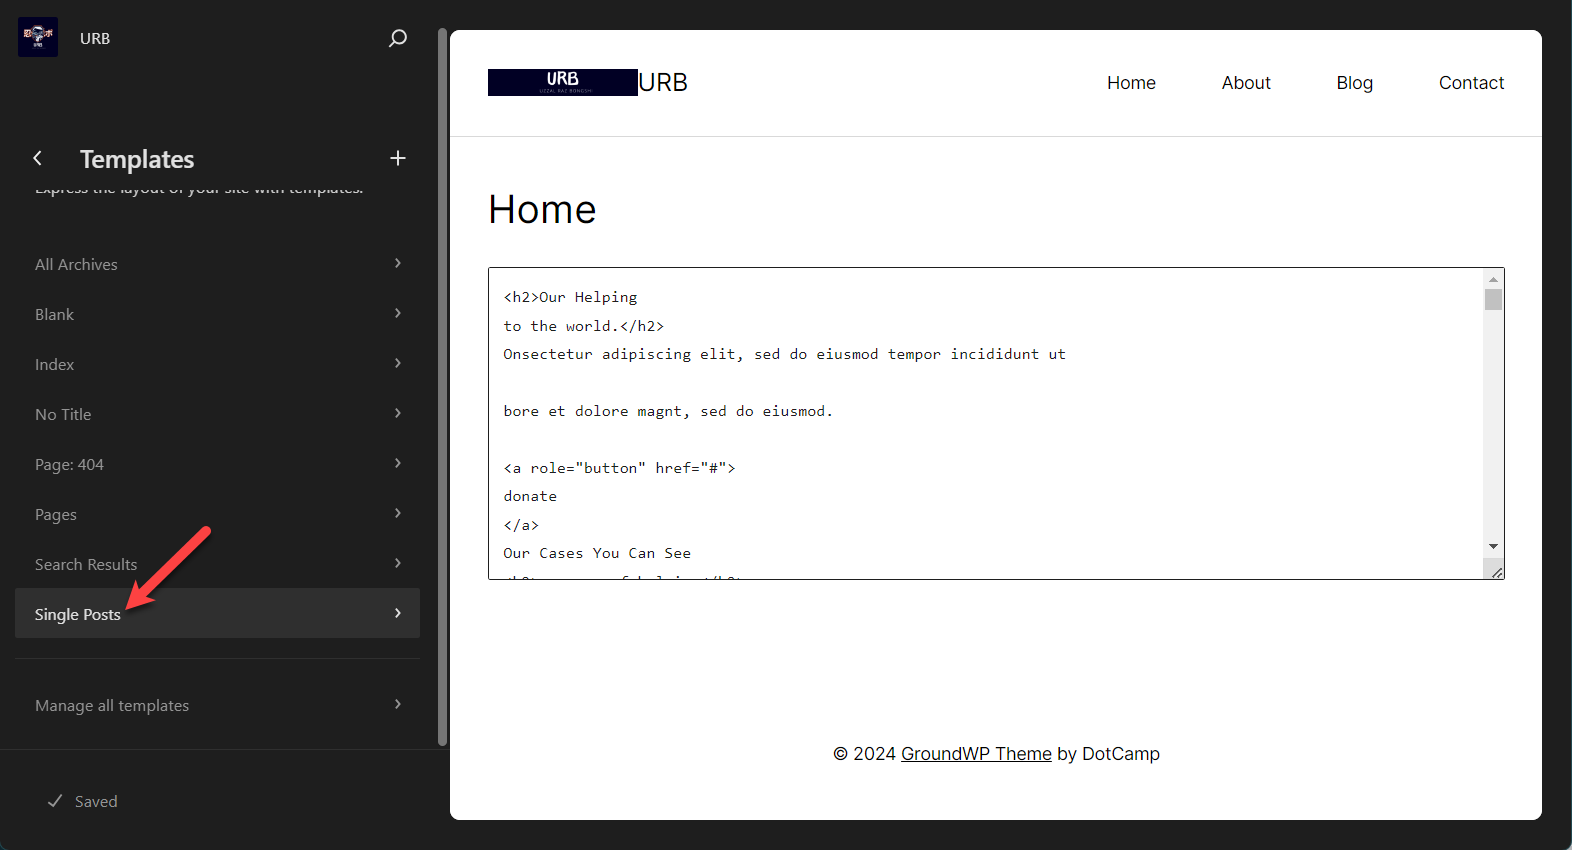
Click anywhere to start editing the template.

Step 3: Remove Header
Click on the header part and delete it. Generally, the whole header part comes as a group.

Step 4: Remove Footer
Scroll below and click on the footer part, then delete it.

Now, click on the save button above, and all of your posts will be header and footer free.

Remove Header & Footer Using Theme Settings
As the process is theme related there for this method may not work with all themes. However, the popular ones and most of the themes allows to hide the header, footer, and other elements.
For example, the OceanWp theme comes with the option to remove header and footer. After installing the OceanWP theme comes with OCean Extra that adds a setting box in your editor screen.

Just open the page or post, then from the below Header option, you will be able to disable header, and from the footer option, you will be able to disable footer.
Different themes may have different procedures.
Remove Header & Footer Using Custom CSS
To remove header with custom CSS, open the page or post. Now right click on anywhere and select Inspect option.
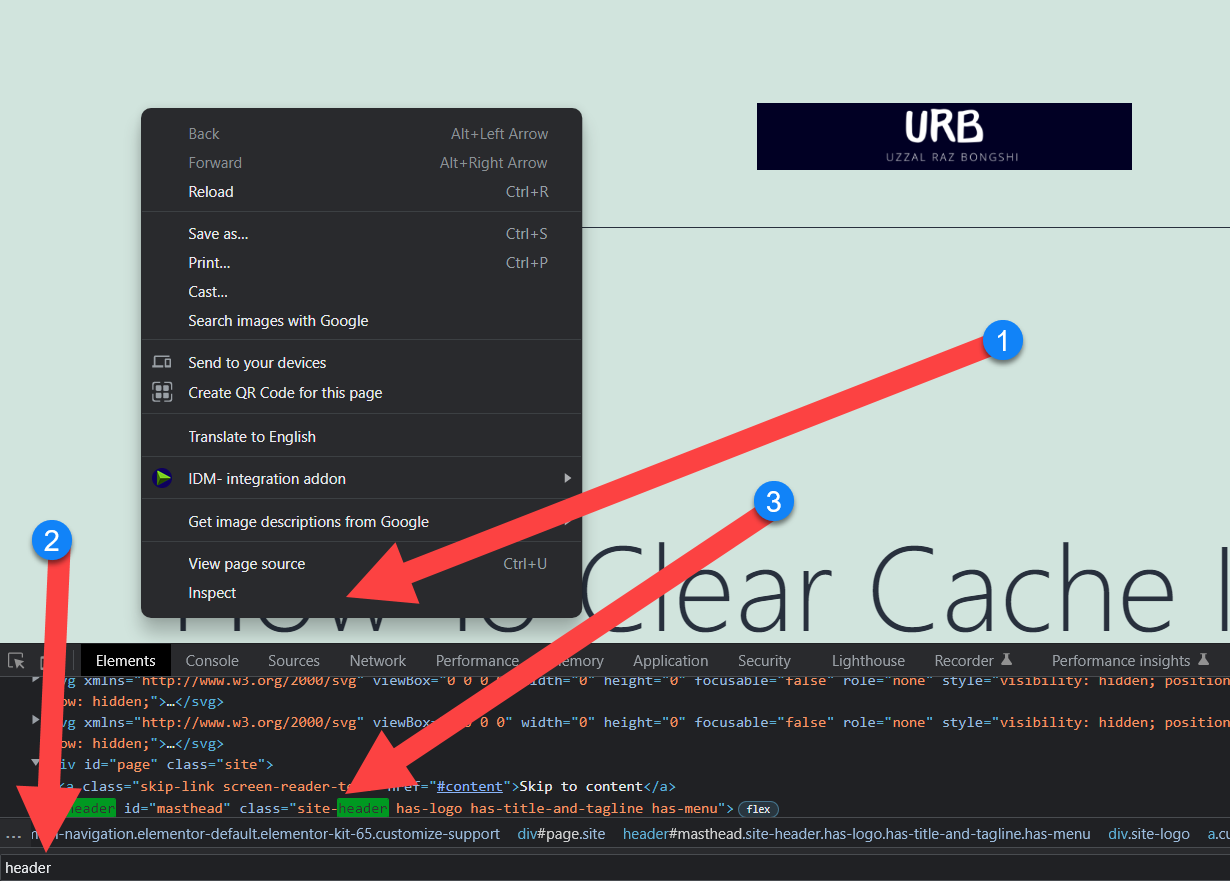
Press Ctrl + F and look for header tag or div. You will find site-header, choose the first one and copy class name.
Now navigate to Appearance -> Customize – Additional CSS.

Now paste the below code, don’t forget to change the class code that you copied earlier. Hit publish button.
.site-header {
	display: none;
}
Now header is removed from your entire website.
If you like to remove header for a specific page, then you have to put the page id before the class. Just copy the below code and replace the page id and class with yours.
.page-id-5 .site-header {
	display: none;
}
To find the page id, travel to DOM or search for ‘page-id’.

You are all done. In the same way, you can remove the footer, too, and use the term footer instead of the header.
Last Words
I hope this guide helped you to remove header and footer in WordPress. If you face any difficulties, feel free to ask your queries. If you liked the post, then share it with your friends, and don’t forget to leave your thoughts in the comment box below.


Leave a Reply