
The lightbox effect has become a popular way to showcase images and videos on modern websites. Instead of redirecting users to another page or showing a small image, a lightbox displays the content in a larger overlay popup, keeping visitors focused while still on your site.
In WordPress, adding a lightbox is easier than ever. With the block editor, you can enable a built-in option to enlarge images without installing any plugin. However, this method is limited. You can open images one by one, but you won’t get the full gallery lightbox experience where visitors can slide through multiple images.
That’s where a dedicated lightbox plugin comes in handy. Plugins give you advanced controls, gallery navigation, and a smoother viewing experience for multiple images. In this tutorial, I’ll show you both methods: how to enable the default “enlarge on click” feature in WordPress and how to use a plugin (Galleryberg) for a proper lightbox gallery.
What is a Lightbox in WordPress?
A lightbox in WordPress is a popup overlay that displays images, videos, or other media in a larger, distraction-free view without leaving the page. It’s triggered when a visitor clicks on an image or media element.
Lightboxes improve the user experience by:
- Allowing visitors to view high-resolution images without navigating away.
- Presenting galleries in a clean, interactive way with next/previous navigation.
- Keeping users engaged longer on your site.
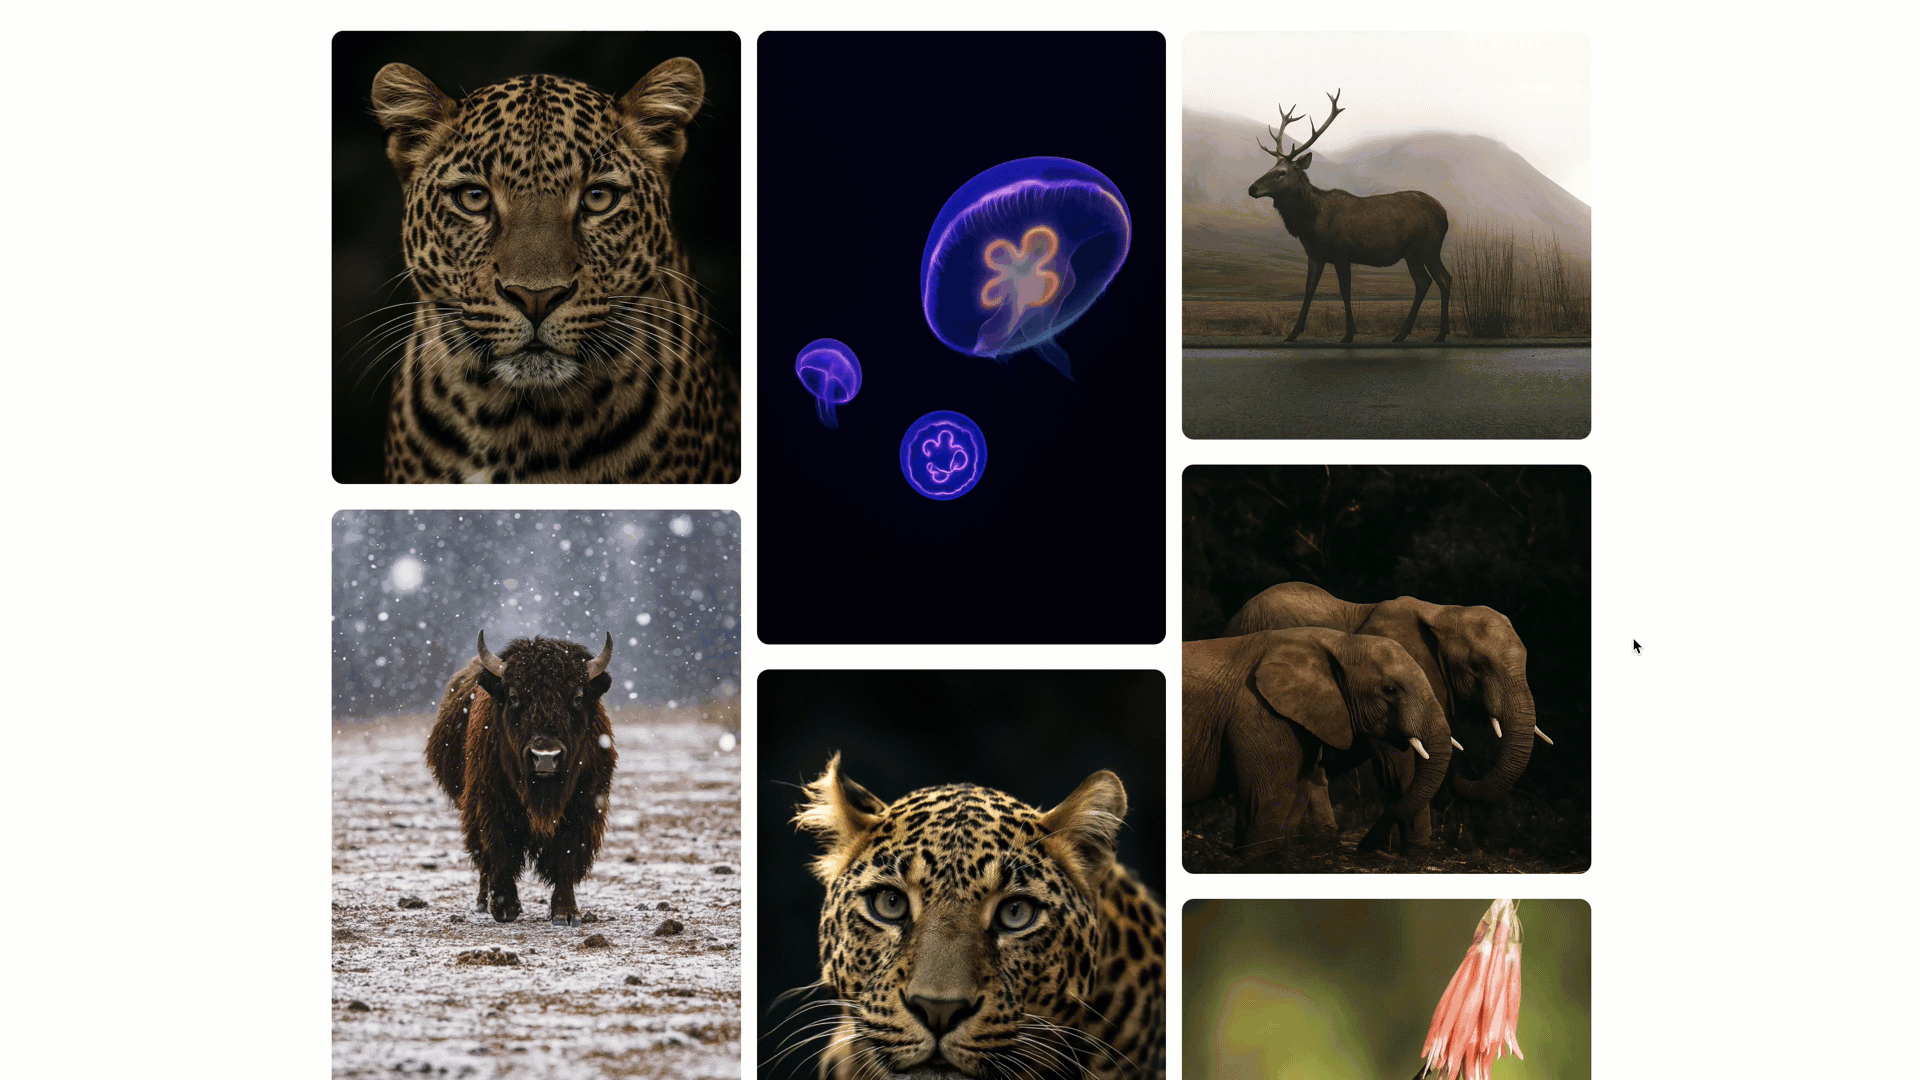
Here’s a quick example of how a lightbox looks:
Method 1: Adding a Lightbox Without Using a Plugin
WordPress now includes a built-in “Enlarge on click” option for images and galleries. This works well if you just want to let users open a larger version of an image without installing anything extra.
Step 1: Add an Image Block
Click on the Add Block (+) button and select the Image block.
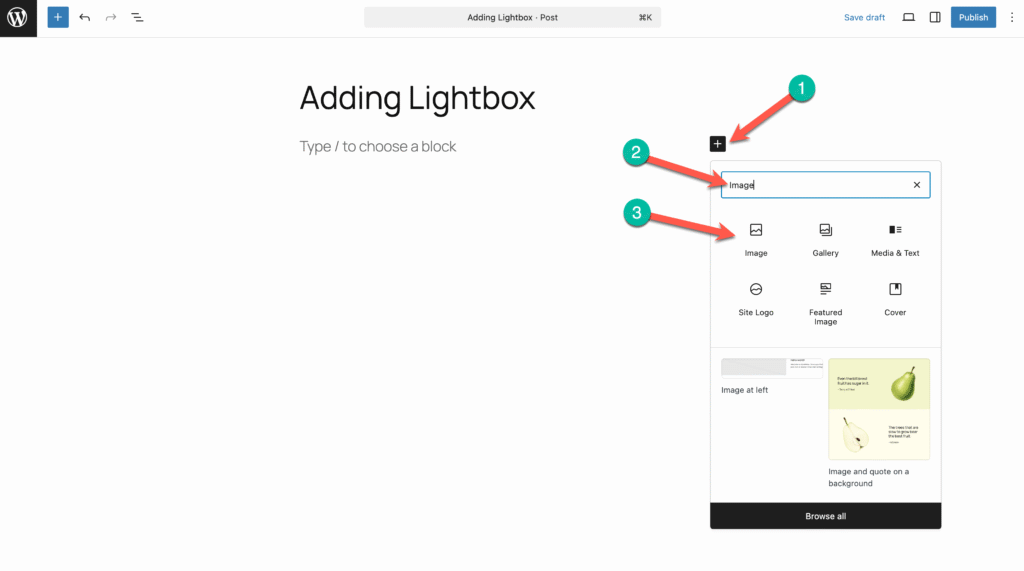
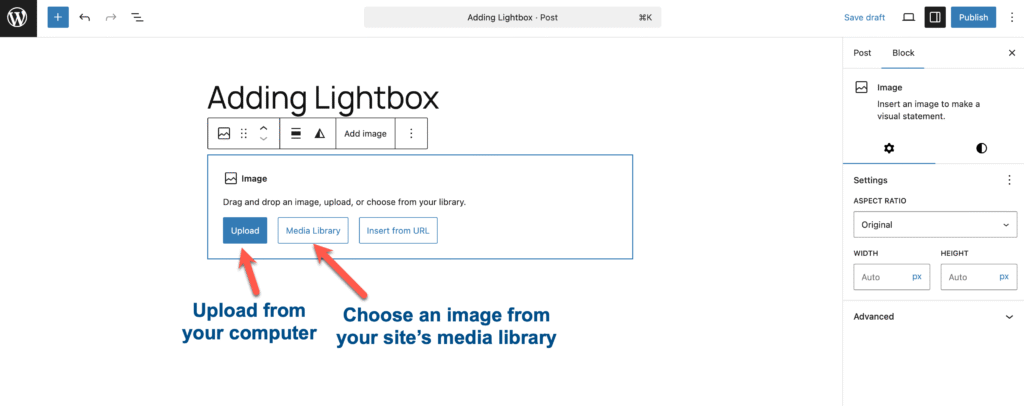
Step 2: Upload or Insert an Image
Upload a new image or pick one from the media library.
Step 3: Enable “Enlarge on Click”
Select the image, click on the Link icon, and enable the Enlarge on click option.
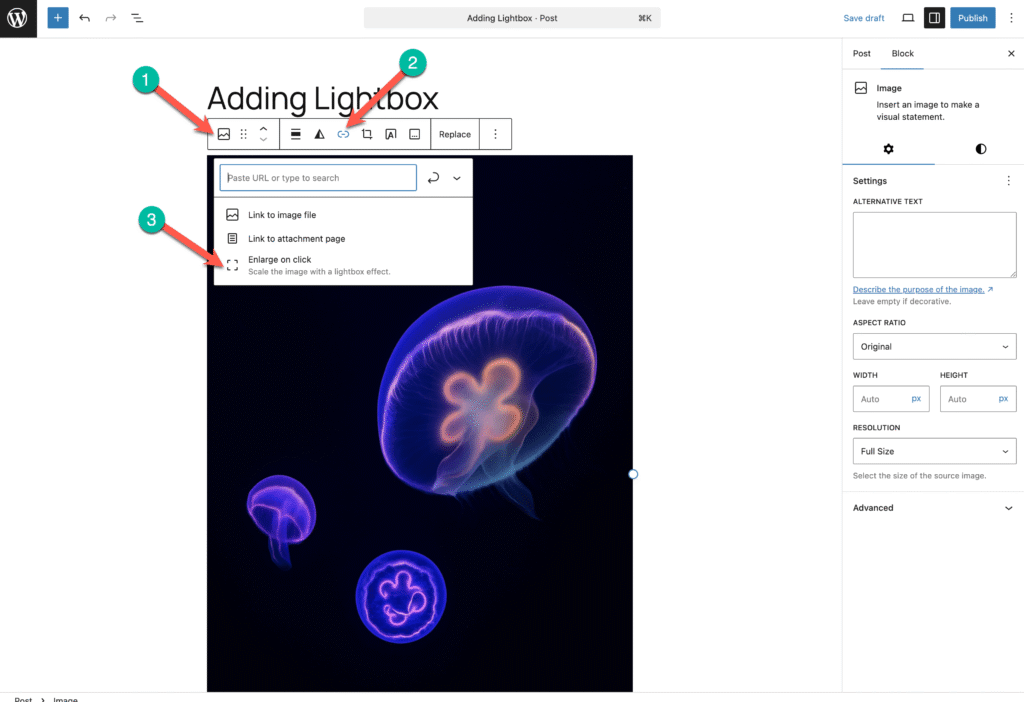
Now, whenever someone clicks the image, it will open in a lightbox-style popup.
For Multiple Images (Gallery Block)
If you want to add multiple images, use the Gallery block instead of inserting individual images. Add your images and then select the Gallery block. And click on the Link icon and enable Enlarge on click.
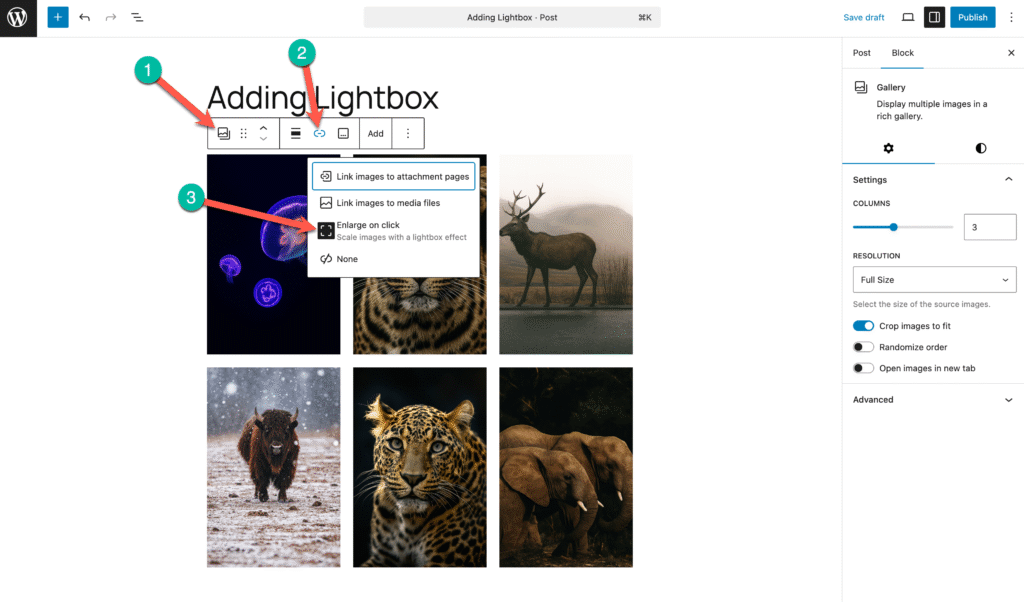
👉 Limitation: While this works fine for single images, the default gallery option doesn’t allow users to slide through multiple images inside the lightbox. Visitors need to click each image individually to view them. This is why we’ll explore the plugin method next.
Method 2: Adding a Lightbox Using a Plugin (Galleryberg)
If you want a true lightbox gallery experience where visitors can slide through images seamlessly, you’ll need a plugin. For this, we’ll use Galleryberg, a lightweight block plugin designed specifically for WordPress.
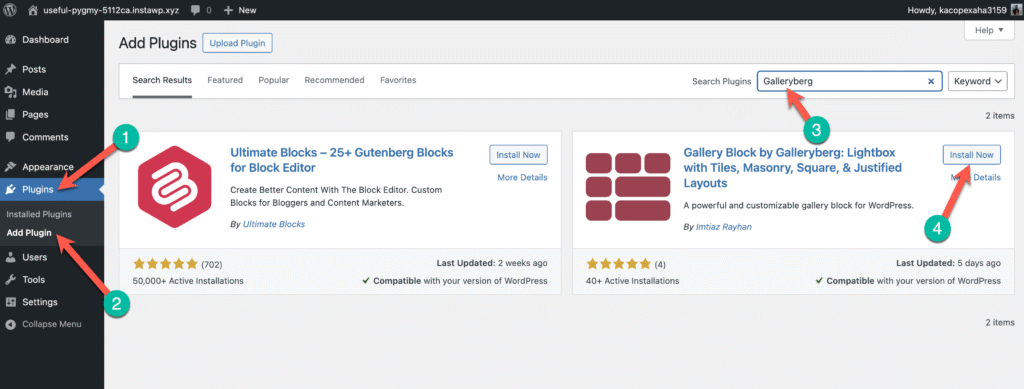
Step 1: Install Galleryberg
From your WordPress Dashboard, go to Plugins → Add New. Search for Galleryberg, install, and activate it.
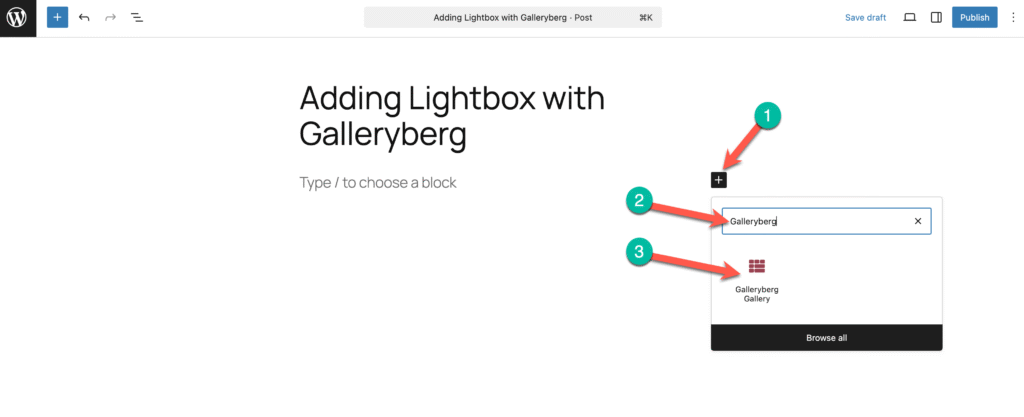
Step 2: Insert the Galleryberg Block
Open the post or page where you want the lightbox. Click on the Add Block (+) button and search for Galleryberg. Insert it into your content.
Step 3: Add Your Images
Upload new images or select from your media library. The plugin will automatically arrange them into your chosen layout (Grid, Masonry, Justified, etc.).
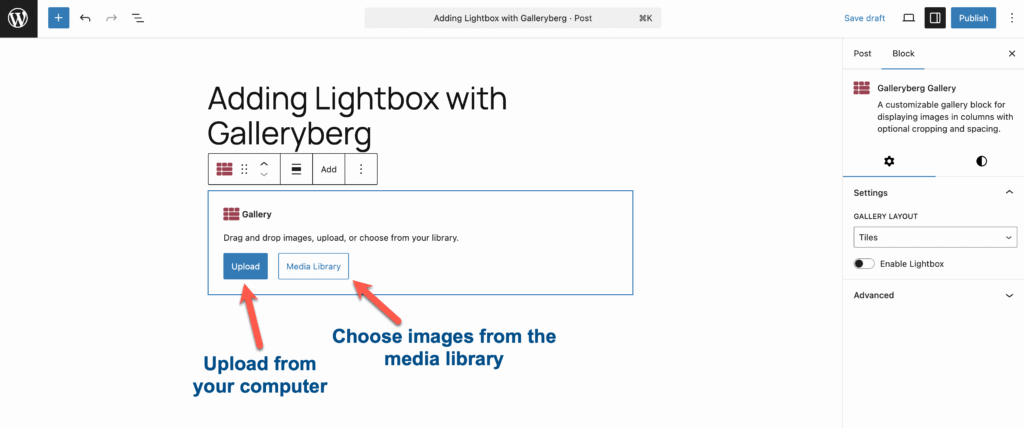
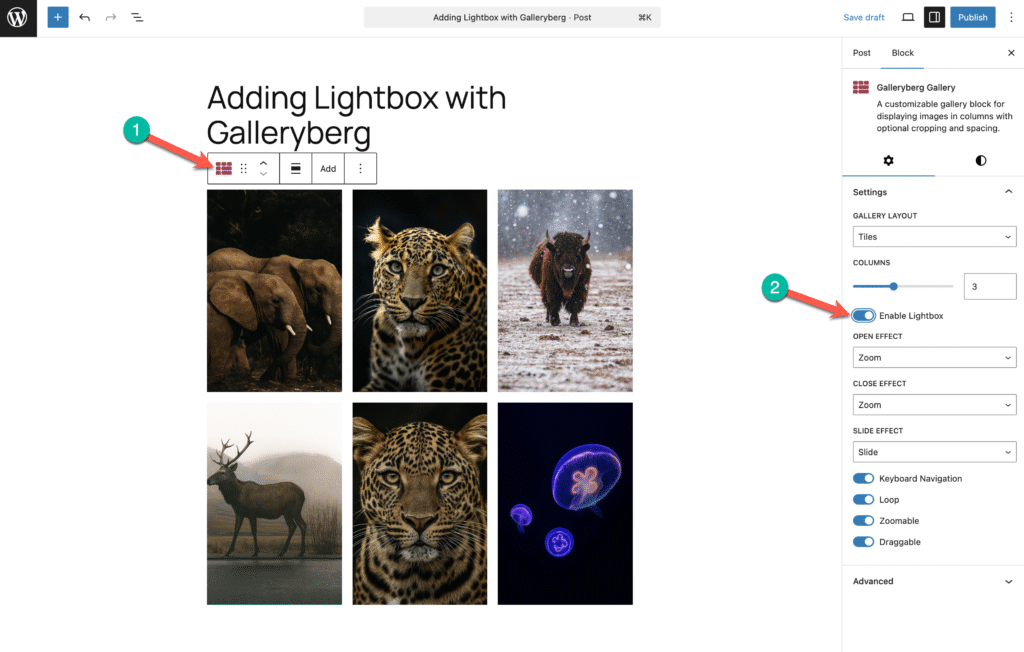
Step 4: Enable the Lightbox
Galleryberg comes with a built-in lightbox option. Simply toggle the Lightbox setting in the block sidebar, and your visitors can now click on an image and smoothly slide through the entire gallery in a popup view.
That’s it—you’ve now created a fully functional lightbox gallery in WordPress.
Bonus Tips
- Use high-quality images: The lightbox effect works best when the enlarged version looks crisp and professional.
- Keep it lightweight: If you only need a single image popup, use WordPress’s default “Expand on click.” For galleries, use a plugin like Galleryberg.
- Stay mobile-friendly: Always preview your lightbox on mobile devices to ensure a smooth experience.
- Avoid overusing lightboxes: Too many popups can distract visitors instead of engaging them.
Last Words
WordPress gives you two simple ways to add a lightbox:
- Use the built-in Expand on click option for quick single images or small galleries.
- Use a plugin like Galleryberg for a complete lightbox gallery experience with navigation and modern layouts.
If you just need basic functionality, the default option works fine. But if you’re looking for an elegant, user-friendly lightbox gallery, Galleryberg is the way to go.


Leave a Reply