
The word Navigation tells the description of itself. Similarly, a navigation menu is a menu where several menu links are available at one place so that you can navigate to different places on the website without any trouble. It helps visitors to find what they have been looking for without any difficulties.
Like all the other websites, we have a navigation menu too.

From this navigation menu of ours, you will be able to visit the blog, support, and download page. Menus can also be collapsed with multiple sub-menus and sometimes also content with a lot of links or so-called mega menu.
The location of the navigation menu depends on your WordPress theme. Most of the premium themes come with a navigation menu with multiple location options so that you can place them in the way you want.
In this post, I am going to show you the process to add navigation menu in WordPress. All you have to do is go through the post and then add one by yourself.
Adding a Navigation Menu in WordPress
Here, I am going to show you the process to add a navigation menu in WordPress for both block themes and classic themes. First, start with the block themes.
Adding a Navigation Menu in Block Theme
Before adding a navigation menu, make sure you have the pages ready on your website that you want to add to the navigation.
Step 1: Open The Editor
From your WordPress dashboard, navigate to Appearance -> Editor.

Step 2: Create a Navigation Menu
If you don’t have one or want to create a new one, then click on the navigation.

Here, you will see your current navigation menu. If you don’t have one, don’t worry.

Click on the three dots button and select the duplicate option. It will create a duplicated navigation menu for you.
Upon clicking on the duplicate button, a copy of your navigation menu will be created and opened for editing. Now, delete the existing menu items. Click on the three dots and remove items one by one.

Step 3: Rename and Add Menu Items
Click on the three dots and select the ‘Rename’ option.

Give a suitable title and hit the ‘Save’ button.

Now, click on the ‘+’ button on the right side.

It will prompt you to add a URL. You can simply search for your page with the name or place any URL you wish. I am searching for a page named ‘Home’.

Then I simply click on the page. In this way, you can also search for your desired pages and then click on it. It will be inserted into your navigation menu.
Step 4: Add Sub-menu Items (Optional)
To add a sub-menu under a menu item, click on the navigation block and then click on the settings button.

Click on the three dots button, on the menu item under which you want to add a sub-menu. Select ‘Add submenu link’.

Search for your page, that you want to add us a sub-menu and click on it.

In this way, you can add multiple items as submenu.
Step 5: Customize Menu Items
If you wish, you can customize your menu items. All you have to do is open the settings and then click on the menu item.

From here, you will be able to customize the label, URL, description, title attribute, and REL attribute.
If you want to change the typography and dimension, click on the style tab. When you are done, don’t forget to hit the ‘Save’ button.
Step 6: Add Navigation Menu to Website
Return to your dashboard and navigate to Appearance -> Editor.
Here click on the ‘Patterns’.

Scroll below, from the TEMPLATE PARTS, click on ‘Header’.

Then click on the header part.

Now hit ‘Add block’ button and search for ‘Navigation’ block.
Click on it, and the menu you created earlier will be inserted.
If you have any other navigation block here, delete it.

Well, now you have your beautiful navigation ready.

Adding a Navigation Menu in Classic Theme
To add a navigation menu in WordPress site of yours, first, navigate to Appearance -> Menus from your dashboard.
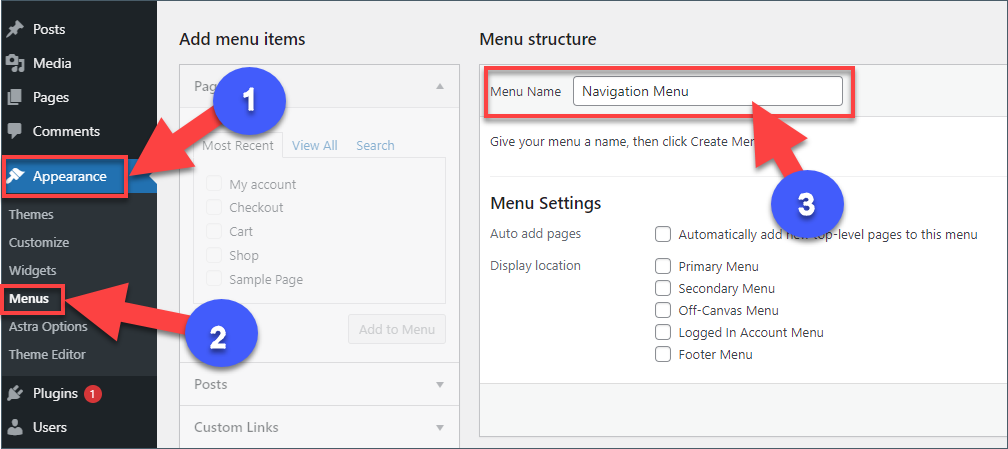
In the Menu name field, write the name of the navigation menu (I kept the name as ‘Navigation Menu’) and hit ‘Create now’ button. The menu will be created, and more options will be shown on the screen.
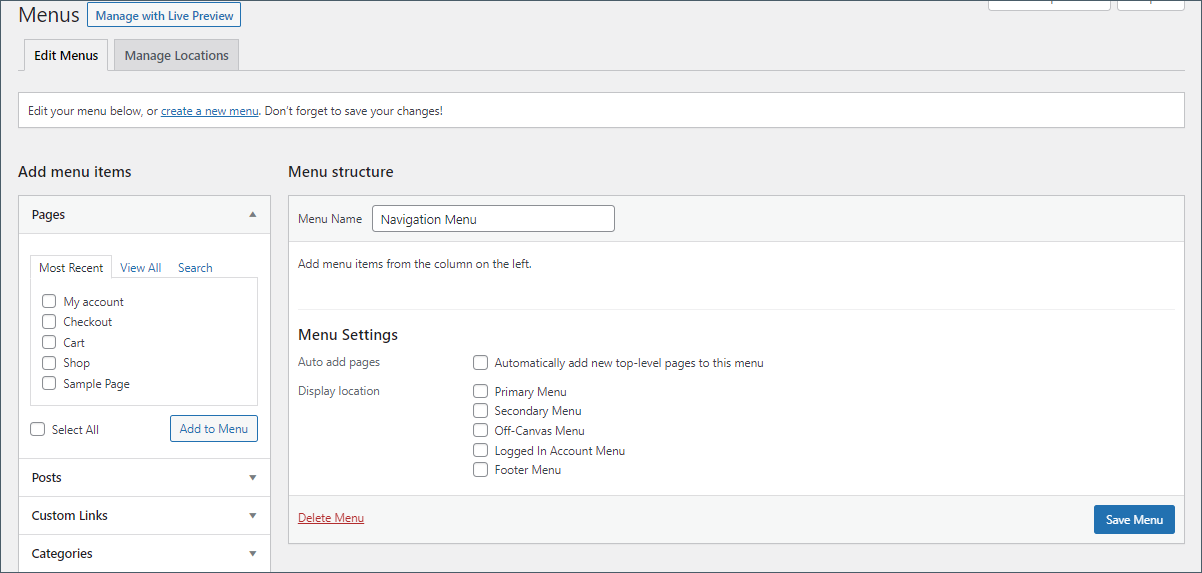
Now you can see menu items to be added on the left side.
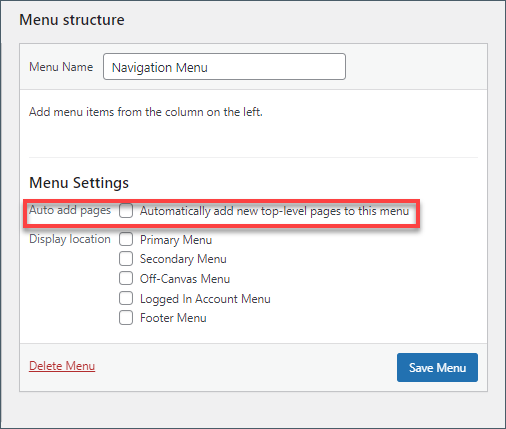
From the display location setting, you can show your menu in any position you prefer. You can automatically add top-level pages in the menu by placing a tick in ‘Auto add pages’.
Or simply place a tick on the pages that you want to add to your navigation menu and then click on the ‘Add to Menu’ button.

Once the menu is created, you will see the order on the right side. Then you can drag and organize in the way you want.

Or you can click on the menu item and then click or move up or move down button.
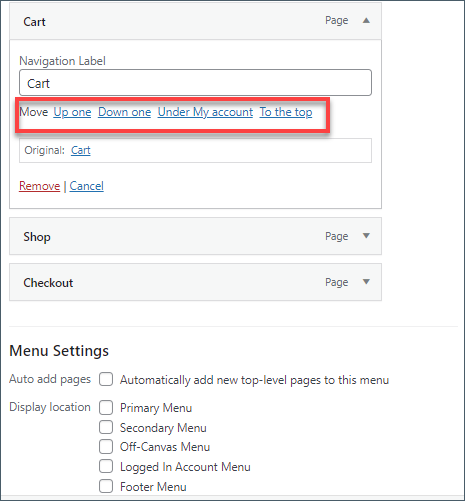
If you Press the ‘Under’ button, it will be linked up like a sub-menu. Or just drag and place it on the right.
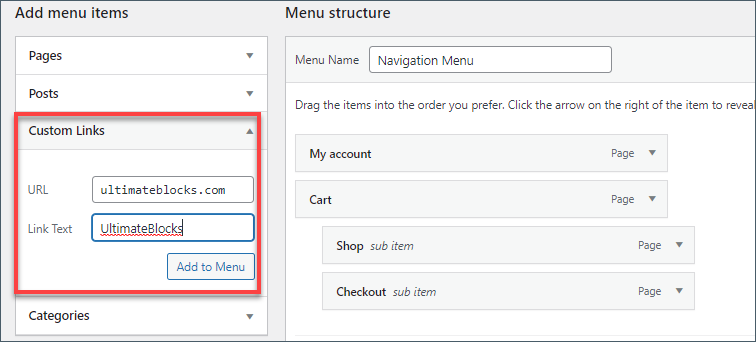
Add Custom Link in Navigation Menu
Similarly, if you want to add custom links to your navigation menu, click on Custom Links and place URL, Link Text, and click on Add to Menu. Then it will be added.
After customizing your navigation menu don’t forget to hit the Save Menu button. If you forget, you will lose your menu.
Last Words
Hope now you will be able to add a navigation menu in WordPress site of yours by yourself, regardless of the theme. If you face any trouble, feel free to ask for help. If you liked this post, share it with your friends and also check out our other posts.


Leave a Reply