
Since the release of WordPress 5.0, a lot of things have changed for WordPress. The old Classic editor has been replaced by the new Block editor.
The Block editor is fully based on blocks. Blocks help you to add and organize content inside your WordPress posts and pages.
If you are new to the Block editor, you might not know how to add a block in WordPress. If so, you’re in the right place. Here, I’ll show you three easy ways to add blocks in WordPress.
Adding a block in the WordPress Block editor is extremely easy. We will show you the 3 easy ways to add block.
Using the Block Inserter (Plus Icon)
The very first method is to use the plus icon, which is also called Inserter.
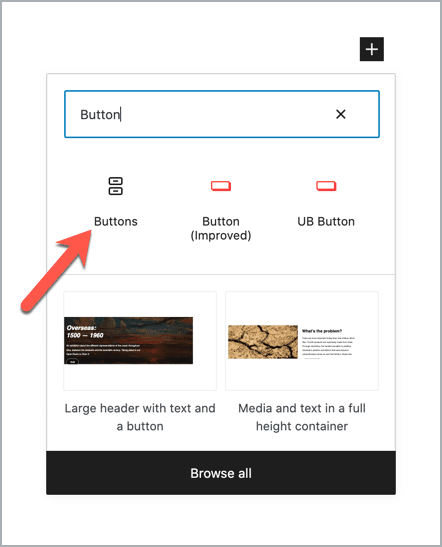
Simply click on the + icon on your editor and search for your desired block.

Then click on the block, and it will be added to your editor.
Once you’ve added the block, you can change the block options from the right-hand side options panel.
Using the Inserter from the Top Toolbar
The second way is to use the inserter from the top toolbar.
Just click on the + sign at the top left corner of the editor. You’ll see all the blocks there. Simply drag your desired block and drop it on the editor.
Using the Slash Command
It’s the quickest way to insert a block. If you’re a blogger or writer, you’ll love it.
Just hit the “/” key on your keyboard and start typing the name of the block. It will start showing you the related blocks. Then click on your desired block.
That’s how simple it is.
Using the Block Inserter Icon in between Blocks
You can easily insert a block between the gap of two blocks. When you hover your cursor between two blocks, you will notice a horizontal line with a ‘Block inserter +’ icon appearing on your screen.
Click the icon, and you will find the option to insert a block.
Using the More Option From the Toolbar
Lastly, you can add a block from its toolbar. Just click on the three-dot icon and click on ‘Add before’ or Add after’ to add a new block before or after the selected block.

Then click on the add block button.

Insert your desired block.
Conclusion
Isn’t it easy to add a new block in WordPress? If you would like to create an advanced website, then simply install the Ultimate Blocks plugin and create uniquely with 21+ blocks.
If you have any confusion, feel free to share us via comment.


Leave a Reply