
Are you looking for a way to lock content in WordPress site of yours in order to increase your subscribers?
Well, this is a working method that helps you to grow your email list. A content locker will also help you to boost your lead generation, and increase sales. In this post, I am going to show you the easiest way to add content locking in WordPress.
Let’s see.
Add Content Locking in WordPress
There are a few plugins that allow you to lock your WordPress content. Here, I am using the MemberPress plugin. It comes with many features and facilities that make it exceptional compared to other plugins.
Step 1: Install & Activate Memberpress Plugin
First, download and install the MemberPress plugin. As it is a pro plugin, you must purchase it before you can use it.

Before purchasing, you may check their pricing plan and then decide which plan to take.

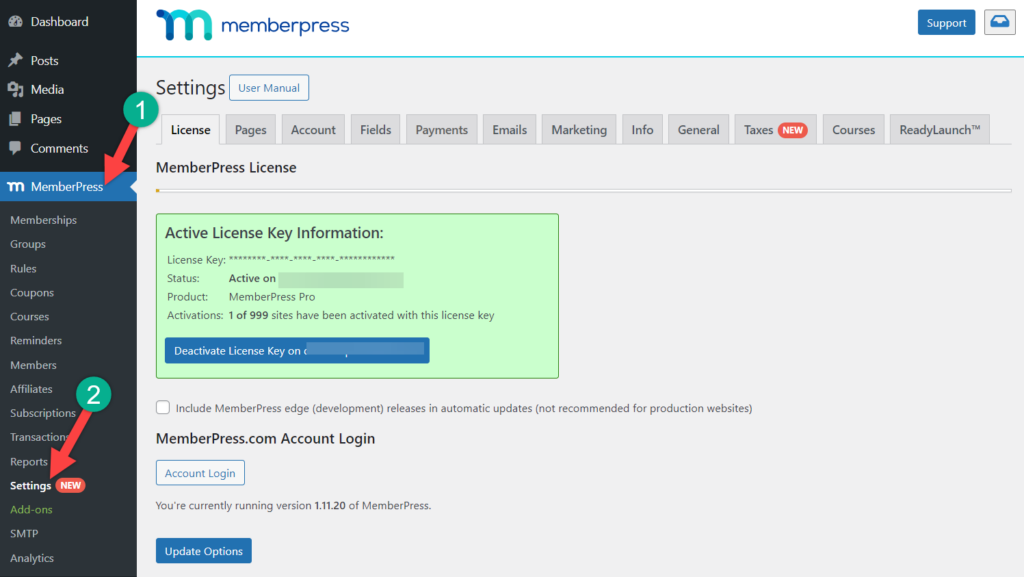
On activation, it will ask for the license key. To activate the plugin, navigate to MemberPress -> Settings -> License, paste your key in the box, and press the Activate license key button.
Upon the first setup, you will have to choose a payment method, create sign-up page, and more.
Step 2: Create New Memberships
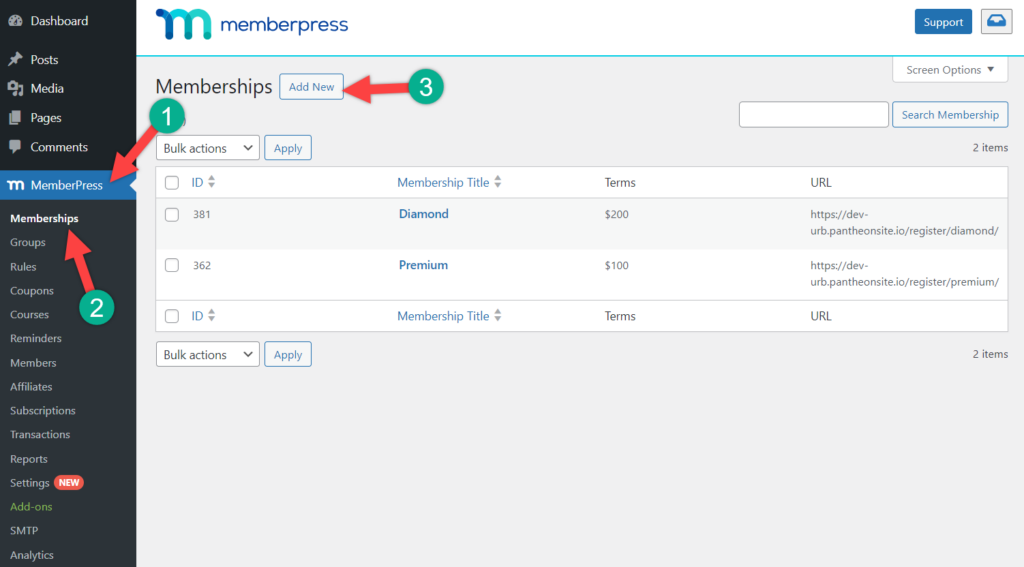
Now, to create a premium subscription, you have to create a membership plan for your subscribers. To do that, navigate to MemberPress -> Memberships page and hit the ‘Add New’ button on the top.
You have to provide a plan name and decide the price of the content and billing type.
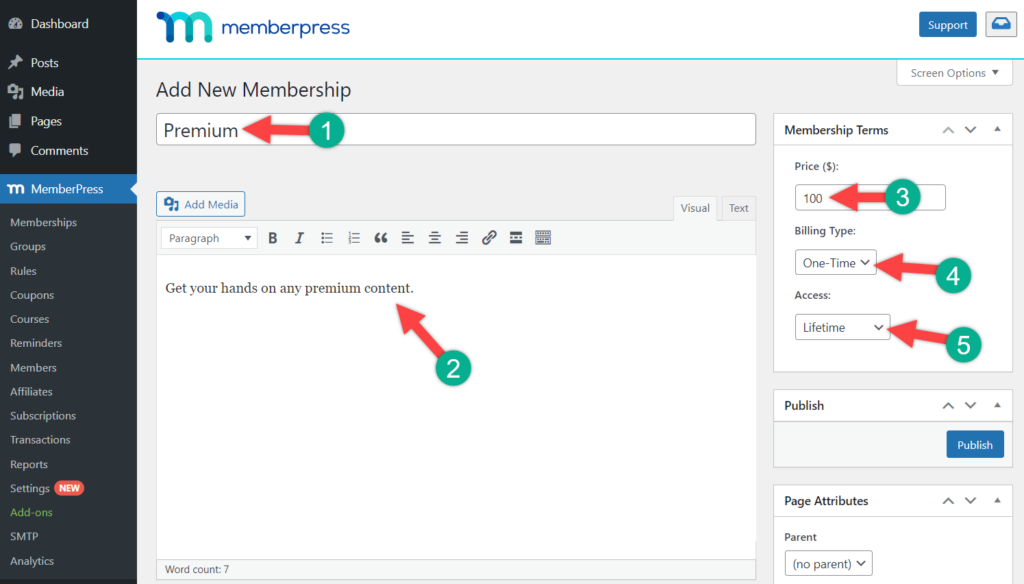
Here, we will create a one-time lifetime payment. You can choose any of the regular subscription options.
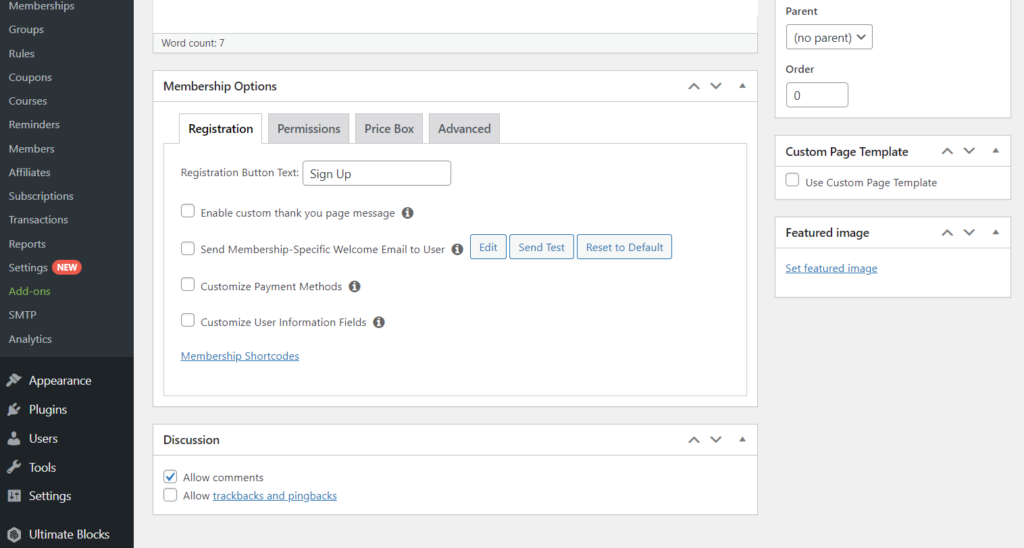
Scroll a little bit below to the membership options meta box, which is below the post editor. Here, you can customize permissions and membership options for this specific plan.
If you need more membership plans, then repeat this process and create as many as you want. When you are finished, click on the publish button.
Step 3: Add Locked Content With Tag
Now, it’s time to add locked content. We have to add the ‘Premium’ tag to the posts that we want for premium members to access.
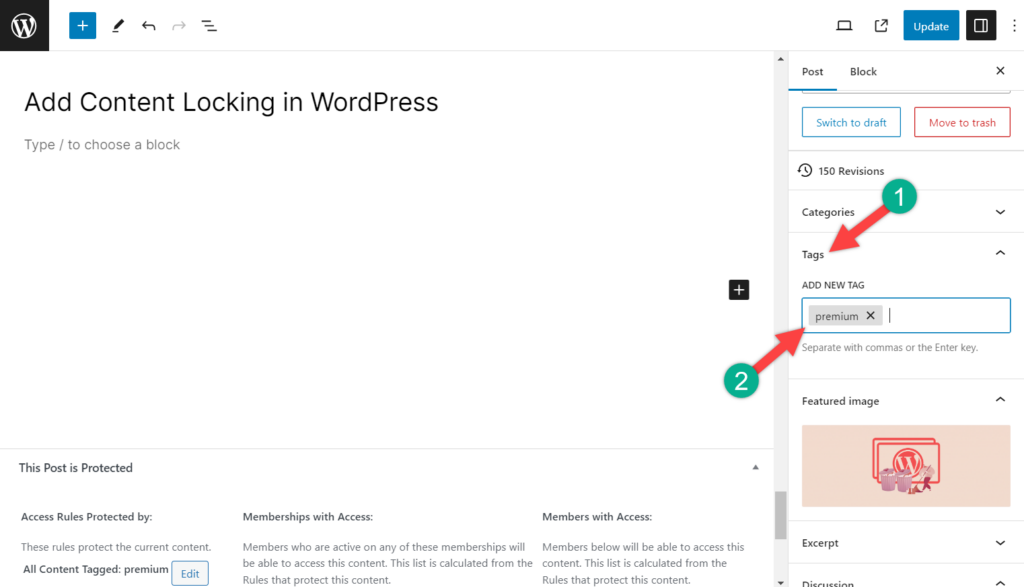
Click on the settings button, and from the post option, click on Tags. Now, write your tag name. Here I have given the name ‘premium’. You can give any tag you want.
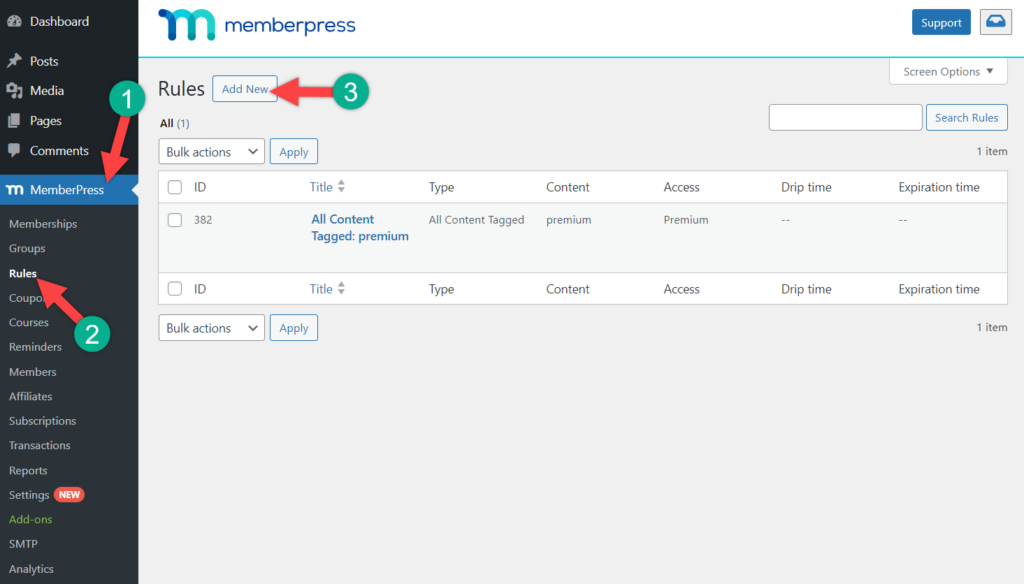
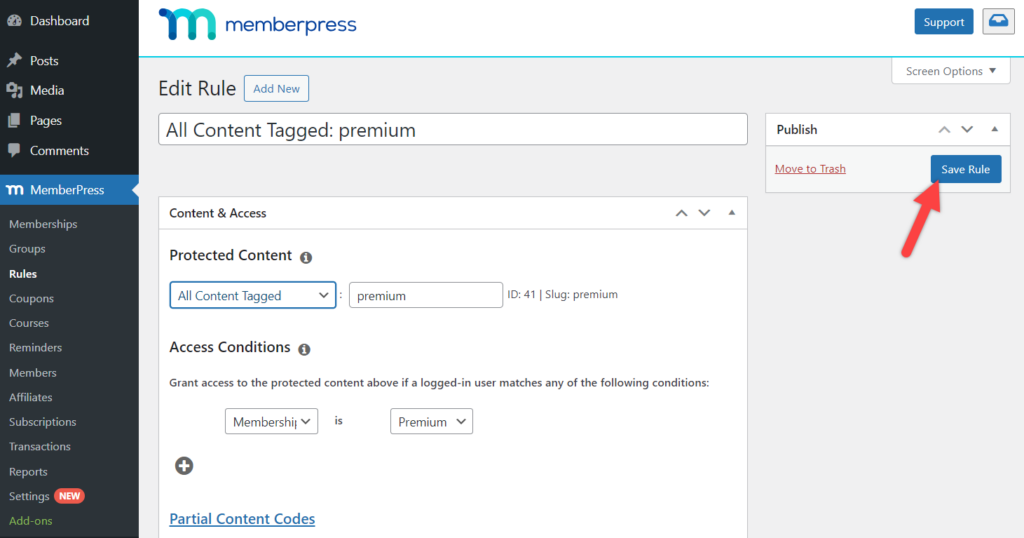
Step 4: Define Rules
Now, we have to define which content is available for each membership plan. You will be able to set rules by navigating to the MemberPress -> Rules page. Now click on the Add New button at the top.
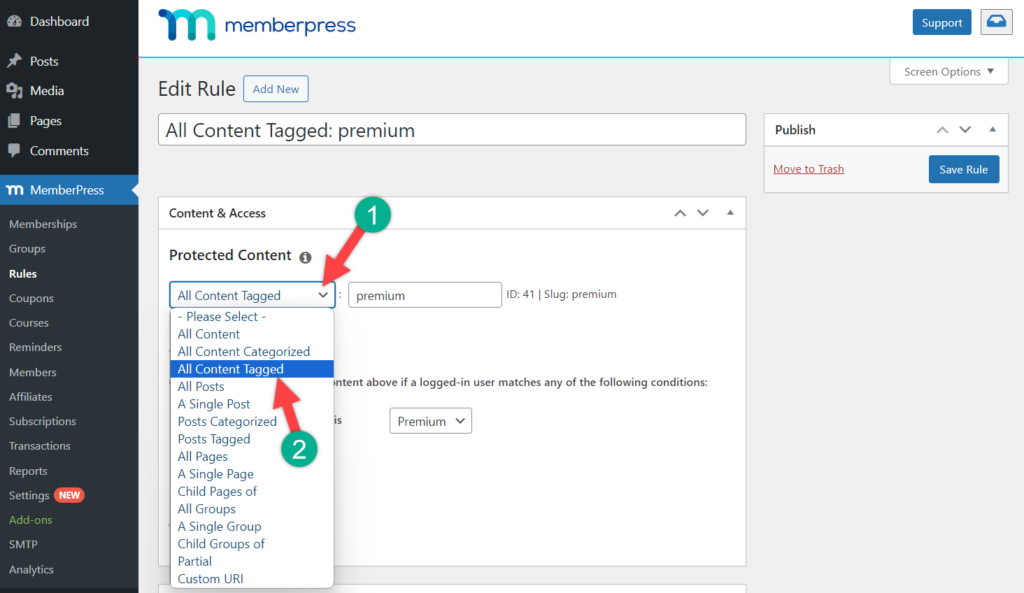
The rule edit page allows you to choose different conditions and associate those with any of your membership plans. For example, here, we will protect all the contents with the ‘Premium’ tag and it will be only available to premium members.
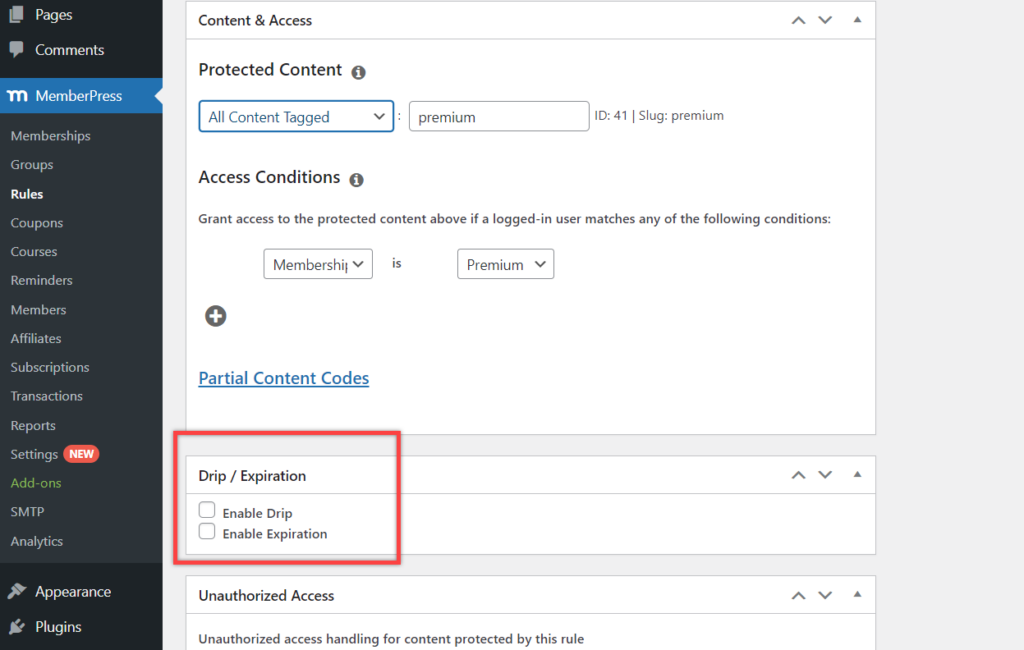
Scroll below the rules editor, and you will find content drip and expiration options. With this option, you will be able to release content gradually and make it unavailable after a specific period of time.
If you like to make all the content available as soon as people sign up and remain available without any expiration, then you should leave ‘Enable drip, Enable Expiration’ unchecked.
In this way, you can create more rules as necessary for your membership site.
Then click on the Save rule button to save your rule settings.
You are all done. Now, non-premium members will be asked to log in, and premium members will be able to see the content when they login to your website.
ProfilePress as Content Locking Alternative
An additional method to implement content locking on your WordPress site is ProfilePress. This plugin lets you to restrict access to specific content, such as posts, pages, or custom post types, making it available only to registered users or paying subscribers.
With ProfilePress, you can create content protection rules based on user roles, membership levels, or login status, allowing for a customized user experience. This plugin also integrates seamlessly with popular payment gateways like Stripe and PayPal, facilitating monetization through paid memberships.

A standout feature of ProfilePress is its Metered Paywall addon. This functionality allows you to offer visitors a limited number of free content views before prompting them to subscribe or register, striking a balance between user engagement and monetization. Additionally, ProfilePress provides tools to prevent abuse of the paywall, such as IP blocking to deter users from bypassing restrictions using incognito modes.

Beyond content locking, ProfilePress offers customizable registration and login forms, member directories, and user profiles, enhancing the overall user experience. Its powerful features make it an excellent alternative for implementing content locking on your WordPress site.
Last Words
I hope this post helped you to add content locking in WordPress. If you still can’t do it, ask me. I will be happy to help you. If you liked the post, please share it with your friends, and don’t forget to write your thoughts in the comment box.


Leave a Reply