Facebook is one of the most common social platforms, and nowadays, almost everything can be done on this platform. This makes communication much easier and more convenient. If you add a messenger button on your website your audience will be able to contact you via live call/chat for any sort of pre-sale questions, inquiries, sales support, etc.
If you don’t know how to add Facebook Messenger to a WordPress website, then you are in the right place. From this post, you will be able to learn to add Facebook messenger button to your WordPress site.
Let’s begin then.
What is a Facebook Messenger Widget?
Facebook Messenger is one of the most popular platforms that everyone uses for socializing as well as for business. Facebook messenger widget is a kind of website plugin that will help your visitors to chat with your Facebook page directly via messenger. When the visitor sends the first message, you will be able to reply back to them and find out more with the Facebook business suite inbox.
Adding Messenger Using Plugin
If you don’t want any sort of trouble then using a plugin is very helpful. There are several plugins available in the WordPress plugins repository, but ‘Facebook chat plugin’ is best. This is a free plugin that is developed by the official Facebook developers for placing the responsive messenger in a few clicks.
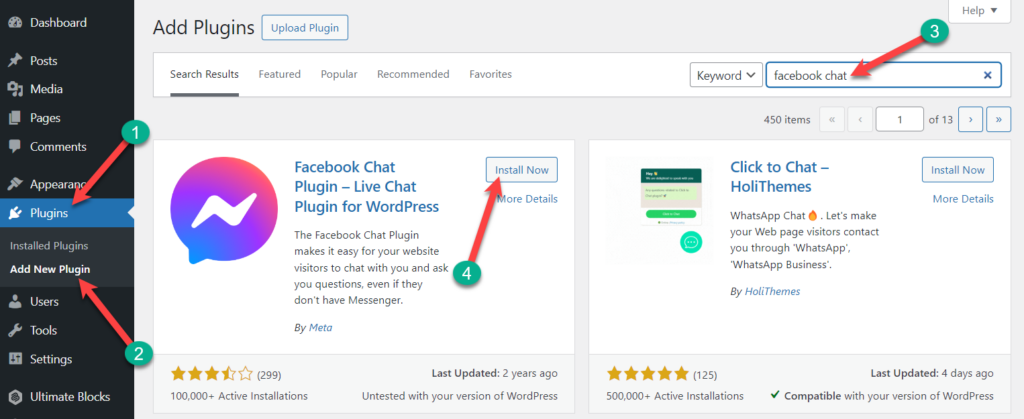
Step 1: Install the Facebook Chat Plugin
To add Facebook messenger, first, you have to install and activate the plugin.
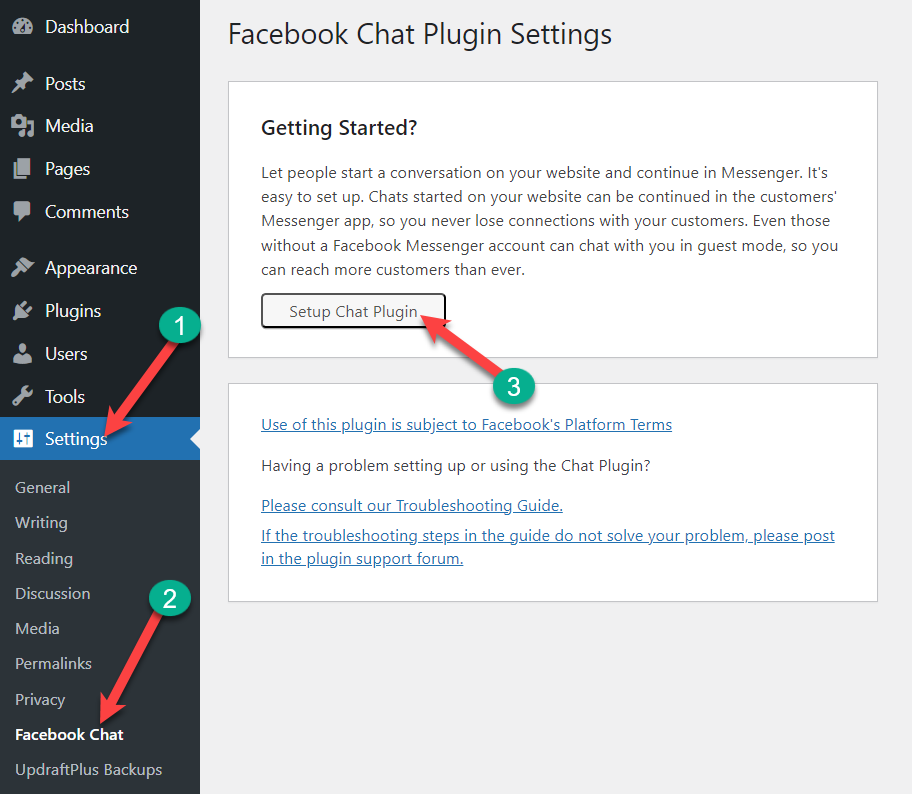
Step 2: Setup The Plugin
From the dashboard, navigate to Settings -> Facebook chat and click on ‘Setup Chat Plugin’.
A new window will appear to ask you to select the Facebook page on which you want to select the messenger button. (If you are not logged in to your Facebook, then you have to log in to your Facebook id first).
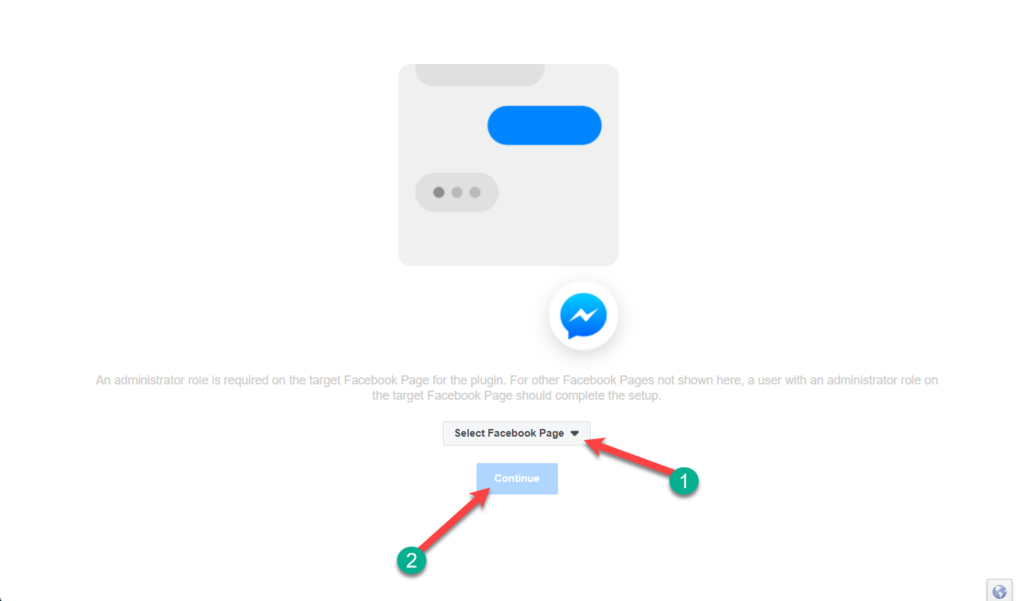
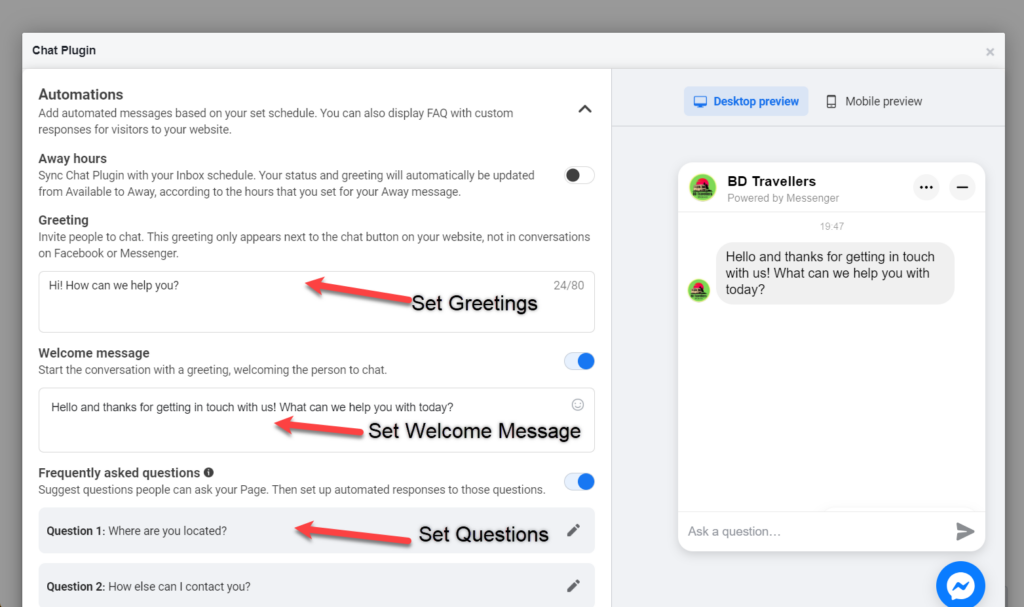
Select the page and click on the ‘Continue’ button. It will direct you to the Automation page, from where you will be able to set greetings, welcome message, and frequently asked questions. When you are done scroll below and toggle “customize your chat plugin”.
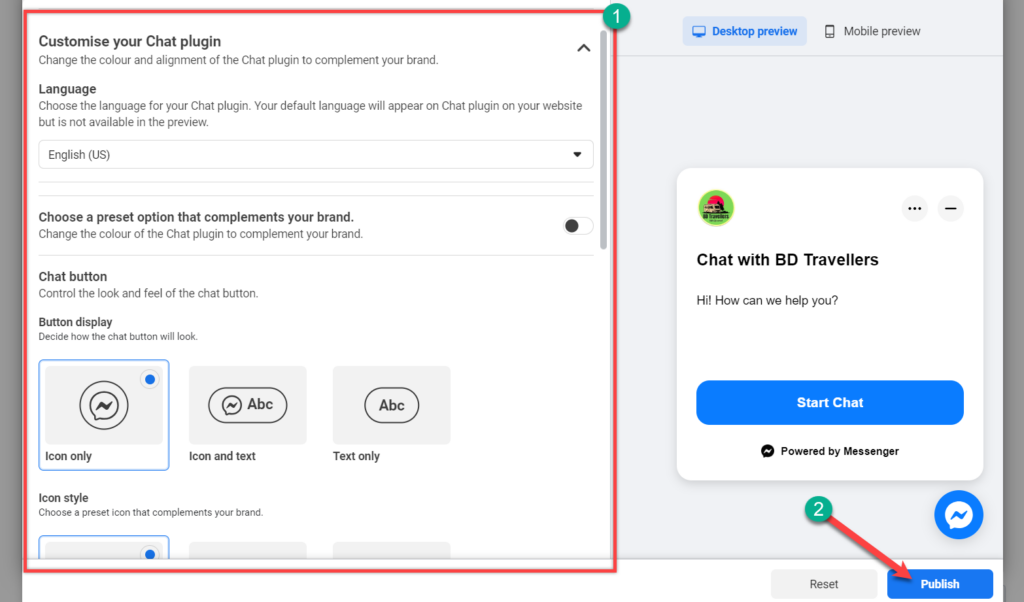
From here, you will be able to customize language, guest chat, brand preset, chat button, button display, icon style, prominence, chat button size, chat window size, position, alignment, and margin. When you are done customizing hit “Publish” button on the very below the right side.
After hitting the publish button a code snippet containing the codes will be automatically added to ‘The Facebook Chat plugin’.
Now, visit your WordPress site to look for your messenger button.
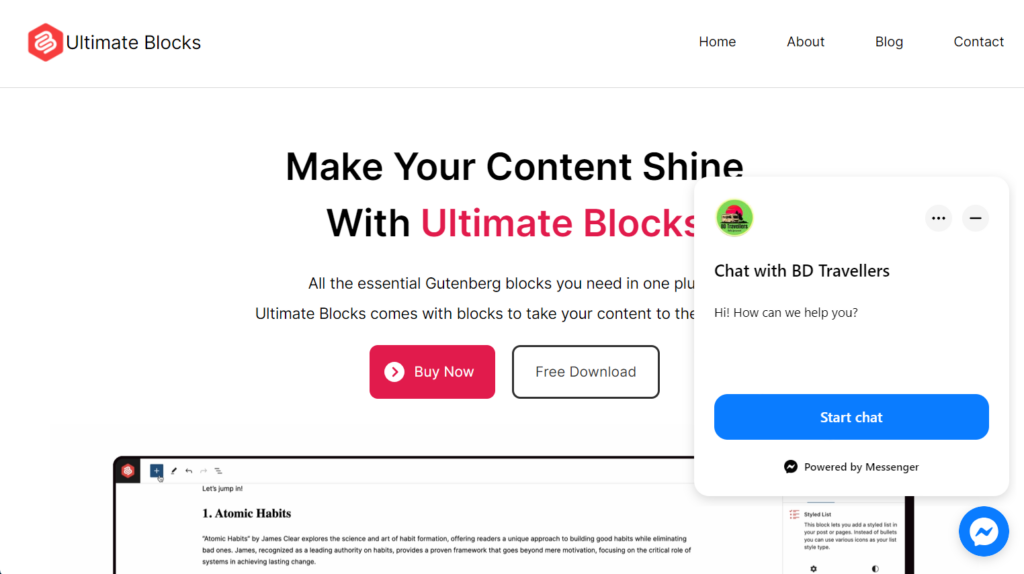
In this way, you can add Facebook messenger to your WordPress site.
Last Words
I hope you have successfully learned to add Facebook messenger on your site. Now, it’s time to add messenger on your website on your own. If you liked the post share it with your friends and don’t forget to write your thought in the comment box below.


Leave a Reply