While visiting a website, you may notice a small icon appearing on the browser tab. This small icon is the site icon, also known as the favicon. It represents the identity of a website and appears in various places like bookmarks, app icons, and address bars.
Though a site icon looks very small, it can help visitors quickly recognize and remember your website. A site icon can be a logo or an image that represents the brand identity of your website.
There are several methods of adding this element to a website. In this article, we’ll break down all the possible methods of how to add a site icon on WordPress websites using a plugin and the WordPress customizer option.
Method 01: Add a Site Icon on WordPress Using the Theme Customizer Option
- Log in to the WordPress dashboard.
- Navigate to Appearance > Customize.
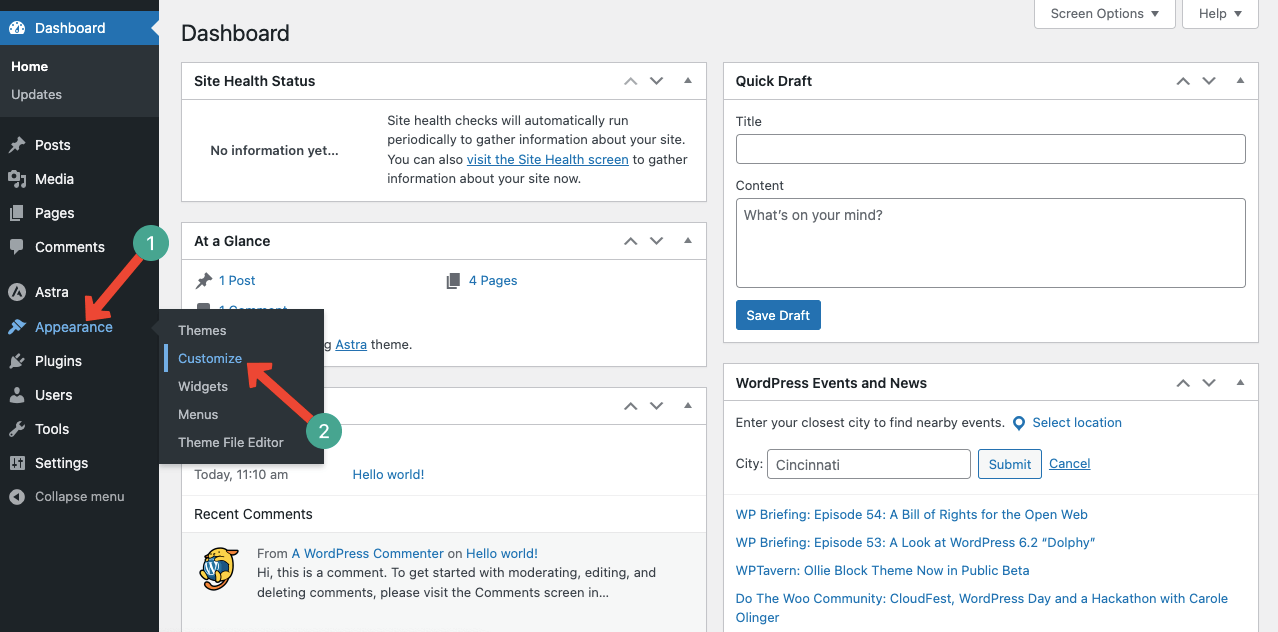
- Scroll the theme customize section a bit.
- You will find the Site Identity option.
- Depending on the theme you are using, this option may appear on the top, middle, or at the bottom.
- Click Site Identity.
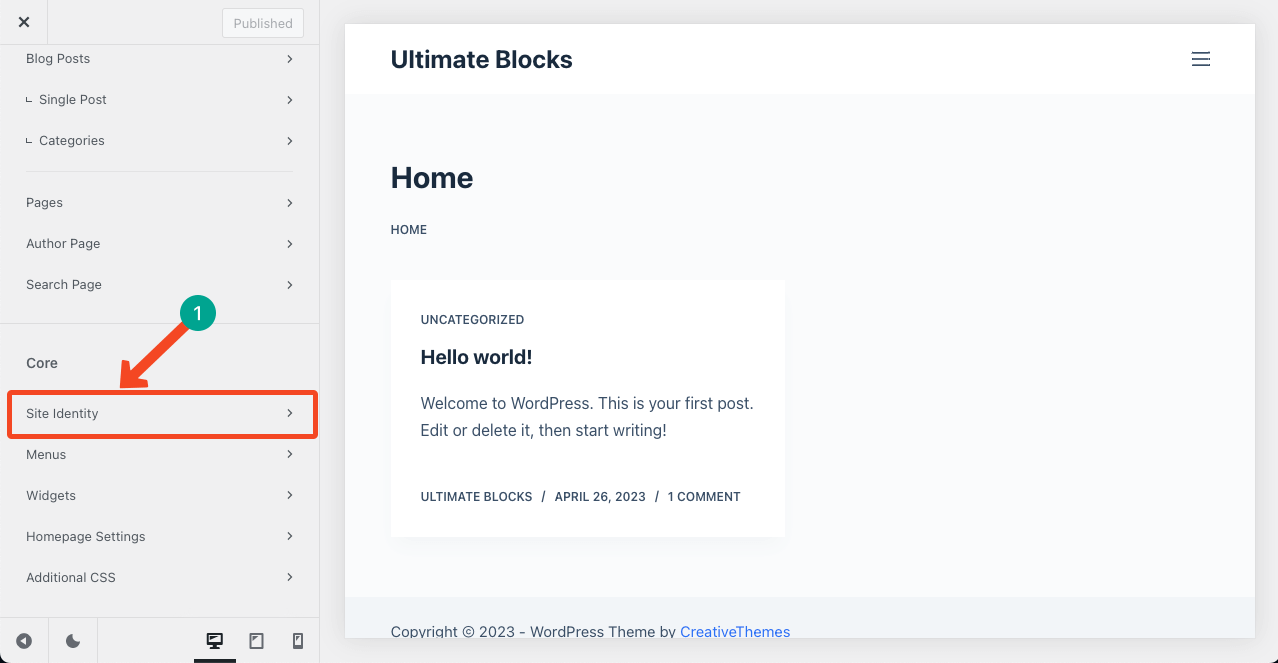
- You’ll get an option to upload a small-sized image.
- Depending on your theme, this section may have different names.
- But in most cases, its name will be Select site icon.
- Click on this option.
- It will allow you to upload a photo from the local drive or media files.

- Once the photo is uploaded, you can see it and its preview here.
- You may decide to change the image if you want.
- Click the Publish button at the end.
Visit this post to learn how to add a search bar in the WordPress header.
Method 02: Add a Site Icon on WordPress Using a Plugin
There are numerous plugins available by which you can create a site icon on WordPress websites. Favicon by RealFaviconGenerator, All in One Favicon, and WP Favicon are some most popular of them.
Besides, you will get this option in page builders like Divi and Elementor. This section will explain the process using the Favicon by RealFaviconGenerator plugin.
- Install and activate the Favicon by RealFaviconGenerator plugin.
- Then, navigate to Settings > Favicon.
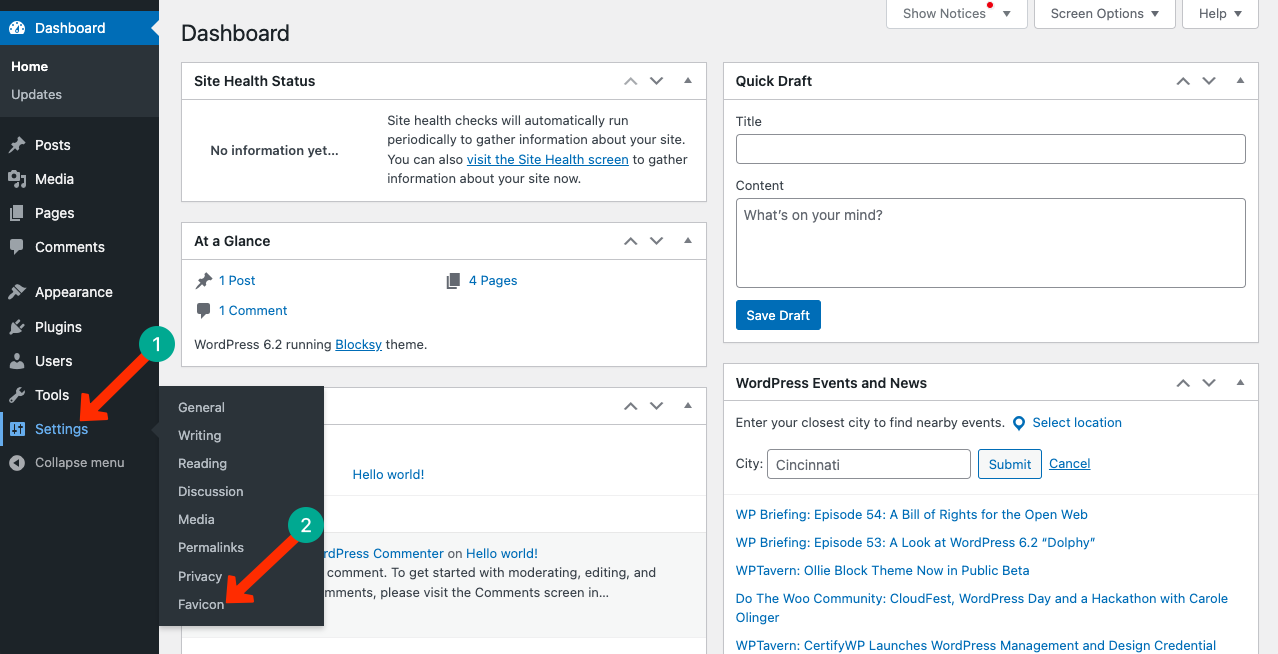
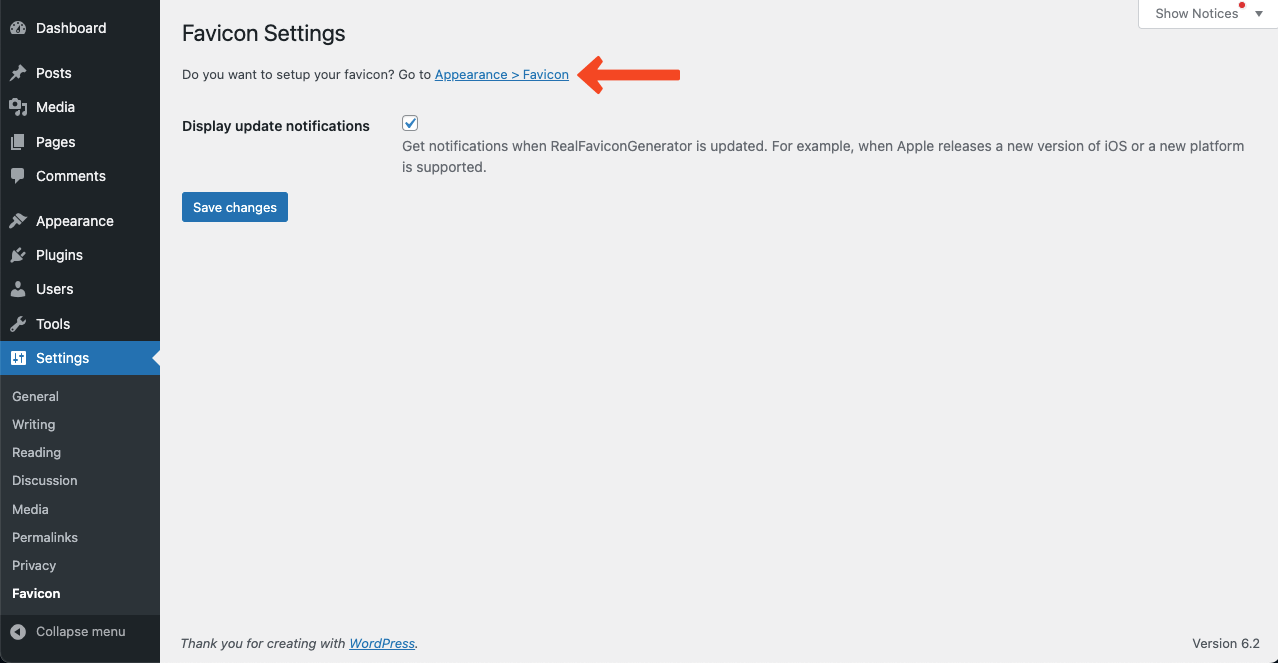
- You will get a link with the anchor text Appearance > Favicon.
- Click on the link.
- It will take you to a new page.
- Click the Select from the Media Library button.
- It will allow you to upload a photo from your local drive or add it from Media files.
- Once the photo is added, click the Generate favicon button.

- You’ll be asked to upload a photo and crop it.
- Scroll down the page once all the processes are done.
- You’ll get the Generate your Favicons and HTML code button.
- Click the button.
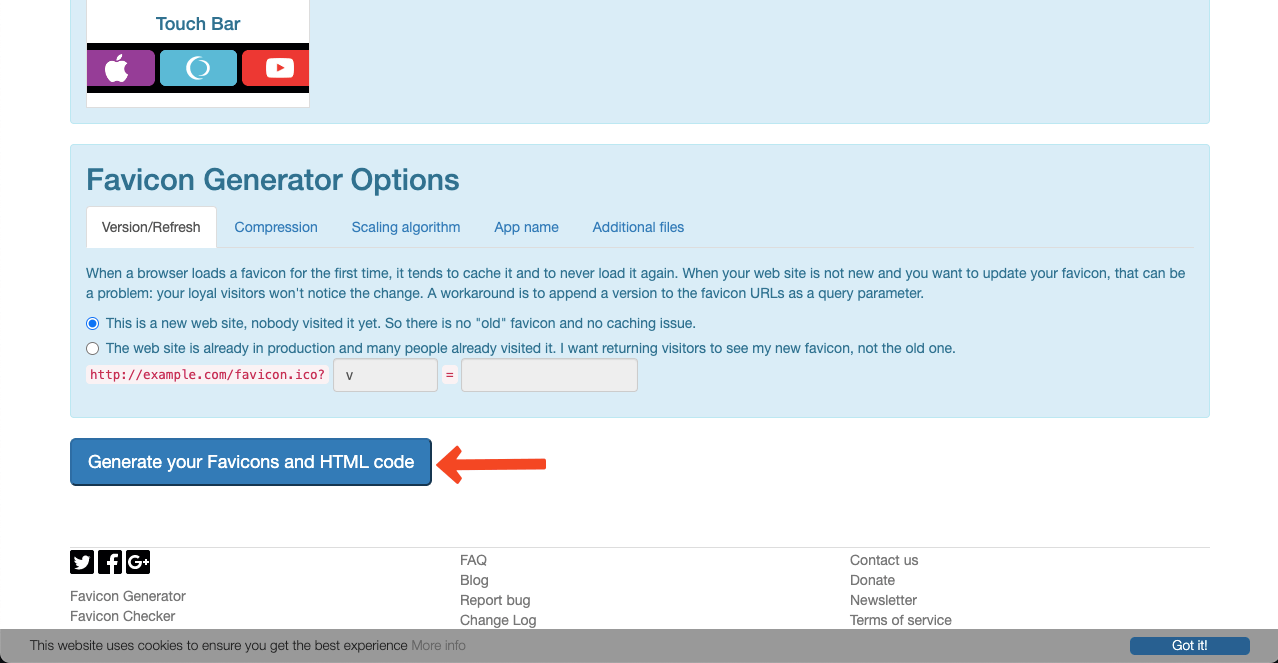
- You’ll see the favicon has been ready and their preview modes in this section.
- You can check how the site icon works by clicking the Check your favicon icon.

Final Takeaway!
Creating a site icon is a simple process but carries a lot of importance in its branding and upholding user experience. There are some points (best practices) you must remember while creating a site icon.
Always use a simple and easy-to-remember design. Make sure the photo has high resolution and the correct size. Cross-check if this photo represents your web logo and is consistent with your brand color.
If you are satisfied with this article, be sure to let us know through the comment section. It will inspire us to cover more interesting topics in the coming days.
Leave a Reply