In various scenarios, the layout of your WordPress site may demand the strategic placement of elements, such as positioning two buttons side by side for a streamlined user experience.
This task might seem daunting initially, often leading to the misconception that it requires complex plugins or advanced coding skills. However, the reality is pleasantly simple.
In this guide, I will walk you through the steps to neatly align two buttons side by side on your WordPress site without additional plugins. Ready to enhance your site’s functionality and aesthetics?
Let’s dive in!
Adding Two Buttons Side by Side in WordPress
Follow these simple steps to add two buttons side-by-side to your WordPress post/page.
Step 1: Add the Buttons Block
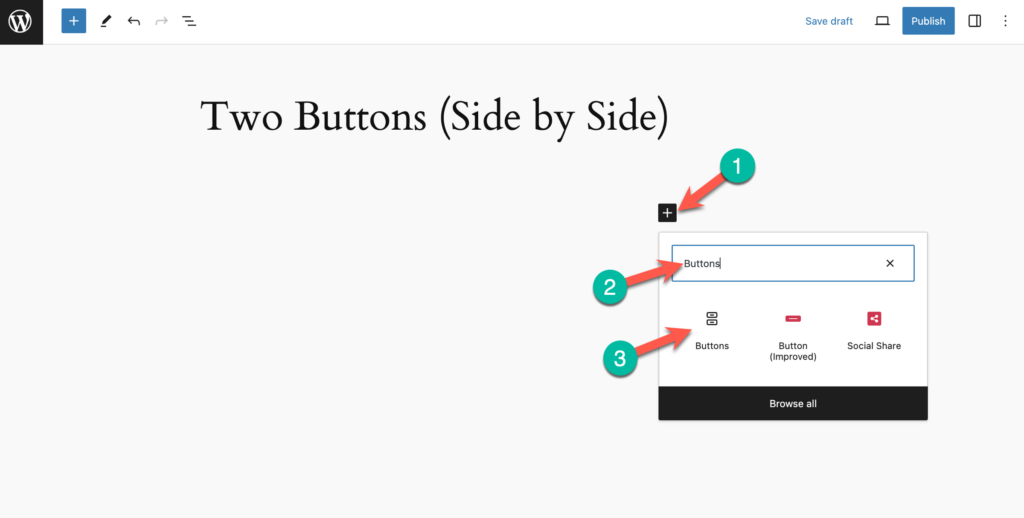
Open the page/post where you want to add two buttons side by side. Click on the ‘+’ icon and search for ‘Buttons’. Then click on it to insert it.
Step 2: Add Another Button
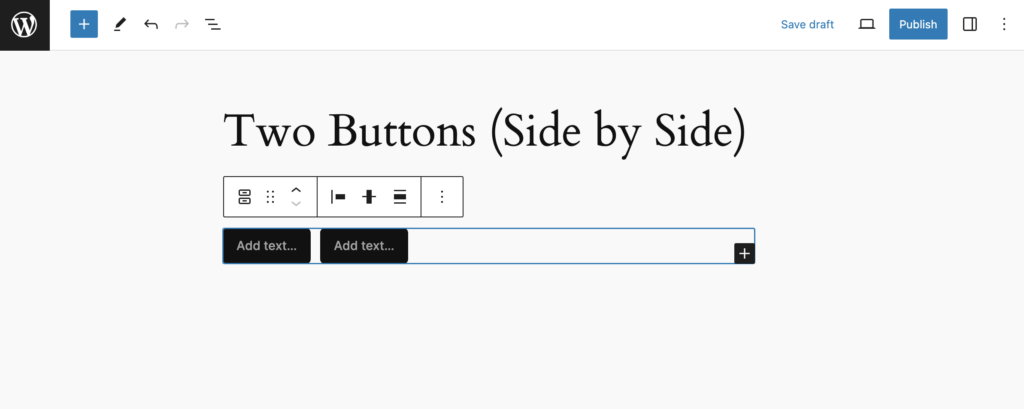
Upon clicking on the ‘Buttons’ block, it will add a single button. To add another button, simply click on the ‘Buttons’ icon from the toolbar (1) and then click on the ‘+’ icon.
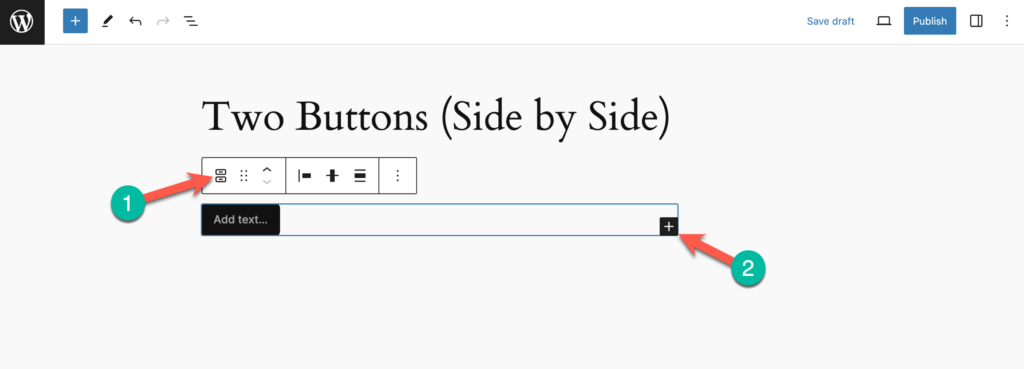
This will create another button on the right side. If you need more buttons, you need to click on the + icon again.
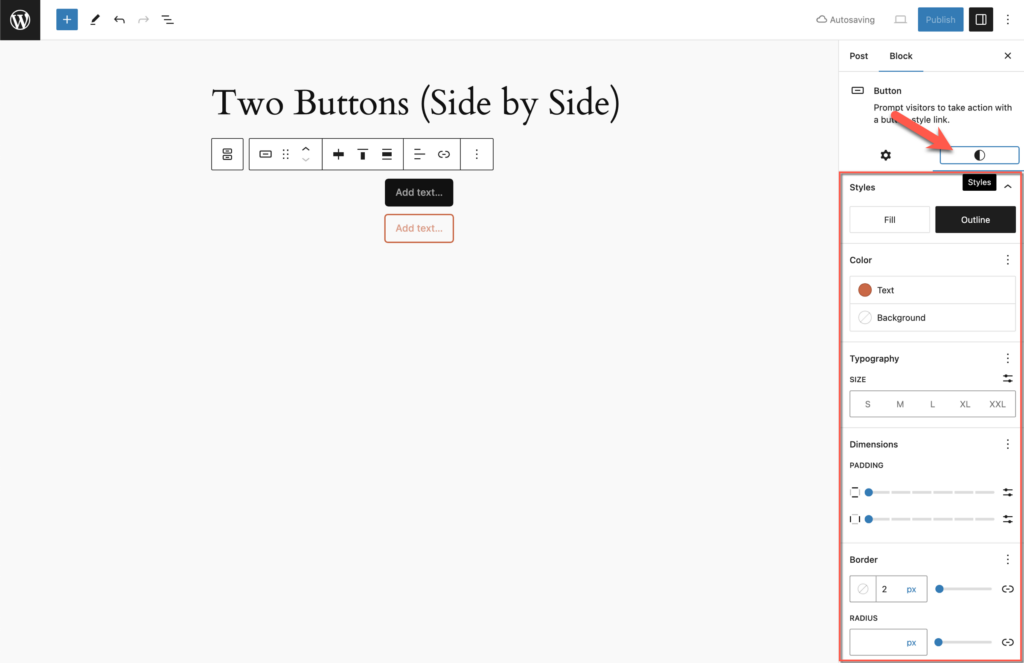
Step 3: Customize The Buttons
To change buttons’ justification and orientation, click on the ‘Settings’ icon from the top corner of the right-hand side.
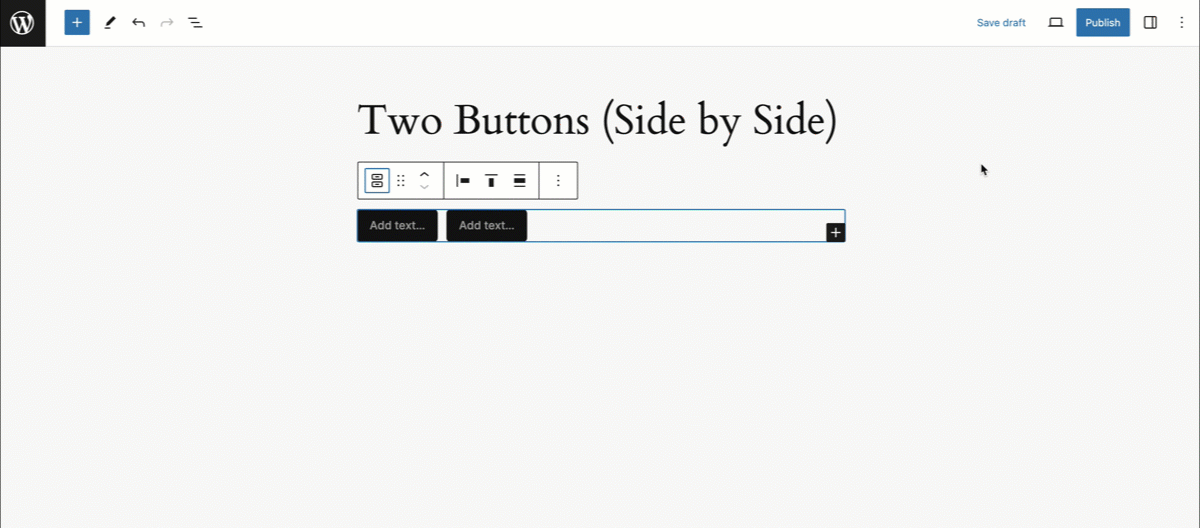
To customize a single button, simply select the button and click on the ‘Styles’ tab from the right-hand side options panel. You will get all customizations there.
That’s it. This is how you can add two buttons side by side.
Want to Add Advanced Buttons Side by Side?
Now if you want to add advanced buttons like the below one with features like icon, hover effect, etc; you can use the Ultimate Blocks plugin. It has a button block.
Let’s see how to use the Ultimate Blocks plugin to add buttons side by side.
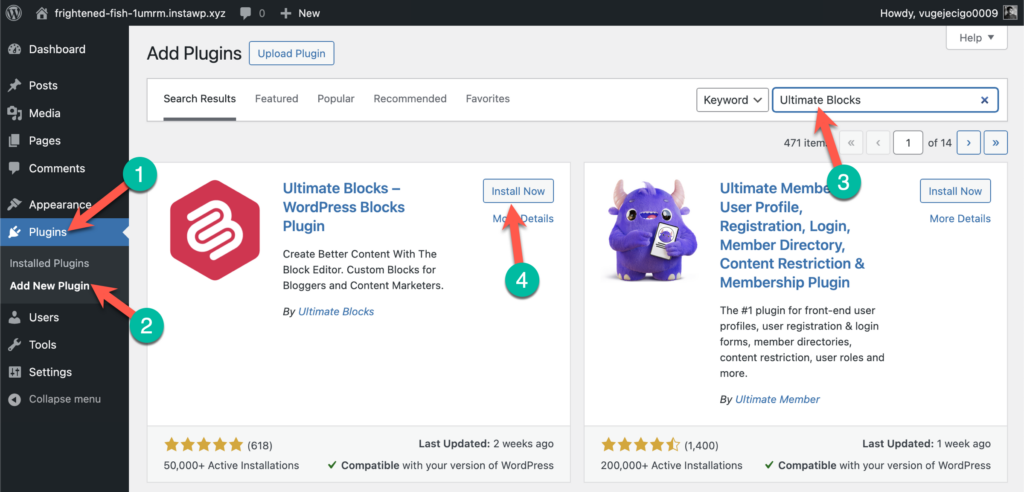
Step 1: Install the Ultimate Blocks Plugin
Go to your WordPress Dashboard and navigate the Plugins > Add New Plugin and search for ‘Ultimate Blocks’. Then install and activate the plugin.
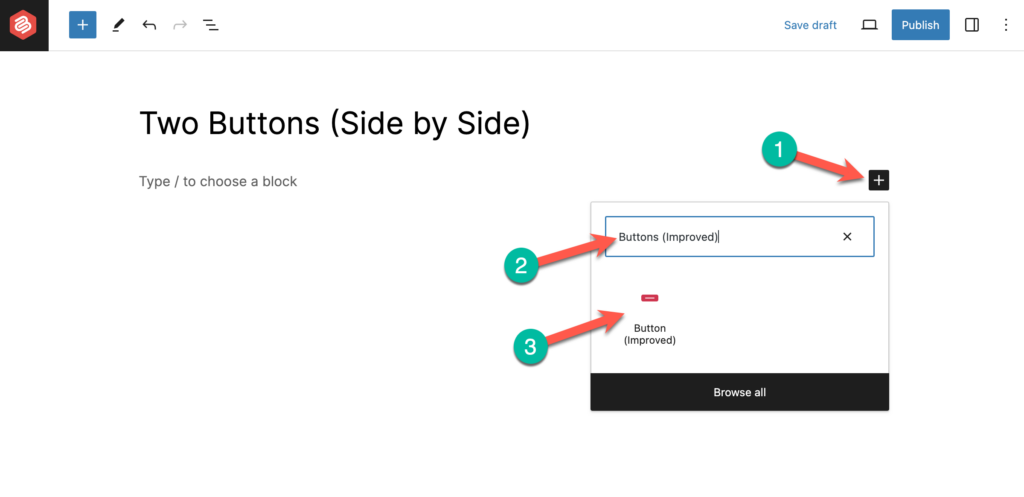
Step 2: Add the Button (Improved) Block
Open the page/post where you want to add the advanced buttons. Then click on the ‘+’ icon and search for ‘Buttons (Improved)’ and click on it to insert it.
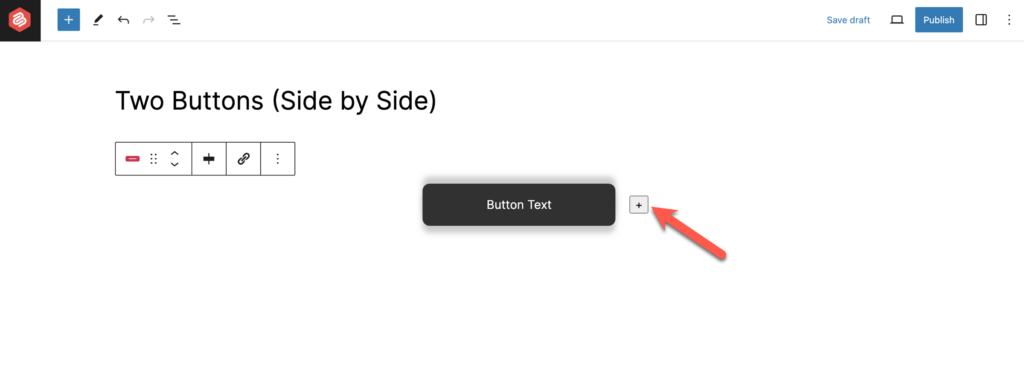
Step 3: Add Another Button
To add another button, simply click on the ‘+’ icon beside the button.
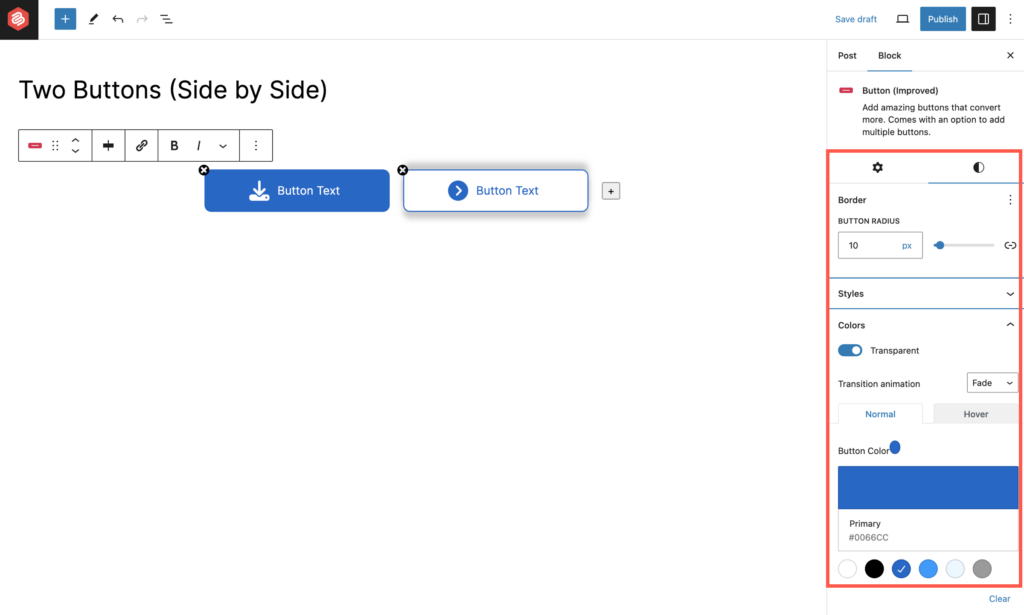
Step 3: Customize the Buttons
From the settings panel, you will be able to customize size, width, icon, icon position. If you want to customize styles, colors, and other advanced options, click on the Styles tab. Then customize as you like.
That’s it. This is how you can add advanced buttons using the Ultimate Blocks plugin.
Video Tutorial

Ultimate Blocks
Last Words
By following the steps outlined, you’re now equipped to position two buttons side by side on your WordPress site, or even more if needed. Should you encounter any challenges or have questions about this process, don’t hesitate to reach out—I’m here to help.
Did you find this guide useful? If so, I’d be delighted if you’d consider sharing it with your network. Your support helps others discover these handy tips too!


Leave a Reply