
Making international payments can be really difficult if your country doesn’t support PayPal. In countries like Bangladesh and Pakistan where PayPal doesn’t work, users have to find other alternatives for sending and receiving payments internationally.
Besides that, PayPal also has a very high commission rate for transactions which has forced many people to look for alternatives.
In this article, I’ll talk in detail about Payoneer which is a great alternative to PayPal. I’ll discuss how to to create a Payoneer account, activate your account, and add funds to make international payments.
As a bonus, I’ll also show you how to get a $50 Sign Up bonus for creating your Payoneer account. This special bonus is only for our readers.
Let’s get started.
What Is Payoneer?
Payoneer is an online money transfer platform that offers digital payment services empowering freelancers, online sellers, and businesses to send and receive money internationally. Payoneer is recognized as one of the best alternatives to PayPal due to its availability across 200 countries and low transaction fees.
With Payoneer, you can not only make international payments online but also withdraw money through your local bank or from an ATM. Today, Payoneer has over 4 million users in 150 different countries.
Benefits Of Using Payoneer
Before choosing a platform for making online payments, it’s important to know all its benefits and uses. So, here are some of the benefits of using Payoneer:
- Withdraw money through local ATM
- No hidden fees or taxes
- Supports freelance marketplaces like Fiverr, Upwork, Freelancer, etc to receive payments
- Offers free virtual US bank account for global payments
- Supports all major eCommerce websites and stores for shopping
- A very fast money transfer system
- Can be used to receive Amazon affiliate payments
These are just a few of the many benefits you get from using Payoneer for making online transactions.
How To Create A Payoneer Account
Creating a Payoneer account is a very simple process and takes less than 5 minutes. Let me walk you through the process of creating a new Payoneer account:
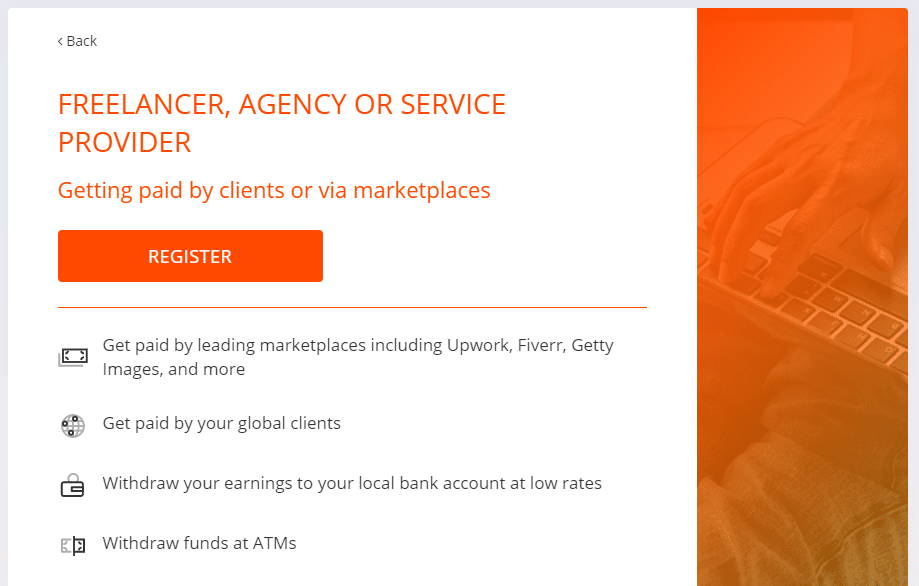
1. Visit Payoneer and click on the button ‘Sign Up & Get $50’ to get started (This offer is exclusive to our readers only).

2. The link will take you to a page where you’ll have to select which type of account fits perfect for your needs.

3. After selecting your needs, click on the ‘Register’ button to proceed to the next step.
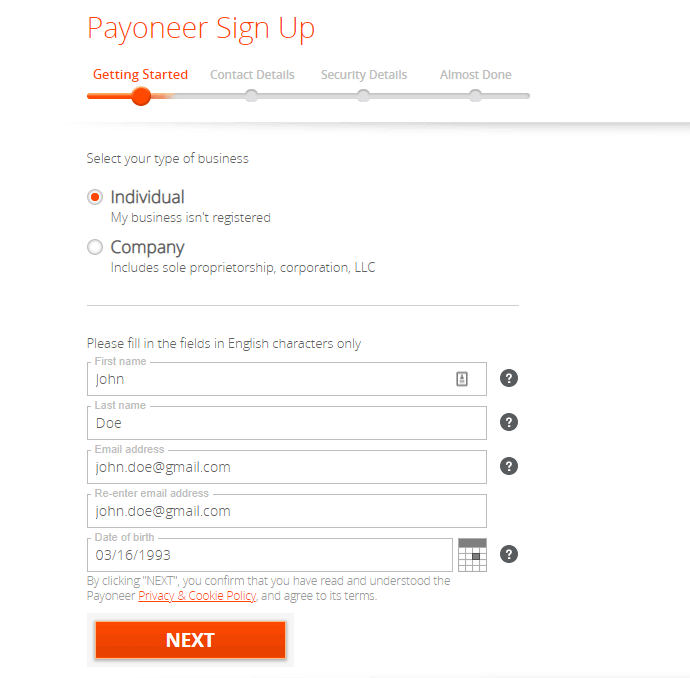
4. The next step is to enter your personal information such as your name, email address, date of birth, etc.
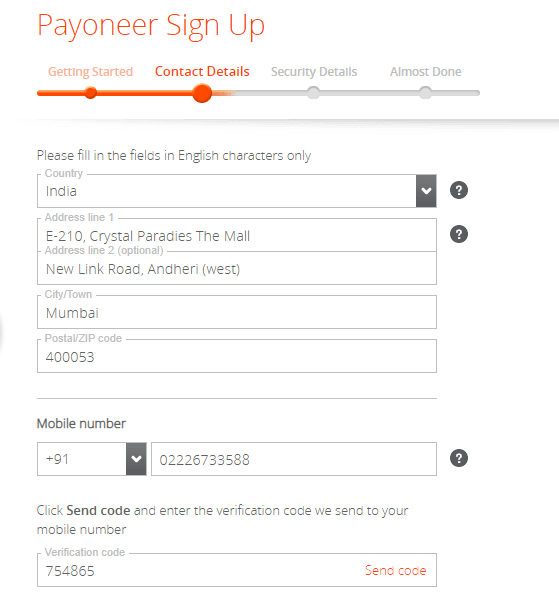
5. Then, enter your contact details which include your country, address, and phone number.
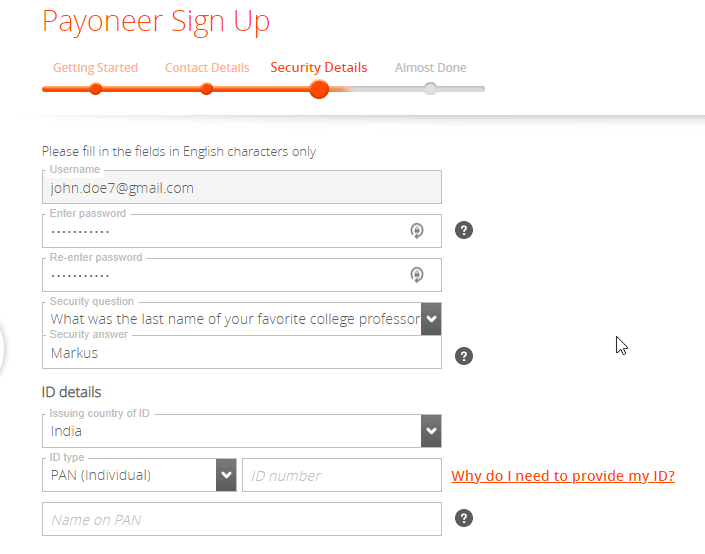
6. Now, you have to set a password and a security question. A helpful tip here is to keep your security question safe somewhere in case you forget your password. Also, provide your ID information in this step.
7. The last step is to enter your bank account details. Click on ‘Submit’ to proceed further.
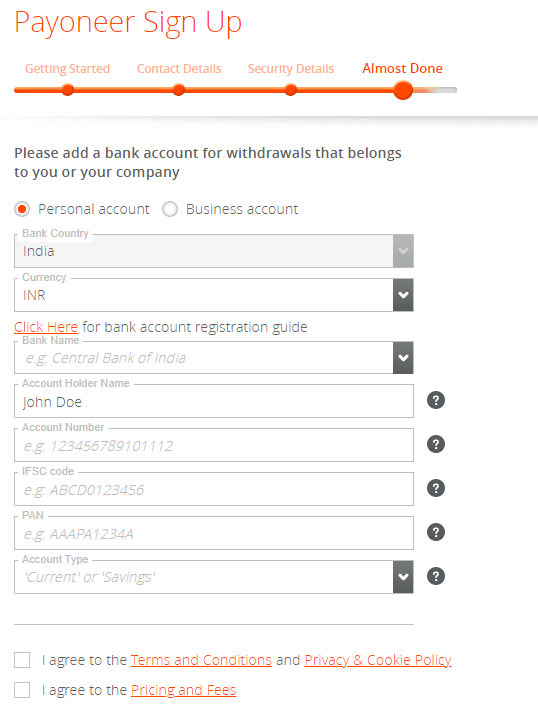
8. Once you’ve submitted your application, it will be under review for approval. This gets approved very fast if you’ve provided the correct information and details.
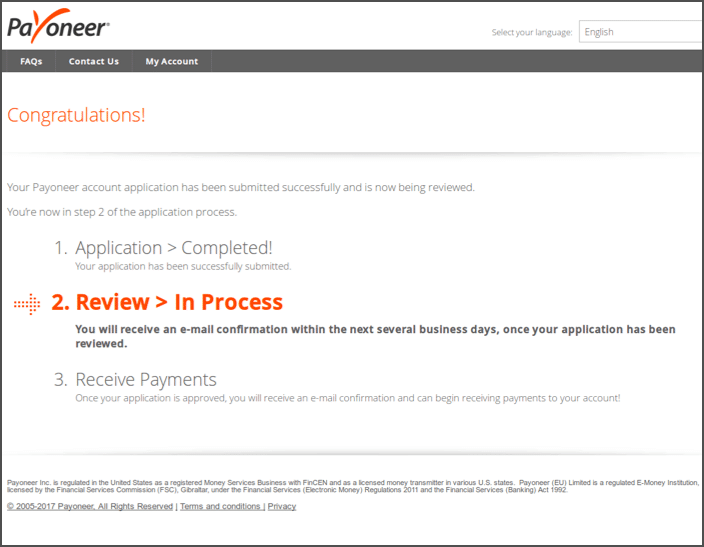
Once your account is approved, you’ll get a letter at your address for confirmation. This letter will contain a 16-digit card number that will be used later.
How To Activate Your Payoneer Account
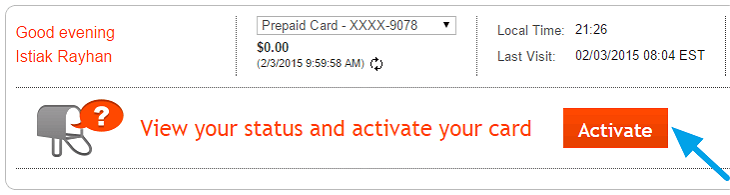
Once your account is approved, the next step is to activate your account so that you can send and receive payments.
Activating your Payoneer account is again a very simple and easy process. Let me guide you through the whole process step-by-step.
When you log in to your Payoneer account, you’ll see an ‘Activate’ button. Click on this button to begin the activation process.
For activation, you’ll have to enter your card number details along with a digital pin. For the card number, check the letter you received from Payoneer and you’ll find the 16-digit number in it. After that, choose a 4-digit PIN. This PIN number will be used at ATMs and stores so do choose a number that you don’t forget.
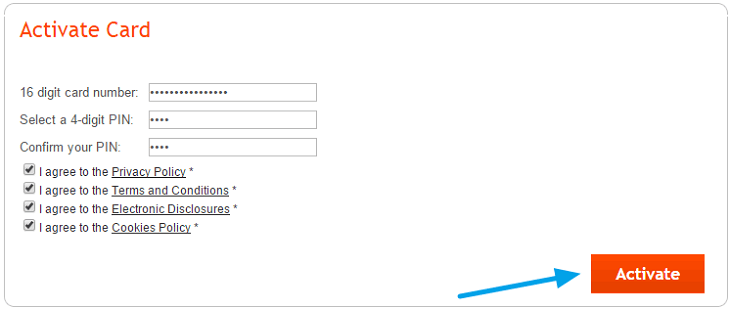
After clicking on the ‘Activation’ button, you’ll receive an email confirmation account activation.
How To Add Funds To Payoneer Account
Once your Payoneer account is activated, it will still show $0.00 as your account balance. To get the $50 bonus for signing up, you’ll first have to receive at least $1000 in your Payoneer account.
You can either do this by receiving money from someone else or adding funds to your Payoneer account by yourself.
Currently, you can’t transfer funds to a Payoneer account from other Payoneer accounts or even from your local bank. Here are the two different methods you can use instead to add funds to your Payoneer account:
1. Receive Payments from Payoneer Supported Companies & Websites
If you’ve created a Payoneer account to receive payments from online marketplaces and other such websites, then this method will work great for you.
Whether you’re a blogger, freelancer, or an affiliate marketer, you can use this method easily. Here are the different companies that support Payoneer for sending payments to its users:
- Freelance Marketplaces: Fiverr, Upwork, ODesk, 99Designs, Freelancer, Elance, etc.
- Affiliate Networks: Envato, CJ, Shareasale, Clickbank, Amazon Affiliate Program, etc.
- Ad Networks: RevenueHits, Kadabra, BuySellAds, InfoLinks, etc.
2. By Using US Payment Service
This is another method for non-US residents to receive payments from US-based companies. For using this service, your account must be verified in order to receive payments.
Lastly, you can also receive funds to your Payoneer account by signing up for their affiliate program and receiving commissions.
How To Withdraw Money From Payoneer Account
Withdrawing money from your Payoneer account is very easy. Here is a step-by-step guide on how you can do that:
Withdraw Money To Your Local Bank
Before you proceed with withdrawing money to your local bank, it’s necessary that your bank account is connected and approved by Payoneer.
1. First, log in to your Payoneer account and go the the ‘Bank Account’ settings under which you’ll find an option to ‘Withdraw’.
2. If you haven’t added and verified your bank account yet, Payoneer will ask you to connect a bank account. Click on the ‘Add New’ button to add your bank account.

3. You’ll be asked to verify your account information by entering your Payoneer information such as Payoneer card number, CVV, date of birth, and account password.
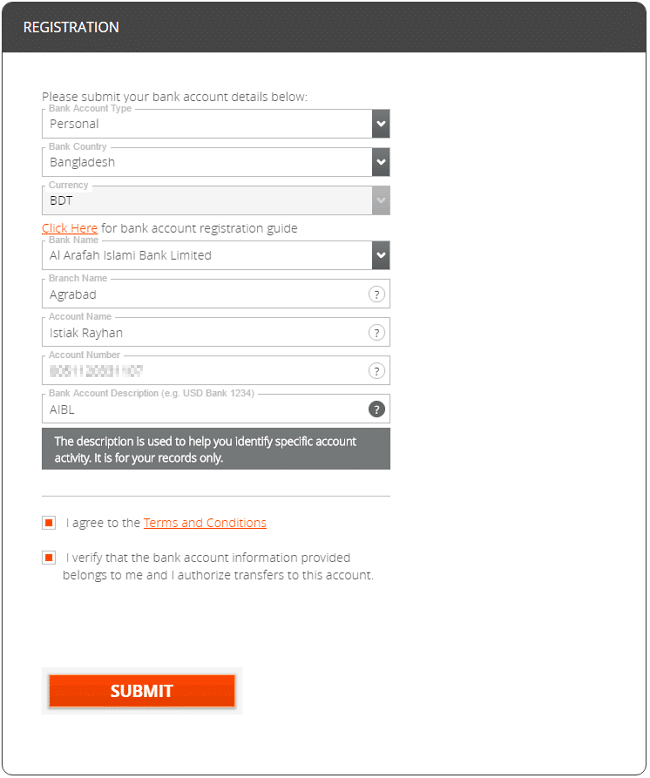
4. Next, enter your bank details. You’ll have to enter your bank name, branch name, account name, account number, and account description. Once you’ve entered all your information, click on the ‘Submit’ button.
5. After submitting your bank information, you’ll receive an email confirming that your bank account has been connected and approved to your Payoneer account.
6. Now, you can go back to your account and ‘Withdraw’ money from your Payoneer account.
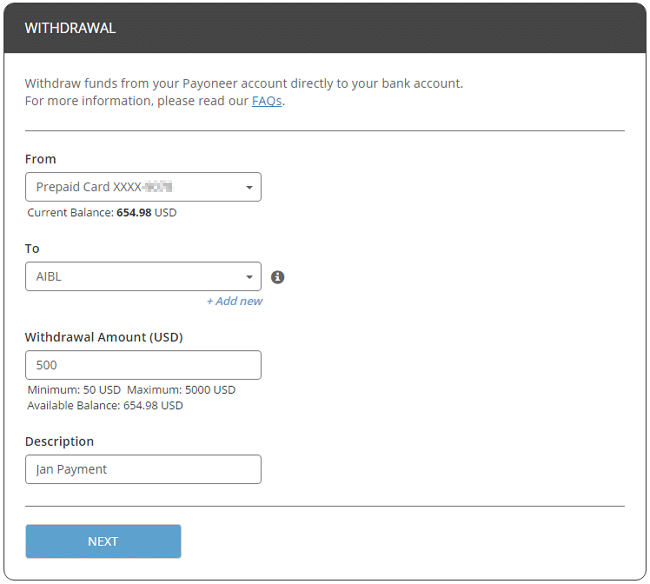
7. Select the bank account to which you want to withdraw money and enter the amount you want to withdraw. Click on the ‘Next’ button to confirm funds withdrawal.
8. Your funds will be transferred to your bank account in 3-4 business days.
Note: You can also enable automatic fund withdrawal in your Payoneer account.
Withdraw Money From A Local ATM
The second method of withdrawing funds from Payoneer is by going to a local ATM. Just ensure that your local ATM supports MasterCard. The amount will be withdrawn in your local currency.
FAQs
Is Payoneer free to sign up?
Signing up for Payoneer is free. There are no charges for opening a new account, allowing easy access to Payoneer’s payment solutions. However, there may be fees for certain transactions, such as withdrawals or currency conversions.
Which documents are needed to create a Payoneer account?
Creating a Payoneer account requires identification documents such as a passport, national ID, or driver’s license. These documents verify your identity and comply with financial regulations.
What is the age limit for Payoneer?
The minimum age to open a Payoneer account is 18 years. This requirement ensures that users are legally able to enter into a contract and manage financial transactions responsibly.
Why is there a $50 eligibility on Payoneer?
This incentive is typically offered as a sign-up bonus to new Payoneer account holders who meet specific criteria, such as receiving a minimum amount of payments into their account within a set timeframe. This promotion encourages new users to utilize Payoneer’s services.
Conclusion
Payoneer is a great platform for anyone who wants to receive international payments without having any transaction fee woes. It’s a great alternative to PayPal and has many other added benefits.
I hope this guide will help you create a Payoneer account easily. If you have any doubts or questions about Payoneer, feel free to comment below.


Leave a Reply