
WordPress saves everything you write on the editor after an interval of 60 seconds. All of the changes that you bring to your page/post are saved as revisions in your database.
It’s a lifesaver if you somehow forget to save your posts. But the downside of the autosave feature is that it can use excessive server resources, and you might find it annoying sometimes.
In that case, you can consider disabling autosave in WordPress. But what I’d recommend is to extend the interval time.
Whatever you want to do, here I’ll be sharing both ways. So let’s get started.
Supercharge Your WordPress Block Editor!

Disable Autosave by Using A WordPress Plugin
Like everything we do in WordPress, we can disable Autosave by using the plugin – Disable Gutenberg Autosave.
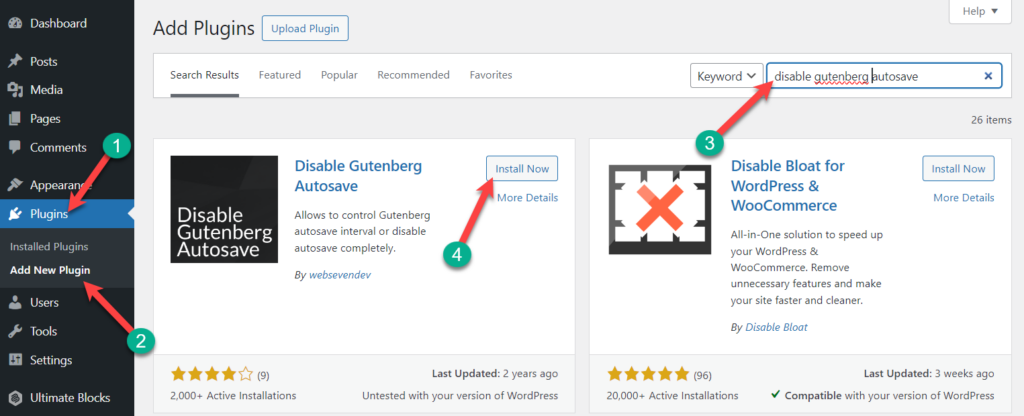
Once you’ve installed and activated the plugin, it will automatically disable the autosave feature.
But the good thing is, you can set an interval time to avoid completely disabling the feature. Just go to the WordPress post editor and click on the vertical three dots from the higher right-hand side and click on ‘Disable Gutenberg Autosave’.
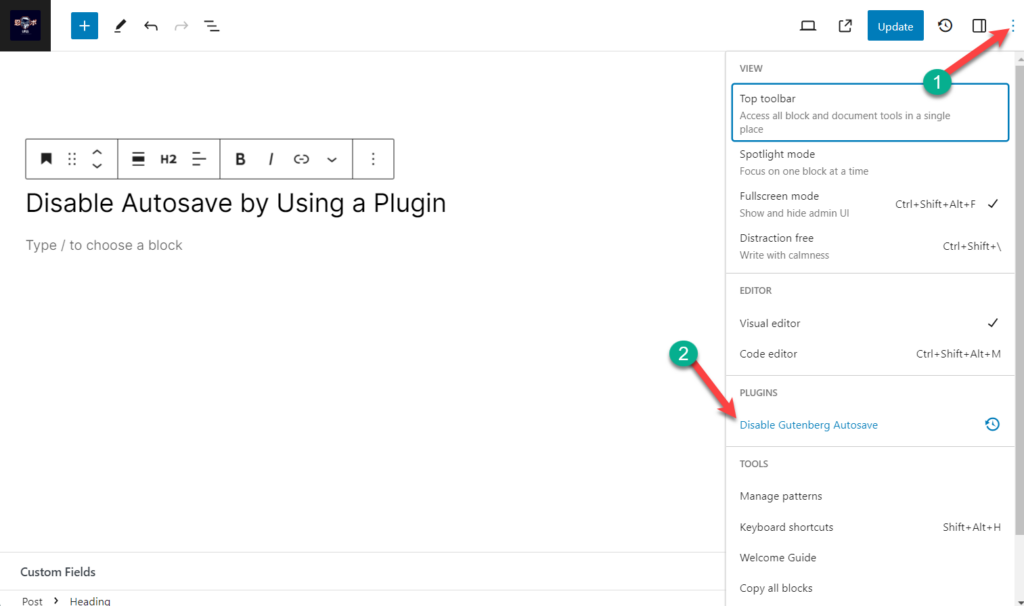
Then choose the interval time and update the post.
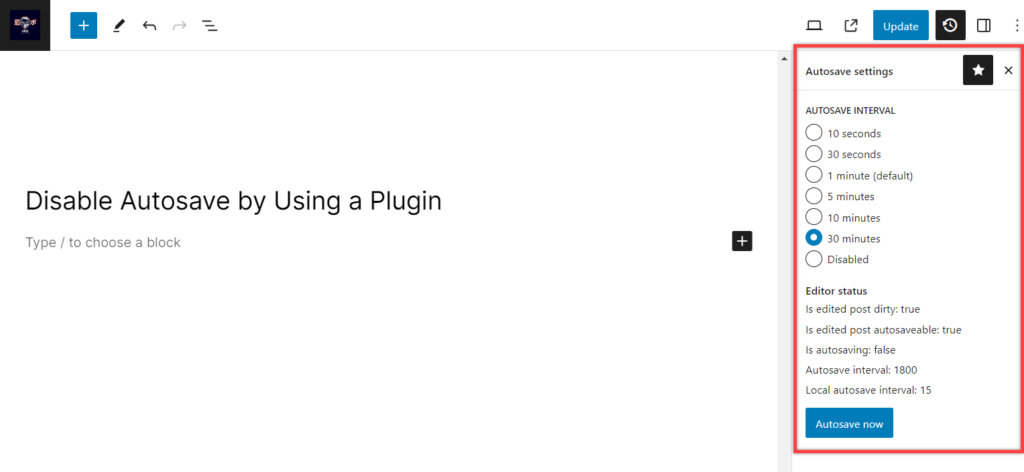
The settings will be saved and you don’t have to do anything.
Disable Autosave by Adding Code in functions.php File
Note: Always take a backup before editing your funtctions.php file.
This is the recommended and easiest way to disable autosave. At first, navigate to Appearance -> Theme Editor, now from the right sidebar, select Theme Functions(functions.php).
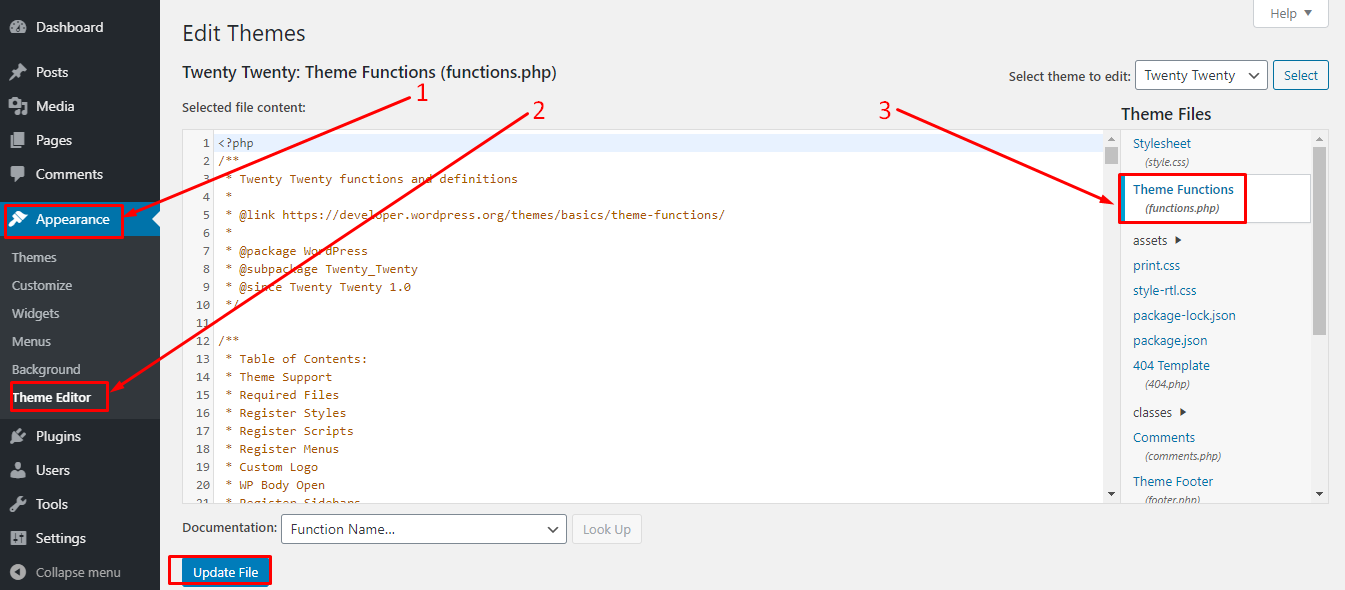
Copy the below code snippet and paste it into the Theme Functions(functions.php).
add_action( 'admin_init', 'disable_autosave' );
function disable_autosave() {
wp_deregister_script( 'autosave' );
}
Don’t forget to update the file. Now you are all done, you have successfully disabled the autosave.
Disable Autosave by Editing wp-config.php File
This is the most used procedure to disable the autosave feature in your WordPress site. All you have to do is copy and paste the following code snippet to your wp-config.php file.
define('AUTOSAVE_INTERVAL', 86400);This code will modify and increase the autosave time interval to an entire day. Therefore a post will be saved after a whole day is gone.
To do this, first, log in to your cPanel. Then access the cPanel File manager code editor and go to the wp-config.php file.
Paste the above code at the very top and click on Save Changes.
Conclusion
If you don’t want to use the FTP of your site, use the first method I mentioned here. Besides, the first method is slightly easy, as there is no use of FTP. I hope you have learned to disable autosave in WordPress now.
If you face any problems, tell me through the comment box. Share this post if you find it useful.


Leave a Reply to Victory Cancel reply