
Engaging readers effectively in a world brimming with distractions is challenging. Text highlighting in WordPress can counter this issue, drawing attention precisely where needed.
This technique not only beautifies your content but also significantly enhances user interaction by spotlighting essential information.
In this guide, we’ll explore how to highlight text in WordPress to ensure readers can easily find and engage with the most important parts of your content.
Highlighting Text in WordPress
You can do it using the block editor, plugin or CSS. Here, I am showing all three ways, but it is suggested to do it using the default way (Block Editor) of WordPress.
Method 1: Using the Block Editor
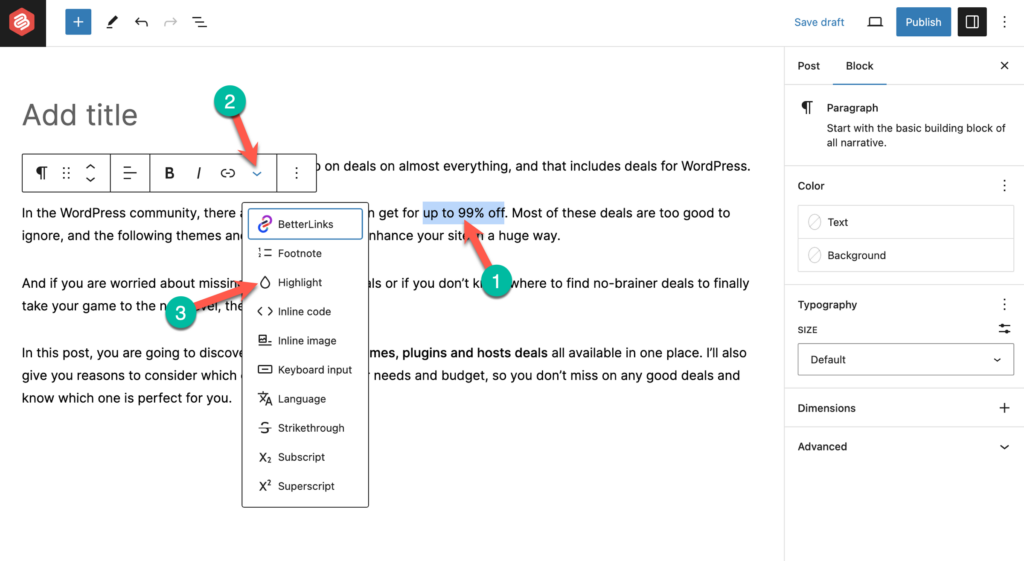
First, select the text (1) you want to highlight within a paragraph or heading block. Then click on the dropdown arrow icon (2) from the toolbar and select ‘Highlight’ option (3).
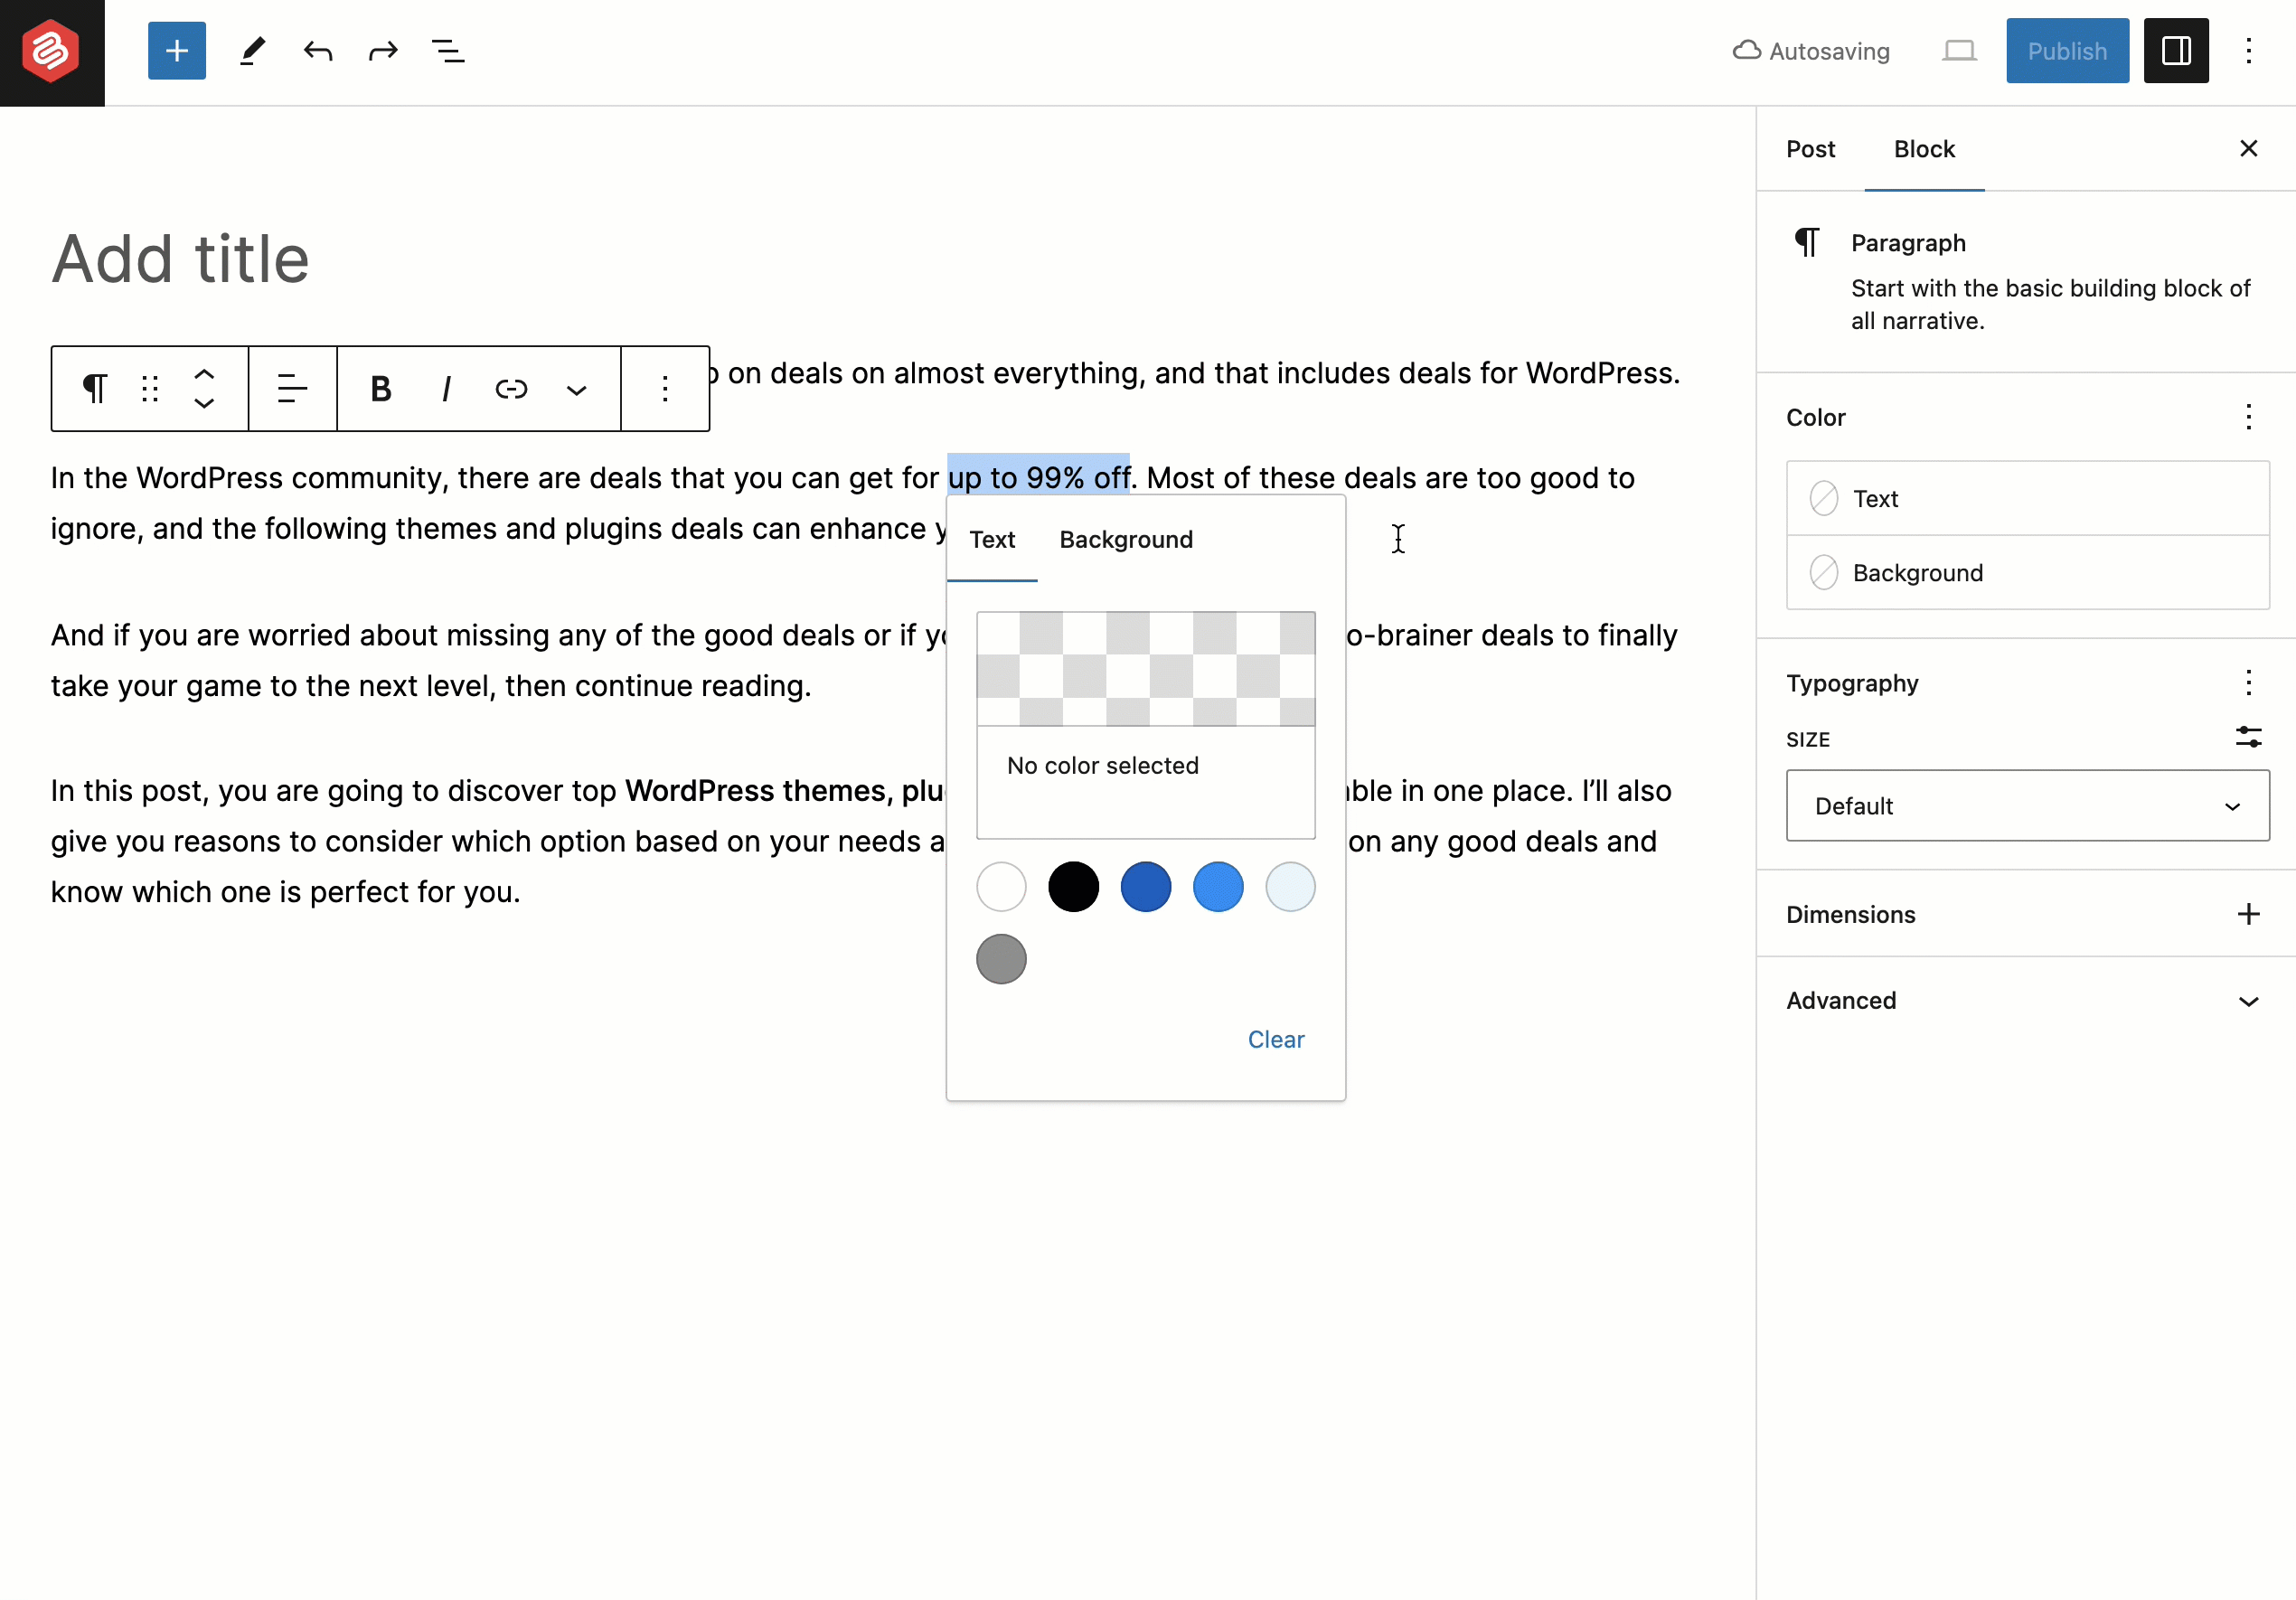
Then select the ‘Background’ tab and choose a color from the palette. The most common color for highlighting text is yellow (FFFF00).
Don’t forget to update or publish the post/page.
Method 2: Using a Plugin
There are WordPress plugins designed to add text highlighting functionality without the need for manual code. Here I’ll be using the ‘Advanced Editor Tools’ (previously TinyMCE Advanced) plugin.
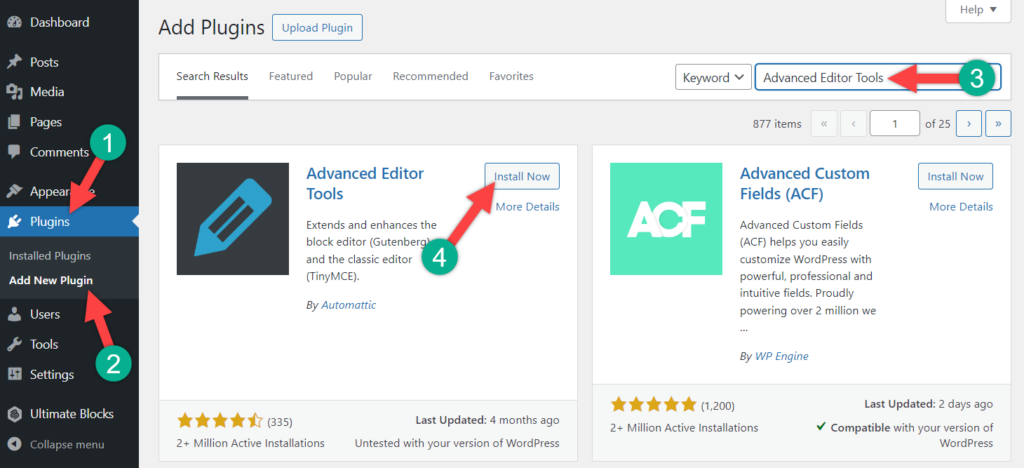
Let’s install the plugin. Go to your WordPress Dashboard and navigate to Plugins > Add New Plugin and search for ‘Advanced Editor Tools’. Then install and activate the plugin.
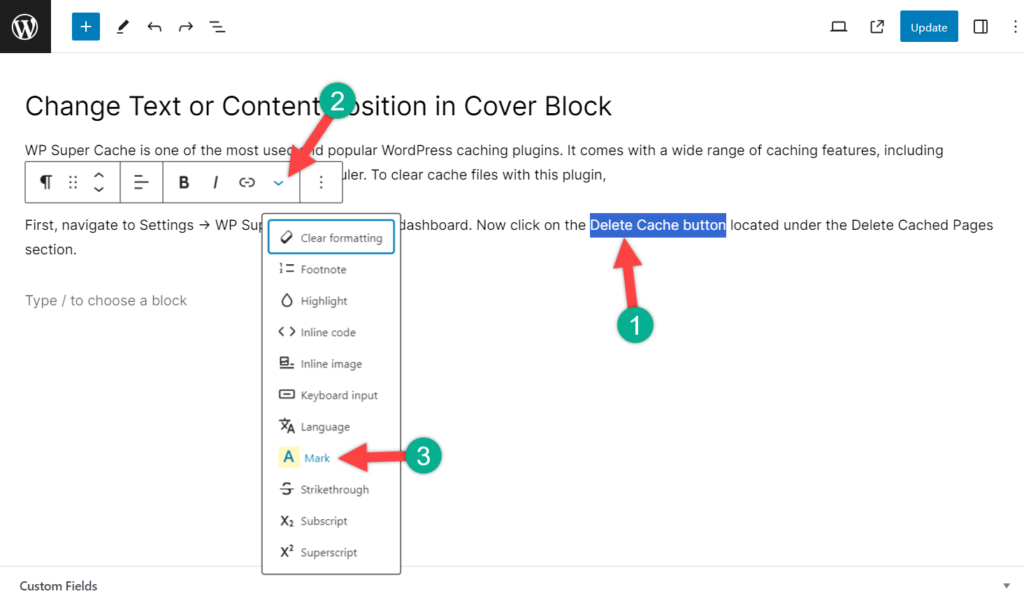
Now open the page or post where you want to highlight the text. Select the text portion which you want to highlight. Then click on the arrow button on the toolbar and select the Mark option.
Now your selected portion of the text will be highlighted.
It’s super easy, right? However, if you don’t highlight text very often then it is wise to highlight text manually.
Method 3: HTML Editing
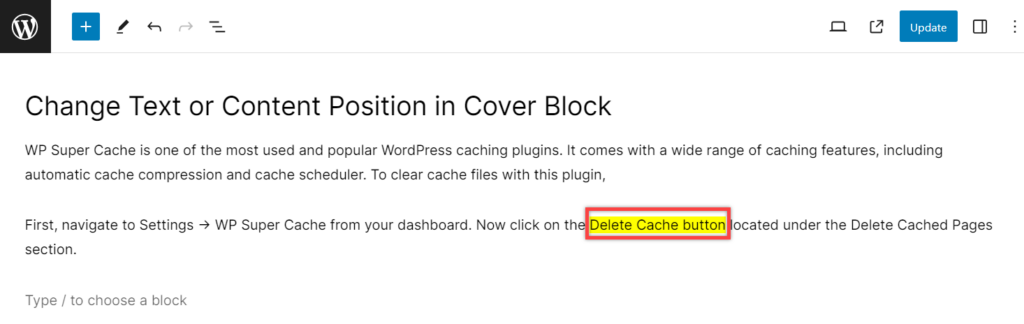
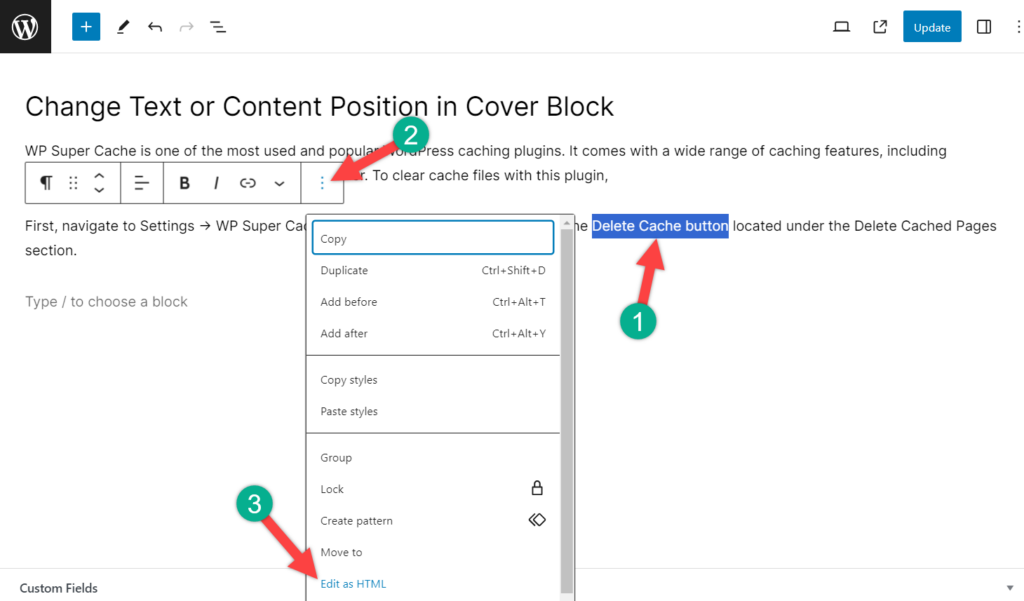
This option requires the implementation of a little bit of code. At first, open the page post where you want to highlight text. Then select a paragraph containing the text and click on the three-dot button. Select Edit as HTML.
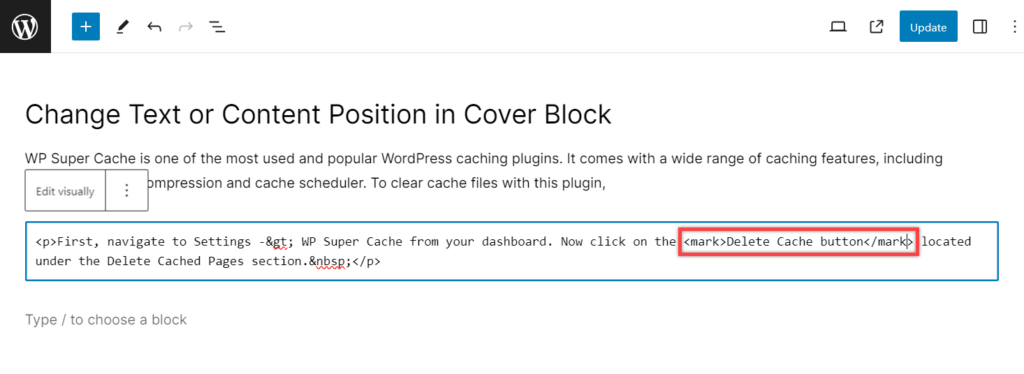
Now you will be able to see the post in HTML format. Now wrap the text up inside the <mark> and </mark> tags in the below way:
<mark> Build Better Content With Ultimate Blocks</mark>
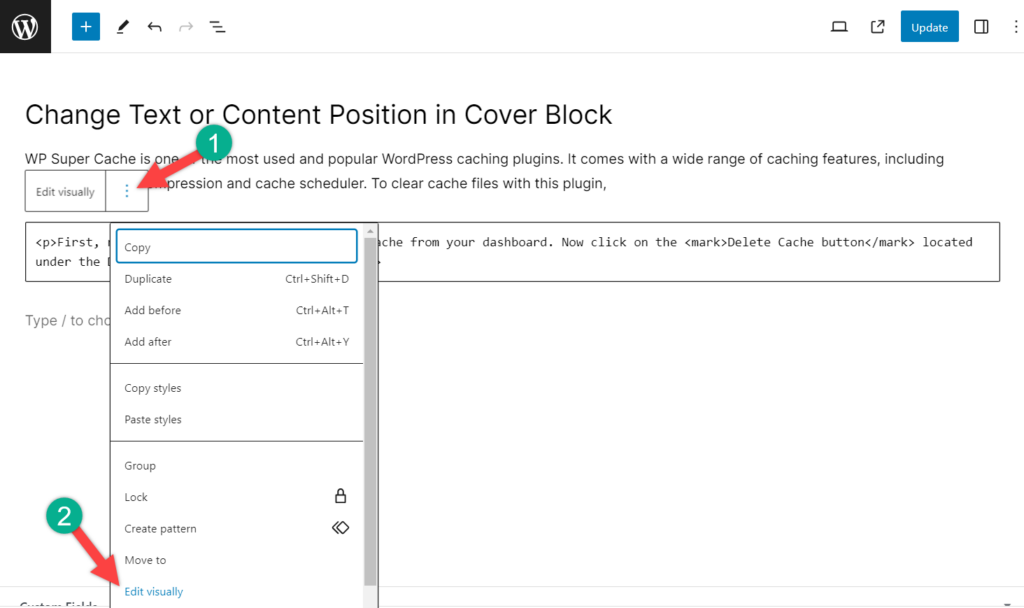
Now you can switch back to the visual mode by clicking on the three-dot menu button and selecting ‘Edit visually’.
Take a look at the changed portion. Where you placed the tags, that portion is highlighted.
Also Read: How to Bold Text in WordPress
Final Words
Well, that’s all guys. For you, I am repeating myself again, if you don’t highlight it most often then do it manually once. And if you think you are going to highlight pretty often then use the plugin. If you have any questions, feel free to ask. I will happy to reply to your questions. If you liked the post, please share it with your friends. Stay safe.


Leave a Reply