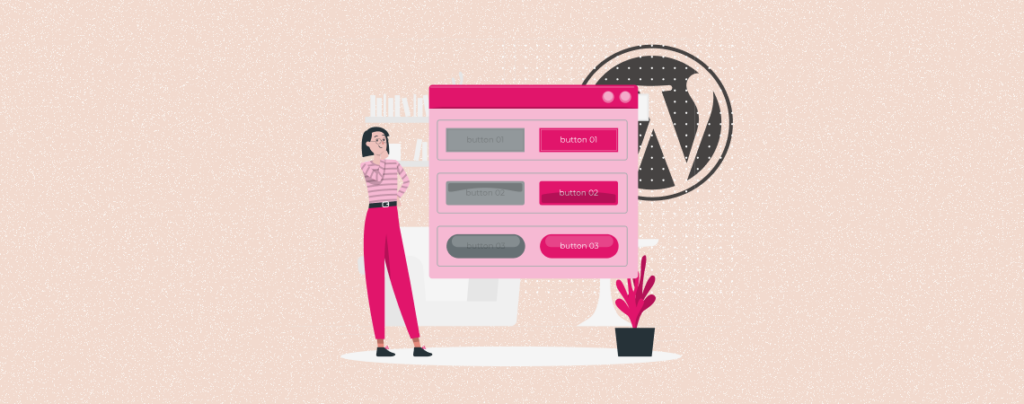
A button is a clickable web element that allows users to initiate or complete specific actions when clicking on them. For example, form submission, download, social sharing, buying something, going to another page, etc.
Buttons can be designed in various forms and labelled with text, icons, or a combination of both. In addition, WordPress allows you to customize the button size at any time as per your need.
This article will show an easy guide on how to change the button size in WordPress to impact the user experience and improve conversions greatly.
Create High-Converting Buttons With Ultimate Blocks!

How to Change the Button Size in WordPress
You can add buttons to WordPress, whether using the default Gutenberg editor or a plugin. But the resizing option is almost the same in both cases. Let’s explore them.
Method 01: How to Change the Button Size Using the Gutenberg Editor
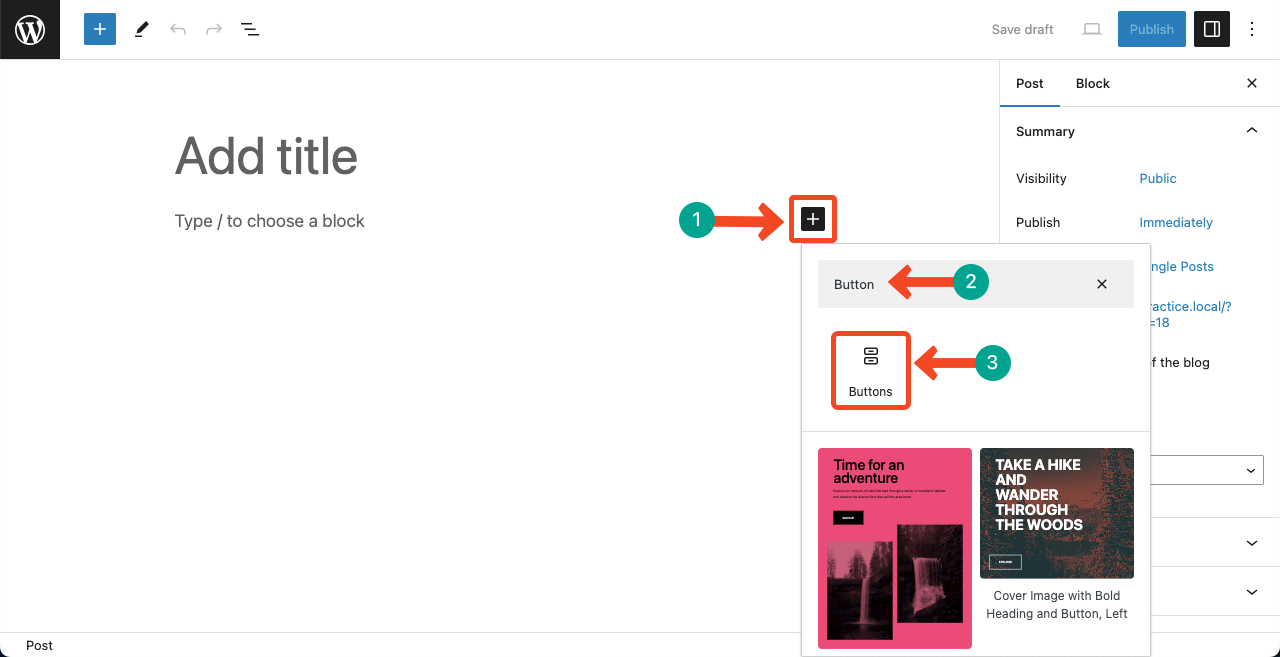
Open a post or page from the WordPress dashboard. Press the Plus (+) icon to open the Gutenberg editor. Type ‘Button’ in the search box. Once the button block appears, click on it. This will add a button on the post/page editor.
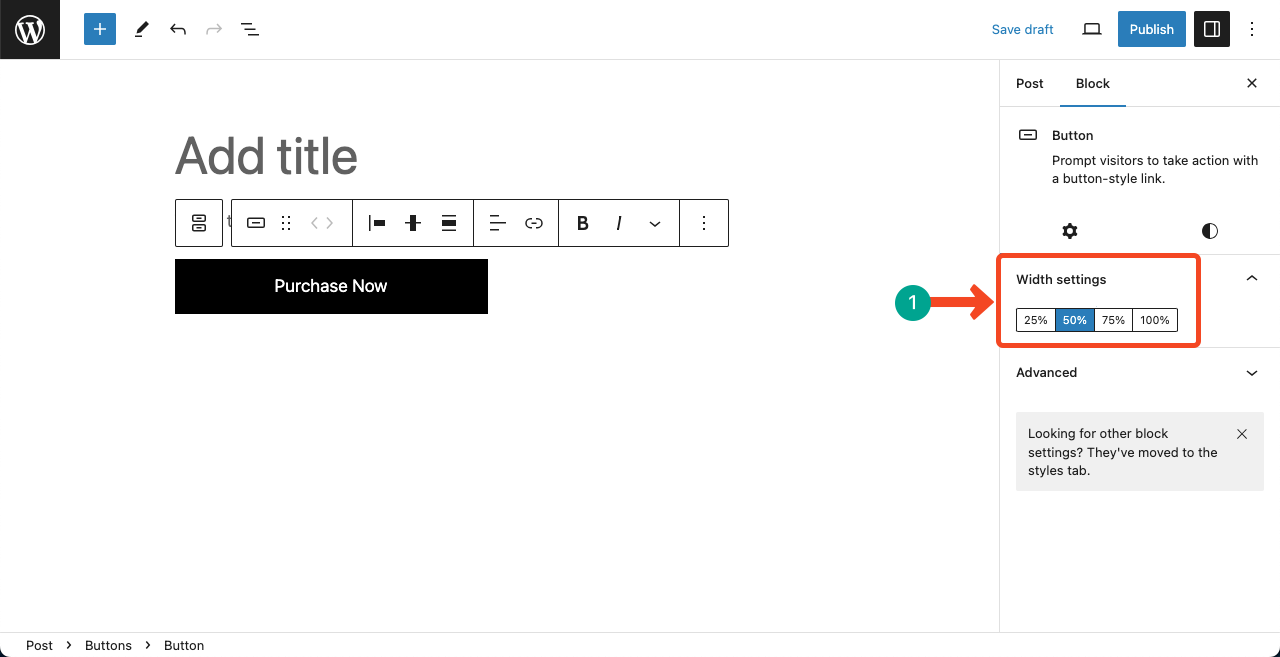
Once the button is added, you’ll see an option named Width settings have appeared on the right sidebar. You will see multiple width options here defined by percentages.
By clicking between them, you can alter the button size and decide on the one that suits you the best.
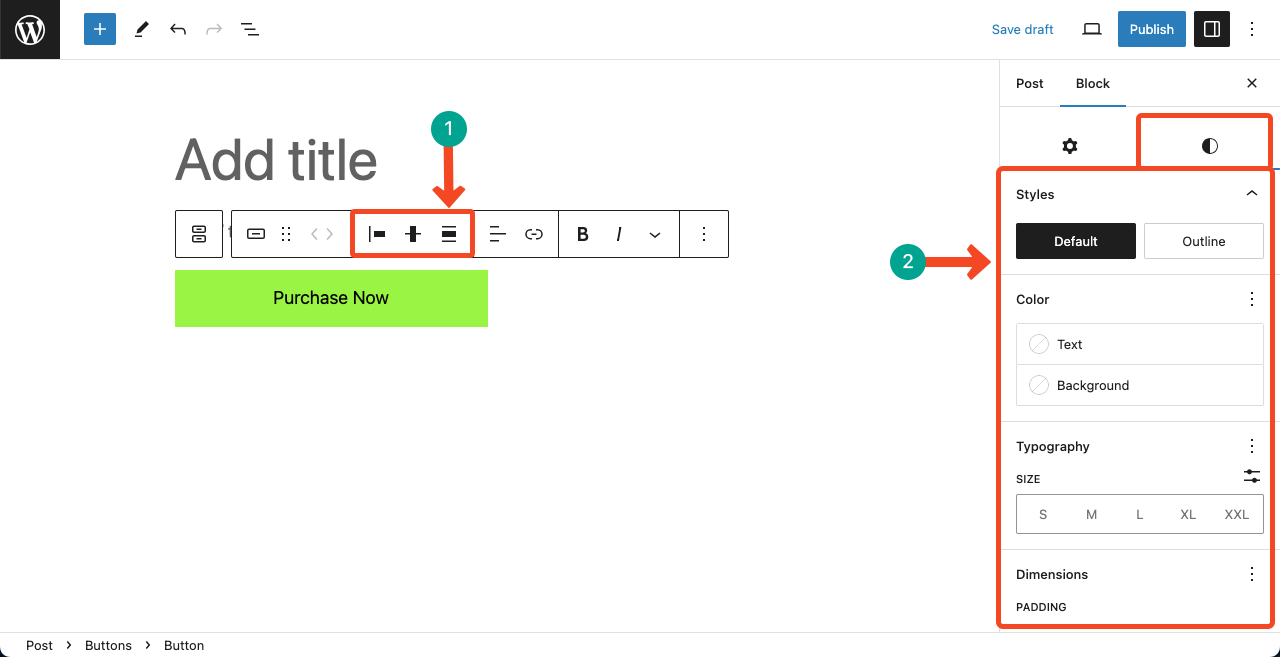
You can change the alignment of the button from the toolbar. And from the style tab, you can customize its stylization, like text color, background color, typography size, button dimension, border, and radius.
Method 02: How to Change the Button Size Using a Plugin
There are numerous plugins in WordPress that allow you to add buttons and customize them. Ultimate Blocks is a well-known Gutenberg block plugin for content marketing. It has a custom button block.
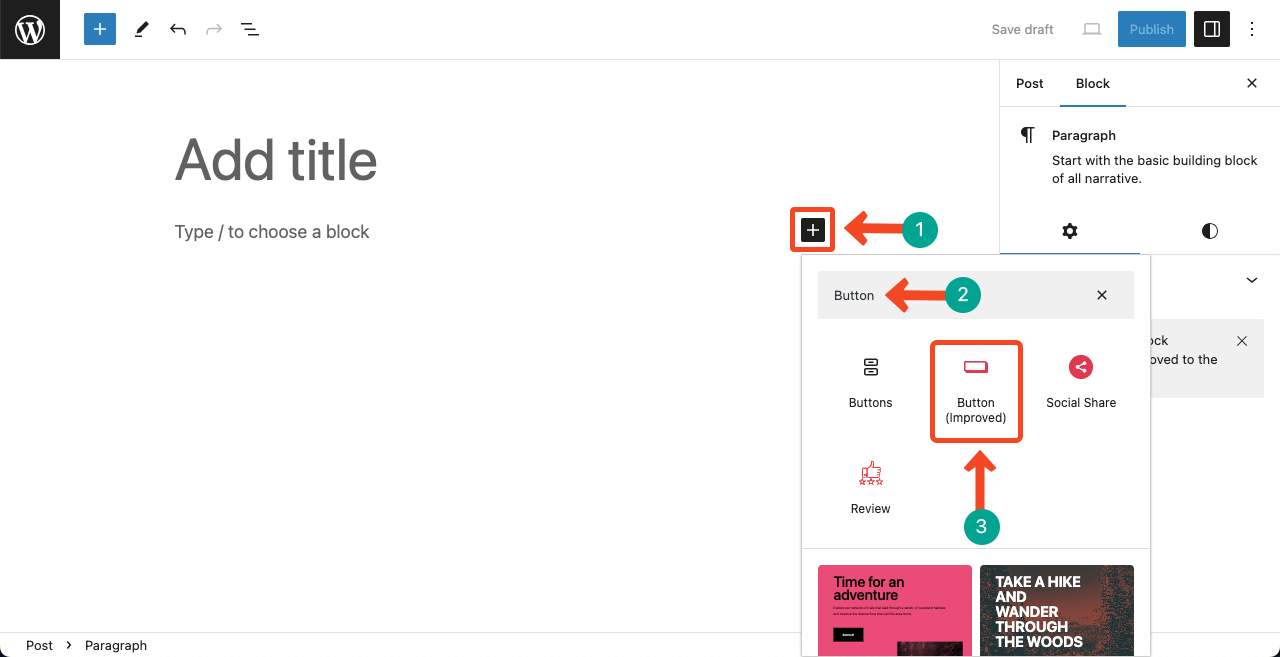
Now, we’ll show you how to resize a button using the custom button block of the plugin. Install and activate the Ultimate Blocks plugin.

Press the Plus (+) icon and type button in the search box. You’ll see the Button (Improved) block appearing below. Press block to add it to the post or page.
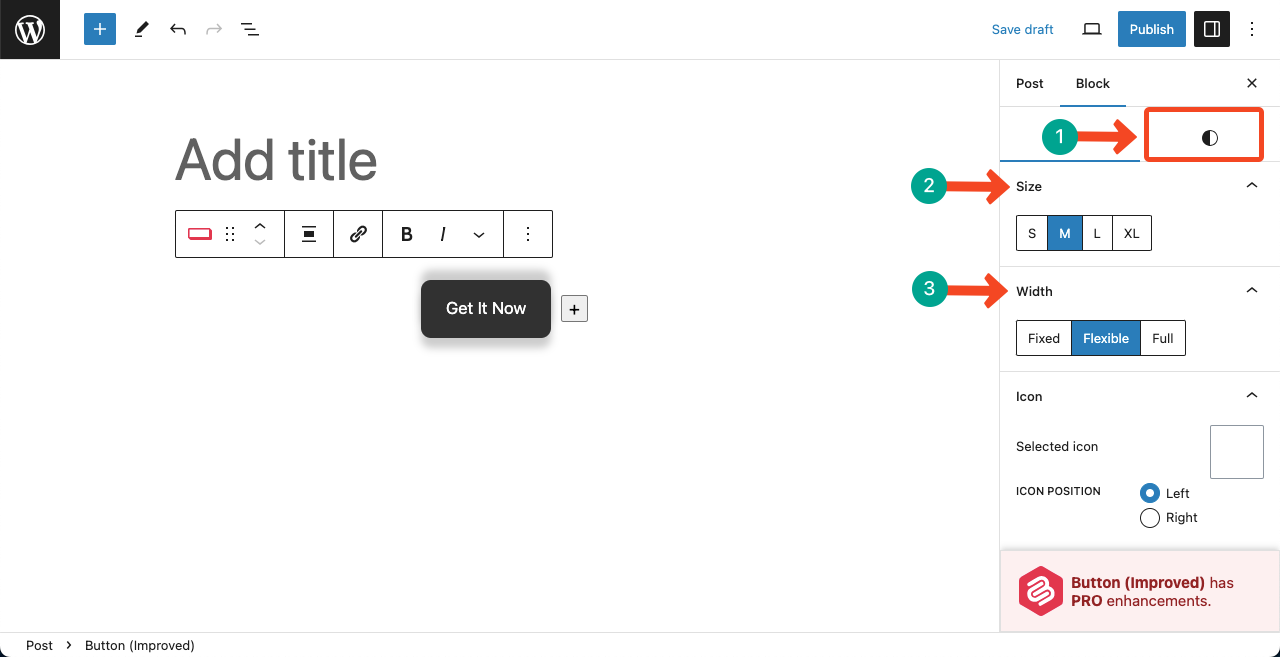
After the button is added, go to the Style tab on the right sidebar. You’ll see the Size and Width options there. Using these two options, you can change the button size.
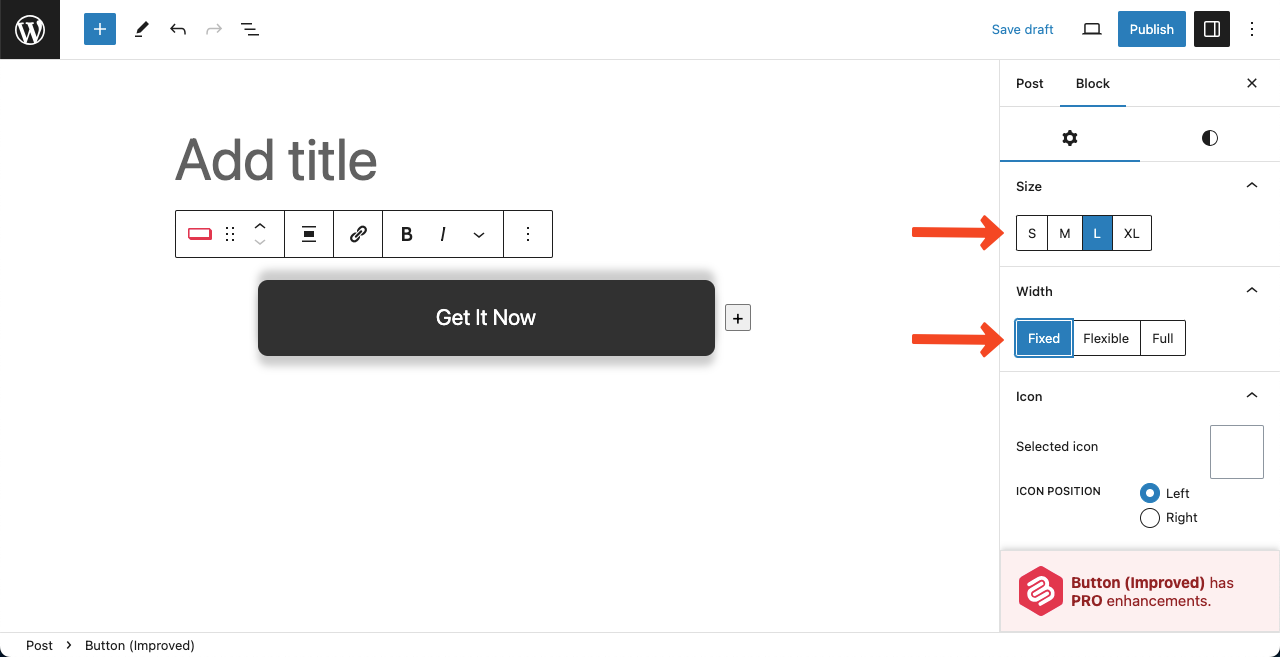
For example, we have selected the Large (L) size and Fixed width. You can see the changes to the button in the image below.
Ultimate Blocks also allow you to add icons to the button. It offers a vast icon library from which you can select the icon you like.
Thus, you can easily change the button size in WordPress.
Final Words!
Apart from the above two methods, there are many other ways to change the button size of WordPress. For example, when you add a button to your site with another plugin, you will surely get some uniqueness in its resizing options.
But the process of almost every method is very close. You won’t find many differences between them. Hope you enjoyed this article. Stay with us for more interesting articles like this one.
More Posts on Buttons


Leave a Reply