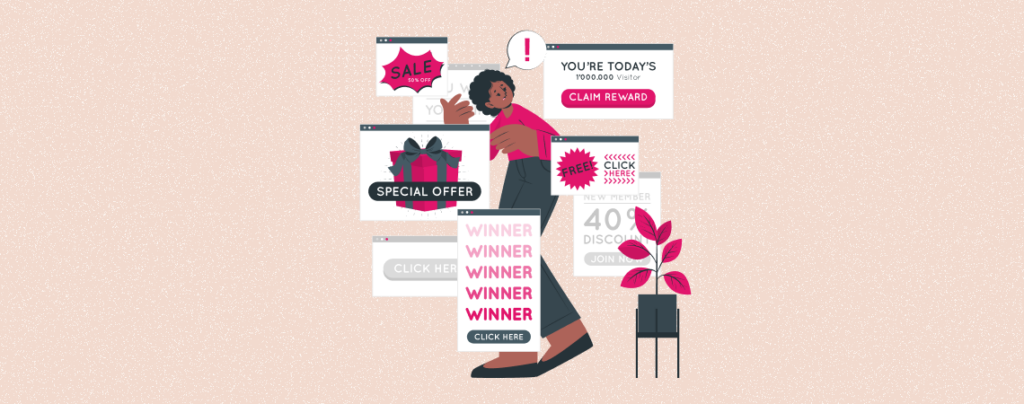
A strong call-to-action box can be a powerful way to drive user engagement, grow conversions, and speed up business growth. It can encourage users to complete specific actions, like subscribing, buying products, or downloading resources.
So, whether you are thinking of organically promoting your products, collecting email addresses, or stimulating people to sign up for newsletters, a well-crafted call to action box can significantly improve your website’s performance.
This article will break you down the most convenient way of how to create a call to action box in WordPress with a beginner-friendly guide. Let’s get things rolling!
How to Create A Call-To-Action Box in WordPress
Creating robust call-to-action boxes was somewhat difficult years ago. People had to depend on page builders as this is a complex task. But there are many Gutenberg block plugins today by which you can instantly create call-to-action boxes anywhere on your posts and pages.
Ultimate Blocks is one of the top plugins of them. This is a wonderful plugin for content marketers coming with 22+ exciting blocks. Call to action is one of them. Let’s see how to create such a box with the plugin.
Step 01: Install and Activate the Ultimate Blocks Plugin
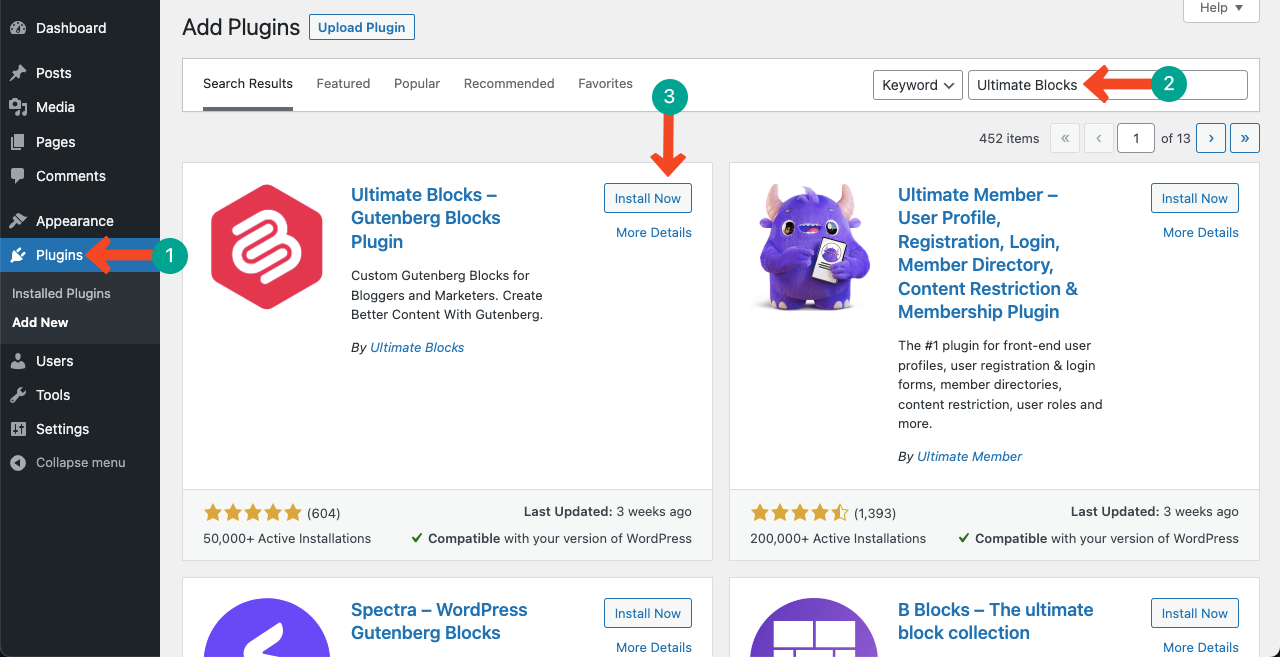
You must install the Ultimate Blocks plugin first. Get into your WordPress dashboard. Navigate to Plugins > Add New.
Type Ultimate Blocks in the search box on the top-right corner. Install and activate the plugin after it appears below.
Step 02: Add the Call to Action Box to a Post or Page
Open a post or page where you want to create the call to action box. Press the Plus (+) icon on the editor to open the Gutenberg editor.
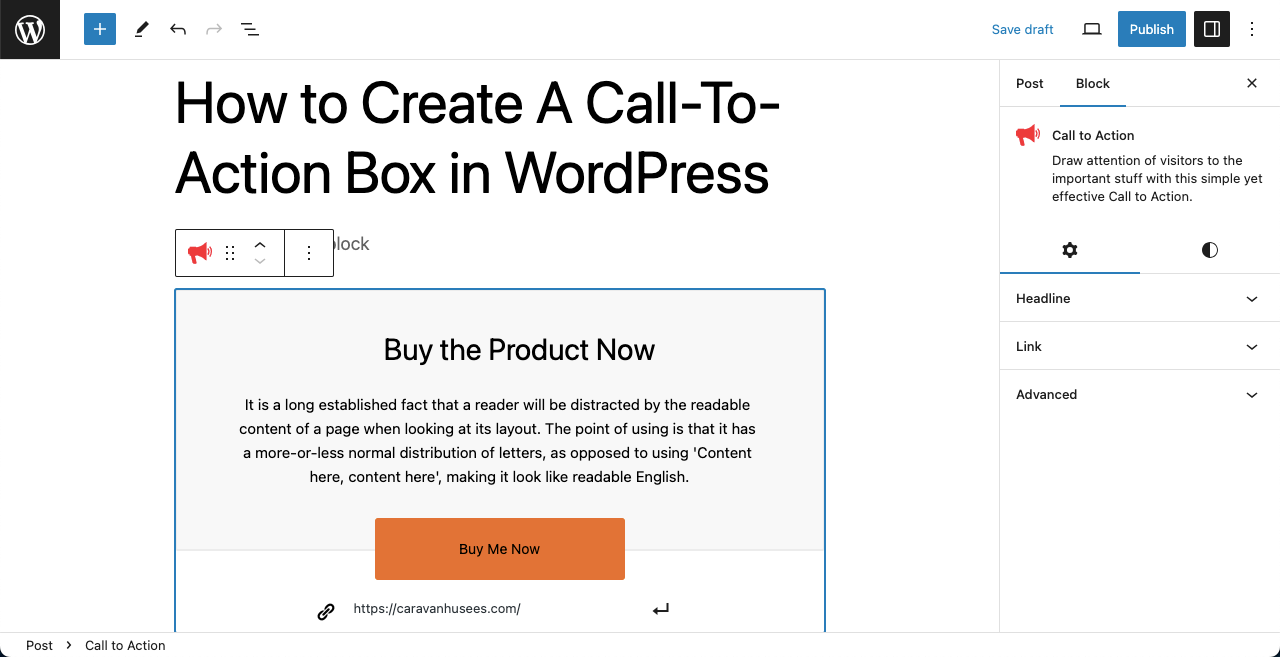
Type Call to Actions in the search box. The block will appear below in real time. Click on it to add the block to the editor.
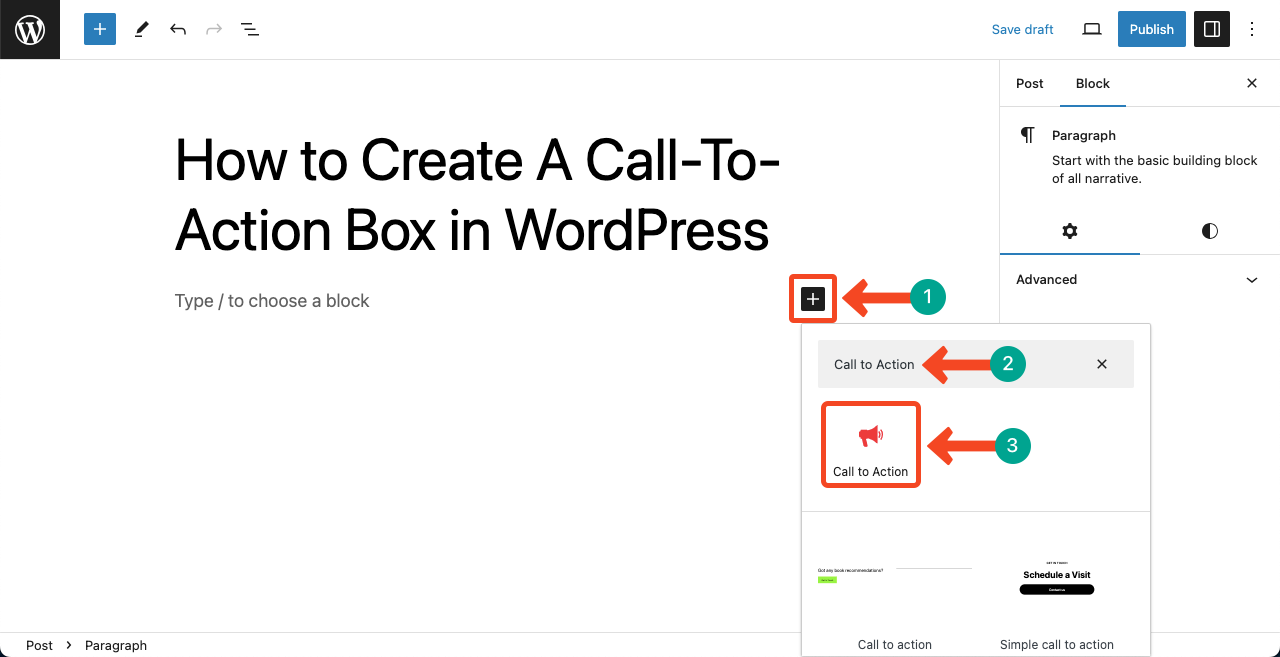
The call to action block will instantly be added to the editor. There are several options on it. You can add a CTA title, a short description, a button, and a button link. For more settings and customization, you’ll get options on the right sidebar.
Step 03: Add Content to the Call to Action Block
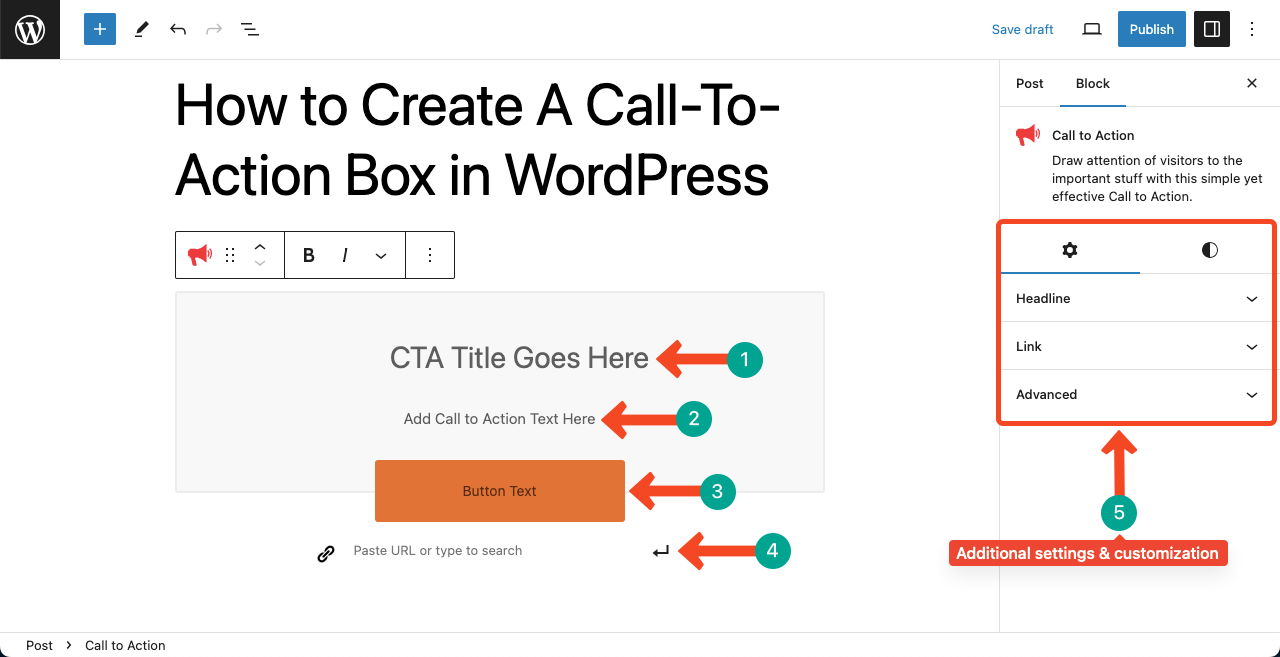
Now, add a title to the block that represents the purpose of the action. Add a short copy. For example, if you want to sell a product, you may briefly describe one or two advantages of the product so people are triggered.
Then, complete the button copy with a valid link.
Step 04: Configure Additional Settings and Customizations
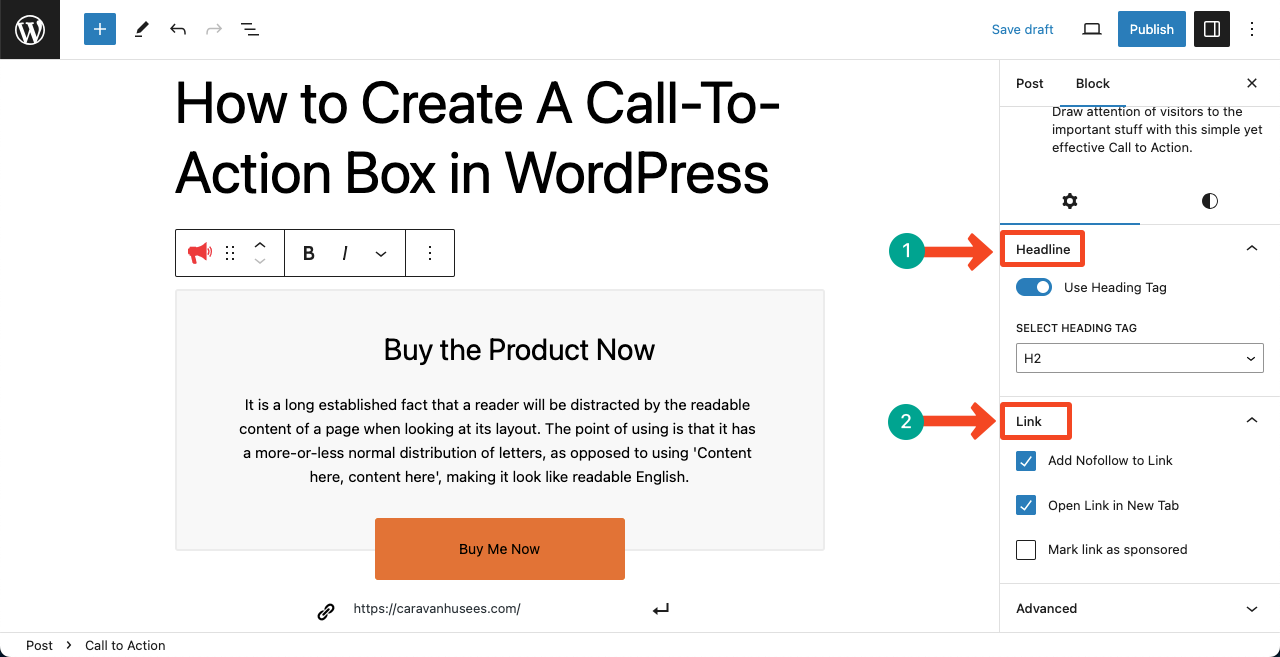
Go to the right sidebar. Expand the Heading option. Toggle on to enable the heading tag for the title of the call to action box. Set whichever tag you want for it.
Then, come and expand the Link option. There are three options: Add Nofollow to Link, Open Link in New Tab, and Mark link as sponsored. Tick mark whichever you want.
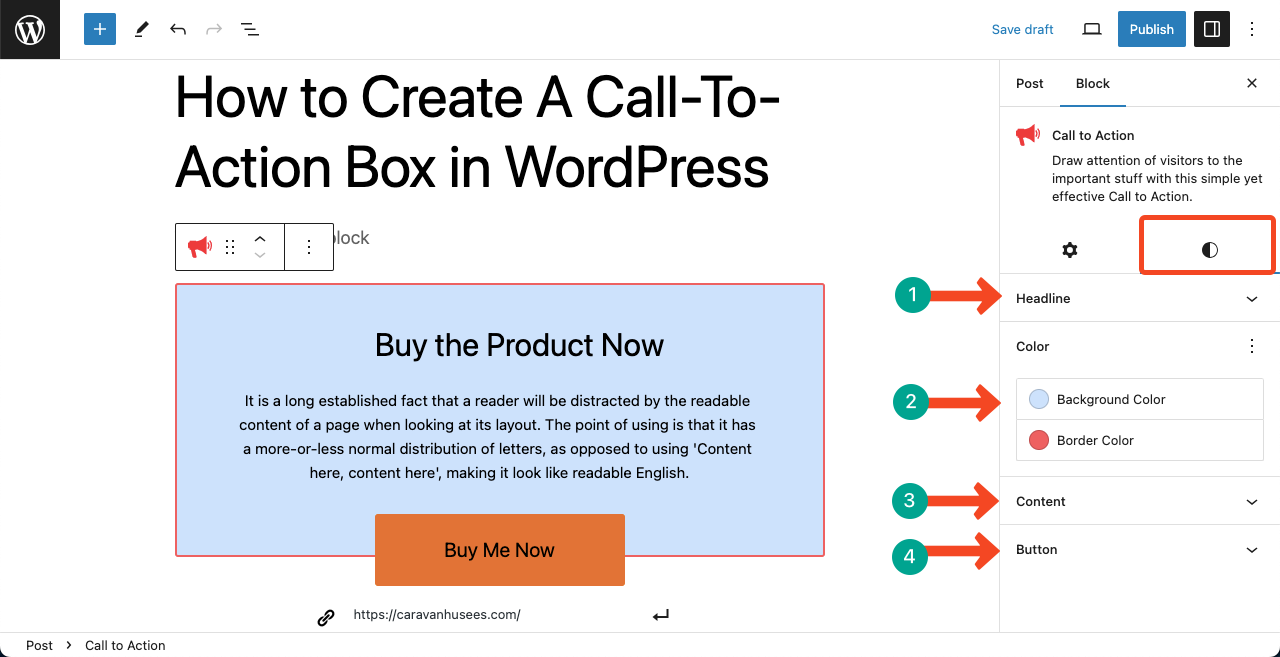
Step 05: Apply Stylization to the Block Elements
Jump to the Style tab afterwards. You will get four options: Headlin, Color, Content, and Button. These options will allow you to respectively customize the typography, text color, background color, button color, and border color.
Thus, you can create a robust call-to-action box on WordPress.
Final Words!
Hopefully, creating a call to action will not be a difficult task for you after reading this article. However, there are several best practices you must follow while creating such boxes to generate heavy engagement and conversions.
Make sure to use clear and compelling story in the title, description, and on the button. Apply contrasting color but not eye-screaming. Maintain whitespace and perfect size for the button. Finally, do some A/B tests to finalize the design.


Leave a Reply