If you run a video streaming website, sports highlights blog, movie review site, or even an online course platform, you may have faced this situation:
You want to show the same video from multiple servers.
Maybe one server goes down.
Maybe one loads slowly in certain countries.
Maybe you want to offer YouTube, Vimeo, and a self-hosted version.
Instead of placing multiple video players one below another (which looks messy), many streaming sites use a cleaner approach:
A multi-server video player with tabs.
In this guide, we’ll show you how to create a multi-server video player in WordPress using tabs without custom coding.
What Is a Multi-Server Video Player?
A multi-server video player allows users to switch between different video sources using tabs or buttons.
For example:
- Server 1 – YouTube Embed
- Server 2 – Vimeo Embed
- Server 3 – Self-hosted MP4
- Server 4 – Backup CDN Link
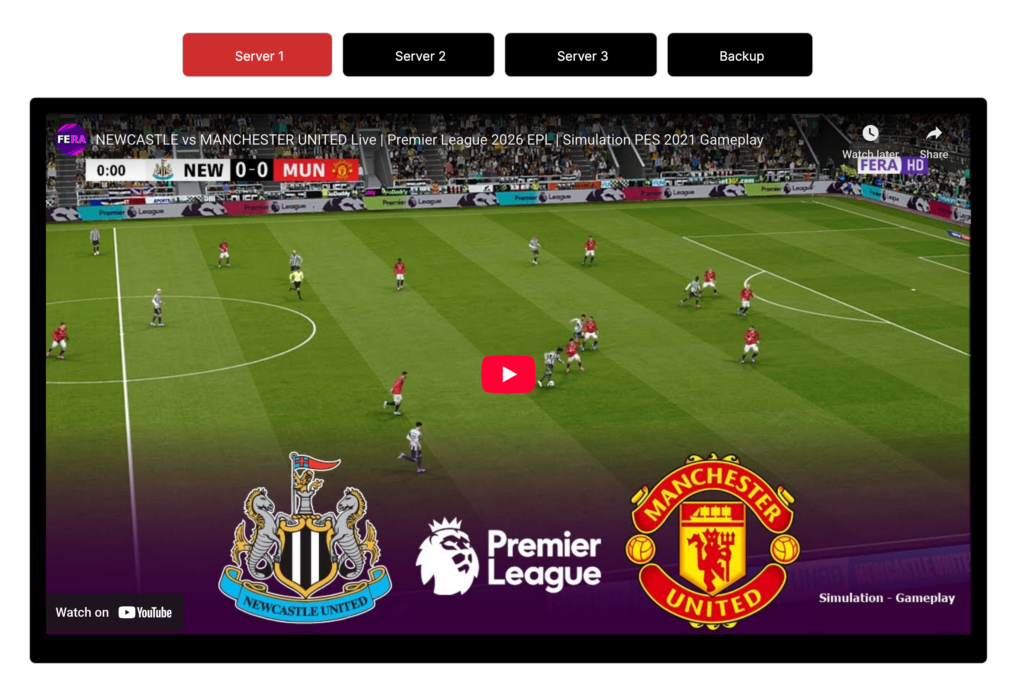
When a user clicks a tab, the video switches instantly without leaving the page.
Why Is This Useful?
- Prevents downtime if one server fails
- Improves user experience
- Offers regional fallback options
- Reduces complaints about buffering
- Looks professional and organized
It’s a common pattern used by streaming sites, sports replay platforms, and online learning portals.
Why Streaming Sites Use Tab Switching
Using tabs instead of stacked video players offers several advantages:
1. Cleaner Layout
If you embed four videos directly on a page, it becomes cluttered. Tabs keep the interface clean and compact.
2. Better User Control
Users can choose the server that works best for them instead of being forced to reload the page.
3. Reduced Visual Overload
Only one video is visible at a time. This improves readability and page design.
4. Faster Perceived Performance
Since only the active tab is visible, users focus on one player at a time instead of multiple embedded iframes.
How to Create a Multi-Server Video Player Using Tabs
You can easily build this setup using a tab block plugin like Ultimate Blocks.
Step 1: Install Ultimate Blocks
- From WordPress Dashboard, go to Plugins → Add Plugin
- Search for Ultimate Blocks
- Install and activate it
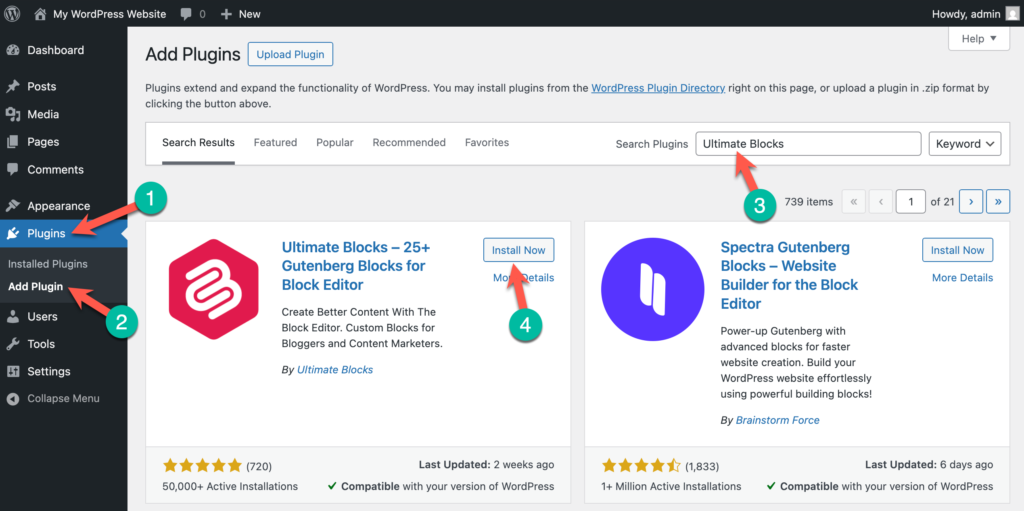
The plugin adds a powerful Tabbed Content block to the Gutenberg editor.
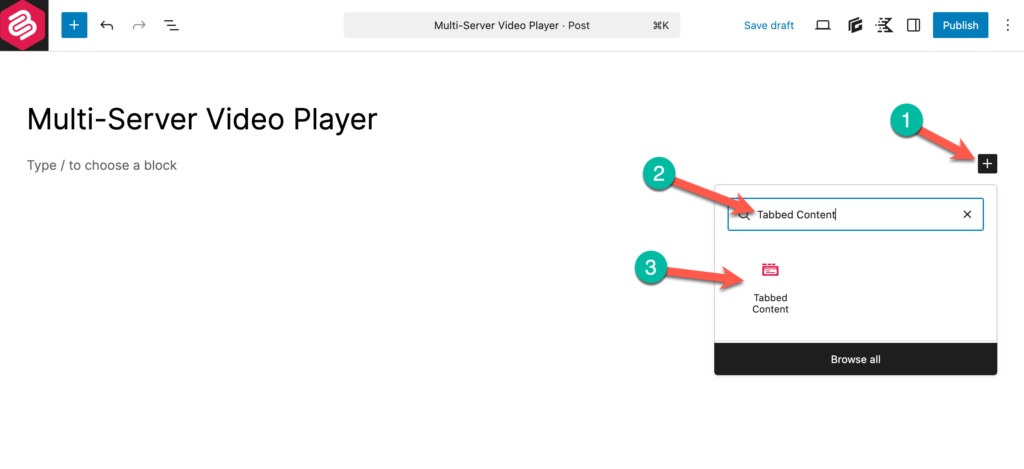
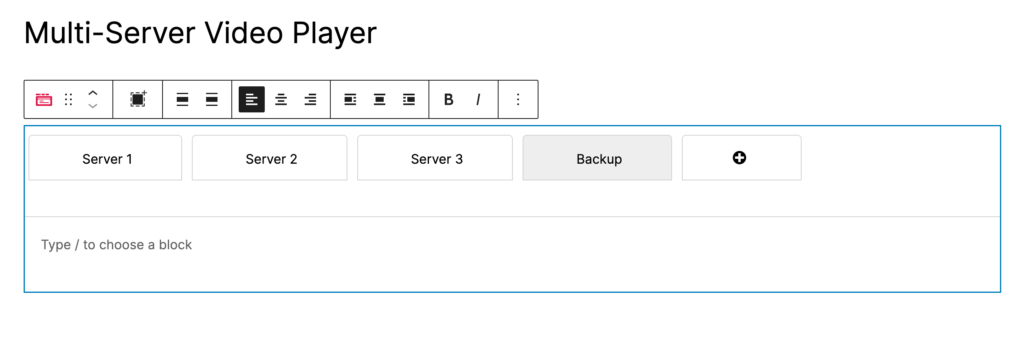
Step 2: Add the Tabbed Content Block
- Open your post or page.
- Click the + (Add Block) button.
- Search for Tabbed Content.
- Insert the block.
By default, it will have one tab (Tab 1). You can have more tabs by clicking on the + (plus) icon.
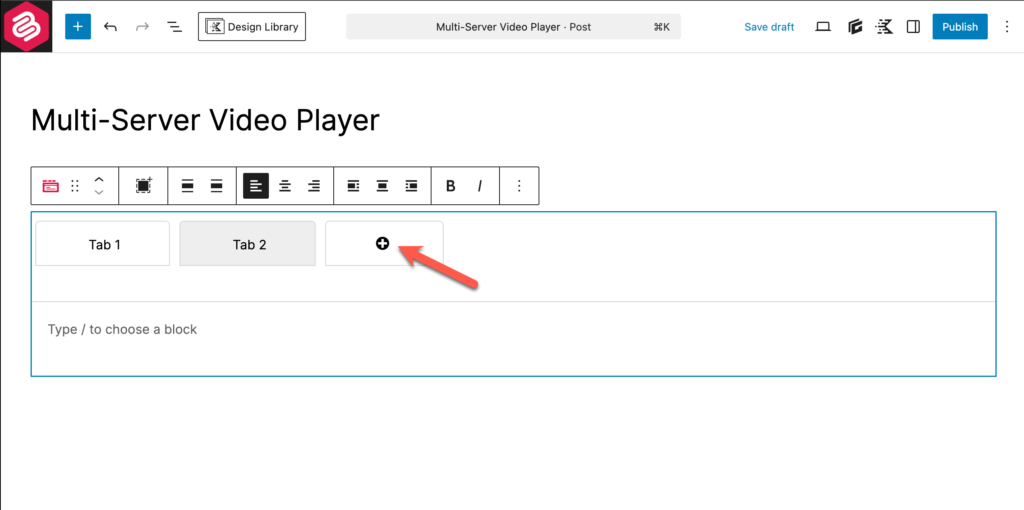
You can rename them to:
- Server 1
- Server 2
- Server 3
- Backup Server
Step 3: Embed Video Inside Each Tab
Click inside each tab and insert your video.
You can add:
- YouTube block
- Vimeo block
- Video block (self-hosted)
- Custom HTML embed code
For example:
Server 1 → YouTube video
Server 2 → Vimeo embed
Server 3 → Self-hosted MP4
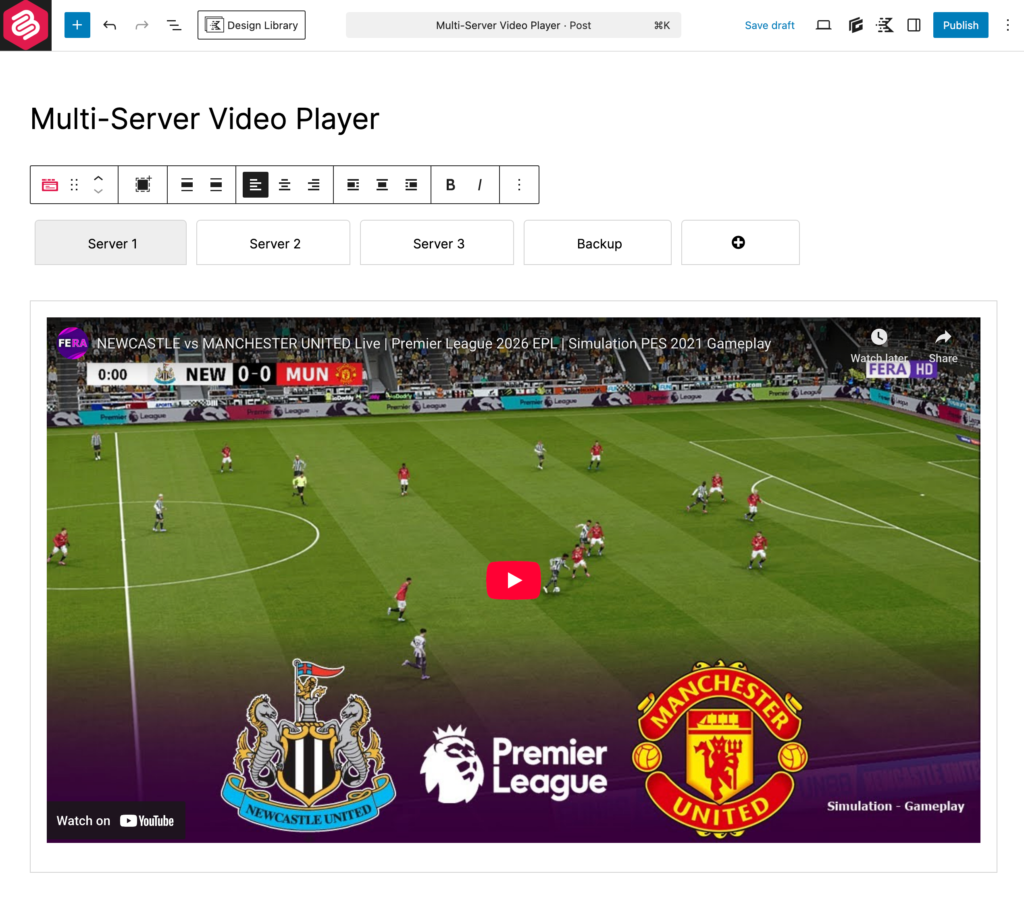
Each tab acts like a container. When users click a tab, the corresponding video appears.
Step 4: Style the Tabs (Optional)
You can customize:
- Tab alignment
- Active tab color
- Background color
- Border styles
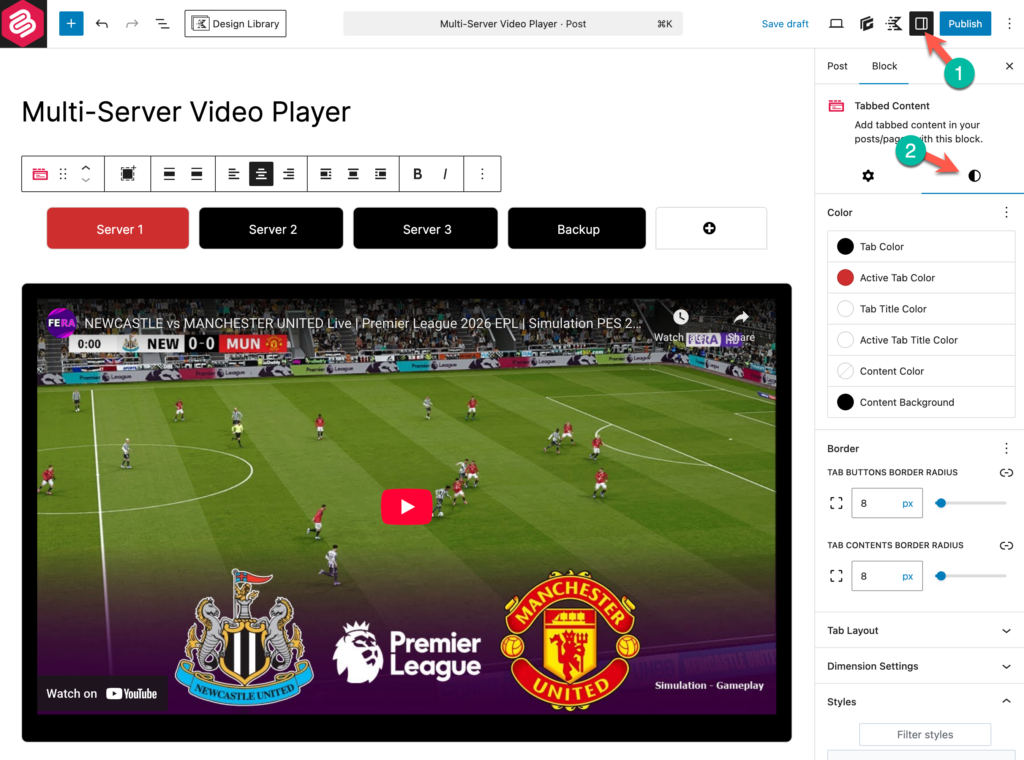
For streaming sites, many creators prefer:
- Dark background
- Highlighted active tab
- Bold server labels
This makes the UI feel more like a video platform.
Step 5: Publish and Test
After publishing:
- Click different tabs
- Ensure video loads properly
- Test on mobile devices
- Test slow internet mode (optional)
You now have a fully functional multi-server video player.
Best Practices & Performance Tips for Video Tabs
Adding multiple video embeds inside tabs can affect performance if not handled properly.
Here are some best practices:
1. Use Lazy Loading
Most modern embed blocks automatically lazy-load videos. This prevents all videos from loading at once.
If you are using custom HTML embeds, ensure loading=”lazy” is enabled where applicable.
2. Avoid Auto-Play on All Servers
Never enable autoplay for all video tabs.
If users switch tabs, background videos may continue playing and consume bandwidth.
3. Maintain Consistent Aspect Ratio
Use a consistent video ratio (16:9 recommended) for all servers.
This prevents layout shift when switching tabs.
4. Keep Server Names Clear
Instead of vague names like “Tab 1,” use:
- Server 1 (Primary)
- Server 2 (Backup)
- Mirror 1
- HD Version
- Low Quality Version
Clear labeling improves UX.
5. Don’t Add Too Many Servers
3–4 tabs are ideal.
Adding 7–8 servers may overwhelm users.
6. Test Editor vs Frontend View
Sometimes themes affect spacing differently on the frontend.
Always preview the live page before finalizing.
Conclusion
A multi-server video player is a smart solution for streaming websites, sports blogs, online course creators, and anyone who relies on video content.
Using WordPress tabs, you can:
- Keep your layout clean
- Improve user experience
- Provide backup video sources
- Build a more professional interface
With the Tabbed Content block in Ultimate Blocks, you can create this setup in minutes — without writing a single line of code.
If you regularly publish video content, this approach can significantly improve both usability and reliability on your site.


Leave a Reply