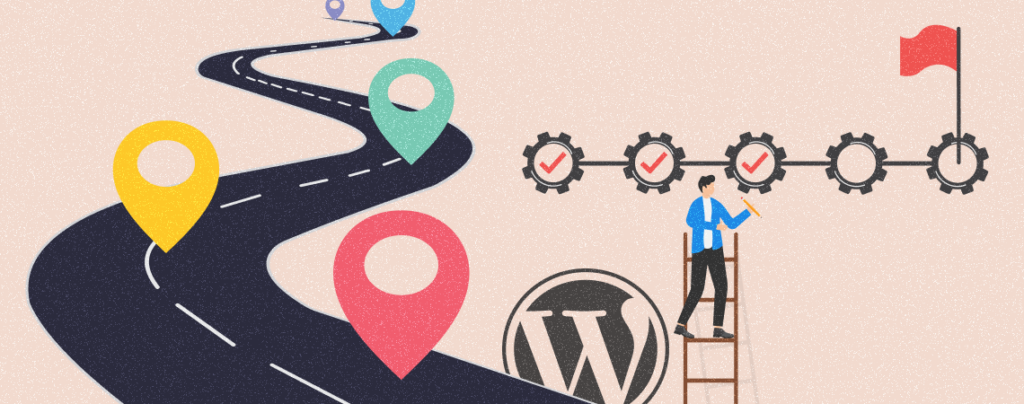
A timeline is a visual representation of a chronological sequence of events displayed with a line so people can understand the time relationships. It can be a wonderful way to chronologically display historical information, project development, milestones achieved, and different events.
There are two types of timelines – horizontal and vertical. Each one has its own set of features and unique visual appeal. This article will show you a step-by-step guide on how to create a timeline in WordPress both horizontally and vertically.
So let’s get started.
Supercharge Your WordPress Block Editor!

Creating a Timeline in WordPress
You’ll find lots of plugins and page builders to create and add timelines to WordPress sites seamlessly. Ultimate Blocks is one of the best of them. It’s a WordPress Blocks plugin that has a Timeline block along with 25+ other Gutenberg blocks.
Step 01: Upload, Install, and Activate the Ultimate Blocks Pro Plugin
First, go to UltimateBlocks.com and get the Ultimate Blocks Pro. Once you’ve bought the plugin, you will get the plugin download link on your email. Download the plugin by click on the link.

After downloading the plugin, go to your WordPress Dashboard and navigate to Plugins > Add New Plugin. Then click on the ‘Upload Plugin’ button and you’ll get the option to upload the plugin. Simply choose the plugin file and click on the ‘Install Now’ button.

Then activate the plugin.
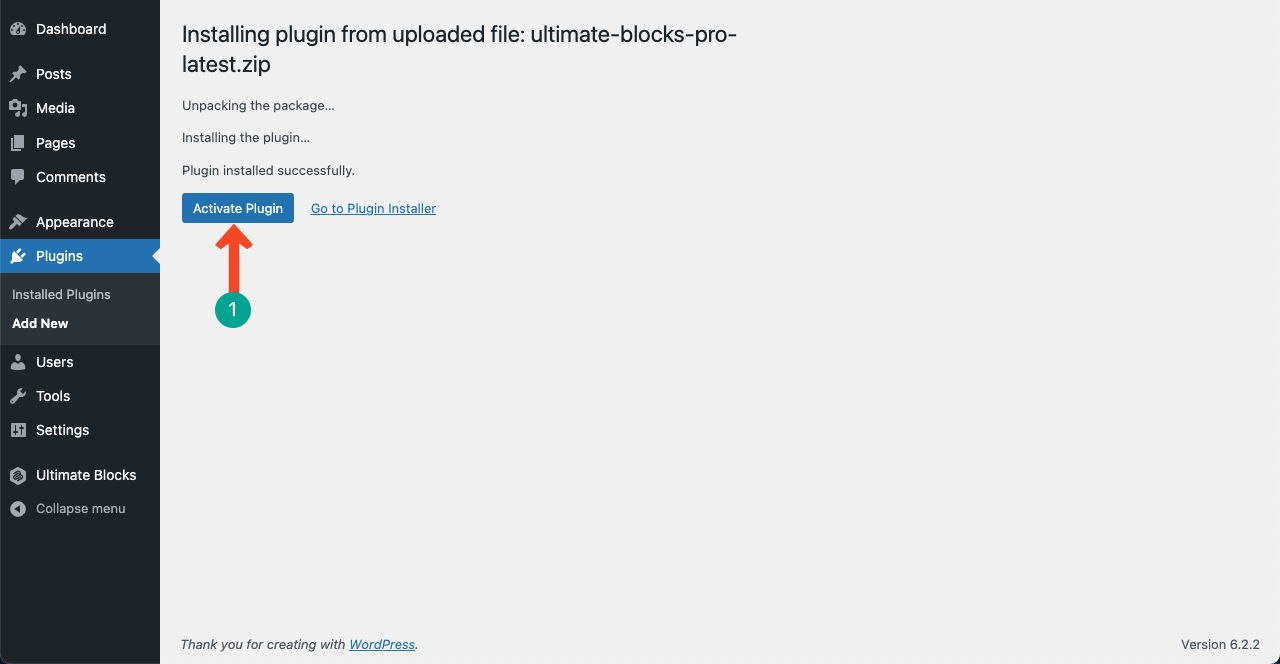
Also, activate license by adding license key. You can learn more about it here.
Step 02: Open a Post/Page and Add the Timeline Block
Open your desired post/page where you want to create the vertical timeline. Press the Plus (+) icon to open the Gutenberg editor. Type Timeline Block in the search box. Press the block once it appears.
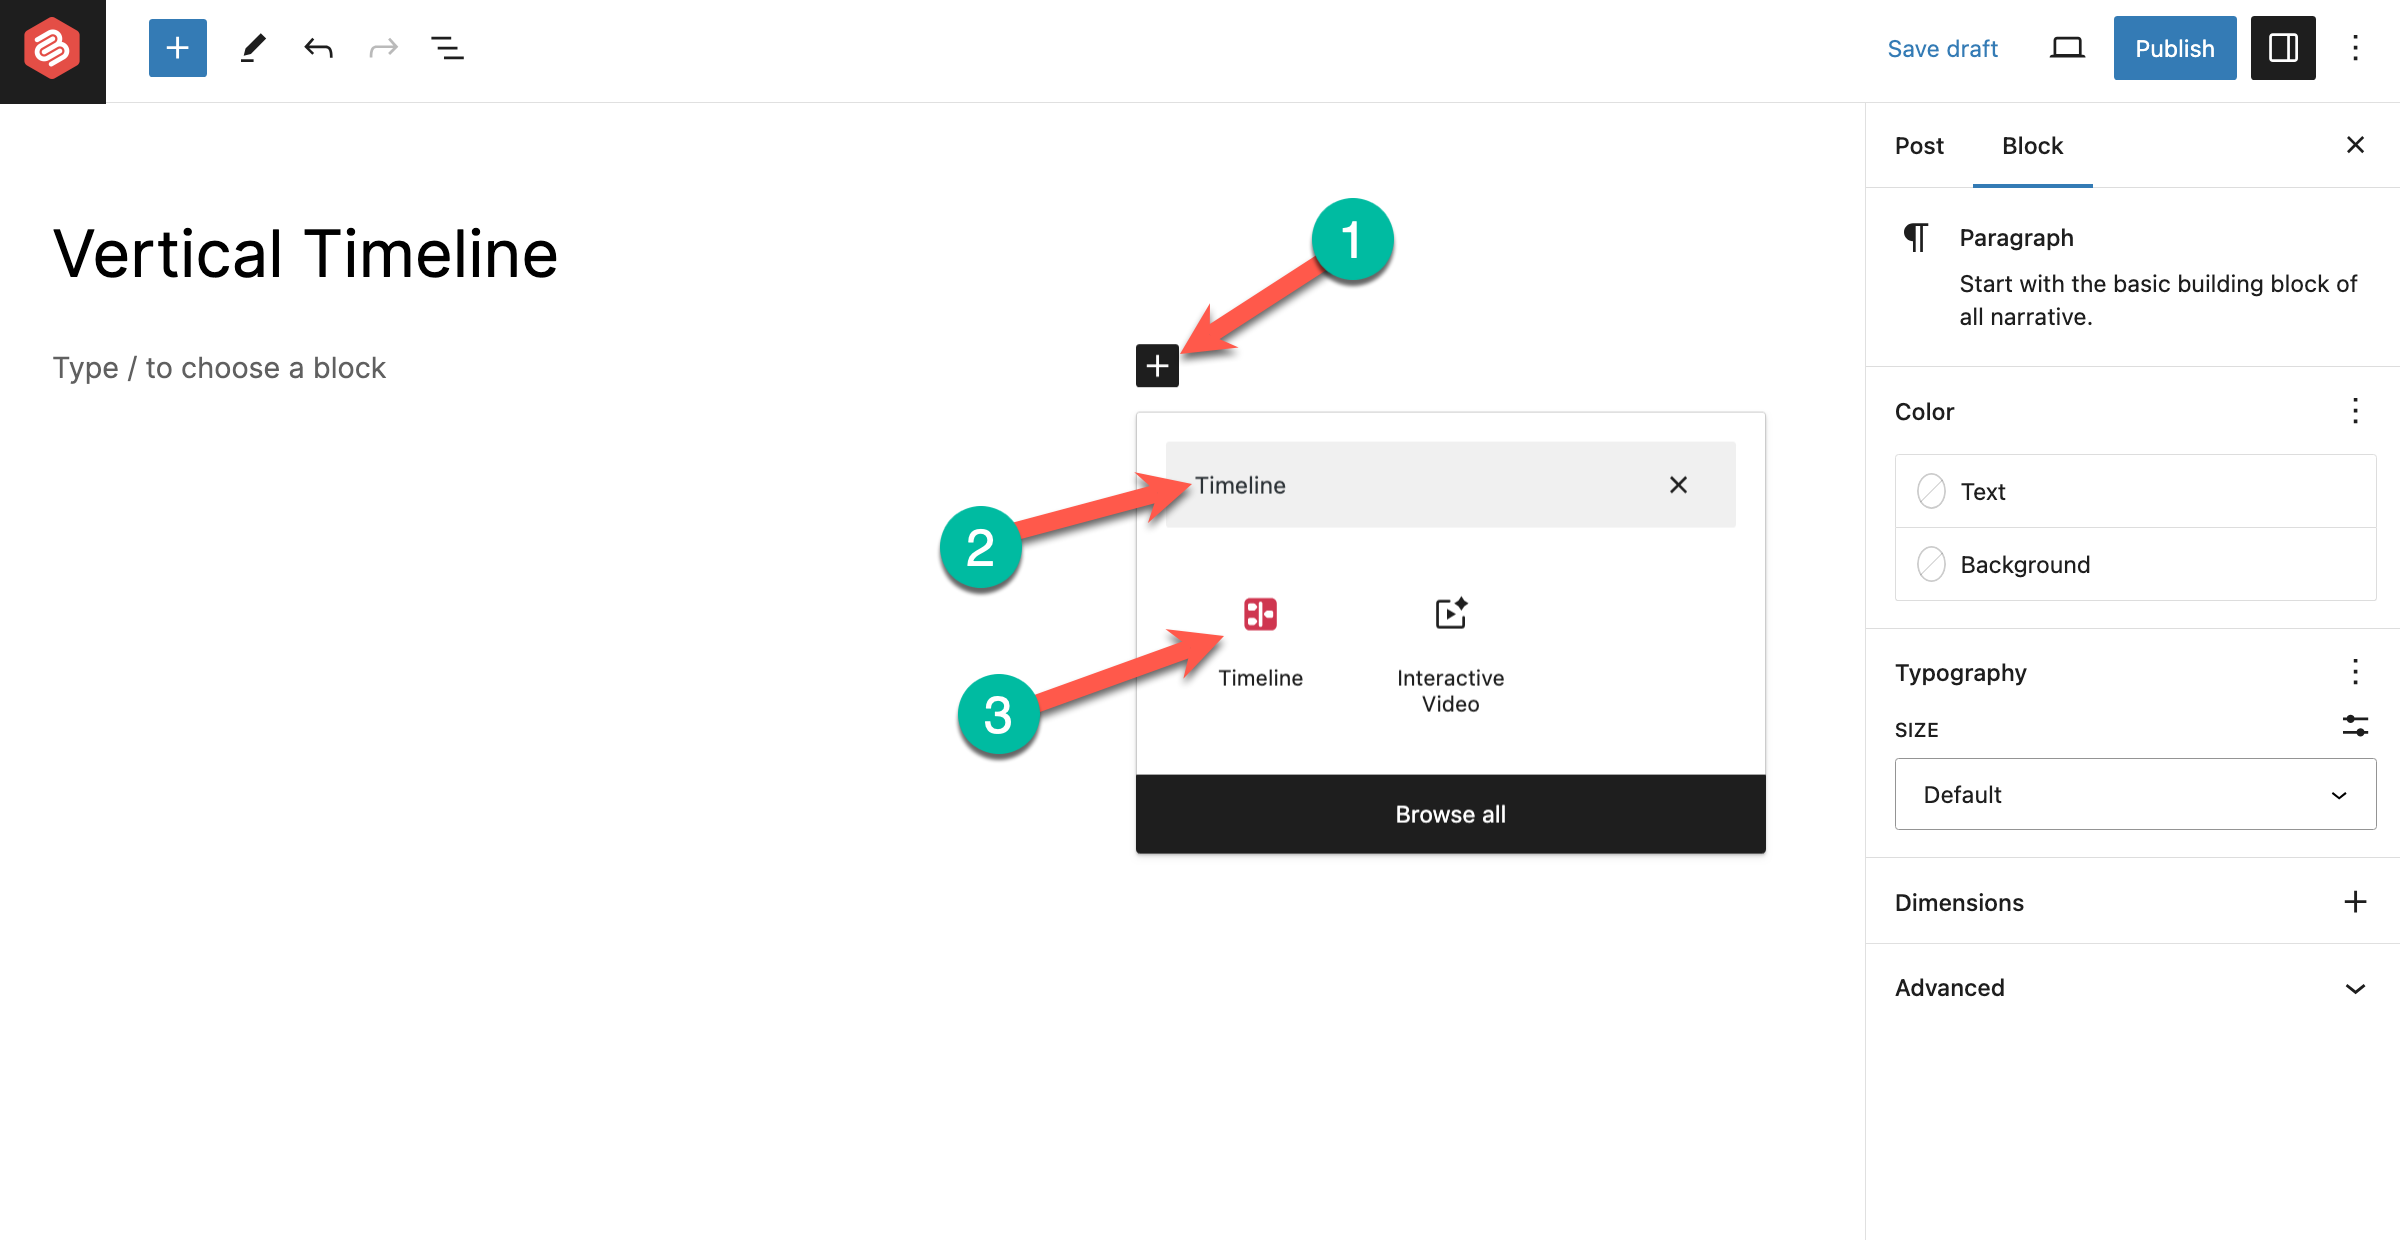
You’ll see a vertical timeline has been created with dummy content. You’ll see edit and customization options on the right sidebar.
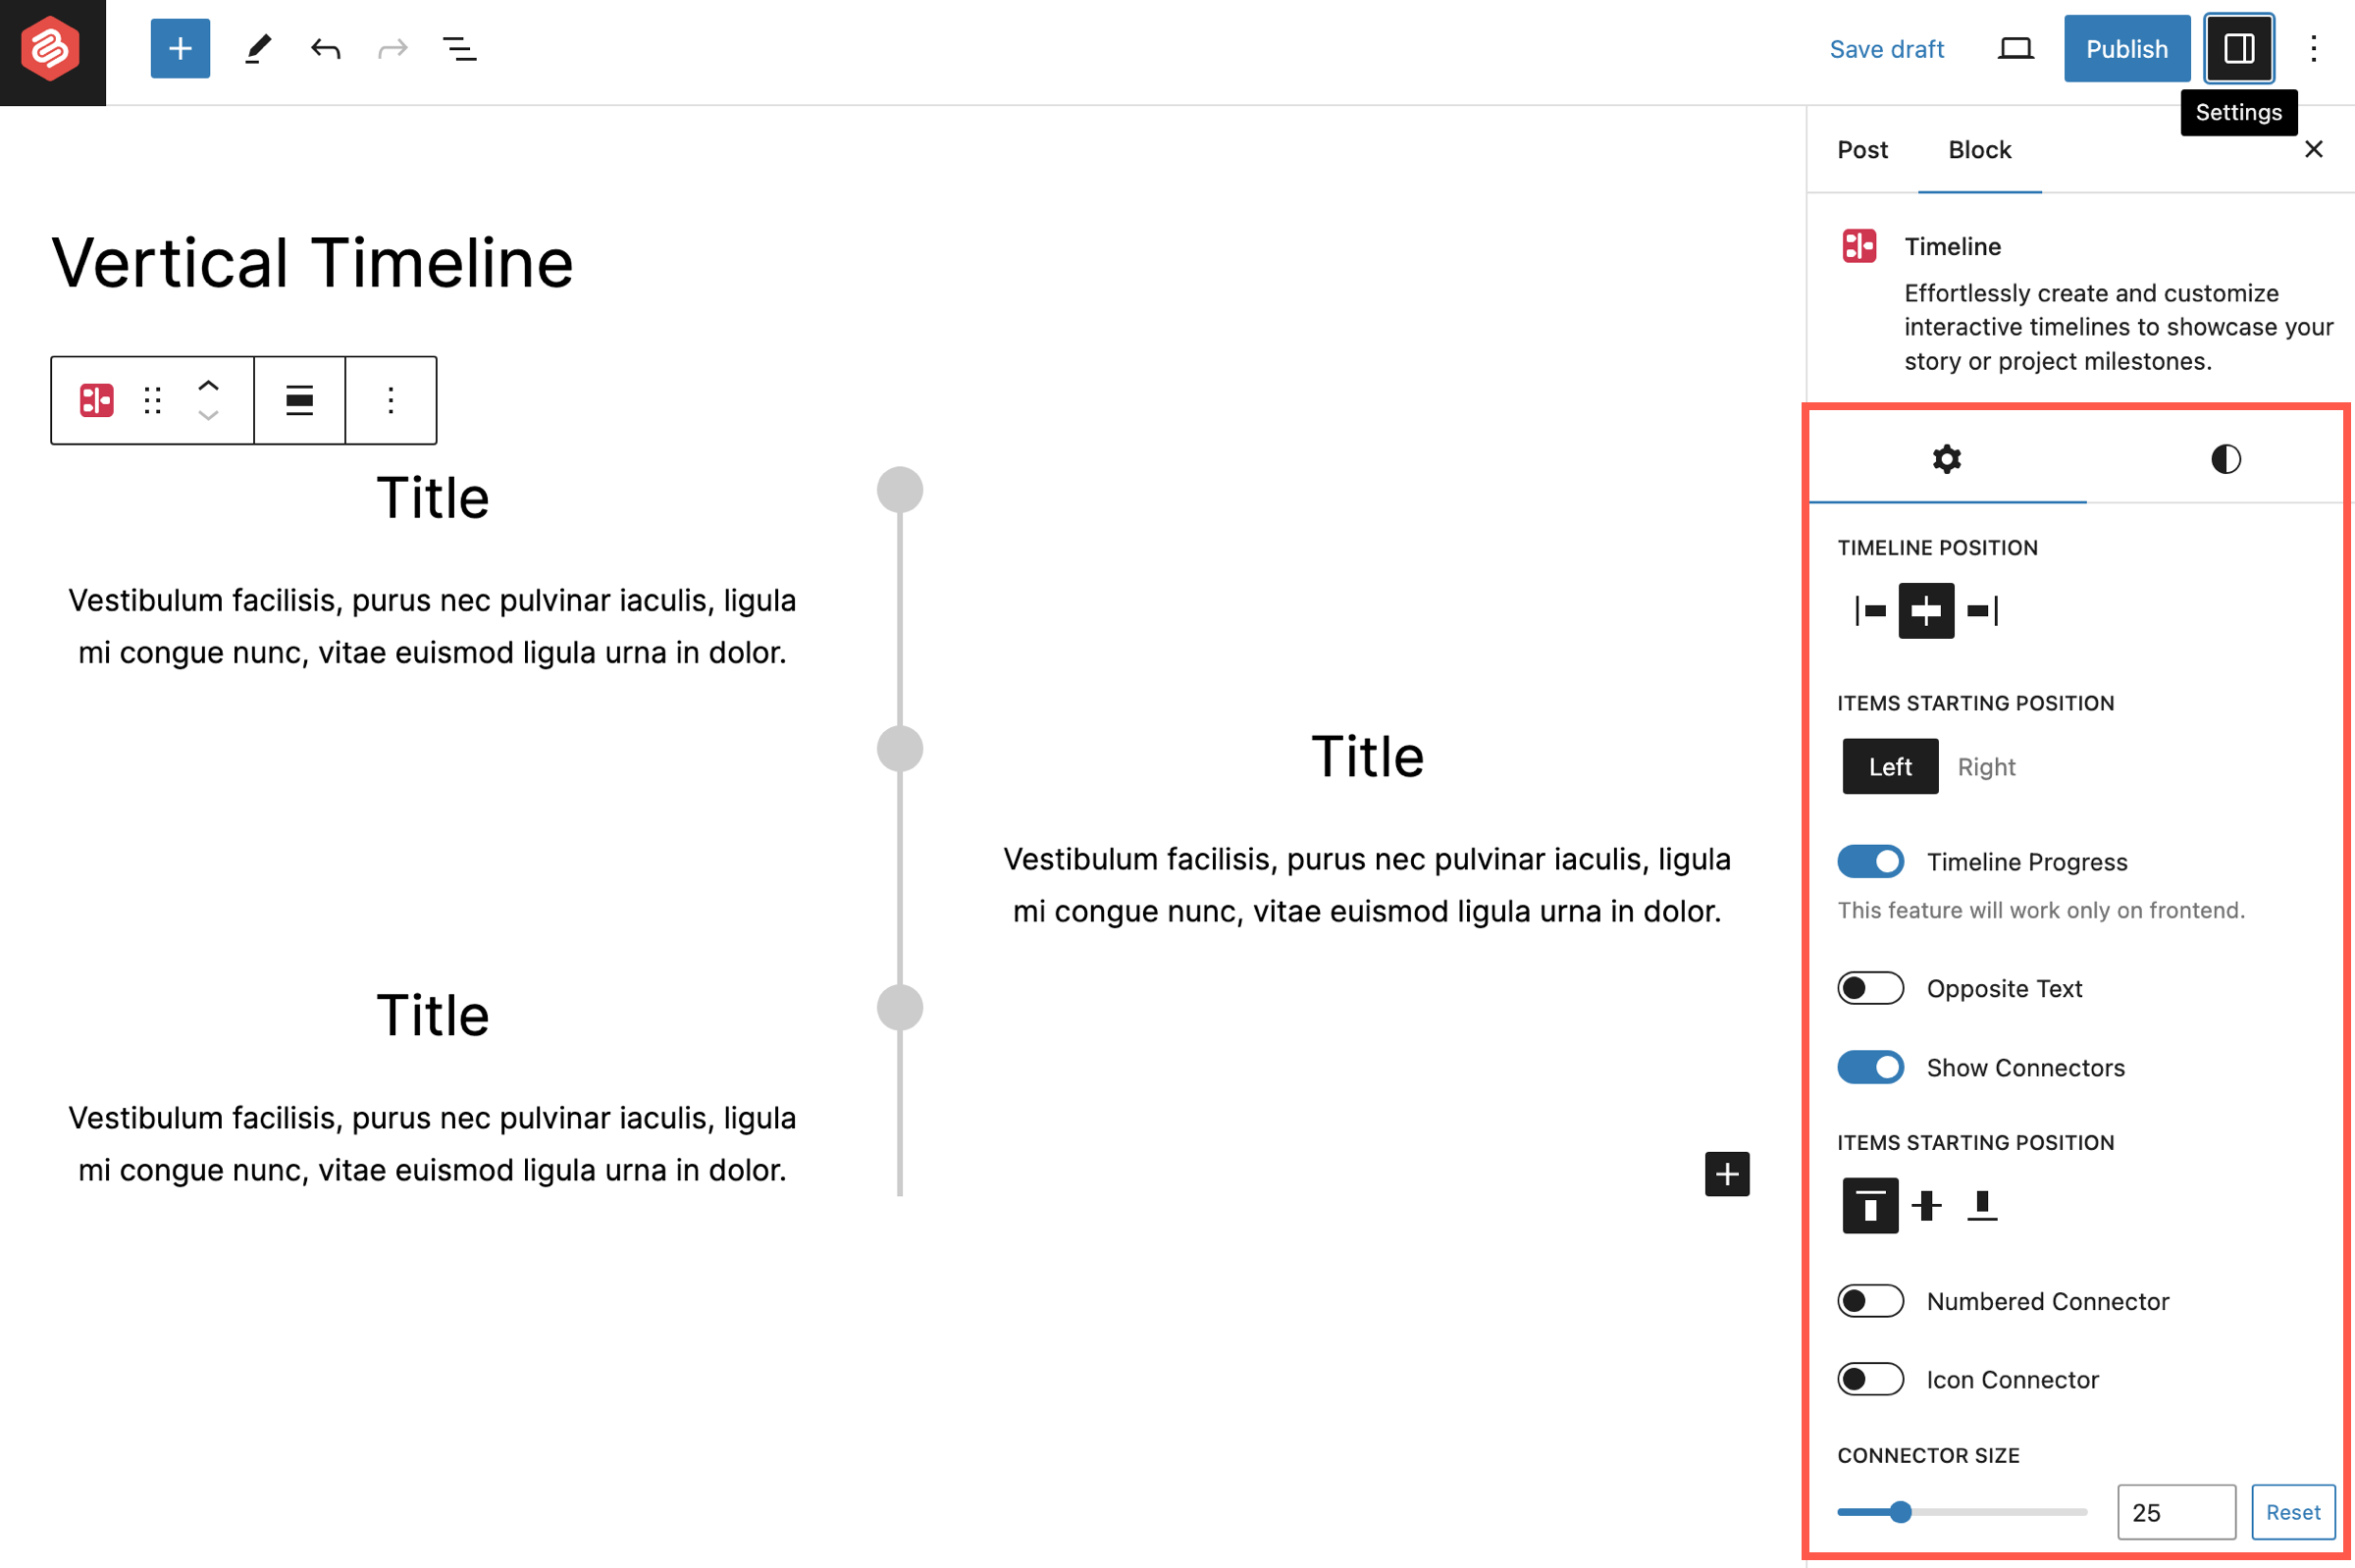
Step 03: Customize the Timeline Layout and Stylization
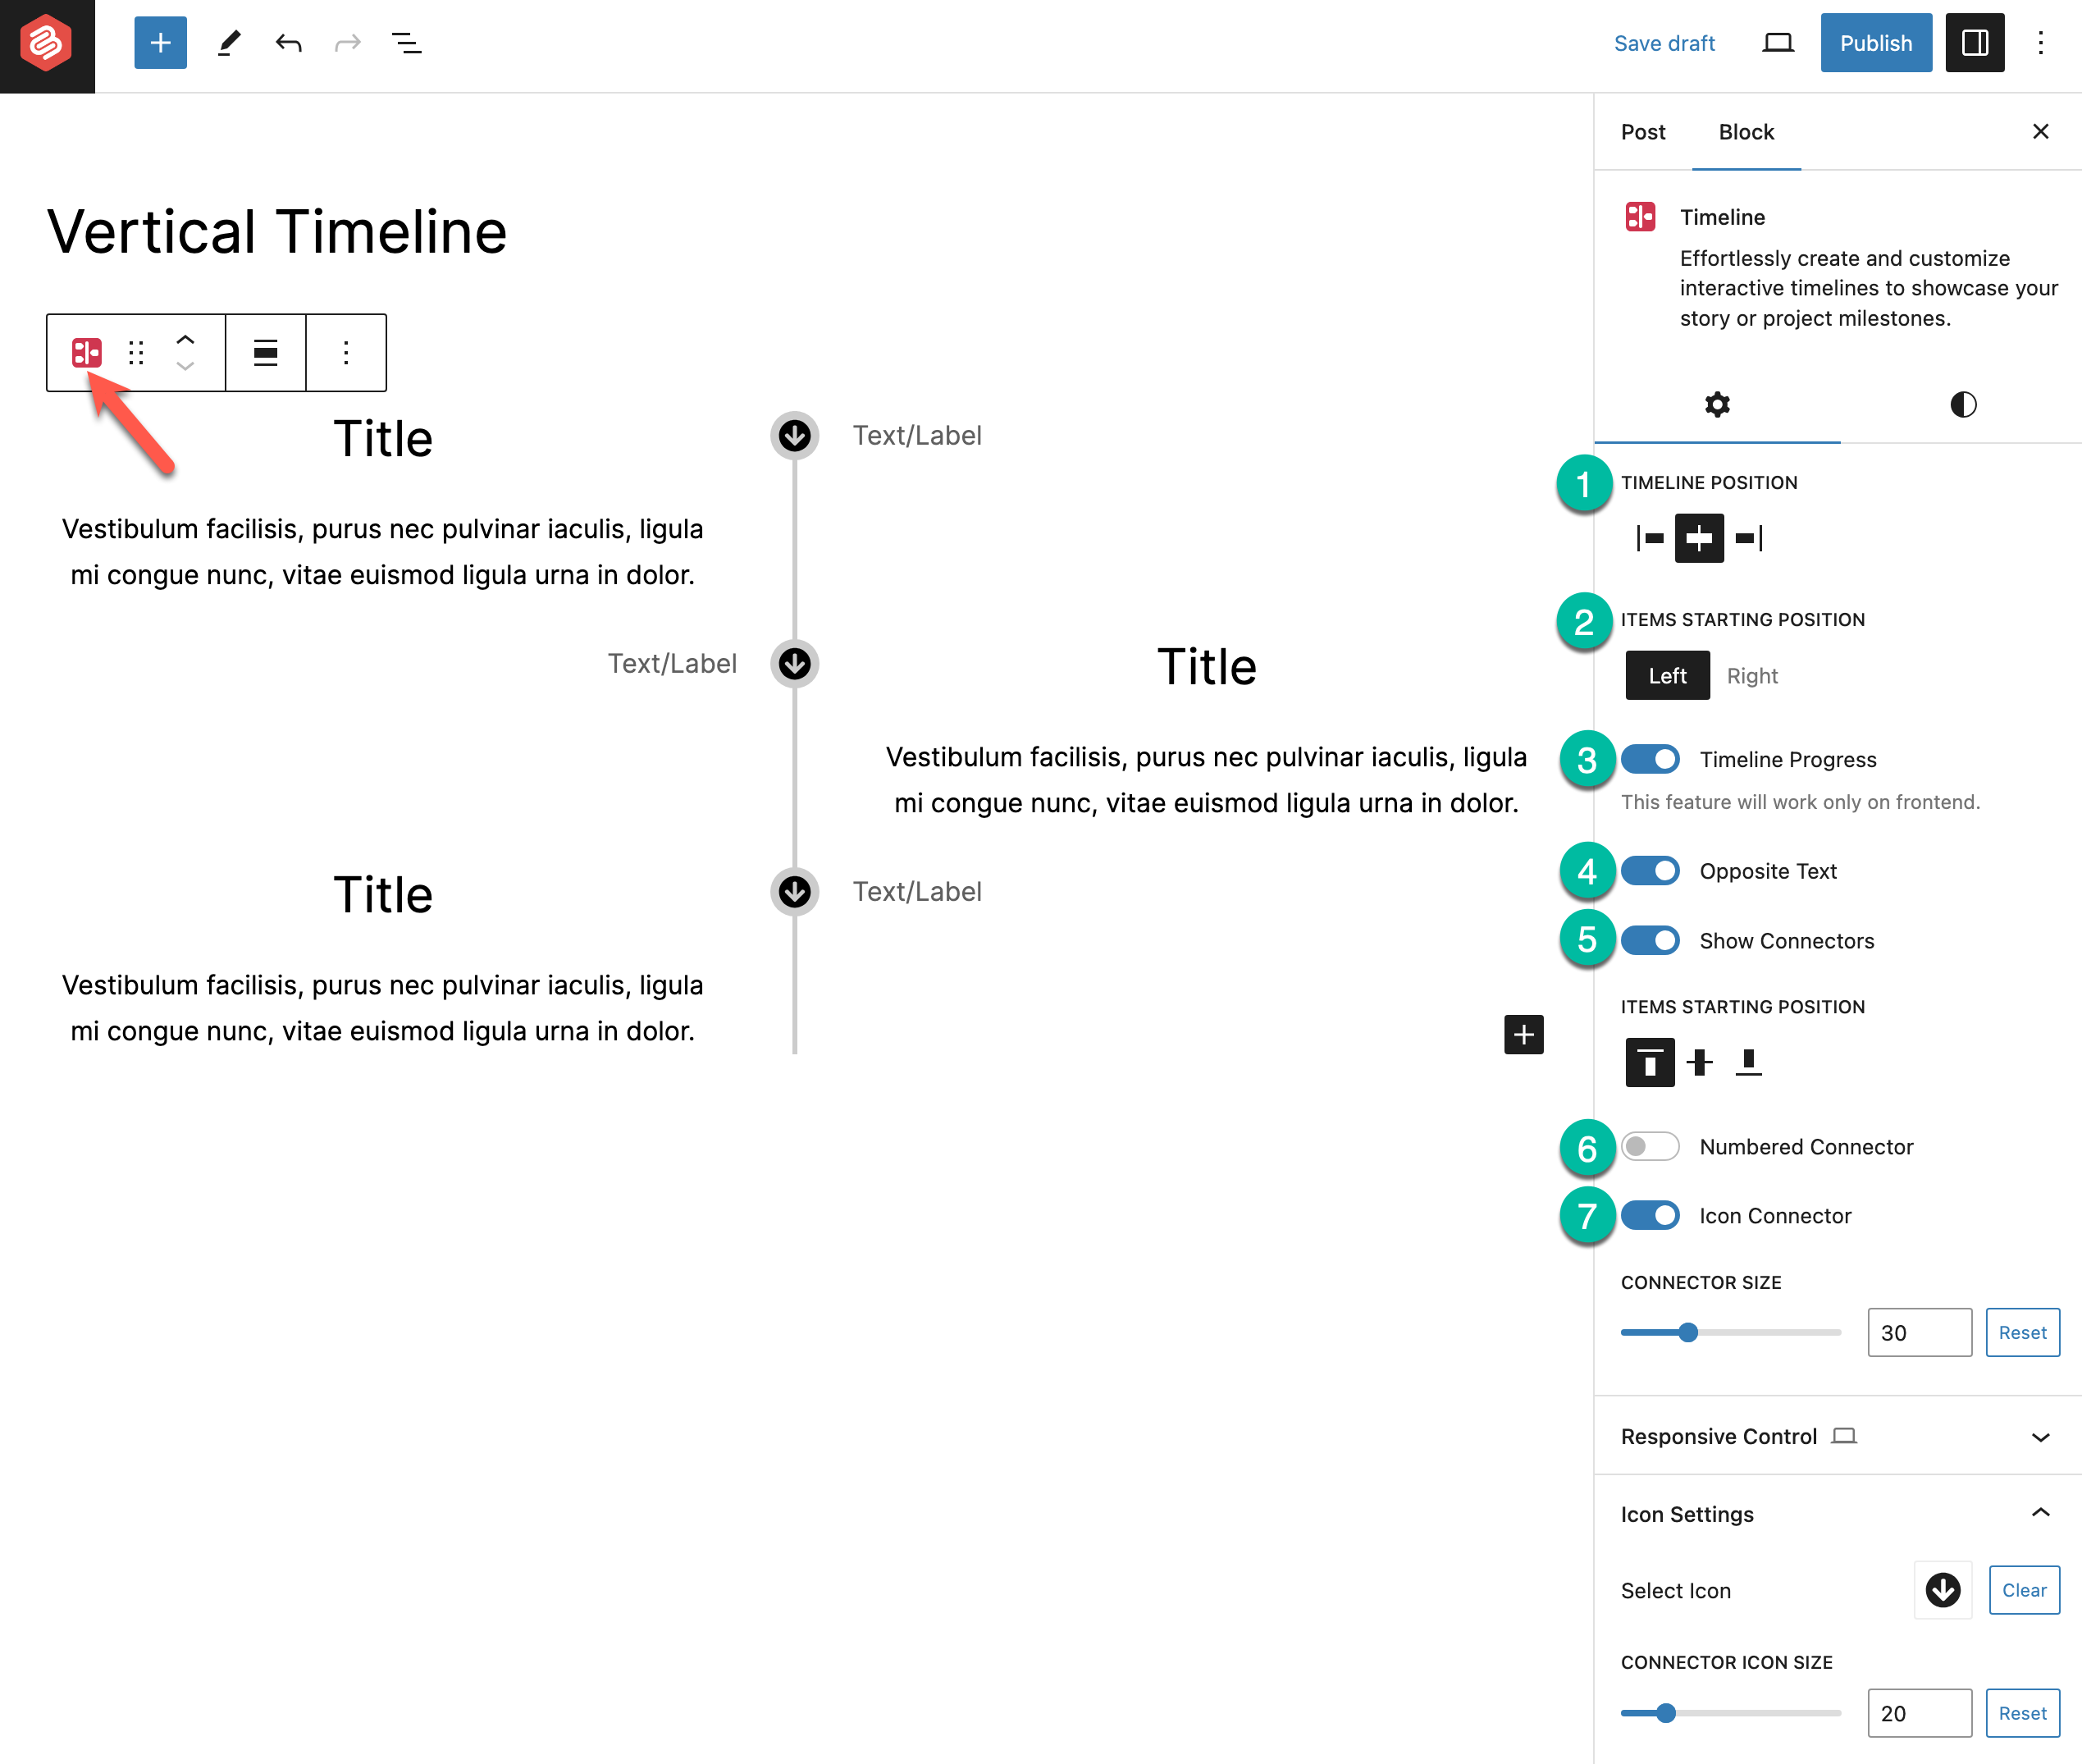
Select the entire timeline by clicking the Timeline block icon. Go to the First tab on the right sidebar. Using the options on this tab, you can do the following things:
- Timeline Position – It allows you to show content chronologically on both sides or one single side.
- Items Starting Position – By default, the first timeline content is shown on the right side. You may decide to show it on the left side from this option.
- Timeline Progress – Show animated progress of the timeline.
- Opposite Text – Level for showing date or something else.
- Show Connectors – Connecting one timeline with another.
- Numbered Connectors – To show the Number.
- Icon Connector – For using custom icons.
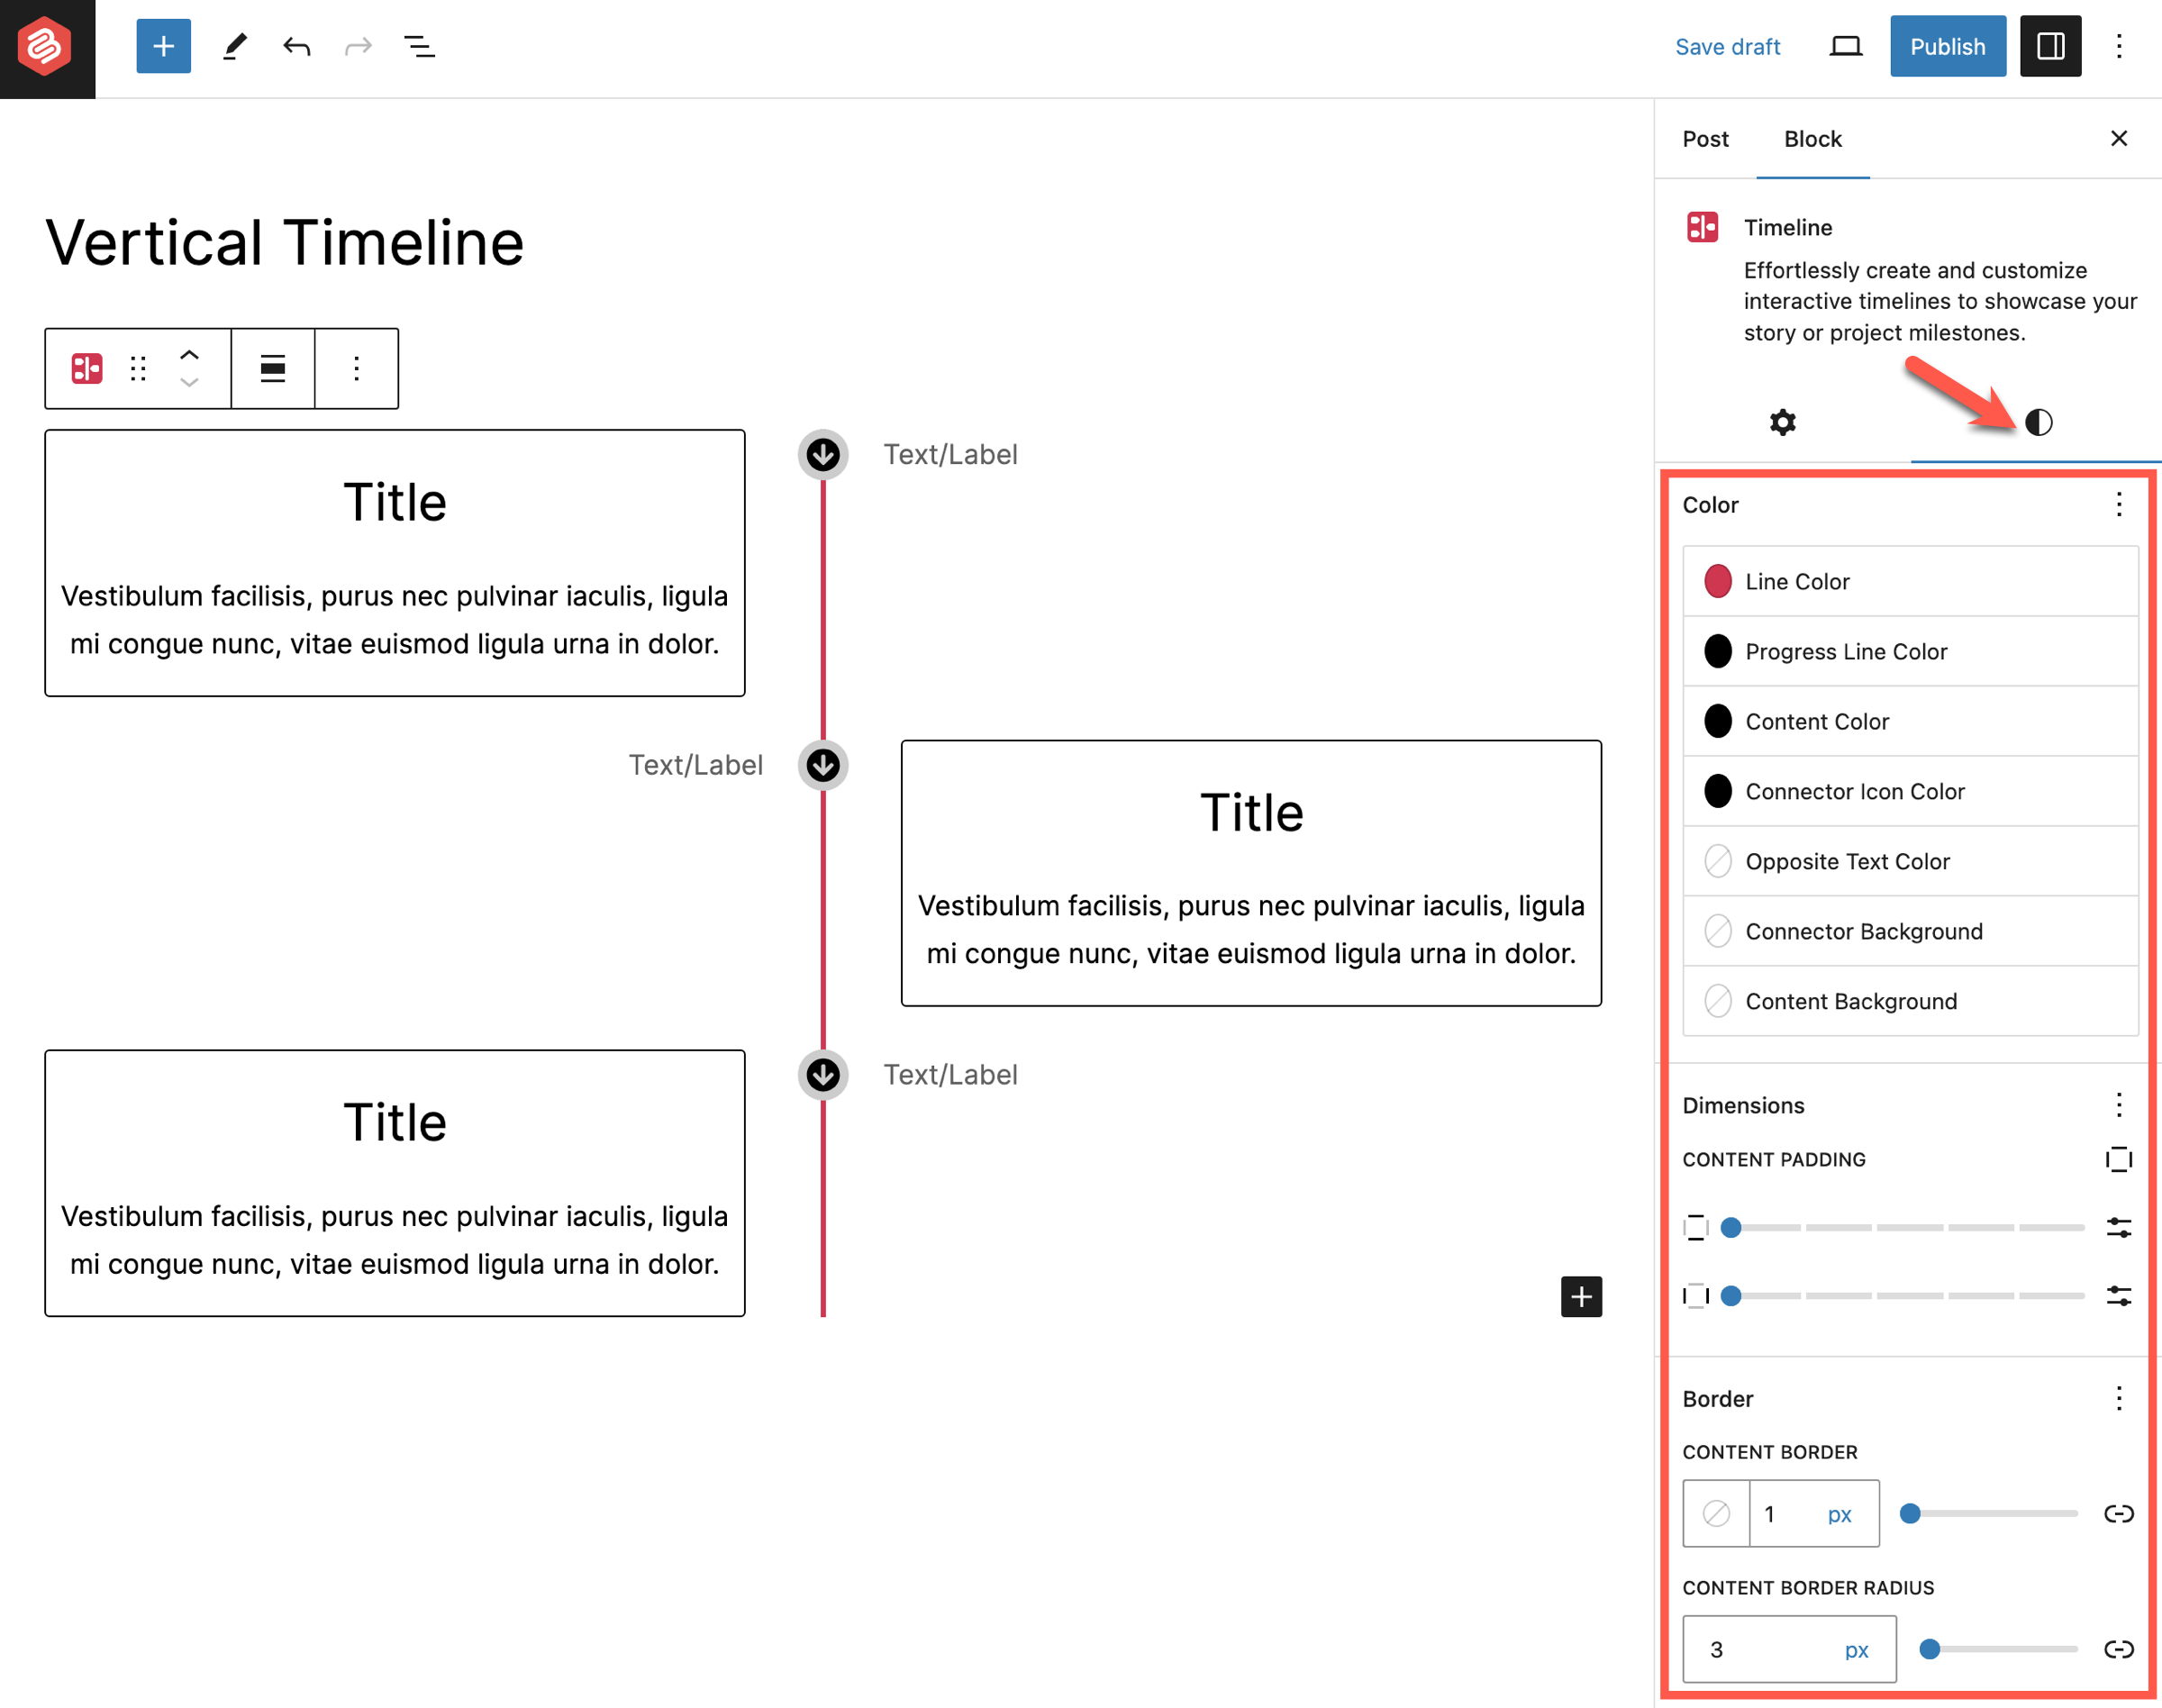
Jump to the Style tab next. Here, you’ll get options to change the Color, Border, etc.
Step 04: Add Content to the Timeline
Once the layout is ready, it’s time to add content one by one. Select the first time section by clicking on it. You’ll be allowed to edit everything.
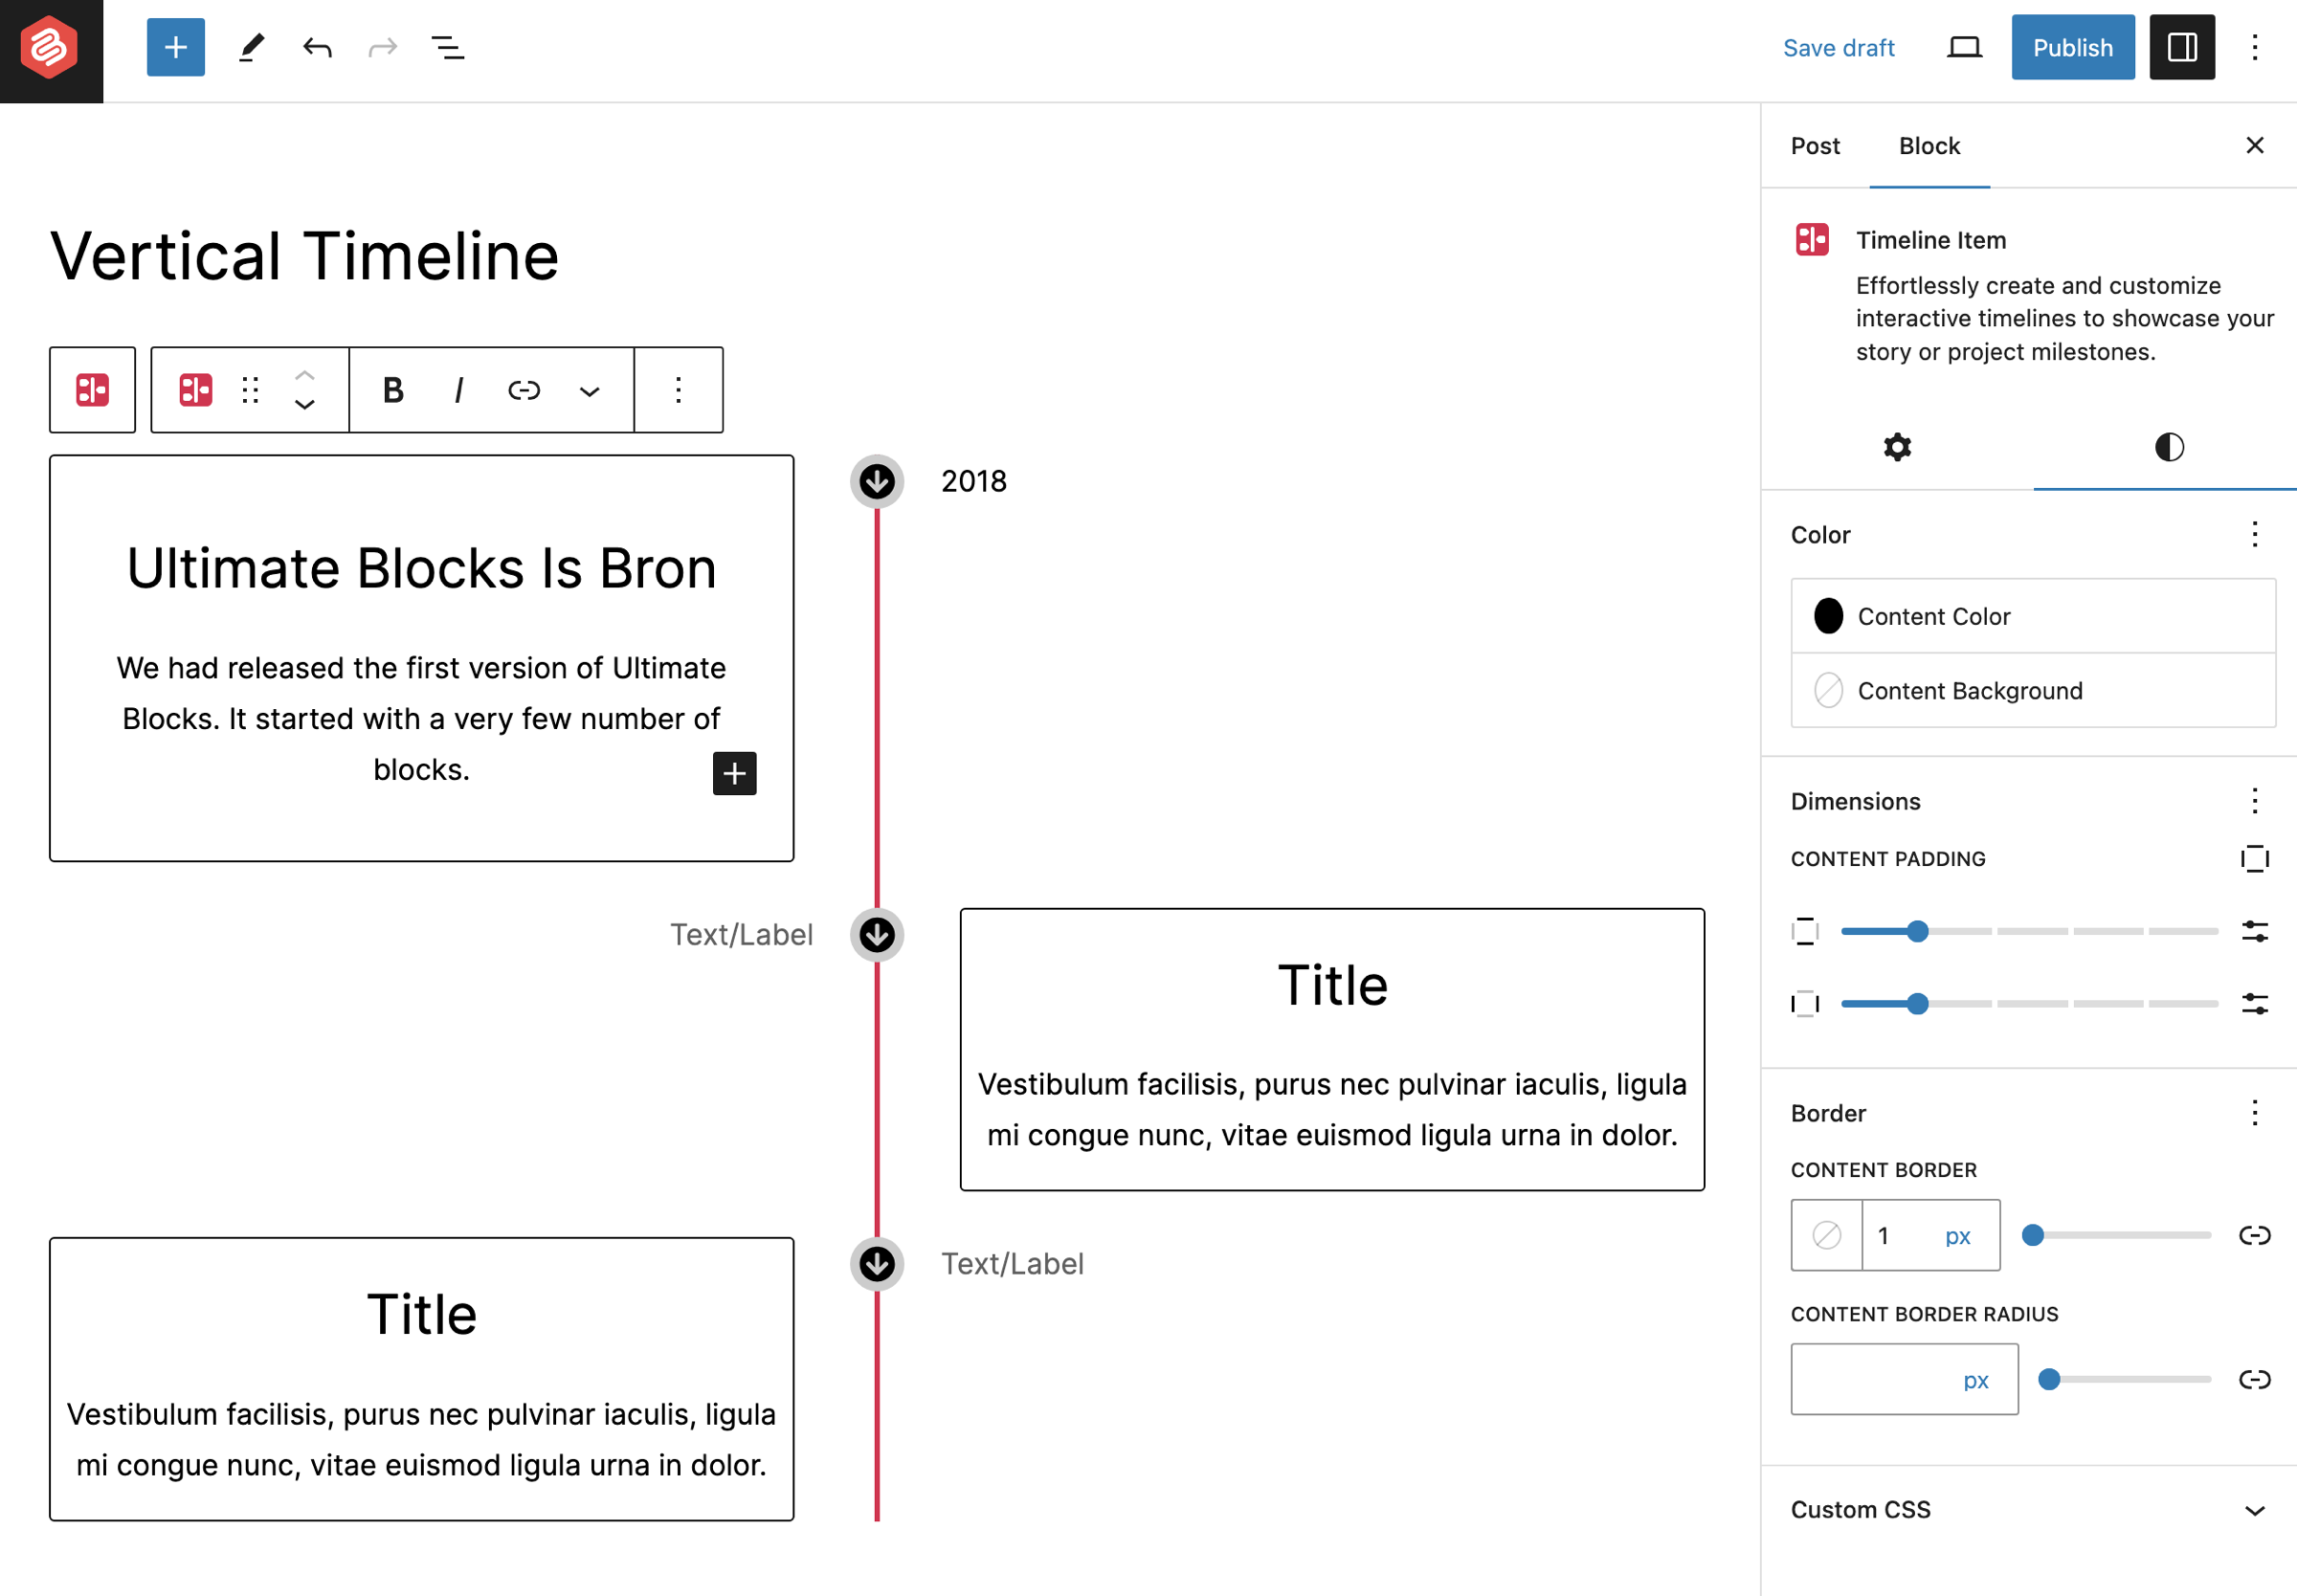
You can add image or any other blocks by click on the + icon.
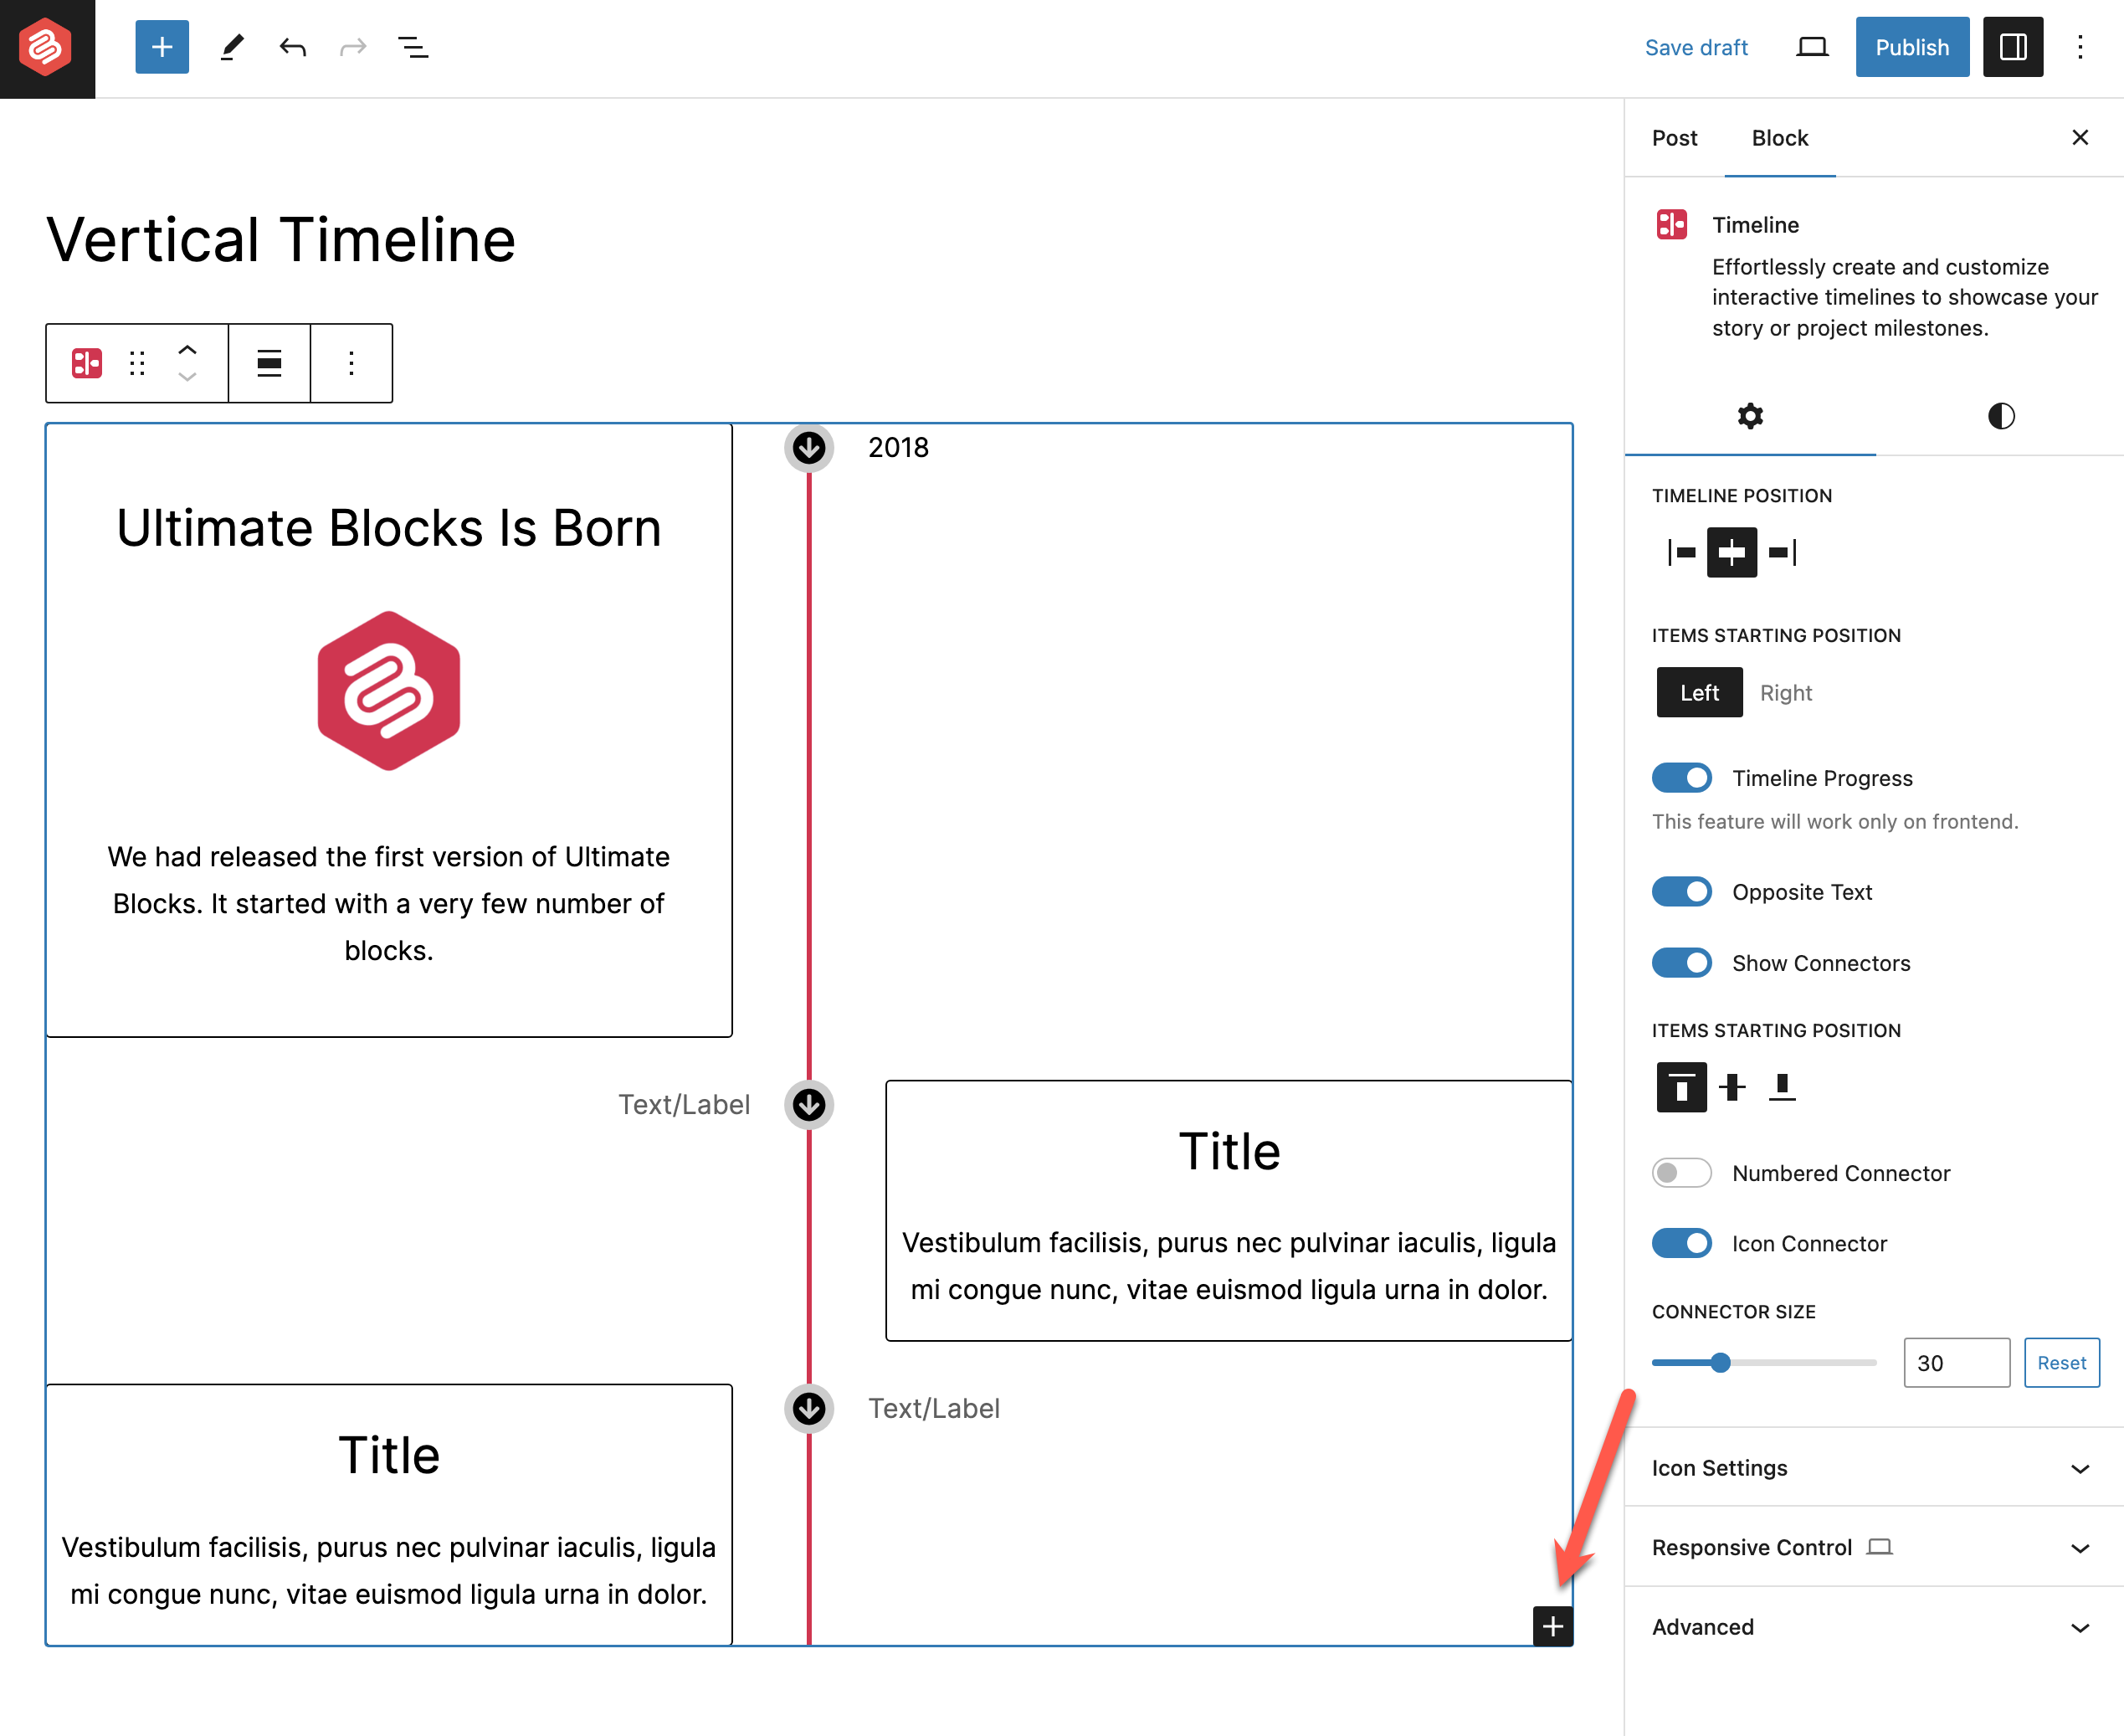
Similarly, keep adding content chronologically to each section on the timeline. At the end of the timeline, you’ll see the + button.
If you want to add more sections to the timeline, press the button. Thus, you can easily create vertical timelines on your WordPress site.
Step 5: Use the Horizontal Timeline Layout
Now if you want you can turn the timeline to horizontal layout from the vertical layout. Simply, select ‘Horizontal’ option from right-hand side options panel.

You can choose the number of items to show initially.

You’ll be able to see the changes in the preview.

That’s it. Your timeline is ready.
Final Words!
Whether you create the timeline horizontally or vertically, make sure to present information in an organized way. Also, don’t overwhelm the timeline section with too much information. Concise them as much as possible.
Otherwise, it will be difficult for users and visitors to find their desired information effectively. So, you must have a plan and do several drafts before finally adding content to the timeline.


Leave a Reply