
Images are an essential part of any website. They grab attention, break up text, and convey messages more effectively than words alone. But static images sometimes fall short in keeping visitors engaged. Allowing users to enlarge images on click not only improves the viewing experience but also makes your site look more modern and interactive.
In this guide, I’ll show you two easy methods to add the “enlarge on click” feature to your WordPress site:
- Method 1: Using the default WordPress option (for Image & Gallery blocks)
- Method 2: Using a gallery plugin with lightbox effects (recommended)
Let’s dive in.
Method 1: Enlarge Images on Click Using the Default WordPress Option
WordPress comes with a built-in option to let visitors click and enlarge images. However, this method is pretty basic, it opens images one by one without smooth lightbox effects or image navigation.
You can apply this feature to both the Image block and the Gallery block. Let’s see how.
1. Enlarge on Click for an Image Block
- Open the post or page where you want to add the image.
- Insert an Image block.
- Upload a new image or choose one from the Media Library.
- Select the image, then from the block toolbar click the Link icon.
- Choose Enlarge on click.
Now, when someone clicks the image, it will expand in a simple popup.
2. Enlarge on Click for a Gallery Block
You can also enable this option for images in a gallery:
- Add a Gallery block to your post or page.
- Upload or select multiple images from the Media Library.
- Insert the gallery.
- Select an image, click the Link icon in the toolbar, and choose Enlarge on click.
⚠️ Limitation: You’ll have to enable “Enlarge on click” for each image individually. Also, the default gallery doesn’t support lightbox navigation, meaning visitors can’t slide through the images, they’ll need to open them one by one.
If you want a smoother and more professional experience with sliding effects, captions, and more control, the next method is for you.
Method 2: Enlarge Images with a Lightbox Plugin (Recommended)
For a better user experience, it’s best to use a dedicated gallery plugin with lightbox effects. This way, visitors can click an image, view it in a popup, and easily navigate between images in the same gallery.
One of the best plugins for this is Galleryberg – a block-based gallery plugin built for Gutenberg.
Here’s how to use it:
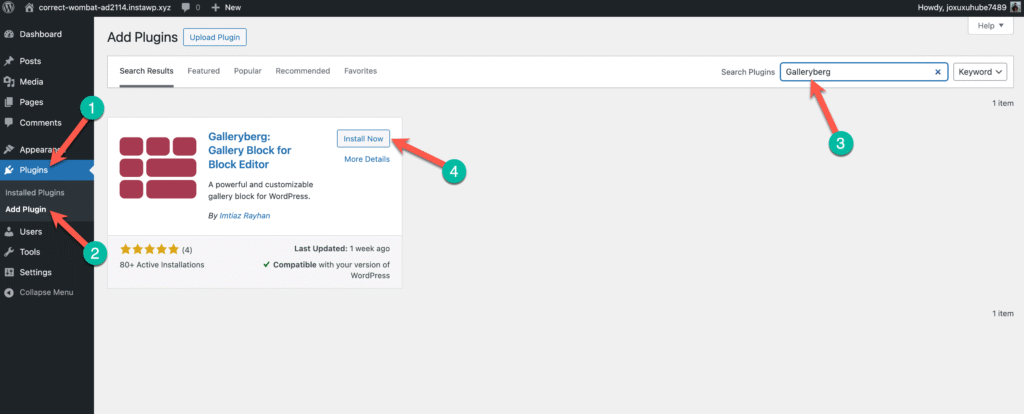
Step 1: Install the Galleryberg Plugin
- Go to your WordPress dashboard.
- Navigate to Plugins → Add New.
- Search for Galleryberg.
- Click Install Now and then Activate.
Step 2: Add a Galleryberg Block
- Open the post or page where you want to display images.
- Insert a Galleryberg block.
- Upload new images or pick from the Media Library.
Step 3: Enable Lightbox
Then simply enable the ‘Lightbox’ option. It will let visitors navigate between images with arrow keys or swipes.
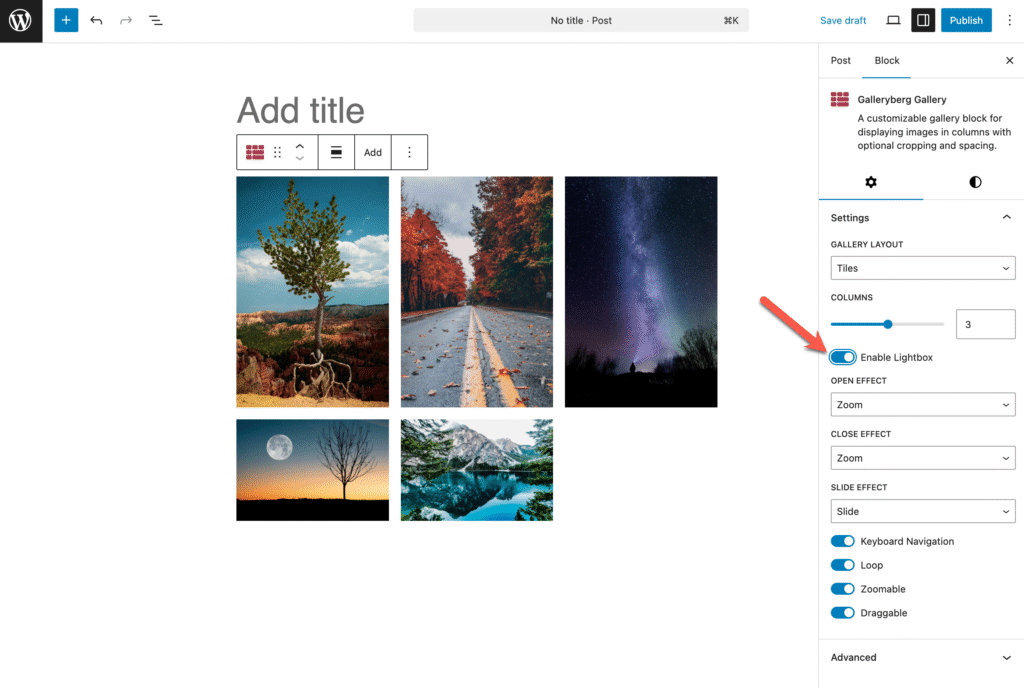
Now, when visitors click an image, it opens in a beautiful popup with smooth sliding effects—much better than WordPress’s default method.

Final Thoughts
Adding an “enlarge on click” feature to your images is a simple yet powerful way to make your website more interactive and engaging.
- If you just want a quick solution, use the default WordPress option.
- If you want a more polished experience with lightbox navigation and gallery effects, go with Galleryberg.
Your visitors will love the enhanced viewing experience either way.


Leave a Reply