Have you seen 403 forbidden error in WordPress? Typically, people get distressed when they notice a 403 error on their WordPress pages. It can be a source of misunderstanding, so I will show How to Fix 403 Forbidden Error in WordPress.
So let’s see what a prohibited 403 mistake is before we go on. It is a status code created by the incorrect configuration of the web server. This incorrect setup can prevent the customer from accessing the requested resource.
What is a 403 Forbidden Error in WordPress?
So let’s see what a prohibited 403 mistake is before we go on. It is a status code created by the incorrect configuration of the webserver. This incorrect setup can prevent the customer from accessing the requested resource.
The issue can be complicated to fix because you cannot load the scripts from your browser since you don’t allow your server. However, you can solve a prohibited WordPress error if you use a WordPress website.
When you see this mistake, there are different possibilities. For instance,:
- 403 Forbidden – Access denied on wp-admin or WordPress login page.
- 403 Forbidden error when visiting any page on your WordPress site.
- 403 Forbidden – during WordPress install.
- Instead of the full 403 forbidden status, it is also possible to simply have “access denied.”
What are the Causes of the 403 Forbidden Error?
A 403 error occurs mostly for 1. Corrupt .htaccess file, and 2. Incorrect file permissions.
It’s also possible that this error is triggered due to
Incorrect IP address: The domain name might point to an old or wrong IP address, due to which your access is blocked.
Faulty WordPress plugin: If a WordPress plugin is misconfigured or conflicting with another plugin, it might trigger 403 errors.
Malware Infection: Your .htaccess file may get constantly corrupted due to a malware infection. In this case, you have to remove the malware before restoring the .htaccess file.
Missing Index page: The name of the homepage of the website might not be named as index.php or index.html.
Updated Web page link: The website owner might have updated the link of the webpage. Which is different from the cached version.
Ways to Fix 403 Forbidden Error in WordPress
Now that you are aware of the numerous 403 errors, let’s explore what makes this mistake.
Method 1: Clear Your Browsing Cache
Your browser cache is one of the major reasons for causing 403 errors. Cache collects and stores data to load your website faster. However, this is possible that you are viewing an older version of the website due to cache.
It’s possible as the cached version on your browser is not updated. Another possible reason is cookies.
If you clear the cache and cookies, this problem should be resolved. Clearing cache and cookies may slow down your browsing speed for the first time, and your browser you to log in to every site again.
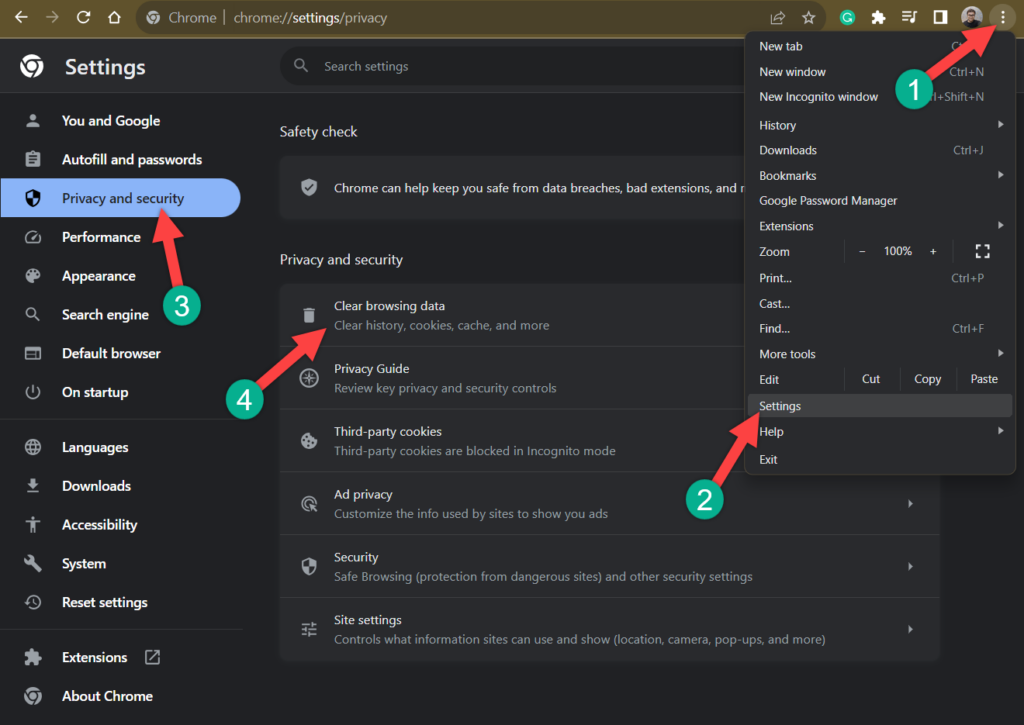
To clear cache and cookies, press Ctrl + Shift + Del or click on the three dots on the top right corner and navigate to settings. Then search for the cache, and you will find the option for clearing browsing data.
Click on ‘Clear Browsing Data’, and a box will appear. Put a tick mark on every field and hit the ‘Clear data’ button.
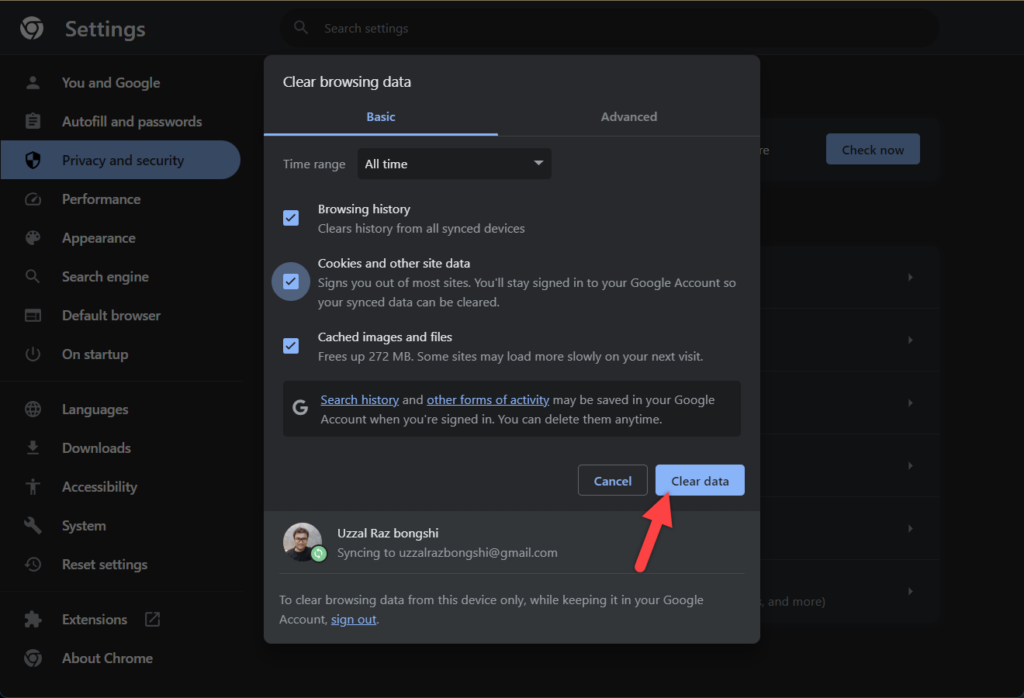
It will clear all the cache and cookies. Now try to reload the website and check if the error continues.
Method 2: Deactivate All WordPress Plugins
There’s a high chance that this error is caused by a faulty plugin or a plugin conflicting with another. In this step, if you can log in to your dashboard, try to disable all WordPress plugins and then enable them one by one. In this way, you will be able to find the faulty one.
If you cannot access your dashboard, try to connect it with an FTP client. If you don’t know how to do it, check this guide How To Use FTP To Upload Files On WordPress.
When you connect your site via FTP client, navigate to the wp-content folder and locate the plugins folder.
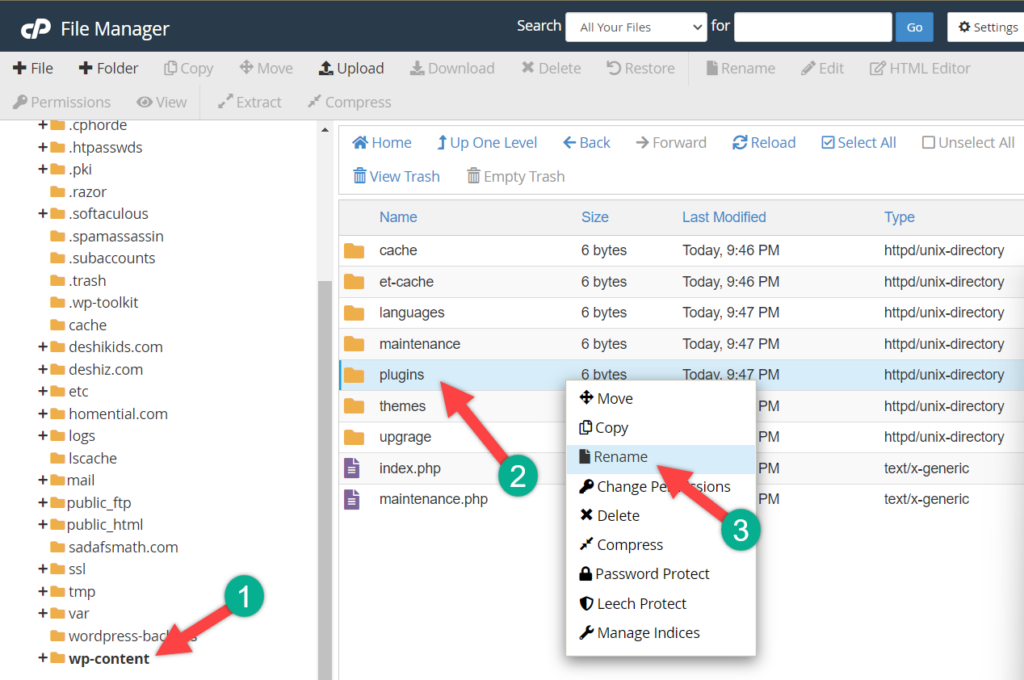
Rename the folder to anything like ‘disabled plugins’.
Now try to access your website and check if the error is still there. If there is no error, then rename the folder back to ‘plugins’. Get back to the WordPress dashboard and try to reactivate plugins one by one.
When the site stops working, you know the culprit that is causing the problem. Now again, connect the website via FTP client and rename the plugins folder to ‘disabled plugins’. Then change it back to ‘plugins‘.
This will disable all the plugins. Then log in to the dashboard and delete the problematic plugin.
Method 3: Correct a Faulty .htaccess File
If you are using an Apache server, then .htaccess can be faulty. It is a basic configuration file that is used by the Apache web server. A simple mistake can cause a big error.
It is difficult to troubleshoot the .htacces file, therefore, it is best to generate a new one.
To do that, connect your website site via FTP (you may check this guide How To Use FTP To Upload Files On WordPress). Then find the .htaccess file in your root directory.
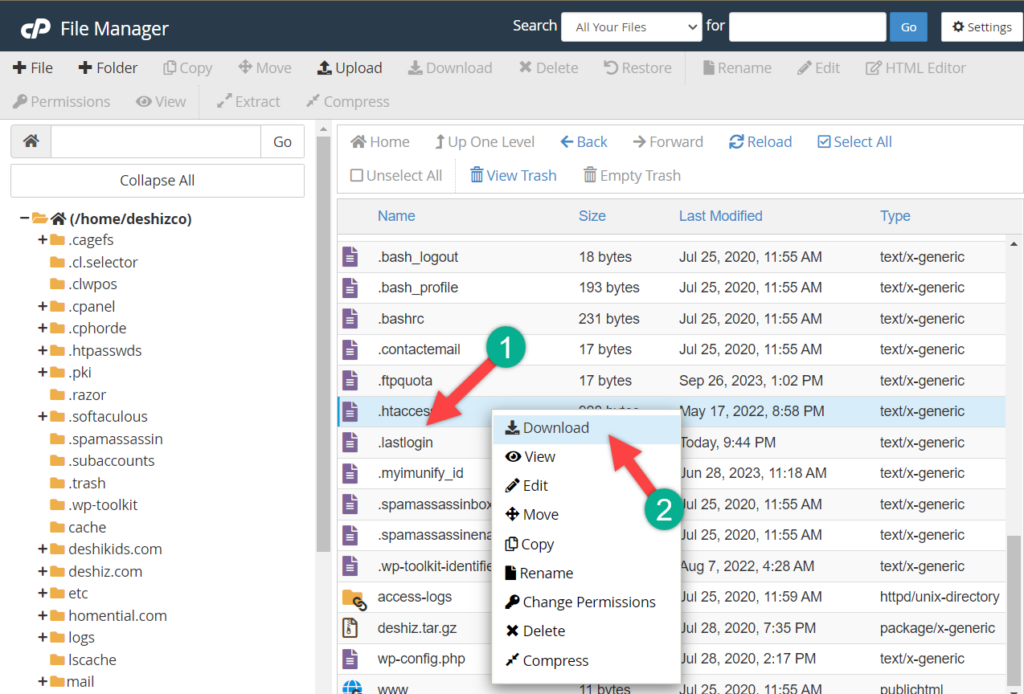
Right-click on the file and download a copy for safety purposes.
Now delete the .htaccess file from your server.
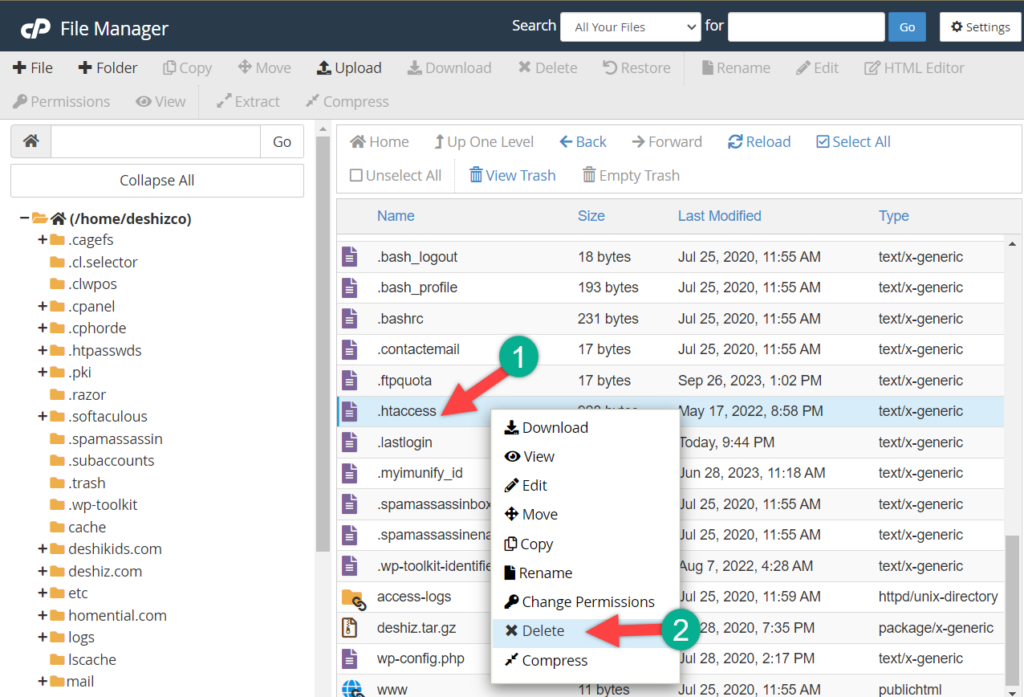
If the .htaccess file was the issue, then you should be able to visit your website.
To force your WordPress site to generate a new clean .htaccess file, navigate to Settings -> Permalinks. Now click on the Save Changes button (you won’t have to make any changes just click the button)
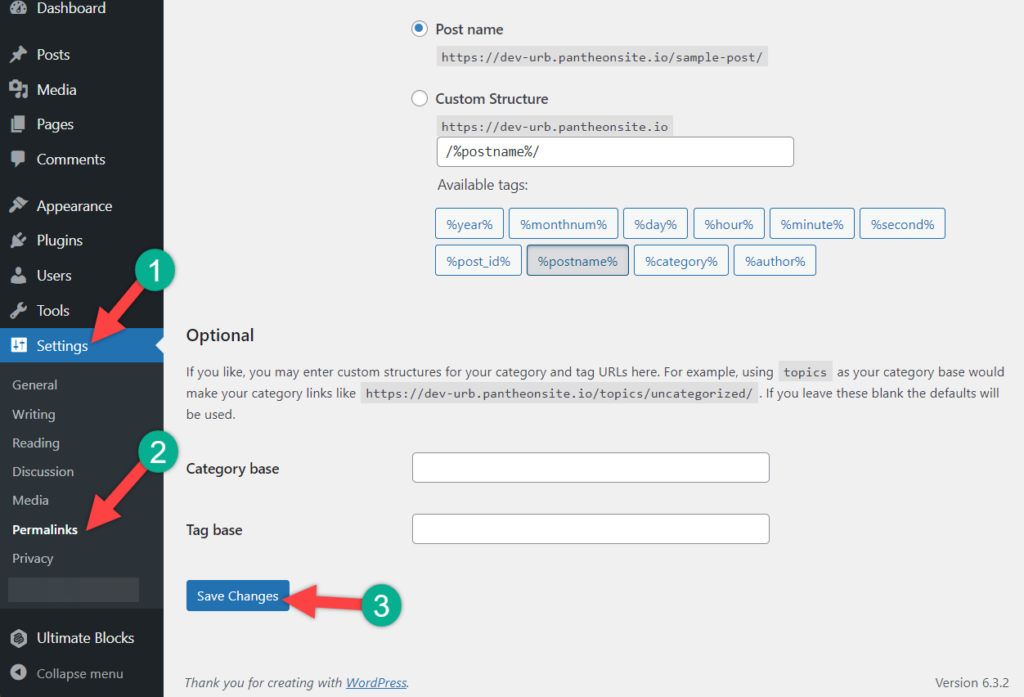
Now WordPress will generate a new .htaccess file for you.
Method 4: Change Your File Permissions
Sometimes due to incorrect filer permissions, 403 errors occur. Generally, files are created with default file permissions, which control how to read, write, and execute them.
To change file permissions first, connect your site with FTP client. Once you are connected, find the public_html and right-click on it. Select ‘File Attributes’.

Here enter the numeric value as 755 and select Apply to directories only, then press the OK button. The good practice for file permission numeric values is using 755 for your folders, 644 for your static content, and 700 for your dynamic content.

After you change the file permissions, you have to repeat this process.
Again find the public_html and right-click on it. Select ‘File Attributes’. But this time, enter 644 as the numeric value and select the Apply to file only option.

When you are done, try to re-access your website to see if the 403 error is resolved.
Method 5: Contact Your Hosting Provider
If any of the above options don’t work for you then, it is recommended to reach out to your hosting provider. They can help you to pinpoint the issue and get you back up and running.
Conclusion
This error mainly occurs due to incorrect file permissions, but there are other possible causes. Finding the real cause of this error can be tricky, however, the above troubleshooting guide should be enough for you to resolve the 403 error.
If this post helped you, please share it with your friends, and don’t forget to share your thoughts in the comment box below.


Leave a Reply